Contact Us

Use the form on the right to contact us.

You can edit the text in this area, and change where the contact form on the right submits to, by entering edit mode using the modes on the bottom right. 


123 Street Avenue, City Town, 99999

(123) 555-6789

email@address.com


You can set your address, phone number, email and site description in the settings tab.
Link to read me page with more information.

Blog

butternut squash + mushroom empanadas

Andrea

It may seem odd to be posting a recipe for empanadas in the dead of Winter. To me empanadas are a Summer food, or maybe Fall; plucked up from a street vendor or taco stand, wrapped in waxed paper, eaten as you walk an outdoor festival or Charlottesville’s downtown pedestrian mall. They are perfect on-the-go, warm weather, sandals and short sleeves food; self-contained pockets of goodness you can eat as you walk. Outside. In the sunshine. So why, then, am I sharing these with you in the gray and bitter cold of January?

Well, for one, I am long overdue in posting this recipe on Bella Eats. Had I uploaded the images of empanadas just after making them, at the beginning of October, when butternut squash was just starting its weekly appearance on our menu, there would still be Fall festivals and backyard BBQs to attend. I wavered with whether or not to even publish this one, thinking that I’d lost its window of opportunity along with that of a handful of apple dishes I’d prepared, until I received an email from a friend on Saturday. She and her husband were on their way to Bali. Bali! In January! How lovely.

Shortly after reading that email I watched Eat, Pray, Love (which, it turns out, is not nearly as good as the book) and stared longingly at the beaches and bike riding and sundresses of Indonesia, the warmth of it all seeping from the screen. That is what I crave this time of year, the ability to escape to someplace warm and tropical, if even for just one meal. If you’re at all similar to me then a dish like these empanadas, which are made up of Winter-ish ingredients but convey the spirit of warmer times, will be just what you’re looking for this January.

Unless, of course, your resolutions for the new year include limiting luxuries like butter in your diet. To that I say, “everything in moderation” and “invite some friends over”! These rich, savory, chock-full-of-butter pockets certainly are not something to have on hand for multiple days at a time, and so are really the perfect thing to make and experiment with when you have plans to eat with a group of people. Just as empanadas are an excellent walking food, they also work well at a mostly-standing, “lose the Winter blahs with tequila in one hand” party. I have a feeling that we will all be looking to add one of those gatherings to our calendars towards the end of this gray and dreary month, so keeping this recipe close will be handy. Trust me.

Butternut squash roasted with mushrooms and wrapped in a delicate, butter-full pastry has all the makings for a hearty Fall-Winter meal. The fresh tomatillo sauce, however, does throw me off. In a space where I try to share mostly seasonal recipes, anything that calls for tomatillos in the heart of January seems a bit hypocritical, does it not? Luckily, there are some good options for jarred tomatillo salsa out there, any of which would be an excellent (and much less time-intensive) addition to the empanadas. I would, however, keep this sauce in mind next Summer when tomatillos are available, and think about making and putting some away for the Fall and Winter months ahead.
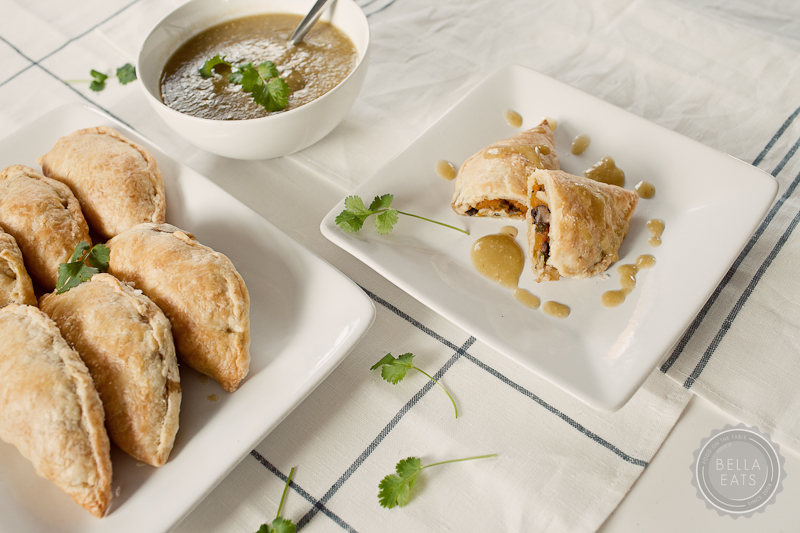
Butternut Squash + Mushroom Empanadas with Tomatillo Sauce
from Gourmet, October 2002
makes 8 empanadas

Filling

  • 1 cup diced (1/4 inch) butternut squash
  • 1/2 cup finely chopped white onion
  • 6 small garlic cloves, minced
  • 2 tbsp olive oil
  • 2 (2 to 3 inch) fresh jalepeño chiles, seeded and ribs discarded, finely chopped
  • 1 pound fresh exotic mushrooms, trimmed and coarsely chopped (I just used cremini mushrooms, because I had them)

Sauce

  • 1 dried pasilla de Oaxaca chile (I used a canned chipotle chile in adobo sauce, also, because I had it) chopped finely
  • 3 garlic cloves, left unpeeled
  • 1 pound fresh tomatillos, husks discarded and tomatillos rinsed and quartered
  • 1/4 cup finely chopped white onion
  • 1/4 cup water
  • 1/2 tsp salt

Empanada Dough (from Gourmet, October 2004 - makes enough for 12 empañadas)

  • 2-1/4 cups unbleached all-purpose flour
  • 1-1/2 tsp salt
  • 1 stick (1/2 cup) cold unsalted butter, cut into 1/2 inch cubes
  • 1 large egg
  • 1/3 cup ice water
  • 1 tbsp distilled white vinegar

Egg Wash

  • 1 large egg beaten with 1 tbsp water

Method

  1. First, make empanada dough. Sift flour and salt together in a large bowl. Blend in butter with your fingertips or with a pastry blender until mixture resembles course meal with some (roughly pea-size) butter lumps.
  2. Beat together egg, water, and vinegar in a small bowl with a fork. Add to flour mixture, stirring with fork until just incorporated (the mixture should look shaggy).
  3. Turn out mixture onto a lightly floured surface and gather together, then knead gently with heel of your hand once or twice, just enough to bring dough together. Form dough into a flat rectangle and chill, wrapped in plastic wrap, at least one hour.
  4. Next, make filling. Preheat oven to 400˚. Combine together the squash, onion, garlic, jalepeño, and mushrooms. Toss with olive oil and a good sprinkling of salt and pepper, and spread in an even layer on a baking sheet. (The Gourmet recipe differs here, boiling and sauteing the vegetables. I love the flavor that is brought forth with roasting, so chose to cook the filling using this method instead.) Roast for 25-35 minutes, until the squash is tender and the mushrooms have released their liquid, stirring every 10 minutes or so. Remove from oven and cool in pan on rack.
  5. Meanwhile, make the sauce. Heat dry, non-stick pan over moderately high heat until hot, then toast unpeeled garlic until lightly blackened, 2 to 3 minutes on each side. Cool garlic and peel.
  6. Simmer tomatillos, onion, garlic, chile, water, and salt in a large saucepan, covered, until tomatillos are very tender, about 20 minutes, and cool slightly. Puree sauce in a blender (or with an immersion blender) until smooth (use caution as liquid is VERY hot). Return sauce to pan and season with salt. 
  7. Finally, assemble the empanadas! Keep the oven heated to 400˚. Divide dough into 12 equal pieces and form each into a disk (you will only need 8 of these pieces, the rest can be stored in the freezer for up to 1 month). On a floured surface, roll out one disk into a 6 to 7 inch round. Spoon about 1/3 cup of filling onto center and brush edge of pastry with egg wash. Fold dough in half to form a half-moon, enclosing filling, and press edges together to seal. Crimp edge decoratively and move empañada to a large baking sheet. Make 6 more empañadas using the same method.
  8. Lightly brush empanadas with remaining egg wash and sprinkle tops with coarse sea salt. Bake on middle rack of oven until golden, 25-30 minutes. 
  9. While empanadas are baking, reheat sauce. Cut each empanada in half when slightly cooled, and drizzle about 3 tablespoons of sauce around them. The sauce will keep for about a week in an airtight container in the refrigerator, and is wonderful as a salsa or drizzled over burritos, fish, or chicken. 

breathless

Andrea

Hi, friends. How are you? Goodness...well, it has been awhile, hasn’t it? We’ve missed a lot these last few months...such as apples. A trip to Boston and Halloween. Pumpkins and cranberries. The second anniversary of Bella Eats. And then there was Thanksgiving, and the first snow, and a trip to Florida and, finally, Christmas and the end of another year. Wow. So many opportunities to share food and photos and life with you all and I missed them, each one. I don’t want to start this first post back after three months gone with an apology, so, I won’t. Instead I’ll just say “Hi!” And, “I’m back!” And finally, “If you’re still here...thank you!”

What I do have to say about these last three months is this...they were full. So very full. The full you feel after an extraordinary meal; one that involves ten-too-many bites, an unbuckling of pants, and a slouching down in one’s chair followed by a long, low groan. So satisfying, but when you look down at your plate there are still ten more bites waiting, and you think to yourself “Can I do it?”. Somehow, you do, and at the end of it all you’re left with no choice but to lie down someplace dark and quiet. 

The thing about those big meals is that they are typically surrounded by a tableful of loved ones, conversing and laughing and drinking and eating right alongside you. They are so jovial and supportive that you don’t even notice the fullness until it is too late, and then they are there to moan and groan with you, and to reminisce about the wonderfulness that was the meal consumed. Been there? I thought so. And that is precisely what the last three months has felt like.

I am typically a very stick-to-the-path kind of girl. I follow directions well, read books and watch shows in sequence, knew what I wanted to be when I grew up at twelve years old. But three months ago I took a detour; strayed from the road I’d been traveling and forged a new trail through uncharted territory. 

I quit my architecture job in order to pursue photography as a career. 

That sentence leaves me giddy; so full of excitement that it is difficult to sit in this chair and continue typing. Not only is it unbelievably amazing to be chasing after a dream I never thought possible, but the unwavering support of family and friends has left me breathless.  There are scary moments, certainly, when I peer ahead and begin to doubt my ability to move forward with sure and confident steps. But then, out of nowhere, I’ll receive an email or phone call or Facebook message or tweet (what a funny world we live in, huh?) and I take another step, and another, and another until I am running so fast that I fear I won’t be able to stop. I am breathless, I tell you.

Finally, with the conclusion of a semester of teaching and 100% of my concentration set on photography, I have time for Bella Eats again. This fact I find nearly as exciting as my decision to change paths; to move towards a big dream shimmering at the horizon.  Bella Eats is part of that dream and, in fact, even the generator of it. Without this site I may not have renewed a passion for photography born long ago and lost in my pursuit of architecture. And I certainly wouldn’t have met all of you, or formed real friendships with some very inspiring and brave individuals. I owe much to this place I’ve carved from the world wide web and the people I’ve connected to through it, and am happy to finally be able to give some of that energy back.

And now, let’s talk about breakfast.

Recently, breakfast has slipped into the role of “Andrea’s favorite meal with friends”. It is usually enjoyed out, at any one of a handful of local joints, with someone I most likely haven’t seen in some time. That seems to be the case with most of my friends these days, who all seem equally as busy as I, and the breakfast hour is one that isn’t typically prescheduled for some other task. It is a mighty fine way to kick off a weekday, leaving you content and happy from the time, food, and news shared. 

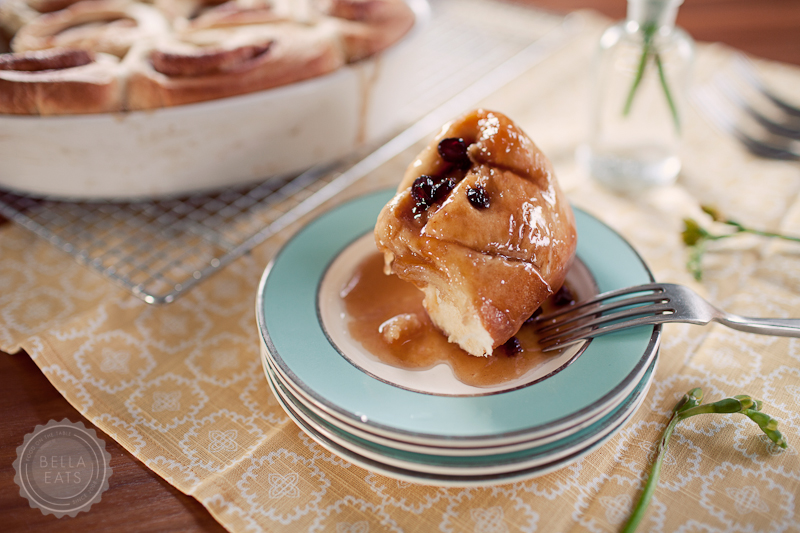
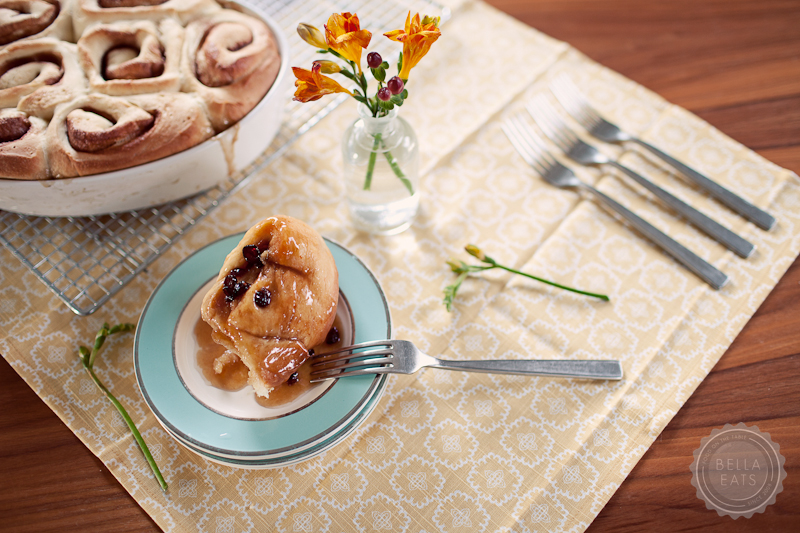
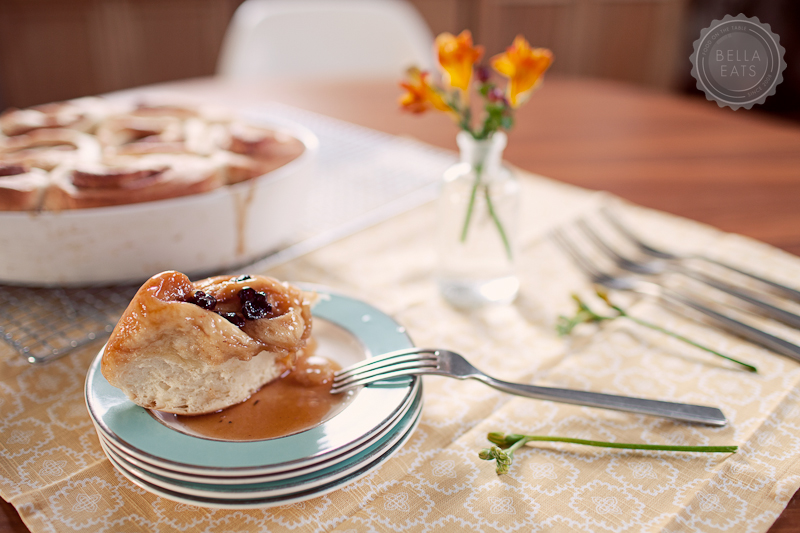
If I could, I would make each and every one of you these sticky buns one morning this week. They take a bit of planning and an early morning wake-up call, but the end result is quite worth the effort. Paired with a cup of coffee and perhaps a few slices of crispy bacon, the soft, pillowed interior makes the perfect vessel for a sticky sauce of caramel and cranberries. We made them twice within a week, once for Thanksgiving guests and again for friends...just because. 

CRANBERRY ORANGE STICKY BUNS

adapted from Peter Reinhart's The Bread Baker's Apprentice
makes 8-12 large sticky buns

Ingredients

  • 6-1/2 tbsp granulated sugar
  • 1 tsp salt
  • 5-1/2 tbsp unsalted butter, at room temperature
  • 1 large egg
  • 1 tsp grated orange zest
  • 3-1/2 to 4 cups unbleached bread flour
  • 2 tsp instant yeast
  • 1-1/8 to 1-1/4 cups whole milk, at room temperature
  • 1/2 cup cinnamon sugar (6-1/2 tbsp granulated sugar plus 1-1/2 tbsp ground cinnamon)
  • Caramel Glaze (see below)
  • 1/4 cup dried cranberries

Method

  1. Cream together the sugar, salt, and butter on medium-high speed in an electric mixer with paddle attachment. Whip in the egg and orange zest until smooth. Add the flour, yeast, and milk. Mix on low speed until the dough forms a ball. Switch to the dough hook and increase the speed to medium, mixing for approximately 10 minutes, or until the dough is silky and supple, tacky but not sticky. You may have to add a little flour or water while mixing to achieve the desired texture. The dough should pass the windowpane test and register 77˚ to 81˚F. Lightly oil a large bowl and transfer the dough to the bowl, rolling it around to coat it with oil. Cover the bowl tightly with plastic wrap.
  2. Ferment the dough at room temperature for approximately 2 hours, or until the dough doubles in size.*
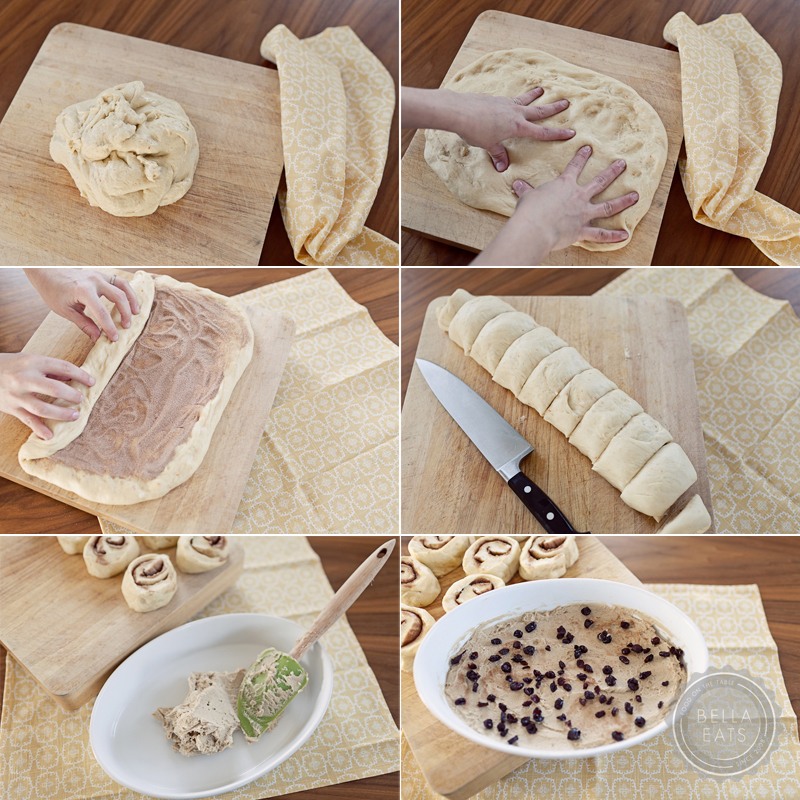
  3. Mist the counter with spray oil and transfer the dough to the counter. Roll the dough with a rolling pin or press and stretch with fingertips, lightly dusting the top of the dough with flour to keep it from sticking. Roll or press into a rectangle about 2/3 inch thick and 14 inches wide by 12 inches long. Don't roll too thin, or the resulting buns will be tough and chewy. Sprinkle the cinnamon sugar over the surface of the dough and roll the dough up into a cigar-shaped log, from the long side. With the seam side down, cut the dough into 8 to 12 even pieces each about 1-3/4 inches thick.
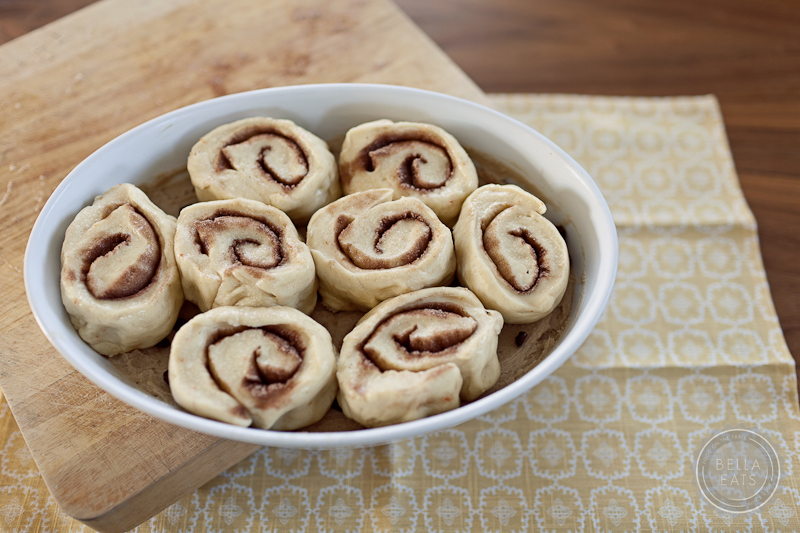
  4. Coat the bottom of 1 or more baking dishes or baking pans with sides at least 1-1/2 inches high with a 1/4 inch layer of the caramel glaze. Sprinkle on the cranberries. Lay the pieces of dough on top of the caramel glaze, spacing them about 1/2 inch apart.** Mist the dough with spray oil and cover loosely with plastic wrap.
  5. Proof at room temperature for 75-90 minutes, or until the pieces have grown into one another and have nearly doubled in size. You may also retard the shaped buns in the refrigerator for 2 days, pulling the pans out of the refrigerator 3 to 4 hours before baking to allow the dough to proof.***
  6. Preheat the oven to 350˚F with the oven rack on the lowest shelf. Place a baking sheet lined with foil on that oven rack to catch potential overflow.
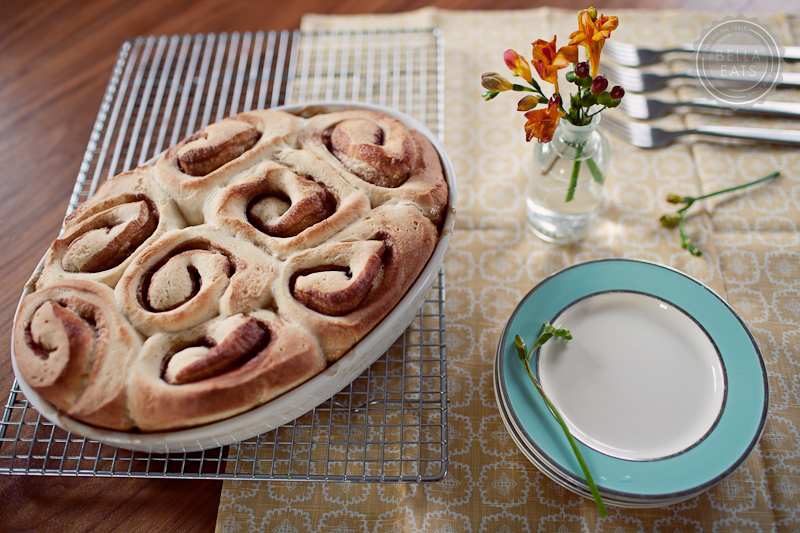
  7. Bake the sticky buns for 30-40 minutes, or until golden brown. Keep in mind that the sticky buns are really upside down, so the heat has to penetrate through the pan and into the glaze to caramelize it. The tops will become the bottoms, so they may appear dark and done in order for the underside to be fully baked.

CARAMEL GLAZE

Ingredients

  • 1/2 cup granulated sugar
  • 1/2 cup firmly packed brown sugar
  • 1/2 tsp salt
  • 1/2 pound unsalted butter, at room temperature
  • 1/2 cup light corn syrup
  • 1 tsp orange extract

Method

  1. Cream together the granulated sugar, brown sugar, salt, and butter for 2 minutes on high speed with the paddle attachment. Add the corn syrup and orange extract. Continue to cream for about 5 minutes until light and fluffy.

You probably will not need all of the glaze for the buns. Refrigerate and save any excess for future use, it will keep for months in a sealed container.

NOTES:

* When the weather is cool I warm the oven to its lowest setting, 170˚, and then turn it off. I place the fermenting dough in the oven to rise and have much better luck than just leaving it on the calendar in our 60˚ house.

** Clearly my baking dish pictured was too small.  But it's pretty, so I dealt with it.

*** The first time I made these I made the dough and fermented it the night before I wanted to bake it. After shaping the rolls and placing them in the pan on the glaze I covered them with plastic wrap and refrigerated them. I set my alarm for 4 hours before I wanted to put them in the oven, took them out of the refrigerator, and went back to bed.  They came out beautifully.

new year, new look

Andrea

What do you think?!?  This design change has been a long time coming.  We had some technical difficulties with the transition from Wordpress, but all is well now and I am so excited to finally be able to show you the new Bella Eats!  Many, many thanks to the lovely ladies at Rock Paper Scissors for the new logo they dreamt up for me.  It embodies what is most important about this site; beautiful images of good food shared at the family table. I love it so much. 

And to Brian, who has labored over this site for the last 4 months...thank you. I know that I am not the easiest client. :)

I will be back shortly with a new recipe! And...HAPPY NEW YEAR! Wishing each one of you a healthy and delicious 2011!

xoxo. Andrea

PS: If you follow me in a Reader, please update your subscription by clicking the orange RSS button to the left, under 'follow along'. Thank you!

transition, through chowder

Andrea

There's been a change in the air these last few weeks...have you felt it? Just the slightest shift in temperature, a chill in the evenings that makes sleeping with windows wide open not only possible, but pleasant. The breeze is changing, carrying with it the scent of a backyard grill, the sound of fallen leaves skipping along pavement, a smattering of goosebumps across a forearm. Afternoon light has a new quality, a dreamy, golden hue that elicits memories of high school football games, apple picking, the feel of a scarf wound loosely about the neck.

Autumn begins officially today, but I’ve seen signs of her impending arrival for most of September. I won’t deny my excitement, for this time of year is truly my favorite, but I will miss the bounties of Summer. There’s been an urgency to our visits to Charlottesville’s City Market each Saturday for three weeks now. A pressure to gather up one last load of roma tomatoes to roast, to pick up a dozen freestone peaches knowing they’ll be absent until next July, to seek out a few more ears of fresh corn before being forced to rely on the kernels stashed away at the back of the freezer.

I bought our first butternut squash just last week. It stood out in our market basket, a dull cloud against the sunset of tomatoes, peaches, and eggplant. Once home we roasted it to sweet perfection before pureeing it with celery, onions and carrots into an earthy potage. The recipe is an Autumn staple, one that will grace our table many times in the next few months. We loved the soup that night as we always do, but still, I wasn’t quite ready for it.

What I wanted instead was a chowder we’d made the week before, one that took advantage of the last of Summer’s produce while introducing the initial tastes of Autumn. Those final few ears of sweet corn, the bell and jalepeño peppers, the first potatoes and carrots of Fall, a cream base with heat that hits from the belly out, all come together to create a soup that perfectly represents this time. The transition from one season to another, from tank tops and flip flops to light jackets and closed-toe flats, embodied in a chowder.

A chowder perfect for those of us on the fence, clinging to Summer while welcoming Fall.

I mentioned, way back at the end of August, that I'd found a new trick to releasing corn kernels from their cob. Well, here it is friend.  I introduce to you the bundt pan, a vessel so perfectly designed for handling fresh corn that I feel it should be marketed in that way.  Sure, it also makes a pretty cake, but really, lots of pans can do that. The central tube fits the end of an ear of corn quite perfectly, and as you cut the kernels from the cob they fall neatly into the pan. No more corn kernels all over the counter and floor. I am probably the last to discover this handy trick, but wow, was I excited when I did. My dogs, however, miss the sweet kernels falling from above.

Spicy Potato Corn Chowder

adapted from Gourmet, July 2008 serves 4 as a first course Ingredients:
  • 3 ears corn, shucked
  • 1 quart water
  • 1 quart chicken broth
  • 1.75 pounds red potatoes, cut into 1/2-inch cubes (3.5 cups)
  • 1 medium onion, chopped
  • 1 large carrot, halved lengthwise, then sliced 1/4 inch thick
  • 1 tablespoon olive oil
  • 1 red bell pepper, chopped
  • 2 jalepeño peppers, minced (no seeds unless you want your soup really spicy)
  • 2 thyme sprigs
  • 2 California bay leaves
  • 1 cup heavy cream
  • 2 cups milk (1% or 2%)
  • 3 scallions, finely chopped
  • 1/2 teaspoon white pepper
  • 1/8 teaspoon cayenne
Method
  1. Cut corn from each cob.
  2. Bring cobs, water, broth, potatoes, and 1/2 teaspoon salt to a boil in a large pot. Boil, covered, stirring occasionally, until potatoes are tender, about 15 minutes. Discard cobs.
  3. Meanwhile, cook onion, carrot, and 1/2 teaspoon salt in oil in a large heavy pot over medium heat, stirring occasionally, until onion is pale golden, about 10 minutes.
  4. Add bell pepper, jalepeño, corn, thyme, bay leaves, and one ladle of liquid from potato/corn pot. Reduce heat to low and cook, covered, stirring occasionally, 15 minutes.
  5. Stir in potatoes with water/broth and cream and gently boil, uncovered, stirring occasionally, about 30 minutes. Reduce heat to low and stir in milk.  Be sure not to allow soup to boil after this point, as milk will curdle. Heat through, about 15 minutes, stirring occasionally.
  6. Discard bay leaves and thyme sprigs.
  7. Use an immersion blender to pureé some of the vegetables, to thicken soup.  Be sure to leave some large chunks of potatoes, peppers, and corn. If you don't have an immersion blender, ladle two scoops of soup into a regular blender and pureé, then add back to soup pot.
  8. Stir in scallions, white pepper, cayenne, and salt to taste, then serve.
Read More

at summer's end

Andrea

Hello. My name is Andrea. I write this food blog, Bella Eats. You may remember me, or due to my long absence you may not. I’m sorry about that, truly I am. I miss this space! Life has been busy. So so so busy. I started teaching architectural design at the University of Virginia. Teaching. At a University. !!! And before that teaching officially began there was training for teaching. And in the middle of all of that I photographed the wedding of a dear friend I’ve known since the fifth grade. Fifth grade! She was such a beautiful bride, and if you’re interested in seeing some of those images please check out the AHPhoto blog.

Oh, and I started a photography business. Because I love taking pictures of people. And buildings. And food. So if you know anybody who needs somebody to take pictures of people, or buildings, or food...feel free to send them my way. I’d appreciate it so so much. And thank you, all of you, who have commented and tweeted and emailed your support. You’re the best, truly.

And yes, I am still working for an architecture firm here in Charlottesville. So...yeah. Busy.

It feels as though summer has completely passed by Bella Eats. Since June I’ve posted about cherries, blackberries, and blueberries. There have been no luscious heirloom tomatoes, no juice-laden peaches, no golden ears of corn. I even have a new trick for releasing kernels from their cob without making a complete mess of the kitchen counter and floor, and I haven’t had the opportunity to share it with you. That is sad my friends, because this trick is a good one. It will change the way you view corn entirely. Soon, I hope.

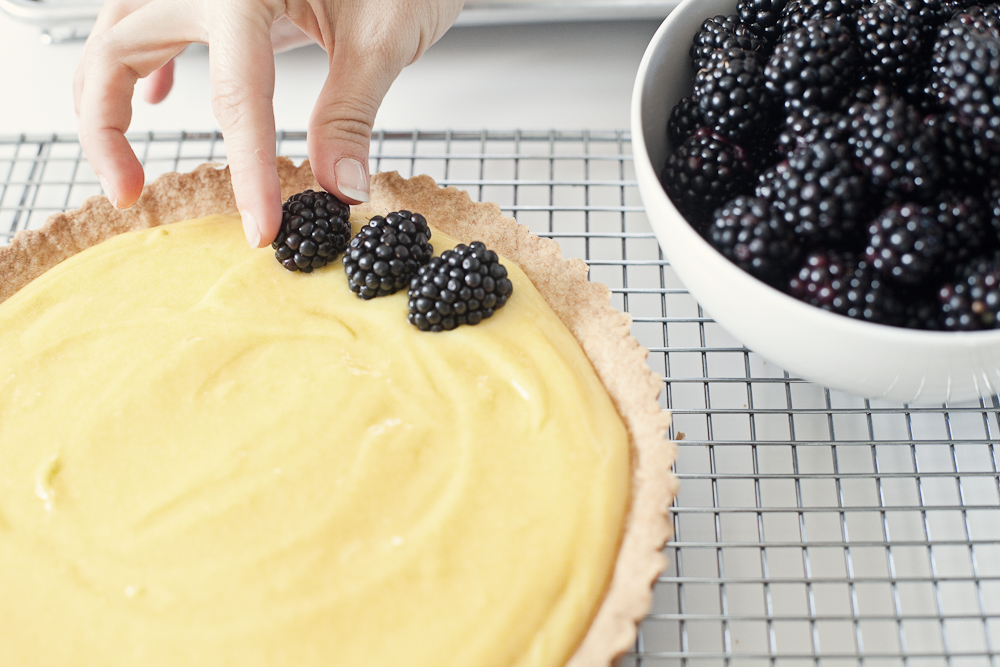
Way back in the middle of July our dear friend Kristin celebrated her birthday. She celebrated with us, and with this lime tart topped with blackberries from our garden. Blackberry season is just about over, a sign that summer is drawing to a quick close. Our bush has shed it’s bounty completely, leaving only the tiny shriveled berries that didn’t ever come to full ripeness. Our freezer is packed full of quart-size bags of the frozen fruit, our pantry shelf stocked with various forms of blackberry jam. This tart was one of the last recipes made this summer using berries fresh from the garden, and looking at these pictures already has me feeling nostalgic.

What is it about food that stirs memories stronger than those evoked by any other sense? While blackberries don't take me back to any point of my childhood, they do plop me down solidly in our backyard here in Charlottesville. For the past 4 years we've spent countless July and August evenings standing in our garden, bowls in hand, fingers stained purple, arms eaten by mosquitos, quietly and contently plucking berries one-by-one from a bush WE planted. I know that forever, no matter where we are, when I pop a freshly picked blackberry into my mouth I will be transported back to this place. I love that.

If you’re lucky you can still find pints of deep purple blackberries at your local farmers’ market, and if you do, I recommend you make this dessert before summer's end. The crust is quite perfect, nearly the consistency and flavor of a shortbread cookie. It doesn't flake and melt in your mouth like many pastry shells, but instead offers a firm vessel on which to carry a scoop of zippy lime curd. And scoop you will, because this tart never really sets up to a solid, sliceable state. Which is fine by me. The delightful combination of sweet shortbread, tart curd, and fresh blackberries had us all going back for seconds, despite our use of a spoon rather than a fork.

For the record, I am so unhappy with the spacing that this new Wordpress theme defaults too, but I just haven't had the time/energy to dig into the CSS code to fix it. And, we're working on a redesign of Bella Eats to be launched right around the two year (two years!) anniversary of this site at the end of October.  So, please bear with me and the awkward/awful spacing of the text in my recipes... Thank you.

Lime Tart with Blackberries

from bon appetit, June 2010 Ingredients for the lime curd:
  • 3 large eggs
  • 3 large egg yolks
  • 1 cup sugar
  • 3/4 cup fresh lime juice
  • 6 tbsp (3/4 stick) unsalted butter, cut into 6 pieces
for the topping:
  • (3) 6-ounce containers fresh blackberries
  • 1 tbsp blackberry jam
for the crust:
  • 1/2 cup (1 stick) unsalted butter, room temperature
  • 1/4 cup sugar
  • 1 large egg yolk
  • 1 1/4 cups all purpose flour
  • 1 large pinch of salt
Method for the lime curd:
  1. Set a fine metal strainer over a medium bowl and set aside. Whisk the eggs, egg yolks, and sugar in another medium metal bowl to blend.  Whisk in lime juice.
  2. Set bowl over large saucepan of gently simmering water (do not allow bottom of bowl to touch water). Whisk constantly until curd thickens and an instant-read thermometer inserted into curd registers 178ºF to 180ºF, about 6 minutes.  Immediately pour curd through prepared strainer set over bowl.
  3. Add butter to warm strained curd; let stand 1 minute, then whisk until blended and smooth.  Press plastic wrap directly onto surface of curd, covering completely.  Refrigerate until cold, about 4 hours.*
*Lime curd can be made up to 2 days ahead.  Keep chilled. for the crust:
  1. Using an electric mixer, beat the butter and sugar in a medium bowl until well blended, 1 to 2 minutes. Add egg yolk; beat to blend. Add flour and salt and mix on low speed until mixture resembles large peas. Using hands, knead in bowl just until dough comes together.
  2. Transfer dough to a 9-inch diameter tart pan with removable bottom. Break dough into pieces, then press dough evenly up sides and onto bottom of pan. Cover and chill 1 hour.**
  3. Preheat oven to 350ºF. Uncover crust and bake until golden brown, about 35 minutes. Cool completely in pan on rack.
**Dough can be made 1 day ahead. Keep chilled. assembly:
  1. Remove sides from tart pan and place crust on plate. Spread lime curd evenly in baked crust. Arrange blackberries in concentric circles on top of tart.
  2. Place am in small microwave-safe bowl. Heat in microwave until jam is melted, about 15 seconds. Whisk to loosen and blend, adding water by teaspoonfuls if thick. Brush jam over berries.*** (I only brushed jam over the outer ring, because I liked how they looked without the glaze.)
***Tart can be made up to 8 hours ahead. Chill uncovered.
Read More

celebrate with citrus cupcakes

Andrea

Last weekend we gathered with friends to celebrate the forthcoming birth of a new family. The party [yes, party. this was not a baby shower. and yes, boys were invited.] was co-hosted by myself and two lovely ladies, all of us brought together by our shared bond to Joe and Erin, the parents-to-be. The event was in the works for two months.  Dozens of emails were passed between the three hostesses as we planned. The only request from Erin was that there be no diaper decorations and no silly shower games. No problem.

We decided to throw a simple summer party and to decorate using colors inspired by the nursery; shades of blue, yellow, and green.  There was fruit-laden sangria and homemade lemonade, pulled-pork sandwiches and corn straight from Erin's family's farm. The weather was kind, overcast and cool with only the slightest spattering of rain. We sat outside sharing stories and laughter as candlelight flickered across happy faces long into the night.

Also, we ate cupcakes.

[To see more images of the evening, visit the AHPhoto blog.]

I love an opportunity to make cupcakes, and an outdoor summer party seemed to be the perfect occasion. A quick email to Erin verified that she had no preference for cake flavor, which was lucky because I had already decided that chocolate wasn't an option. It just didn't fit in with the party decor, which is a perfectly valid excuse I assure you.

And so I was left thinking about vanilla and lemon. It is no secret that I am a fanatic for citrus-flavored sweets, with four lemon cakescitrus sconeskey lime butter cookies, and coconut lime bars all listed on the Bella Eats recipe page. I should probably apologize for giving you yet another citrus dessert...but I won't. You just can't go wrong with citrus, and that requires no apology.

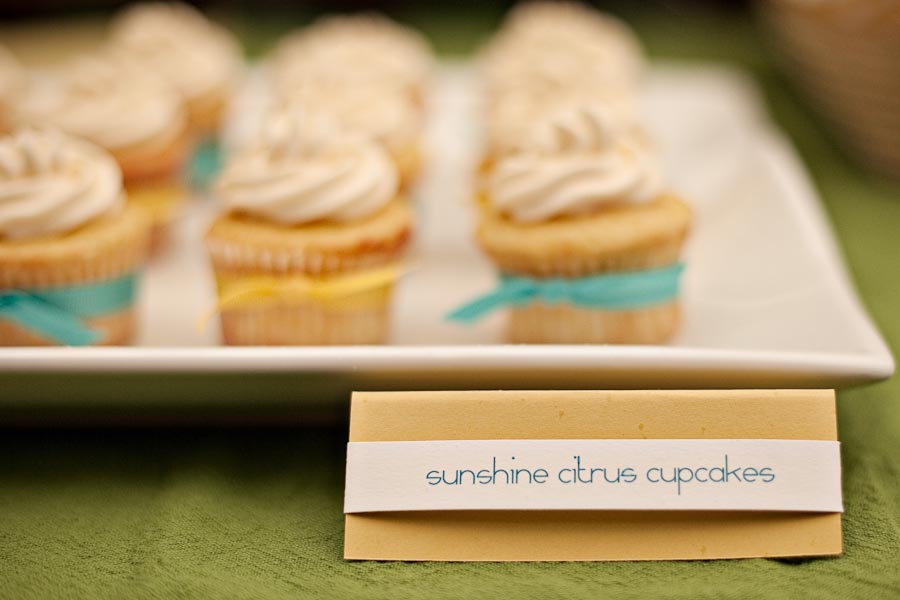
The cake itself is actually a modification of an old favorite, borrowed from the Lemon Mousse Cake I made for my own birthday a few months ago. It is a chiffon cake, made light and spongy by the egg whites folded into the batter just before baking. The addition of lemon and orange zest brightens the flavor, but it is the swirl atop the golden domes that truly stands out. The meringue buttercream seemed to be a hit, although it is the most unusual frosting I have ever tasted. A finger swiped across the side of the mixing bowl produces a dollop of ultra-creamy spread that melts as soon as it hits the tongue. At first the taste buds are overwhelmed with the flavor of butter, which then melts away to become a bright pop of lemon, that then fades to the slow warmth of Grand Marnier. It is a three-step process using each third of the tongue - front, middle, back - in succession, with each flavor forming its own distinct statement. And it isn't too sweet, so you could easily eat several cupcakes without causing your teeth to ache.

Not that I would know that...

The frosting shapes beautifully, and despite my fears did not melt in the warm and humid evening air. A summer winner, for sure.

Sunshine Citrus Cupcakes

cake modified from the greyston bakery cookbook, pg. 46,  frosting from gourmet makes 18 standard cupcakes Cake Ingredients:
  • 5 eggs, separated
  • 1/4 cup (1/2 stick) unsalted butter, melted and cooled
  • 1/2 cup milk
  • 1-1/2 tsp vanilla extract
  • 1-1/2 cups unbleached all-purpose flour
  • 1-1/4 cups sugar
  • 2-1/2 tsp baking powder
  • 1/4 tsp salt
  • 1 tbsp lemon zest
  • 1 tbsp orange zest
  • 1/2 fresh lemon, seeds discarded
Frosting Ingredients:
  • 4 large egg whites
  • 1 cup sugar
  • 2 sticks unsalted butter, cut into tablespoons and softened slightly
  • 1/3 cup orange liqueur such as Grand Marnier
  • 2 tablespoons fresh lemon juice
Cake Method:
  1. Position a rack in the center of the oven and preheat oven to 350º. Line 1 standard muffin tin with 12 liners, and another with 6 liners.
  2. In a small bowl, combine the egg yolks, butter, milk and vanilla.  Set aside.
  3. In a large bowl, whisk together the flour, 1 cup of sugar, baking powder and salt to blend.  Add the lemon and orange zest and blend with your fingers to separate clumps. Add the egg yolk mixture and stir until well combined.  Set aside.
  4. In a clean dry bowl, using clean dry beaters, beat the egg whites on medium-high speed until they hold soft peaks.  Lower the mixer speed to medium and gradually add the remaining 1/4 cup sugar, beating the whites until they hold stiff peaks.  Stir about one-third of the egg whites into the batter to lighten.  Gently fold the remaining whites into the batter, in two batches, to blend thoroughly.
  5. Transfer the batter to the prepared pans, filling each muffin cup 3/4 of the way full.  Bake for 15 to 20 minutes, or until a wooden skewer inserted near the center of a cupcake comes out clean.
  6. Set the pans on a wire rack for 10 minutes to cool.  Remove the cupcakes from the pans and allow them to cool completely on wire racks.
Frosting Method:
  1. Heat whites and sugar in a metal bowl set over a saucepan of simmering water, whisking constantly, until sugar is dissolved and a thermometer registers 160°F. Remove bowl from heat and beat mixture in standing electric mixer on medium-high speed until thick, glossy peaks form. If mixture is still warm, continue beating until cool. (this takes about 10 minutes)
  2. With mixer running, add butter, 1 tablespoon at a time, beating well after each addition. Add liqueur and lemon juice, beating on high speed until smooth and fluffy, about 10 minutes. If buttercream begins to separate, beat on high speed until smooth.
Assemble:
  1. Use a pastry bag to pipe frosting over cupcakes once they are completely cool. Keep refrigerated until ready to consume.
Congratulations Joe and Erin, we are so excited to meet your baby boy!
Read More

music festival winners!

Andrea

Thank you all for entering to win tickets to the Brew Ridge Trail Music Festival and The Festy!  I used a random number generator to pick the winners, who are listed below.

The winner of the Brew Ridge Trail Music Festival tickets is...Greg!

The winner of The Festy tickets is...Jes!

Greg and Jes, please send me an email (bellaeats@gmail.com) with your full name and contact information, and I will pass it on to Stephanie who will make sure there are tickets waiting for you at Will Call! If I don't hear from you by the end of the day Sunday August 15th, I'll do another drawing to give the tickets to somebody else.

Thank you all for entering!

Read More

exciting news!

Andrea

Hello Friends! Remember me mentioning how busy I've been lately? Well, I am here to tell you the main reason... I've launched a photography company, Andrea Hubbell Photography! I'd love to share my portfolio with you, and hope you'll subscribe to the AHPhoto blog I've started as part of my new website. You can also follow me on Twitter, if you'd like, for photography-specific tweets.

No worries, Bella Eats isn't going anywhere! In fact, we are in the midst of a big website and branding overhaul that will be revealed in the next two months. I even have a lovely lime and blackberry tart to share with you very soon... (see if you can find an image of it in my portfolio!)

Until then, I'd like to entice you over to the AHPhoto blog with a few teaser images of our recent trip to Chincoteague. Consider it an [almost] Wordless Wednesday.

And don't forget, if you're interested in winning tickets to The Festy or the Brew Ridge Trail Music Festival, leave a comment here by the end-of-day (eastern time) this Friday, the 13th!

Read More

celebrate summer with local beer, local music [giveaway!]

Andrea

A few weeks ago I received an email with the subject “Does Bella like beer?”. Well yes, Bella does like beer, and so I opened that email and kept on reading. In it, a very nice woman named Stephanie asked if I might like to visit an award-winning local brewery for a complimentary tour and tasting. She also asked if I thought the followers of Bella Eats might be interested in reading about that visit, and then submitting a comment on that post for a chance to win a pair of tickets to two separate music festivals in Virginia. Well gosh that all sounded like a lot of fun and, while product promotion and giveaways aren’t very typical in this web space of mine, I really liked the idea of reviewing a local company and hosting a giveaway that supports local music.

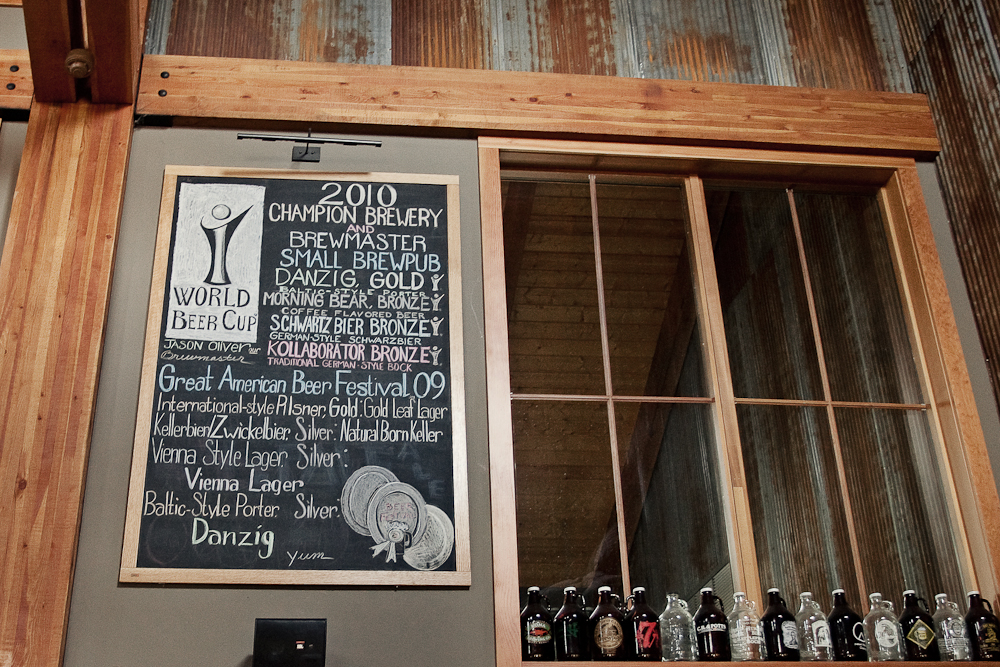
And that is how, a flurry of emails later, Brian and I found ourselves driving west out of Charlottesville two Sundays ago. Our destination, Devils Backbone Brewing Company, was recently named Champion Brewery and Brewmaster in the small brewpub category at the 2010 World Beer Cup. They also earned one gold medal and three bronze medals for individual beers entered in the same competition, and last year brought home four medals from the 2009 Great American Beer Festival. With stats like that, the not-even-two-years-old brewery had been on our "things to do/see in/around Charlottesville" list for good reason.

The brewmaster, Jason Oliver, has over 14 years of brewing experience and 15 medals for beers he's brewed. We were lucky to have a semi-private tour of the brewhouse scheduled with Jason, who is incredibly knowledgeable about his craft and patient with those of us who are not. He took us through the entire process, from steeping barley in water to fermenting with yeast to flavoring with hops. We were able to try several types of barley from a handful of different countries so that we could see for ourselves how different grains influence the final flavor of the beer we drink. It was fascinating, and very enjoyable. If you live in central Virginia, or are planning to visit the area, I highly recommend scheduling a tour of the brewhouse at Devils Backbone Brewing Company.

[thank you Brian for the above pictures of Jason and me]

After our tour Brian and I found our way to a couple of stools at the long copper-clad bar. DB Brewing Company has 10 beers on tap at all times, 4 that are brewed year-round and 6 rotating seasonal beers that are created by Jason. We decided to split the sampler, and Jason lined up our ten samples alongside a menu with their descriptions. The beers ranged in color from the champagne-toned Azreal (my favorite) to the cola-dark Inspirado (Brian's favorite).

They were each unique, some were surprising, all were quite good. The Wintergreen Weiss, a Bavarian-style hefeweizen, had my attention, as well as the Gold Leaf Lager. But the Azreal...oh, the Azreal (aka Gargamel...a little Smurf reference for you). Fruity on the nose and the tongue, so easy to drink yet nearly 8% alcohol...that one is dangerous, and I loved it. Brian's favorite, the Inspirado, was also excellent with its deep, dark color and rich, fruity flavor.

If you're in the area, make the drive out to Nelson County to visit Devils Backbone Brewing Company. Take the tour, try the sampler, stay for lunch. And be sure to go home with a growler or two. DB Brewing Company beer is available on tap at a few restaurants around Charlottesville, but the only way to take it home with you is to get it straight from the brewery.

Many thanks to Jason and Devils Backbone Brewing Company for hosting us, and to Stephanie for setting it all up!

Music Festival Tickets Giveaway!

Devils Backbone Brewing Company is hosting two music festivals on their Concert Grounds at Devils Backbone, the Brew Ridge Music Festival and The Festy. Bella Eats is giving away one pair of tickets to each music festival! You have three opportunities to win tickets:
  1. Leave a comment on this post specifying that you are interested in winning the tickets and which festival you would prefer to attend.
  2. Become a friend of both BRTMF and The Festy on Facebook and leave a second comment on this post telling me you've done so. (Honor system here folks!)
  3. Follow The Festy on Twitter and leave a third comment on this post telling me you've done so. (Again, honor system!)
Post comments by Friday, August 13th. I will pick the winners using a random number generator and announce them on Saturday, August 14th. Good luck!

Brew Ridge Music Festival: The second annual Brew Ridge Trail Music Festival is an all ages event featuring top musical artists and sixteen local beers on tap. Scheduled for Sat, August 21 at the Concert Grounds at Devils Backbone (Nelson County, VA, 45 miles from Charlottesville), Cerberus Productions, 106.1 "The Corner" and the Brew Ridge Trail members are thrilled that this year's festival will be headlined by Ivan Neville's Dumpstaphunk. Additional confirmed acts include Devon Allman's Honeytribe and William Walter & Co. For overnight accommodations, Wintergreen. Gates open at noon, rain or shine. For more information or to purchase tickets, please visit Brew Ridge Trail Music Festival.

One winner will receive two Taphouse Tent tickets, which include admission to the festival and (8) 4oz beer tasting tickets!

Follow on Facebook

The Festy: The Infamous Stringdusters, The Artist Farm, Cerberus Productions and Devils Backbone Brewing Company present The Festy Experience, a 2-day camping festival over Columbus Day weekend (Oct 9 & 10) at The Concert Grounds at Devils Backbone in Nelson County, Virginia (45 mi. from Charlottesville). Hosted and curated by The Infamous Stringdusters, The Festy Experience will celebrate and combine the best in live music, outdoor sports and lifestyle, craft beer culture and raging good times.

In addition to two nights with The Dusters, confirmed acts include Railroad Earth, Josh Ritter, Toubab Krewe, The Tony Rice Unit and a slew of musically diverse acts that embody The Festy Experience spirit.

Wanna festy, but don't wanna camp? Weekend day passes are available, but bypass couch surfing for the Wintergreen Resort Experience. All rooms booked at the Wintergreen Resort in association with The Festy Experience will receive an exclusive 20% off.

One winner will receive two tickets to The Festy! Follow on Facebook Follow on Twitter
Read More

finally, a piece of NOLA

Andrea

July.  What a busy month this has been.  I know I've said that a lot these last few months, remarked often about the quick passing of time and my inability to sit behind my computer to put words on this digital page of mine.  Are you tired of that yet?  I sure am.  So, rather than dwell on my mile-long 'to do' list I've decided to share with you one of my favorite places. A city that my mind escapes to when life gets hectic and all I want is a cool spot in a shady courtyard, an ice-laden cocktail in my hand and notes of jazz wafting on the breeze. Am I procrastinating? Maybe a little.  But "write a flippin' post for Bella Eats!" is definitely on my list, so I AM accomplishing something...

It is difficult to explain the draw that Brian and I have to New Orleans.  It just...is. We feel it as soon as we step off the plane, a bubbling of emotion from deep within, a giddy excitement that manifests itself as raised hairs along goose-bumped arms. Neither of us have ever lived in the city, we have no family in the area, our first visit together occurred just seven years ago. Yet after that initial stay in the Big Easy we were hooked. Completely and totally.

NOLA is so much more than Bourbon Street and Mardi Gras and frozen drinks in phallic cups. The city has soul, and to find it one needs only to spend a few hours walking slowly down her cracked sidewalks. Underneath the peeling paint, the sagging balconies, the leaning cottages, and the rusty ironwork is a humble elegance steeped in history and perseverance. She keeps her chin up and dances to her own soundtrack; a mix composed of melancholy notes from a jazz clarinetist on Royal, the rumble and clang of a street car on Saint Charles, the clink of an oyster shell tossed on a pile behind a bar, a “what can I getcha, baby?” from the busy woman behind a restaurant counter.

Her natives are loyal, devoted to the place they’ve called home for most, if not all, of their lives. They are drawn to her magic, held hostage by an appeal that keeps them coming home even after high waters threatened to wash that possibility into the Gulf. Sit down at a table in any well-established restaurant and learn that your waiter has worked there for 40+ years. He loves his job and has been well taken care of for all that time, because that's how they do things in the Big Easy. Filter in and out of shops and restaurants in the French Quarter and be thanked not only for visiting that particular address, but for visiting New Orleans. “Come back soon, y’hear? This city needs you.”

We do go back, as often as we can. With each visit we try to experience new places, new food, new music; but it is difficult to stray from those that have become favorites. It just wouldn’t be a weekend in NOLA without a black ham biscuit, beignets and cafe au lait at midnight, a muffaletta, blackened Louisiana drum, Fritzel’s, Doreen. Tell any lover of New Orleans that you’re planning a visit and watch their eyes light up as they rattle off their own list of places you must see, meals you must eat.  But most of all, they'll be excited that you're going to New Orleans, and that the city will have another set of fans to add to her list.

We last visited NOLA in May.  You might remember me mentioning our trip and making promises to share recipes inspired by the fabulous meals we had while there. Oh, and photographs...I promised those too. I also mentioned the stifling heat we experienced during our stay and my relief that we'd be spared from such temperatures in Virginia for another two-ish months.  Ha. If only I had knocked on wood after hitting 'publish' on that post...

The record-breaking temperatures have kept us from doing much cooking in our kitchen, as even the thought of turning on the stovetop raises a bead of sweat at my hairline. I'd just about given up on the idea of sharing red beans and rice with you anytime before October when I read this article on The Kitchn about slow-cooking in the summer. I know that it seems counter-intuitive to pull out the Crock Pot in the middle of a heat wave, but it actually makes quite a bit of sense.

For this recipe, which I adapted from a traditional stovetop variation, all of the preparation was completed in the morning before work when my house was cool and the setting sun wasn't blaring through the west-facing kitchen window. The ingredients were tossed in the Crock Pot, I turned the heat to low and out the door we went.  When we arrived home that night the house smelled amazing and dinner was ready without either of us laboring over a hot stove.  We ladled up the beans, poured ourselves cold cocktails, and settled into our dark den. Not exactly a shady New Orleans courtyard, but a respite all the same.

These beans were really fantastic; smoked and earthy with just a hint of spice.  My ingredients are very close to Chef Prudhomme's; it was really just the process and the color of the bell peppers that I altered. Also, Brian and I don't have quite the tolerance for spicy heat that most native New Orleanians do, so I knocked that back a bit as well.

Red Beans + Rice with Andouille Smoked Sausage

recipe adapted from Chef Paul Prudhomme's Louisiana Kitchen serves 6 Ingredients
  • 1 pound dried red kidney beans
  • water
  • 2 cups diced onion
  • 2 cups diced celery
  • 2 cups diced red bell pepper
  • 2 large smoked ham hocks, about 2.5 pounds total
  • 5 bay leaves
  • 1 tsp ground black pepper
  • 2 tsp dried thyme
  • 1 1/2 tsp dried oregano
  • 1 1/2 tsp garlic powder
  • 1 tsp ground red pepper (preferably cayenne)
  • 1 pound andouille sausage links
  • salt to taste
  • Basic Cooked Rice (recipe below)
Method
  1. The night before, place the dried red beans in a large saucepan and cover with water 2-inches above the beans. Let soak overnight.
  2. The next morning, drain the red beans and rinse thoroughly.  Refill the saucepan with fresh water to cover the beans by 2-inches.  Bring to a brisk boil and cook for 10 minutes.  Remove the beans from the heat and drain.
  3. Place the boiled beans in a slow-cooker (crock pot) and add ten cups of water over top. Add everything but the andouille sausage, salt and Basic Cooked Rice to the pot and stir well.
  4. Set the slow-cooker to the 'low' setting and let cook for 6 to 7 hours, until the beans are tender and just starting to break apart. (I came home for a late lunch to check on the beans, and turned the slow-cooker to the 'warm' setting for the remaining 4 hours of my work day).
  5. Add the andouille sausage links (split in half or quarters, depending on the size of the links) to the slow-cooker and continue to cook for 1 additional hour.
  6. Salt to taste.
  7. Serve over Basic Cooked Rice.
***UPDATE***

Thank you to InternationalRoutier for bringing to my attention the fact that dried red kidney beans cooked in slow cookers have been known to cause food poisoning!  You can be protected from this possibility by soaking the dry beans for at least 5 hours, and then boiling the beans briskly for at least 10 minutes prior to adding them to the slow cooker.  I've modified my recipe above to reflect this change.

Basic Cooked Rice

from Chef Paul Prudhomme's Louisiana Kitchen makes about 6 cups of rice Ingredients
  • 2 cups uncooked rice (I used brown rice)
  • 2 1/2 cups chicken broth
  • 1 1/2 tbsp very finely chopped onions
  • 1 1/2 tbsp very finely chopped celery
  • 1 1/2 tbsp very finely chopped bell pepper (the recipe calls for green, I used red because I love them)
  • 1 1/2 tbsp unsalted butter, melted
  • 1/2 tsp salt
  • 1/8 tsp garlic powder
  • a pinch each of white pepper, ground red pepper (cayenne), and black pepper
Method
  1. In a 5x9x2 1/2-inch standard loaf pan, combine all ingredients and mix well. Seal pan snugly with aluminum foil. Bake at 350º until rice is tender, about 1 hour, 10 minutes. Serve immediately.*
* I made the rice the night before.  If you are planning to do the same, DO NOT use green bell peppers, as they tend to sour quickly. Reheat the rice in a skillet with a bit of melted butter.

We can't even begin to imagine the affect that the explosion of the DeepWater Horizon oil drilling rig will have on the Gulf, the coast, the country, the world. The stories and images are devastating. If you are able and would like to help the recovery, I've provided links below to organizations that would appreciate your contribution.

Greater New Orleans Foundation National Wildlife Federation International Bird Rescue Research Center
Read More

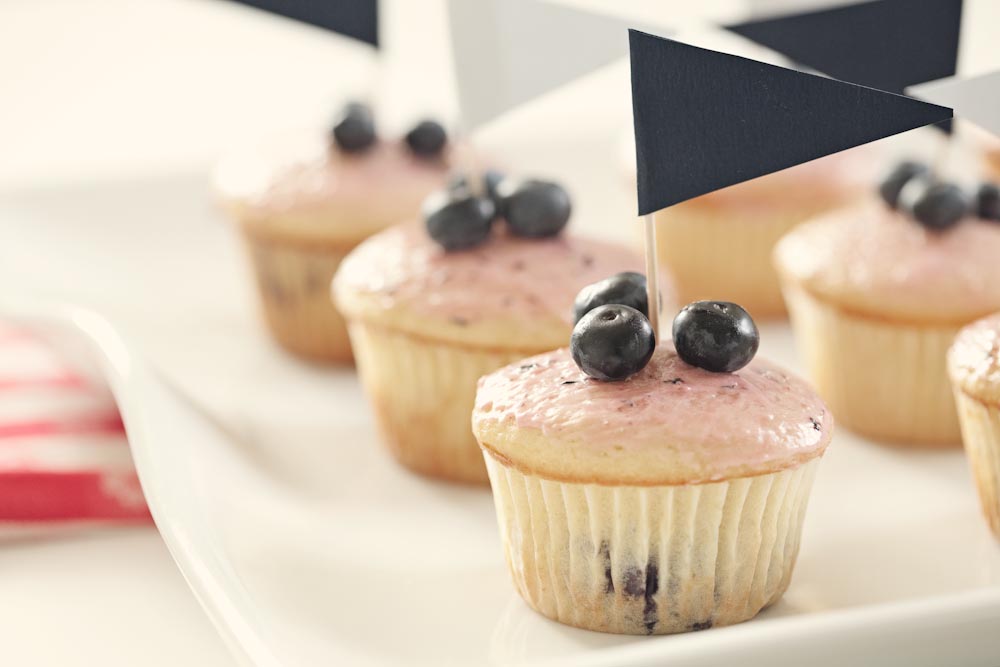
blueberry hill cupcakes, and a happy 4th to you!

Andrea

The 4th of July is upon us already!  I'm not sure why 2010 is in such a hurry to rush on by, but I do wish that she would slow down just a bit.  I had big plans for this week, some favorite salads and cocktails and desserts to share with you before the holiday weekend ahead of us.  But, well, time flew.

I did manage to share one dessert with you, and here is a second.  The first was somewhat healthy, this one is not. Both are delicious, and either would make a nice addition to your picnic, bar-be-que, or party.  How to choose...

I am keeping things short and sweet today, because I have family in town!  That means wandering shops on Charlottesville's Downtown Mall, stopping for gelato, lunch on a patio, pampering with my Momma, vinho verde on the back deck, sausages on the grill.  And that's just today!  Oh, the weekend we'll have.

I hope that yours is just as lovely.  What are your plans?  (I really do want to know!)

Perhaps you could make these cupcakes?  Lemony and chock-full of bright bursts of blueberry, they absolutely scream summer.  You'll love them, I'm sure.

Blueberry Hill Cupcakes with Blueberry Glaze

cupcakes from bon appetit, glaze from bella eats I've heard good things about the frosting that accompanies this recipe on bon appetit, but wanted something lighter and with a bit of color.  I bet a lemon buttercream or a lemon glaze would also be really delicious. Also, my "glaze" originally started out as a full-blown buttercream frosting.  I frosted one cupcake, but found the very sweet topping to be very overpowering.  The cake itself is so delicious that you really want to let it shine. Cupcake Ingredients
  • 3 1/4 cups all purpose flour
  • 1 1/4 cups sugar
  • 1 tablespoon baking powder
  • 1/2 teaspoon coarse kosher salt
  • 1/4 teaspoon baking soda
  • 6 tablespoons (3/4 stick) unsalted butter, melted
  • 1/4 cup canola oil
  • 2 large eggs
  • 1 cup buttermilk or low-fat yogurt
  • 1 cup whole milk
  • 1 teaspoon vanilla extract
  • 1 teaspoon grated lemon zest
  • 1 1/4 cups fresh blueberries, frozen for 4 hours
Glaze Ingredients
  • 2-3 tablespoons blueberry puree (about 1/2 cup blueberries, pureed and strained if desired...I did not strain)
  • 4 tbsp butter (1/2 stick), room temperature
  • 1-1/2 cups powdered sugar
Method
  1. Preheat oven to 350* F.  Line two 12-cup muffin pans with paper liners.  Sift flour and next 4 ingredients into a large bowl.  Whisk the melted butter and oil in a separate, medium bowl.  Add eggs; whisk to blend.  Whisk in buttermilk, milk, vanilla extract, and zest.  Add buttermilk mixture to dry ingredients; whisk just to blend.  Stir in frozen blueberries.
  2. Divide batter among liners.  Bake cupcakes until a tester inserted into center comes out clean, 23-27 minutes. Transfer cupcakes to racks; cool.
  3. Beat butter in electric mixer with whisk attachment until creamy.  Add about 1/2 the sugar slowly.  Add 2 tbsp of the blueberry puree and continue whisking to blend.  Add the last of the sugar and whisk to blend. Taste, and add more blueberry puree if desired.  You want the consistency to be like a loose buttercream; easy to spread but also easy to control (you don't want it running down the sides of your cupcakes).
  4. When the cupcakes are nearly cool, brush them lightly with the glaze.  You will find that the glaze will harden nicely in about an hour.
  5. Keep stored at room temperature in an air-tight container.
Read More

happy, happy day

Andrea

Last year at this time I was posting regularly about our backyard vegetable patch. I’d shared potato salad with our sugar snap peas, an earthy, herby frittata, and a rosy beet risotto. The garden was, while a bit overgrown, orderly and walkable. I visited it every day, scurrying through the gate in the morning after my runs to pick raspberries for breakfast, losing myself to daydreams as I stood with a hose each afternoon and soaked the soil under the tomatoes and peppers. I was oh-so-proud of our little plot, and oh-so-excited to share its progress with you all.

In December, after harvesting the last of the carrots for our Christmas dinner, Brian and I mourned the fact that those were probably the last vegetables we’d see come from our current backyard. We were planning to move this Summer, and didn’t think it would be very smart to put a lot of time, money, or energy into a piece of land that would no longer be ours in just six months’ time. It made me sad. Very, very, sad.

March came and went without us ordering organic compost to till into soil already rich from three years of amendment and gardening. There was no sprinkling of lettuce, kale, carrot, or beet seeds; no elaborate map drawn to show the exact location of each plant to come. May 15th, the last frost date for our part of Virginia, rolled by without us spending a Saturday planting tiny tomato, cucumber and pepper plants. The weeds grew, and grew, and grew...and I just let them.

Multiple friends who don’t know our plans to move, but do know the joy we get from growing our own food, have asked “how’s that garden of yours?”. This single question, innocent as it is, elicits a panicked look from Brian, who tries to change the subject before I can launch into our sorrowful (to me) tale. About how, no, we didn’t plant any vegetables in our backyard this year. And no, we don’t think we’ll be moving into a new house in time to establish a new garden. And yes, I am devastated that we’re not spending a portion of our weekends weeding and watering and planting and harvesting. Harumph.

In hindsight, we should have planted summer veggies. Things never move as quickly as anticipated, and our putting the house on the market was no exception. By now we could have been eating our own lettuce, cucumbers, sugar snap peas, and beets. Instead we’re buying them at the farmer’s market, which is the next best thing, but still not quite as satisfying. I’m getting over it. Really.

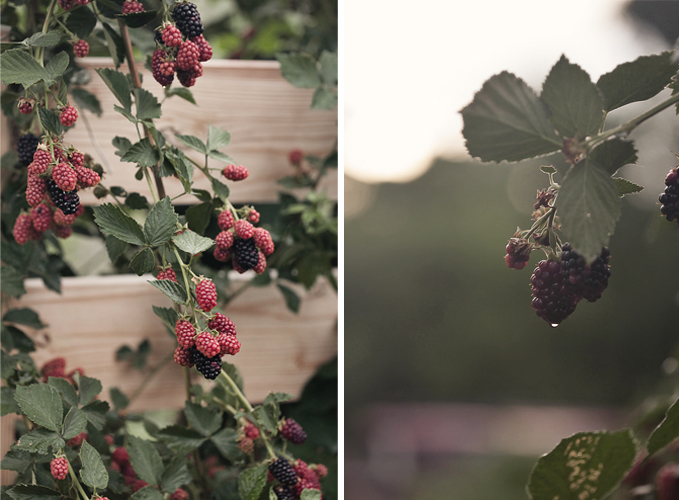
However...our berries have been AMAZING this year. Strawberries, red and golden raspberries, gooseberries, blackberries. Thank goodness for hardy perennial fruit that grows no matter the neglect it’s received! Those shots at the top of the page are from my visit to the garden last Friday morning, when I first noticed that the blackberries are starting to ripen. I did a little dance, hurried back inside for my camera and a bowl, and proceeded to pick every single fully-black berry on the vine. Happy, happy day.

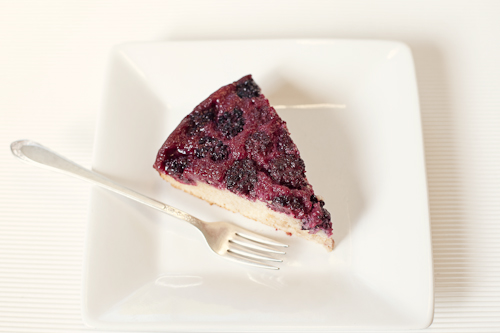
This cake was actually made with blackberries that we grew last summer and froze. We had 8 quarts in our own freezer, and many more were given to friends. I'm betting that our harvest will be doubled this year, and we're not moving until I am proven right.  Stubborn?  Not me.

Even if you have fresh blackberries on hand, you should still freeze them for at least 4 hours before adding them to the batter. The frozen berries, with the help of the syrup, will stay firmly rooted to the bottom of the pan without rising to the top (which will become the bottom) of the cake.

The whole wheat flour provides the cake with a dense crumb, perfect for picking up between two fingers.  I made it for dessert, but I think it is even better for breakfast.  Not too sweet, hearty with whole grains, a nice compliment to a cup of coffee.

Blackberry Upside-Down Cake

from Sweet and Natural Baking, by Mani Niall serves 10 Ingredients fruit
  • 1/3 cup liquid fruit juice concentrate (or, agave nectar)
  • 2 tbsp canola oil
  • 3 cups frozen blackberries
cake
  • 3 large egg whites, at room temperature
  • 3/4 cup liquid fruit juice concentrate (or, agave nectar)
  • 2/3 cup skim milk
  • 1/3 cup plus 1 tbsp canola oil
  • 2 tsp vanilla extract
  • 2 cups whole wheat pastry flour
  • 2 tsp baking powder
  • 1/4 tsp fine sea salt
Method
  1. Position a rack in the center of the oven and preheat the oven to 350 degrees. Spray a 10-inch ovenproof skillet or springform pan with vegetable oil spray.
  2. For the fruit:  In a small saucepan, bring the fruit juice concentrate and oil to a simmer. Reduce the heat to low and simmer for 2 minutes. Pour into the prepared pan. Immediately arrange the blackberries in the pan in a single layer. Work quickly, as the syrup will harden rapidly. Place in the freezer while preparing the batter. (This will keep the fruit from floating to the top of the batter while baking.)
  3. For the cake:  In a medium bowl, using a handheld electric mixer at high speed, beat the egg whites until soft peaks form. Gradually beat in the fruit juice concentrate, beating until stiff peaks form. Reduce the speed to low and add the milk, oil and vanilla, mixing until well combined.
  4. In another medium bowl, whisk the flour, baking powder, and salt until combined. Add to the liquid ingredients and whisk until smooth. Remove the pan from the freezer and pour the batter over the fruit.
  5. Bake until a toothpick inserted in the center comes out clean, 35 to 40 minutes. Cool on a cake rack for 10 minutes. Run a knife around the inside of the skillet or springform to loosen the cake. Invert onto a serving plate. Let stand for 5 minutes so that the cake can absorb the juices. Remove the skillet of release the sides of the spring form and carefully lift off the bottom. Serve the cake warm or at room temperature.
Read More

truly, I do

Andrea

The mosquitoes are out in full force, covering my skin with pink welts each time I venture into our overgrown garden. My hair frizzes to twice its volume as soon as I consider stepping outside. I can’t walk down the block without tiny beads of sweat popping up on the back of my neck, yet my office is frigid enough to require a sweater. Spring seems to have moved on early this year, leaving in her wake an abrasive and demanding Summer.

But, despite all of this personal discomfort, I love this time of year. Truly, I do.

I love the thunderstorms that sweep in like clockwork each afternoon, lending the sky an ominous tone and the air an electric buzz. I love the booths at the farmer’s market, the tables full of greens and berries and cucumbers and beets. I love that the water is warm enough to take the dogs swimming at the reservoir, and that those trips are the perfect opportunity for a picnic. I love drinking Moscow Mules on the back deck while watching fireflies glow in the trees, and the smell of sun screen and citronella and bug spray made sweeter by the intoxicating aroma of freshly-mown grass and trampled mint.

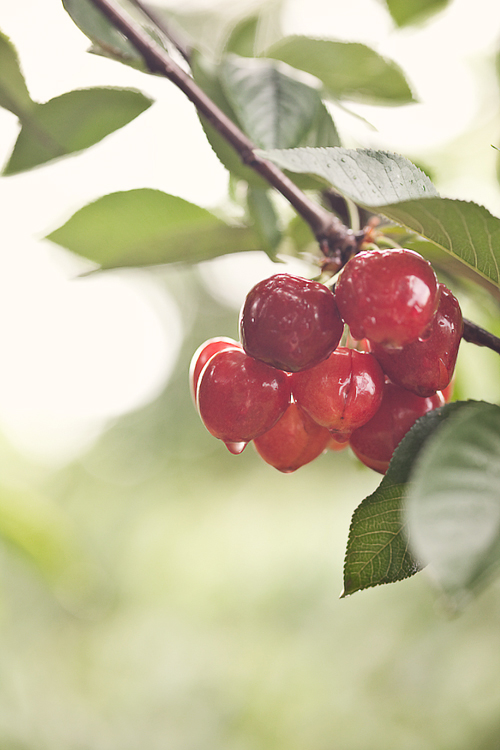
Those are all compelling arguments, I know, but what I love most about this Almost-Summer time of year is the local Virginia fruit. Those few days where I find myself wandering between tidy rows of strawberries, or ducking under tree branches dripping with both rainwater and cherries, are worth every welt on my itchy legs. Filling our basket with blueberries and melons at Charlottesville's City Market makes the sweltering heat just bearable as we make our way between stalls. And folding homegrown raspberries into whipped buttercream...oh my. There aren't many discomforts that fresh raspberry buttercream can't fix.

But today, let's focus on those cherries. Ten-year-old Andrea would probably tell you that they are her favorite fruit...ever...for their appearance at the grocery store was always perfectly timed with the end of school and the beginning of Summer vacation. My momma, a teacher and just as excited for the break, would plan day trips to Florida’s fresh water springs for my friends and me. A bag full of sweet cherries was always packed as part of our lunch. After a few hours of swimming and snorkeling and sharks’ tooth hunting the dark-skinned globes would come out of the cooler, icy cold and immediately covered in tiny beads of condensation.

We’d find a spot in the grass, out of the shade of our claimed pavilion. The spring water was frigid, and the sun felt good on our skin as we spread a blanket and chose our places for the competition that was sure to follow. Small hands reached into the Ziplock bag, pulling out handfuls of tangled fruit to place in cross-legged laps. One-by-one, plucked from the mass by rubbery stems, the cherries were popped into eager mouths.  Rolled around and around the tongue, the pit was picked clean before being spat from juice-stained lips across the sun-soaked lawn.

Oh, summer.

I won't deny that my adult days have seen the occasional cherry-pit-spitting contest.  Yes, I do that.  But 28-year-old Andrea has also learned how to bake and how to make jam, and that cherries pair well with savory partners as well as sweet.  Take this dish, for instance, a variation on the classic tomato and basil bread salad.  In it, sweet cherries are paired with the tang of  balsamic vinegar and spicy arugula, all held together by a base of crisped bread and a topping of creamy chevre.  It is a very adult meal, a lovely, rustic dinner for two on the back deck that is complimented nicely by an effervescent vinho verde.

Just be sure to save some of those whole cherries for dessert...you never know when your inner child will demand a little friendly competition.

Bread Salad with Cherries, Arugula and Goat Cheese

from A Homemade Life, by Molly Wizenberg makes 4 first-course servings, or a meal for 2 Ingredients
  • 6 oz rustic bread, preferably a day old (I used a whole wheat baguette)
  • olive oil
  • 1/2 pound cherries, halved and pitted (I used sweet cherries, and a cherry pitter was SO handy)
  • 1/8 tsp pressed or crushed garlic
  • balsamic vinegar
  • salt
  • arugula
  • fresh chevre, coarsely crumbled
  • black pepper
Method
  1. Preheat oven to 400 degrees.
  2. Trim crust from bread, and discard the crust.  Tear the bread into rough, bite-size pieces (you should have about 4 cups, total).  Dump the bread onto a rimmed baking sheet, and drizzle it with olive oil.  Toss to coat. Bake until crispy and golden in spots, shaking the pan once, 8 to 10 minutes.
  3. Meanwhile, put about one-third of the cherries in a small bowl and mash them lightly with a fork to release their juices.
  4. When the bread is nicely toasted, turn it into a large bowl. While it is still hot, add the crushed garlic and toss well.  Set the bowl aside to cool for a minute or two, then add all of the cherries, both mashed and halved, and toss. Add 2 tsp balsamic vinegar and toss again. Add 1 tablespoon olive oil and a pinch or two of salt and toss again.
  5. Taste, and adjust the vinegar, oil and salt as needed.  The bread and cherries should taste good on their own. When you're satisfied with the flavor, add about 2 handfuls of arugula and toss one last time.  Finish with a generous amount of crumbled goat cheese and a few grinds of the pepper mill, and serve.
Read More

perfect as they are

Andrea

Last month, at the very beginning of May (where did you go, sweet May?) Brian and I went strawberry picking. I’d received the email days before that shouted against a bright green backdrop “strawberries are here!”.   I anxiously await this announcement each year.  Not only does it mark Spring’s firm hold on this time in Charlottesville, it also foreshadows the other emails to come reporting the arrival of cherries(!) and peaches(!!) throughout the summer. (I'll add that, since it has taken me so very long to share this post and recipe with you, I've already received both the "cherries are ready!" and "peaches are early, and ready!" emails.  I'll try to do better this month with timely posting...)

And so Brian and I hopped in the car that Friday and drove out to the country to fill a flat with ten pounds of bright and beautiful berries. Never mind the fact that we have a garden on the side of our house that is absolutely FULL of strawberry plants. Plants that have well exceeded their raised bed boundary and tumbled into the aisles of what was once a very organized patch. Plants that, during the time we were heading towards the orchard with windows down and music blaring, were completely covered with star-shaped flowers and tiny green fruit.  But those country strawberries, they were ready RIGHT THEN, and I just couldn’t wait another week for ours to ripen.

There is something very special about moving slowly between those neat rows of plants, bending down to push emerald leaves aside, revealing the ripe and ready gems hiding in their shade.  The berries come off their stems with the most satisfying "snap!", and if popped in your mouth at that exact moment are one of the most delicious treats to ever touch your tongue.  Warmed by the sun, the fruit seems to explode in the mouth as vibrant juice seeps into every nook and cranny. It is so overwhelmingly good that you must close your eyes, tilt your face up towards the sky and slip into a little food dance of happiness.  Yes, I do that.

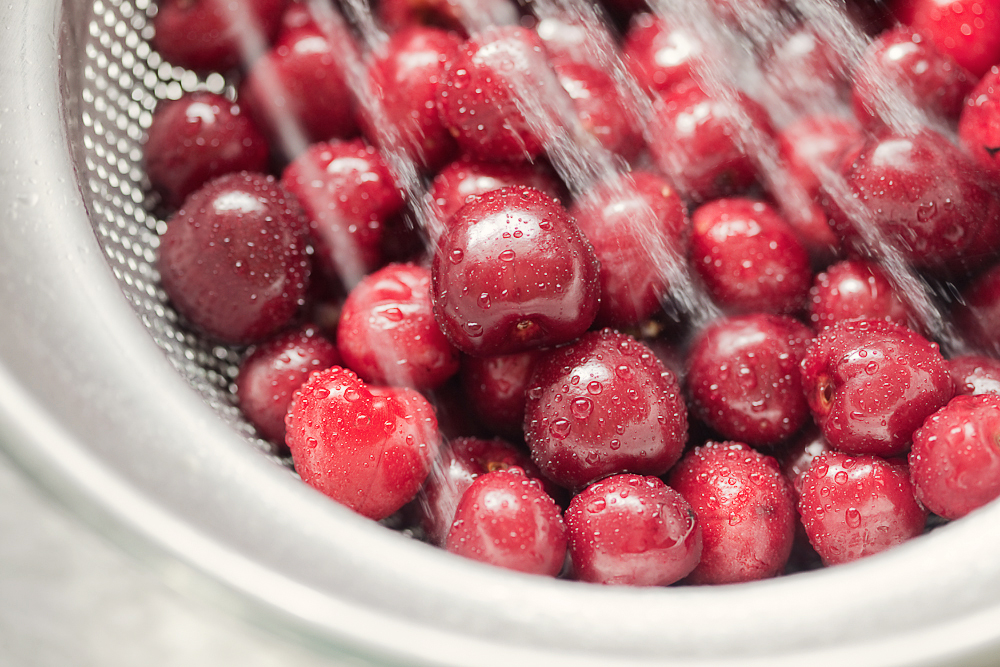
Once home, I set to work finding recipes for our bounty.  I thought about pie and jam and cobbler, but in the end decided that the berries were perfect just as they were.  And so I rinsed them all and placed most in a large colander in the fridge, ready for breakfast yogurt and cereal, afternoon snacks and ice cream topping.  The pint that I set aside was slated for tiny tarts, the raw berries sliced thinly and laid across a filling of cooked rhubarb within a crisp, buttery shell.

The marriage of rhubarb and strawberry is timeless, like that of chocolate and peanut butter, or coconut and lime.  One will never tire of the other, and folks will undoubtably continue to enjoy their combined company for years to come.  In these tarts, the rhubarb is cooked down in a process that resembles the making of jam, and the end result is quite similar to the classic jarred spread.  The tartness of the rhubarb is gently subdued by the sugar it is reduced with, but still punchy enough to provide nice balance to the sweet berries.

The best part of these tarts is the strawberries themselves, kept raw and firm and perfectly sweet on their own.  Find the freshest fruit possible and you can't go wrong.

Rhubarb Strawberry Tarts

from The Greyston Bakery Cookbook makes one 9-inch tart or six 4-inch tarts Ingredients
  • 1/3 cup sugar
  • 1/2 cup water
  • 1-1/4 pounds fresh rhubarb, trimmed and cut diagonally into 1/4"-thick pieces (about 5-6 cups)
  • 1 pint strawberries
  • 1 fully baked 9" Tart Pastry (see recipe below), cooled
Method
  1. In a heavy saucepan, combine the sugar and water.  Stir over medium-low heat until the sugar dissolves. Add the rhubarb, increase the heat, and bring to a boil.  Reduce the heat to medium-low, cover, and simmer for 5 minutes, or until the rhubarb is just beginning to soften.  Remove the pan from the heat.  Let stand, covered, for 10 minutes, or until the rhubarb is tender.
  2. Set a mesh strainer over a medium bowl and drain the rhubarb, reserving the liquid.  Allow the rhubarb to cool completely.  In a small saucepan, simmer the reserved liquid over medium-low heat for 5 minutes, or until it is reduced to a thick syrup.  Set the syrup aside and allow it to cool completely.
  3. Meanwhile, wash and hull the strawberries.  Thinly slice the strawberries lengthwise.
  4. Spread the cooled rhubarb evenly over the bottom of the tart shell.  Arrange the strawberry slices in concentric circles over the rhubarb filling, covering it completely.  Brush or spoon the cooled syrup over the top of the strawberries.  Chill before serving.

Tart Pastry

Ingredients
  • 1-1/4 cups all-purpose flour
  • 2 tbsp sugar
  • 1/4 tsp salt
  • 7 tbsp unsalted butter, cut into very small pieces and chilled
  • 1-3 tbsp ice water, as needed
Method
  1. In a bowl, whisk together the flour, sugar, and salt to blend thoroughly.  Using a pastry blender, metal pastry scraper, two knives or your fingers, cut or rub the butter in the dry ingredients until the mixture resembles a coarse meal.
  2. Using a fork, stir in the water, 1 tbsp at a time, adding just enough for the dough to hold together without becoming wet.  Gather the dough into a ball and then flatten it into a disk.  Wrap the disk of dough in plastic wrap and chill for 1 hour.
  3. Remove the dough from the refrigerator.  Using a rolling pin on a lightly floured board, roll the dough to form a rough circle about 1/4" thick.  Carefully transfer the dough to a 9" fluted tart pan (or six 4" pans) with a removable bottom.  Press the dough lightly but firmly into the edges of the pan, allowing the excess dough to hang over the edges of the pan.  Roll the rolling pin over the top of the pan to trim the excess dough from the pan rim.  Pierce the bottom of the dough several times with the tines of a fork.  Chill for at least 30 minutes before baking.
  4. Position a rack in the center of the oven and preheat the oven to 400*F.  Line the chilled shell with foil or parchment and fill with pie weights, dried beans, or raw rice.
  5. Bake the shell for 12 minutes, or until the pastry is set and golden.  Carefully remove the foil or parchment and weights and continue to bake the shell another 10 to 15 minutes (a little less if you use the smaller pans), or until the pastry is golden brown.  If the edges start to brown too much, cover them with strips of foil or piecrust shields.  Cool on a rack.
Read More

it's better this way

Andrea

Last Monday I sat on a plane at Louis Armstrong International Airport, Brian’s hand in mine as we taxied down the runway and lifted off, on our way home to Charlottesville. Out the window I watched a city that I love dearly fall away, nostalgic and missing New Orleans already.

We’d arrived Friday morning to heat and humidity that we won’t (hopefully) see in Virginia for another two months. After checking bags at our hotel, changing into shorts and slathering on sunscreen we set out into the city with two friends who’d joined us for four days of exploring, absorbing, listening and, most importantly, eating. As the veteran visitors, Brian and I had laid out an agenda based on food - our nine meals were carefully scheduled and the rest of the trip was woven loosely around their locations.

There were muffalettas and seafood po-boys, chicken andouille gumbo and spicy jambalaya, raw oysters and bags of boiled crawfish, black ham biscuits and fluffy omelets served with fries, powdered beignets and pecan-laden pralines. We sipped Pimm’s Cups as we strolled the French Quarter, cooled off with a creamy Bourbon Milk Punch at Bourbon House, swirled ice in our vodka tonics while listening to set after set of incredible jazz. We walked and biked between those meals to help counter the indulgence of the weekend, oftentimes feeling that what we really, really needed was to find a shady spot to stretch out horizontally for a nice, long nap.

As New Orleans disappeared beneath a bank of hazy clouds last Monday I found myself thinking that we could live there, Brian and I, in a cute Creole cottage just downriver from the French Quarter. We’d paint our home in shades of blue and grey with a vibrant yellow, or maybe eggplant, accent around the windows and doors. There would be bikes leaned up against the side of the house, one with a basket, ready at a moment’s notice to be ridden into the Quarter for lunch or to the Crescent City Farmer’s Market for fresh, local seafood and produce. Our yard would be tiny, just big enough for a vegetable garden and a stone terrace with an umbrella-covered picnic table. We’d string lanterns from the trees and host crawfish boils on that terrace, invite guests who would wear jaunty hats and sip frosty cocktails as they unconsciously swayed to the sounds of Doreen’s clarinet wafting from the stereo.

It is a lovely dream, one that I could see becoming a reality one day if we could just find a way to get used to the stifling heat. And the cockroaches - complete terror only scratches the surface of the affect that those little buggers have on me. And the city’s status as the murder capital of the USA...  Minor details, since I already have the biggest obstacle solved - vegetables. Did you notice that my list of traditional NOLA fare does not include even a hint of green? While we happily consumed fried / buttered / sugared food for four full days, I believe that four days must be the limit. For as I dreamt about our little blue Creole cottage and crawfish boils and lanterns strung from trees and clinking glasses of frosty beverages, I managed to squeeze a giant bowl of homegrown greens onto the linen-covered table in the middle of that backyard terrace.

A vegetable garden would be an absolute necessity to our New Orleans lifestyle.

The next day, back at work in Charlottesville and fully submerged in reality, Brian and I met a friend for lunch at Feast. I ordered a mixed salad plate, and while I couldn’t stop talking about the wonderful food in New Orleans, my mind was distracted by how amazingly satisfying the plate full of veggies in front of me was. And on Saturday, at our own City Market, we filled our basket with all the green we could get our hands on - two heads of lettuce, two bunches of both kale and collards, two pounds of asparagus.

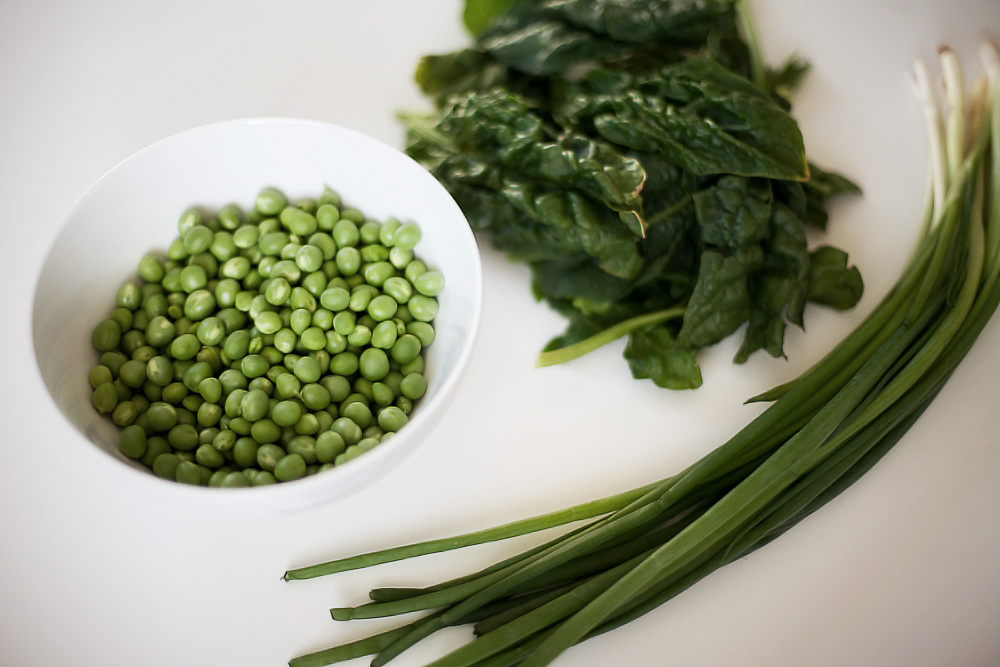
I plan to share some of our favorite New Orleans-inspired dishes here on Bella Eats in the next month or two (along with some photographs from our trip!), but just had to give our systems a break this last 10 days.  I'd originally thought that a full month of NOLA fare on this little blog could be fun, but have decided instead to spread those rich, indulgent dishes out, to balance them with recipes like this side of wilted spinach tossed with fresh peas, garlic and scallions.  It's better this way, I promise.

Tangles of earthy spinach play well with the sweet peas in this dish. The mild flavors are complimented nicely by the subdued bite of sliced garlic and a generous handful of scallions.  Serve alongside a fillet of white fish dressed simply with lemon, sea salt and herbs for a healthy, feel-good-to-the-core meal.

Spinach with Peas and Scallions

adapted from The Naked Chef Takes Off by Jamie Oliver serves 4 Ingredients
  • 2 tbsp olive oil
  • 2 tbsp butter, divided
  • 1 bunch of scallions, dark and light green parts diced (about 1/4 cup)
  • 3 garlic cloves, sliced
  • 2 cups of fresh or frozen peas
  • 1 cup white wine
  • 4 large handfulls of spinach, tough stems removed
  • sea salt and pepper
Method
  1. Heat olive oil and 1 tbsp butter in deep skillet over medium heat. Add the scallions and sliced garlic, stirring to coat with oil and butter.  Let saute' for 2-3 minutes, not letting the garlic brown.
  2. Add the peas, and saute' for another 2-3 minutes, until the garlic starts to turn golden brown.  Add the wine, and bring to a boil.  Reduce to a simmer and allow to cook for another 2-3 minutes.  If using fresh peas, be sure to test one before adding the spinach to be sure that it is cooked.
  3. Add the spinach, stirring to coat with liquid.  Allow spinach to heat through and wilt, 2-3 more minutes.  Add last tbsp of butter and salt and pepper to taste.
Read More

the fallen plate

Andrea

Hello friends. Things have been a little bare around here lately, haven’t they? I am having a hard time believing that April slipped by with only two posts on Bella Eats. Two posts? How did that happen? We’ve been cooking and eating, I assure you, and I have a long list of recipes that I was planning to share last month. The photographs are all edited, and most are even loaded into drafts in my Wordpress dashboard. So what, you ask, is the deal?

I’ll spare you the list of excuses because really, what it comes down to, is that life is just plain busy. I’ve tried my best to become a very good juggler, to keep all of the plates soaring high above my head with a flick of my wrist and the occasional impressive behind-the-back catch but, alas, one of those plates fell.

The Bella Eats plate is a tough one to keep in the air when time is running short at the end of the day, mostly because of the words that accompany each meal that I share here. My time for writing comes after work, after running and yoga, after dinner and dishes, after free-lance photography edits and marketing projects. Lately when that time is upon me, the time to sit behind my computer and let the words seep from the well in my brain, down my arms and out through my finger tips...I find myself with an empty well.

And so I go to bed. I cuddle in next to Brian with the sheets wrapped around my shoulders and two dogs crowding my feet. The ceiling fan whirs overhead and I attempt to match my breath to its subtle rhythm, incorporating techniques from my yoga practice in an effort to fall asleep as quickly as possible. But my mind, the mind that failed me for an entire hour prior to my giving in and coming to bed is now racing. There are 'to do' lists and emails to write and recipes and workout plans swirling around on their own paths, making a terrible knot of jumbled thoughts that only the clarity of morning will untangle.

When sleep finally overtakes my body it is not without its own side effects. Suddenly my mind, not deterred by slumber, has all kinds of ideas about writing and work and life, weaving intricate stories through my dreams that are exciting and fascinating and inspiring.  The scenes are so vivid that I find myself waking up multiple times in the night, tossing and turning as characters new and familiar wind their way in and out of predicaments that oh-so-loosely resemble my waking hours. I find myself hitting 'snooze' on the alarm multiple times each morning, trying to catch the tail-end of these thoughts before they fizzle out and leave me with only a hazy shadow of something that I think, maybe, if I could just remember, might have been good. It seems that this is the only time I have for creative wandering, the only time not bogged down by obligations and responsibility. I relish in it, until I realize the time and jump from bed in a panic, beginning the daily process all over again.

These extended 'snooze' sessions have caused me to rely heavily on grab-and-go breakfasts. The kind that, after hastily rising from bed and jumping in the shower, darting around the house looking for this shirt or that shoe, feeding dogs and packing a lunch allow me to simply reach into the freezer or pantry for a single item to stash in my bag and eat at the office. Gone are the mornings of leisurely breakfasts that involve turning on the oven and dirtying a pot, bowl and spoon. These days I am simply happy that I thought to freeze the leftover Carrot and Pineapple muffins I made weeks ago, and hopeful that soon, very very soon, my schedule will slow down to its normal pace. I am ready for that Bella Eats plate to soar again, to form high arcs above my head as words flow from my fingertips into this little space on the 'net.

Until then, thanks for being here.  I am so happy you're reading.

These muffins are incredibly moist, even after a 3-week stay in the freezer. They have a hearty crumb fortified by the whole wheat flour, and a subtle sweetness provided by the pineapple and the agave nectar. I find them quite filling when paired with a piece of fruit or a cup of yogurt for breakfast.

Carrot Pineapple Muffins

makes 12 whole grain, no added fat, naturally-sweetened muffins adapted from Sweet and Natural Baking, by Mani Niall Ingredients
  • 2-1/2 cups whole wheat pastry flour
  • 3 tbsp oat bran
  • 3/4 tsp baking soda
  • 1/2 tsp ground cinnamon
  • 1/4 tsp ground ginger (I will bump this up to 1/2 tsp next time)
  • 1/4 tsp salt
  • 4 large egg whites
  • 1/2 cup light agave nectar
  • 1/2 cup skim milk
  • 1-1/3 cups grated carrots (I peeled the carrots into long ribbons first, then chopped them finely)
  • 3/4 cup diced pineapple (I used canned, but will definitely use fresh next time)
  • 12 chunks of fresh or canned pineapple, about 1 x 1 x 1/2 inch in size
Method
  1. Preheat oven to 350*.  Lightly spray a standard 12-cup muffin pan with vegetable oil spray.
  2. Sift together the flour, bran, baking soda, cinnamon, ginger and salt into a medium bowl and make a well in the center.
  3. In another medium bowl, using a handheld electric mixer set at high speed, beat the egg whites with all the agave nectar until soft peaks form.  Reduce the speed to low and gradually beat in the milk.  Pour into the flour well and stir with a wooden spoon just until combined.  Stir in the carrots and the diced pineapple.
  4. Spoon the batter into the muffin cups, filling about 3/4 of the way full.  Top each muffin with a pineapple chunk.  Bake the muffins until a toothpick inserted in the centers comes out clean and the tops spring back when pressed with a finger, 20 to 25 minutes.  Cool for 2 minutes, run a knife around the inside of the cups to release the muffins, and remove from the cups. Serve the muffins warm or at room temperature.
To freeze, wrap each muffin individually in plastic wrap or aluminum foil.  Place the muffins in a Ziplock bag in the freezer. They should keep for up to 3 months.
Read More

to satisfy all cravings

Andrea

My heels hit the pavement with a muffled thud that keeps time with the music streaming in my ear.  I've been fussing with the wire to my headphones, trying to rearrange the line moving down the inside of my shirt to the iPhone in my hand without losing my balance and accidentally stepping out in front of a car.  Frustrated, I finally pull the plugs from my ears and wrap the cord around my wrist, content to let my feet provide base to accompany the chirping birds' melody as I finish my jog.

I’ve only recently started running again, pounding the pavement on my neighborhood streets as much for the fitness benefits as for the opportunity to get outside and absorb the beauty of my environment. Running and I don’t really get along (you can read a bit about that here, from the old Bella Eats) so my mileage is pretty light and my pace is fairly slow. I typically try to distract myself either with a talkative buddy or a good Pandora station on my iPod, but lately have found that my surroundings are distraction enough.

In the last few weeks I’ve witnessed the transition of dry, yellow lawns into luscious, chartreuse carpets speckled with sunny dandelions and dusty purple violets. I’ve waited patiently for the lilac bush at the top of one long, steadily-sloped hill to come to bloom and finally, just last week, was able to stop for a few deep inhales of oh-so-sweet perfume from its clumps of delicate blossoms. As my feet pad-pad-pad the concrete sidewalk I’ve found my head spinning in all directions to absorb freshly-mulched flower beds that first showcased crocuses in mid-March, revealed daffodils two weeks later and tulips two weeks after that. The ethereal quality of each April day is enough to entice me to lace up my shoes and walk out the door, always excited to see what’s changed in the few days since I last plodded around the neighborhood.

As I peak the last small hill before the intersection one block from my house I am hot and sweaty, my skin bright pink and glistening with tiny beads of moisture. I reach the corner and slow to a walk, raising my hands to the top of my head and taking in a few deep, slightly ragged breaths. The breeze picks up just then, sweeping through the branches overhead to send a cascade of browning cherry blossoms swirling towards the ground. This is the last of them, the white and pink flowers have been slowly pushed out by darkening green leaves over the last couple of weeks. I’ll miss the bright, cottony treetops, but now we have floppy dogwood blossoms and bright fuchsia azaleas to admire. And after that there will be wild sweet peas and multiflora rose, both lending the air surrounding Charlottesville with the sweetest scent you can imagine, making the deep, ragged breaths at the end of a run a bit more tolerable.

The sun is setting now, giving the golden evening light a hint of green as beams filter through the new growth on our backyard trees. I stretch on the back deck for a few minutes, sinking my hips deep into a lunge as the Spring breeze brushes over my still-damp skin, sending a little smattering of goosebumps up my cooling arms. It’s going to get chilly overnight, despite the mid-day temperature of 65-degrees.

This is so typical for Charlottesville this time of year - daily temperatures that swing from the 30's to the 70's and back in just 24 hours' time.  It calls for a little planning in the morning, a layering of clothing to be sure you're warm enough when you walk out the door but not too hot when you step out for lunch.  It means watching the forecast carefully to be sure that those plants that spent the Winter indoors and "just want a little sunshine!" on the back deck are brought in before the air turns too cool. It also means preparing meals that satisfy a plethora of cravings, from light and bright to comforting and warm.

As I finish my stretching and head inside my nose absorbs the scent of chicken braising in a bath of milk, lemon, sage and cinnamon.  There is soup too, a zippy puree of Winter-Spring veggies.  I am glad that I thought to start dinner prior to my run, because although standing in a hot kitchen prepping dinner sounds miserable right now, in thirty minutes the cool air slipping through our windows will have me wanting a warm and comforting meal.  A warm and comforting meal that is, at the same time, light and bright with the promise of Spring.

This soup is perfect on these Spring days with nights that feel closer to Winter. The parsnips are strong, so if you're looking for just a hint of the root I'd reduce their amount to 1/2 pound and up your potato count to 3.  Be sure to add the squeeze of lemon at the end, it really makes the asparagus shine.

Creamy Asparagus and Parsnip Soup

serves 4 Ingredients
  • 3 tbsp butter
  • 2 large russet potatoes, peeled and diced to 1-inch chunks
  • about 3/4 pound parsnips, peeled and diced to 1-inch rounds
  • 1/2 large onion, diced
  • 3 garlic cloves, minced
  • 1 pound asparagus, tough ends removed, chopped to 1-inch pieces
  • 1 cup white wine
  • 4-5 cups chicken broth
  • salt and pepper
  • 1 lemon
Method
  1. Melt butter in a large soup pot over medium-high heat.  Add the potatoes, parsnips, onion, garlic, and asparagus and stir to coat with butter.  Cover pot and let veggies sweat for 10-15 minutes, until the potatoes and parsnips are slightly tender.
  2. Add white wine to pot and stir to deglaze bottom of pan if there are any bits of veggie stuck.  Add the chicken broth, enough to just cover all of the vegetables.  Bring to a boil, then reduce to a simmer and cook until potatoes and parsnips are fully tender, another 10 minutes or so.
  3. Using an immersion blender or a regular blender, puree the vegetables until you have a smooth, creamy consistency devoid of any chunks.  Season with salt, pepper, and lemon juice, to taste.
This chicken is everything that everybody has raved about.  Moist and flavorful, it is wonderful on its own dressed simply with the sauce created from the braising liquid.

Braised Chicken in Milk

recipe from Jamie Oliver via Whitney in Chicago and The Kitchn serves 4 Ingredients
  • 3-1/2 pound organic chicken
  • sea salt and freshly ground black pepper
  • 1 stick of butter
  • olive oil
  • cinnamon stick (mine was about 3 inches in length)
  • handful of fresh sage leaves, removed from stem
  • zest of 2 lemons
  • 10 cloves of garlic (I removed the skin)
  • 1 pint milk
Method
  1. Preheat your oven to 375*.
  2. Rinse and thoroughly dry your chicken.
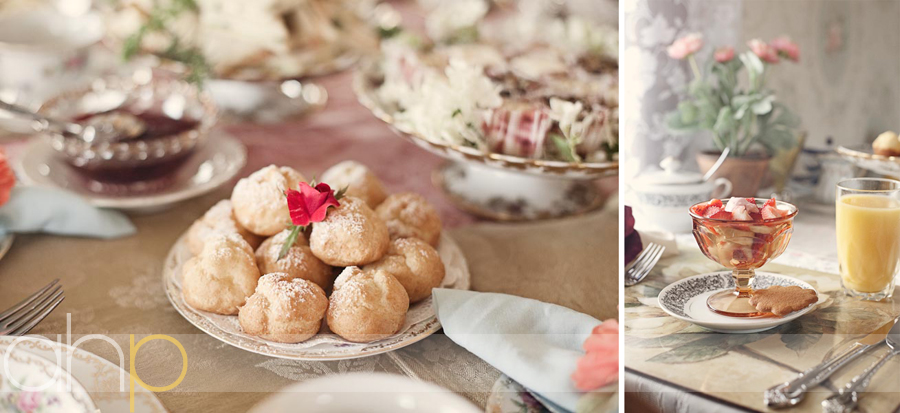
  3. Rub your chicken down with sea salt and black pepper, evenly and thoroughly.  Heat a large oven-proof pot on your stove top and melt the stick of butter and a glug of olive oil together.  Place the chicken in the pot, breast-side down, and fry until golden brown.  Turn bird to all sides to get even, golden color.  This should take about 10 minutes.
  4. Remove the bird from the pot and place on a plate.  Discard the remaining butter and oil.  Put the bird back in the pot (don't mind all of the little brown bits at the bottom of the pot, they will add tremendous flavor to the final sauce) and add the rest of your ingredients.  Place the pot in the oven, covered, and cook chicken for 90 minutes.  Baste with the cooking juices whenever you remember (which I did 2 or 3 times).  If you think about it, remove the lid for the last 30 minutes of cooking, so that the skin will crisp up a bit.  If not, no biggie.
  5. To serve, pull all of the neat from the bones and divide amongst 4 plates.  Be sure to siphon up the juices in the pot including the curds, which I know look weird but add so much flavor to the sauce.  I put the sauce in a jelly jar and shook it really hard, to help incorporate those curds into the liquid so that they didn't look so funny on my chicken.  Spoon the sauce over the pulled chicken and ENJOY!
Be sure to fish out all of the garlic cloves from the pot when the chicken is done.  Spread them over thick slices of chunky bread, and swoon!
Read More

at the market: kale

Andrea

Last Saturday was the opening weekend for the 2010 Charlottesville City Market. I awoke bright and early that morning, positively giddy with excitement, ready to greet old friends and fill our basket with local meat, cheese, eggs, coffee and greens. I not-so-gently shook Brian awake, bounced down the hall to brush my teeth and tame my hair, pulled on jeans and slipped into sandals all in the amount of time it typically takes me to fumble around groggily looking for the ‘snooze’ button on my alarm.

We arrived beneath a sky washed with shades of pink and blue, just as the cool morning air was pierced by golden sunbeams slipping between historic brick buildings.  Our bodies cast long shadows on the sidewalk as we made our way towards the parking lot full of rainbow-hued tents, listening to the chatter of vendors and patrons mingled with the strum of a banjo and the bark of a dog.  The intoxicating smell of sizzling, smokey breakfast sausage wafted our way as the folks from Babes in the Wood grilled plump links for the line of people curled around their booth, ready to get their fill of a market favorite missed for the last four months.

We made our way down the already-crowded aisles, stopping to admire a booth of freshly cut tulips resembling painted Easter eggs swaying atop fluorescent green stems.  Our first destination, always, is Double H Farm, where we're sure to receive a big bear-hug from Richard and a bright, happy smile from Jean.  It was no different last Saturday, and even though we saw each other every few weeks through the long, cold Winter, we greeted each other as if it had been months since our last visit, all so excited that Spring is finally here and we'll be able to catch up every week.

After a brief chat, our basket was filled with a dozen eggs, arugula, kale, sliced ham and a 6-pack of lettuce plants.  Goodbyes were said alongside "see you next week!" and Brian and I moved on to explore the rest of the market.  We stopped at the Shenandoah Joe booth for our morning cup of coffee and a pound of whole beans for the week, before moving on to Night Sky Farm for some samples of chevre and the purchase of fresh feta cheese.  We wandered between booths, waving to familiar faces and introducing ourselves to new vendors, until finally our basket was filled to the brim and our wallets were empty.

Once home I surveyed our purchases, planned our menu for the week and penned our grocery shopping list.  I love this time of year, when local, seasonal produce begins to inform our meal choices, when the trip to the grocery store happens only after a visit to the farmer's market.

Greens will play a prominent role in our diet for the next few months, until a greater variety of locally-grown produce becomes available.  I'm okay with that, as it seems that there are endless possibilities for the leafy, fiber and vitamin-full vegetables.  Last week we tried kale chips for the very first time, after seeing them pop up on many of my favorite blogs.  We used green curly kale and, although not as crispy as a potato chip, they were really quite tasty.  Next time we'll try lacinato kale, as it seems that the thicker leaves will make for a more substantial chip.

We also spread the baked kale across whole wheat pitas brushed with olive oil, and then topped the 'pizzas' with thinly sliced red onion and thick slices of fresh mozzarella.  Delicious, and such a healthy, quick dinner.

Baked Kale Chips

Ingredients
  • one large bunch of kale (I used the green, curly variety, but I think that Lacinato would be even better)
  • 1-2 tbsp olive oil
  • sea salt
  • freshly grated parmesan
Method
  1. Preheat oven to 350*
  2. Rinse and dry kale as best you can with paper towels or in a salad spinner.  Tear into bite-size pieces, discarding tough central stems.
  3. Toss kale with olive oil, just to coat very lightly.  Spread kale across baking sheets in one layer.  Sprinkle with sea salt and freshly grated parmesan.
  4. Bake at 350* for 10-15 minutes, until edges are starting to brown and kale gets mostly crispy.  Remove from oven and remove from tray, laying kale chips out on a wire rack to cool slightly.  Serve immediately.

Our City Market lost someone very dear this week.  John Coles, founder of the Virginia Independent Consumers and Farmers Association (VICFA), longtime food advocate and producer of incredible, artisanal goat cheese, has passed away.  His presence at the City Market and as a member of the local food community will be missed greatly.

You can read Joel Salatin's tribute to John here.

Read More

a persuasive cake

Andrea

Here we are at the end of March. Spring has claimed her space and unpacked her bags, kicked off her shoes and accepted a glass of lemony iced tea. She's fully settled in and ready to chat for awhile, her pony-tail bobbing enthusiastically as she shows you what's in store for the next few months.

There are predictions of 83* sunny days in Charlottesville this weekend...83*! That is shorts weather, my friends, and tank tops and strappy sandals and [eek!] swim suits weather. It was all very exciting until I pulled out a pair of those shorts last night and realized that this month coming to an end, the month full of birthdays and cake and cocktails, has done a number on certain, *ahem*, areas. Those well-intentioned New Year’s resolutions set in January were shaken with the arrival of Brian’s birthday 29 days ago, and continued to slowly slip away as we celebrated our way through March.

This last weekend was the culmination of all of that good cheer. With my Daddy in town for four days spoiling us rotten, there were indulgent meals shared at favorite restaurants and bottles of wine Brian and I could never justify buying ourselves. As a “thank you!” for all of that generosity we had a little barbeque Saturday afternoon, complete with Double H Farm baby back ribs smoked on the Big Green Egg, the best baked beans I’ve ever had, salad with a hearty base of [local!] emerald green spinach and a delightfully moist lemon mousse cake. Although the air was a crisp 50*, we had a cloudless Caribbean-blue sky and a brilliantly radiant sun to warm our skin and confirm the departure of [old man] Winter.

And now today, with all of those birthdays behind us and the very last of that lemon mousse cake tossed away in the trash (but not before a bite or two passed my lips to verify its staleness) it is time to think of April, the second to last month before the water flowing steadily through our surrounding rivers warms to a point that justifies the loading up of kayaks and the donning of swim suits. It’s time to welcome the farmers back to downtown Charlottesville, to our Saturday morning City Market that starts this weekend(!), and to embrace the first gifts of Spring. It’s time to lighten up and brighten up, to take a break from all the sugary-sweet goodness of March and indulge in the green that comes with April.

But first, I want to give you more cake.

With a buoyant crumb that bounces back at the poke of a finger and an airy, lemon-tinted mousse so cool and refreshing you'll have to fight yourself not to finish the entire bowl in one sitting, this cake seems to be the perfect welcome for Spring. It's a persuasive cake, the kind that you want to always have under a dome on your counter, ready to share with important guests while sitting on the front porch drinking a tall glass of iced tea. It seems that, when being offered a cake like this one, it would be impossible for those guests to leave.

That's my hope anyway, as I embrace Spring and ask her to stick around for awhile.

This is a very long recipe, but is actually very simple.  Especially if you divide the tasks between two days - the cake and lemon curd on the first, the mousse, frosting and assembly on the second.

Lemon Mousse Cake

from the greyston bakery cookbook, pg. 46

serves 8 to 10

Ingredients

for the cake

  • 5 eggs, separated
  • 1/4 cup (1/2 stick) unsalted butter, melted and cooled
  • 1/2 cup milk
  • 1-1/2 tsp vanilla extract
  • 1-1/2 cups unbleached all-purpose flour
  • 1-1/4 cups sugar
  • 2-1/2 tsp baking powder
  • 1/4 tsp salt
  • 1/2 fresh lemon, seeds discarded

for the lemon curd

  • 2 large eggs
  • 1 egg yolk
  • 1/2 cup granulated sugar
  • 1/3 cup fresh lemon juice (from about 2 medium lemons)
  • 1/8 tsp salt
  • 1/4 cup (1/2 stick) unsalted butter, cut into small pieces
  • 1 tsp finely grated lemon zest
for the lemon mousse
  • 1 cup heavy cream
  • 3/4 cup lemon curd
for the lemon buttercream frosting
  • 6 tbsp (3/4 stick) unsalted butter, room temperature
  • 2 cups confectioners' sugar, sifted
  • 3 tbsp heavy cream
  • 1-1/4 tsp vanilla extract
  • 1 tsp lemon extract
Method make the cake (up to one day ahead)
  1. Position a rack in the center of the oven and preheat oven to 350*.  Grease and flour two 8" round cake pans and line the pan bottoms with parchment rounds.
  2. In a small bowl, combine the egg yolks, butter, milk and vanilla.  Set aside.
  3. In a large bowl, whisk together the flour, 1 cup of sugar, baking powder and salt to blend.  Add the egg yolk mixture and stir until well combined.  Set aside.
  4. In a clean dry bowl, using clean dry beaters, beat the egg whites on medium-high speed until they hold soft peaks.  Lower the mixer speed to medium and gradually add the remaining 1/4 cup sugar, beating the whites until they hold stiff peaks.  Stir about one-third of the egg whites into the batter to lighten.  Gently fold the remaining whites into the batter, in two batches, to blend thoroughly.
  5. Transfer the batter to the prepared pans, filling them equally.  Bake for 30 to 35 minutes, or until the sides of the cakes begin to pull away slightly from the pans and a wooden skewer inserted near the center of the cake comes out clean.
  6. Set the pans on a wire rack for 10 minutes to cool.  Turn the cakes out onto the rack and carefully remove the parchment.  Reinvert the cakes and allow them to cool completely on wire racks.
  7. If making the cakes the night before (as I did), wrap them tightly with plastic wrap once entirely cool and keep at room temperature.
make the lemon curd (up to one week ahead)
  1. In a small saucepan set over medium-low heat, whisk the eggs and egg yolk with the sugar, lemon juice and salt.  Continue to cook, whisking constantly, for 10 minutes or until thickened.
  2. Remove the curd from the heat and add the butter, stirring until melted.  Strain the mixture through a mesh sieve into a small bowl.  Stir in the lemon zest.
  3. Cover with plastic wrap, pressing the plastic directly on the entire surface of the lemon curd to prevent a skin from forming.  Chill the curd in the refrigerator until firm.
make the lemon mousse
  1. In the bowl of an electric mixer set on medium-high speed, beat the cream until it holds soft peaks.  Working in three batches, gently fold the cream into the lemon curd.  Refrigerate for at least 1 hour before using.
make the lemon buttercream frosting
  1. In a clean bowl of an electric mixer, combine the butter, sugar, cream, vanilla and lemon extract.  Mix on medium-low speed until well combined.
assemble the cake
  1. With a long serrated knife, trim the rounded top off each cake layer to create a flat surface.
  2. Squeeze half of the juice from the lemon over the cut side of one layer of cake.  Place that layer, cut side up, on a serving plate. Spread the lemon mousse evenly on top.
  3. Carefully place the next layer, cut side down, on top of the first layer.  Squeeze the rest of the juice from the lemon on top. Frost the top and sides of the cake with the lemon buttercream frosting.  Place the cake in the refrigerator for at least an hour to set.  Keep refrigerated until ready to serve.

Read More