Contact Us

Use the form on the right to contact us.

You can edit the text in this area, and change where the contact form on the right submits to, by entering edit mode using the modes on the bottom right. 


123 Street Avenue, City Town, 99999

(123) 555-6789

email@address.com


You can set your address, phone number, email and site description in the settings tab.
Link to read me page with more information.

Blog

Filtering by Tag: lemon

fresh fig tart with lemon cream

Andrea

Fig Marscapone Tart0001.jpg

Figs. Quite possibly the most beautiful edible fruit in existence. They are at their peak in Charlottesville, and I can't get enough of the soft globes that are actually inverted flowers (Did you know? I did not. Thanks, Megan!). We foraged for them over on Beyond the Flavor, joining our friend Daniel as he visited some of his favorite fig-gathering haunts around the city. Eagerly awaiting their arrival each September, I've been known to stake out trees on the University of Virginia grounds; faithfully driving by each day for weeks waiting for the green fruit to turn rosey, only to be foiled by a student who reached the trees an hour before us on the day they were finally ripe. The sight of his retreating form, bag of fresh figs full to bursting at his side, still saddens my heart. 

On Beyond the Flavor, we've asked our readers to submit their favorite fig recipes. (Like us on Facebook and submit your recipe here, if you've got a favorite to share. There's a prize for the winner!) While my preferred way to consume a fig is fresh, straight from the tree, I wanted to try something new for this little contest we're holding. I thought about a savory treat, but settled on sweet because, let's be honest, that's my area. 

A quick internet search resulted in this recipe, whose simplicity and un-touched figs caught my attention.  There were obstacles that stood in my way - a lack of sour cream in the refrigerator and an oven that broke in the middle of baking the crust - but I persevered and was able to share four pieces amongst friends. The firm crust with a cornmeal crunch paired nicely with soft, lemon-scented cream and the pop of tiny fig seeds between teeth. We four enjoyed it immensely, outside under the stars, while our friends' dog enjoyed the leftovers on the countertop in the kitchen upstairs. A disappointment, for sure, as I had at least one more piece earmarked for the next morning's breakfast. 

My craving not fully satisfied, I'll be making this tart again. As soon as we fix the oven.

Fig Marscapone Tart0002.jpg

Fresh Fig Tart with Rosemary Cornmeal Crust + Lemon Mascarpone Cream

modified from Gourmet, July 2003

serves 12

crust ingredients

  • 1 1/2 cups all-purpose flour
  • 1/2 cup yellow cornmeal (not stone-ground)
  • 1 tablespoon sugar
  • 1/4 teaspoon salt
  • 1 stick (1/2 cup) cold unsalted butter, cut into pieces
  • 1 1/2 tablespoons finely chopped fresh rosemary
  • 4 to 5 tablespoons ice water
filling ingredients
  • 1/3 cup sour cream (I used Greek yogurt instead)
  • 1 cup mascarpone cheese (8 oz)
  • 1/4 cup sugar
  • 1 1/2 teaspoons finely grated fresh lemon zest
  • 1/8 teaspoon salt
  • 1 1/2 lb fresh figs

crust method

  1. Pulse together flour, cornmeal, sugar, and salt in a food processor. Add butter and rosemary and pulse until mixture resembles coarse meal with some small (roughly pea-size) butter lumps. Drizzle evenly with 4 tablespoons ice water and pulse until just incorporated.
  2. Gently squeeze a small handful: If it doesn't hold together, add more water, 1/2 tablespoon at a time, pulsing after each addition and continuing to test.
  3. Press dough evenly onto bottom and up sides of tart pan with floured fingers. Smooth dough with a small offset metal spatula or back of a spoon (floured if necessary), then roll a rolling pin over top of pan to trim dough flush with rim. Chill crust until firm, about 30 minutes.

filling + assembly

  1. Preheat oven to 400°F.
  2. Bake crust in middle of oven until center and edges are golden, 25 to 30 minutes (don't worry if bottom of crust cracks), then cool in pan on a rack.
  3. filling + assembly
  4. Whisk together sour cream, mascarpone, sugar, zest, and salt in a bowl.
  5. Remove side of tart pan and spread mascarpone cream in shell. Cut figs lengthwise into 1/4-inch-thick slices and arrange decoratively over cream.
Fig Marscapone Tart0003.jpg

For those of you missing more regular Bella Eats posts, you really should hop over to Beyond the Flavor.  I am there more often than I am here, although I haven't given up on this little corner of the internet. I know I've said this before, many times, but I do hope to carve out more time to spend in this space I created nearly four (4!!!) years ago.  After all, it was the inspiration for everything I am doing today with food and photography, and I can't bear to see it fade away. Many thanks to all of you who stick around, comment, and poke me with emails to say hello. I appreciate each and every one of you.  xoxo.

lemon olive oil cake with apricots and rosemary

Andrea

Apricot Cake0001.jpg

Brian and I have spent a total of maybe thirty nights apart since we were married six and a half years ago. We’ve racked up seventeen of those nights in the last seven months, since the beginning of 2012, and have another ten on the calendar for August and September. We’re each traveling for work more than ever before, being pulled to New York, Connecticut, Chicago, Florida, Philadelphia, New Orleans, and New Hampshire this year alone. 

An essential part of travel, for each of us, is the exploration of local food. Before we embark on a journey we ask friends, Facebook, and Twitter for restaurant recommendations. I look through the archives of Bon Appetit, Saveur, Gourmet, and The New York Times to see what I can find about the culinary scene. While visiting, Instagram is aflutter with food and drinks consumed. If we’re apart, iPhone photos are swapped between Brian and I; visual descriptions of whatever treats have been found both away and at home. We stay connected through the food we eat, never liking to spend a meal separately.

The best part, though, is the gifts given upon return. That little piece of an experience apart that lets the other know they weren’t really that far away at all. From New Orleans there was duck jerky from Butcher and, that one time, two pounds of sliced ham from Mother’s. From Florida, a special spice rub from 4Rivers BBQ. The exchange goes the other way, too, with the homemade pot roast awaiting my return from New York in February, or the whisper of a ‘fruit surprise’ in the kitchen just two weeks ago.

I’d returned early-ish on Sunday morning. Having photographed a wedding in northern Virginia with Sarah the night before, we’d each been anxious to get home to our husbands. An early departure with a quick stop at Starbucks had us back in Charlottesville by 10am, just in time for me to crawl in bed for the last 30 minutes of weekend snuggling with Brian and the pups. As we recapped our two nights apart, Brian rattled off the list of goodies he’d picked up at the farmers’ market the morning before. Excited to see my surprise, I padded out to the kitchen to investigate. And there sat the prettiest, rosiest apricots in my very favorite bowl.

Just the thought of Brian coming across those apricots at the market makes me smile, because I know that he would never have picked them up just for himself. No, he saw the pretty fruits and thought ‘Andrea would like to bake something with these.’ and whisked them away to our house where, two days later, they were the stars of this cake.

Apricot Cake0002.jpg
Apricot Cake0003.jpg
Apricot Cake0004.jpg
Apricot Cake0005.jpg

We adored this cake. Not too sweet (Brian's favorite kind) but bursting with the flavor of fresh apricots. The base has an almost poundcake-like consistency...dense and a bit spongey. The earthiness of the rosemary was the perfect compliment to the brightness of the fruit. Be sure to pick good apricots; they'll make all the difference.

Lemon Olive Oil Cake with Apricots and Rosemary

serves 8

adapted from Gourmet, April 2006

Ingredients

  • 3/4 cup olive oil (extra-virgin if desired), plus additional for greasing pan
  • 1 large lemon
  • 1 tsp minced fresh rosemary
  • 1 cup cake flour (not self-rising)
  • 5 large eggs, separated, reserving 1 white for another use
  • 3/4 cup plus 1 1/2 tablespoons sugar
  • 10 fresh apricots, halved and pitted

Method

  1. Put oven rack in middle position and preheat oven to 350°F. Grease a 9-inch springform pan with some oil, then line the bottom with a round of parchment paper. Oil the parchment.
  2. Finely grate enough lemon zest to measure 1-1/2 teaspoons and whisk together with flour. Add the chopped rosemary and whisk. Halve lemon, then squeeze and reserve 1 1/2 tablespoons fresh lemon juice.
  3. Beat together yolks and 1/2 cup sugar in a large bowl with an electric mixer at high speed until thick and pale, about 3 minutes. Reduce speed to medium and add olive oil (3/4 cup) and reserved lemon juice, beating until just combined (mixture may appear separated). Using a wooden spoon, stir in flour mixture (do not beat) until just combined.
  4. Beat egg whites (from 4 eggs) with 1/2 teaspoon salt in another large bowl with cleaned beaters at medium-high speed until foamy, then add 1/4 cup sugar a little at a time, beating, and continue to beat until egg whites just hold soft peaks, about 3 minutes.
  5. Gently fold one third of whites into yolk mixture to lighten, then fold in remaining whites gently but thoroughly.
  6. Transfer batter to springform pan and gently rap against work surface once or twice to release any air bubbles. Place apricot halves in a decorative pattern across the top of the cake, cut-side up. Sprinkle top evenly with remaining 1-1/2 tablespoons sugar. Bake until puffed and golden and a wooden pick or skewer inserted in center of cake comes out clean, about 45 minutes. Cool cake in pan on a rack 10 minutes, then run a thin knife around edge of pan and remove side of pan. Cool cake to room temperature, about 1-1/4 hours. Remove bottom of pan and peel off parchment, then transfer cake to a serving plate.
Apricot Cake0006.jpg

blueberry lemon tartlets

Andrea

There have been a lot of sweets around here lately. I would apologize, but this little blog is a glimpse into my kitchen and sweets are what I am craving these days. Ice cream. And popsicles. And tiny tartlets with fresh fruit mounded on top. Even though Summer has officially just arrived, here in Virginia you'd think she'd been around for at least the last month.  And when Summer lands firmly on our dry + crispy lawn I like for the food passing my lips to be cool and refreshing, laden with flavors of citrus and berry. Of course, there are salads abounding as well, but salads aren't nearly as much fun to photograph, write about, or share here in this space. Except that I've been slicing kumquats to sprinkle overtop of my spinach lately and that, my friends, is a really good idea. If you can find kumquats in your area I suggest you give it a try, I think you'll be pleased.

While you're out, pick up a few pints of fresh blueberries, and then hurry home to whip up these sweet little tartlets. The blueberries are such a nice accompaniment to the sharp tang of lemon curd nestled within the butter pastry. You'll only need one of those pints for this recipe, but if you're like me you won't be able to resist eating berries by the handful as you prep. 

Oh! And if you're in central Virginia, pick up the Summer issue of Flavor Magazine. Not only because Flavor is a wonderful resource for sustainable eating in the Capital Foodshed, but because you may just recognize a photograph in the Pairings section on page 79...!

Happy Summer, friends!

Chantilly cream is one of my great pleasures. I experienced it for the first time at K-Paul's in New Orleans when it was served with my cafe au lait, and I just about licked the bowl. Sprinkled with dried lavender, it is a lovely accompaniment to sweet blueberries. Add in the lemon curd and butter pastry and you've got quite the divine dessert.

I should also note that I've never, ever been able to achieve a non-shrinking tart or pie crust. This recipe is suggested by Joy of Cooking for tartlets specifically because the pastry is not supposed to shrink, but, mine still did. Apparently pastry dough and I just don't get along. I'm working on it.

Blueberry Lemon Tartlets with Chantilly Cream + Lavender

crust and curd recipes from The Joy of Cooking, chantilly cream recipe from Chef Paul Prudhomme's Louisiana Kitchen

makes (6) 4-inch tartlets, with some leftover lemon curd and chantilly cream (darn!)

Pastry

  • 1 cup plus 2 tbsp all-purpose flour
  • 1 tbsp white sugar or 2 tbsp powdered sugar
  • 1/4 tsp salt
  • 6 tbsp (3/4 stick) cold unsalted butter
  • 3 oz cold cream cheese
  • 2 to 3 tbsp cold heavy cream

Lemon Curd

  • 1 cup sugar
  • 8 tbsp unsalted butter (1 stick), cut into small pieces
  • 8 large egg yolks
  • 1/2 cup strained fresh lemon juice (from 2 to 3 lemons)
  • 1 tbsp grated lemon zest, plus more for garnish

Chantilly Cream

  • 2/3 cup heavy cream
  • 1 tsp vanilla extract
  • 1 tsp brandy
  • 1 tsp Grand Marnier
  • 1/4 cup sugar
  • 2 tbsp dairy sour cream

Assembly

  • 1 pint fresh blueberries
  • 1 tsp dried lavender

Method

  1. Place a medium-size bowl and beaters in the refrigerator, to be used for the chantilly cream.
  2. To make the pastry, whisk together the flour, sugar, and salt. Cut the butter and cream cheese into 1/4-inch pieces. Using a pastry blender or 2 knives, cut the butter and cream cheese into the dry ingredients until the mixture resembles coarse crumbs with some pea-sized pieces. Drizzle the heavy cream over the mixture and cut in with the blade side of a rubber spatula, or stir with a fork until the dough begins to gather into moist clumps. Press the dough into a flat disk, wrap tightly in plastic, and refrigerate for at least 1 hour or up to 2 days.
  3. On a lightly floured work surface, roll the dough about 1/8 inch thick, then cut into rounds wide enough to cover the bottom and sides of your tartlet pans, with 1 to 1.5 inches extra dough to spare. Press the dough rounds into the pans, then fold the overhanging dough back on itself over the crust sides, doubling their thickness. Press the doubled dough firmly to seal, then thoroughly prick the sides and bottoms with a fork. Arrange the crusts on a baking sheet and refrigerate for at least 30 minutes.
  4. Position a rack in the center of your oven and preheat to 400°F. Bake the crusts for 5 to 7 minutes, then prick the bottoms of any that have puffed. Continue to bake until the crusts are golden brown and firm to the touch, 12 to 15 minutes more.
  5. For the lemon curd, preheat your oven to 350°F. Combine the sugar and butter in a heat proof bowl. Bring 1-inch of water to a bare simmer in a skillet, and set the bowl of sugar and butter in the skillet. Stir until the butter is melted, and remove the bowl from the skillet. Add the egg yolks and beat until no yellow streaks remain. Stir in the lemon juice and return the bowl to the skillet. Heat the mixture over medium heat, stirring gently until it thickens to the consistency of heavy cream and lightly coats a spoon, 6 to 8 minutes. Strain the lemon mixture through a clean fine-mesh sieve into a bowl, then stir in the lemon zest.
  6. Pour the filling into the tart crusts. Bake the tartlets until the center looks set but still very quivery, like gelatin, when the pan is nudged, for 15 to 20 minutes. Let cool completely on a rack.
  7. Meanwhile, make the chantilly cream. Combine the cream, vanilla, brandy, and Grand Marnier in the chilled bowl and beat with an electric mixer on medium speed for 1 minute. Add the sugar and sour cream and beat on medium just until soft peaks form, about 3 minutes. Do no overbeat!!!
  8. To assemble, pile blueberries on top of each tartlet. Add a generous dollop of chantilly cream and sprinkle with fresh lavender and lemon zest.
  9. If you make the tarts ahead, lightly oil sheets of plastic wrap and press directly on the filling in each tartlet. They can be stored in the refrigerator for up to 1 day. Dress with blueberries and chantilly cream when ready to serve.

lemon-drenched lemon cakes

Andrea

Today I made and re-photographed this Lemon Drenched Lemon Cake for a project I am working on with Retail Relay. Also, for a dinner party Brian and I are going to tonight. Except this time, I am topping it with Blackberry Compote. MmmHmm...

Happy Weekend, Everyone!

lemon cake-2.jpg
lemon cake-1.jpg
lemon cake-3.jpg

This recipe makes 2 cakes.  After reading some comments from Joy's readers I would not recommend trying to bake this cake in any pan other than loaf pans.  Also, I used ALL of the syrup.  I just kept brushing layer upon layer of syrup over the tops of the cakes, allowing each application to soak in before adding another.  And, when there was just a bit left in the bowl, I poured it onto the serving plate and plopped the cakes right on top of it, allowing the bottoms to soak it up and get nice and lemon-y.  If you're not a lemon fanatic like me, you might want to only use 1/2 the syrup.

Lemon Drenched Lemon Cakes

Recipe adapted from Dorie Greenspan via Joy the Baker.  Be sure to check out the lovely pictures of this cake on Joy's site, since I was a bit of a slacker and didn't get many...

Cake:

  • 2-2/3 cups all-purpose flour
  • 2-1/2 tsp baking powder
  • pinch of salt
  • 2-1/3 cups sugar
  • 1-1/2 tsp vanilla
  • 6 large eggs, preferably at room temperature
  • 2/3 cup heavy cream
  • zest of 2 lemons, finely grated
  • 1 stick, plus 7 tbsp unsalted butter (15 tbsp total), melted and cooled

Syrup:

  • 1/3 cup water
  • 1/4 cup sugar
  • juice of two lemons

Method:

  1. Center a rack in the oven and preheat the oven to 350 degrees F. Butter two 9x5-inch loaf pans, dust the insides with flour and tap out the excess. Even if the pans are nonstick, it’s a good idea to butter and flour them.
  2. Sift together the flour, baking powder and salt.
  3. Put the sugar and the lemon zest in a large bowl, working with your fingers, rub them together until the sugar is moist and thoroughly imbued with the fragrance of lemon.
  4. Add the eggs and whisk them into the sugar, beating until they are thoroughly incorporated. Whisk in the extract, then whisk in the cream. Continuing with the whisk, or switching to a large rubber spatula, gently stir in the dry ingredients in 3 or 4 additions; the batter will be smooth and thick. Finish by folding in the melted butter in 2 or 3 additions. Pour the batter into the pans, smoothing with a rubber spatula.
  5. Bake for 55 to 60 minutes, or until a knife inserted into the center of the cakes comes out clean. As soon as the cake goes into the oven, make the syrup. After about 30 minutes in the oven, check the cakes for color- if they are browning too quickly, cover them lightly with foil tents.
  6. Stir the water and sugar together in a medium saucepan over medium heat until the sugar melts, then bring to a boil. Remove the pan from heat and stir in the lemon juice. Pour the syrup into a heatproof bowl and let cool.
  7. When the cakes test done, transfer them to a wire rack to cool for 5 minutes before unmolding them and turning them right side up on the rack. Place the rack over a baking sheet lined with wax paper and, using a thin skewer, cake tester or thin-bladed sharp knife, poke holes all over the cakes. Brush the cakes all over with the syrup, working slowly so that the cakes sop it up. Leave the cakes on the rack to cool to room temperature.

Blackberry Compote

Ingredients:

  • 3 cups fresh or frozen blackberries
  • 1/2 cup water
  • 1/2 cup sugar
  • 1 cinnamon stick

Method:

  • Place all ingredients in a medium saucepan over medium heat. Bring to a strong simmer for 20 minutes, stirring occasionally, until compote has thickened and reduced. Allow to cool, and serve over slices of cake.
  • blueberry hill cupcakes, and a happy 4th to you!

    Andrea

    The 4th of July is upon us already!  I'm not sure why 2010 is in such a hurry to rush on by, but I do wish that she would slow down just a bit.  I had big plans for this week, some favorite salads and cocktails and desserts to share with you before the holiday weekend ahead of us.  But, well, time flew.

    I did manage to share one dessert with you, and here is a second.  The first was somewhat healthy, this one is not. Both are delicious, and either would make a nice addition to your picnic, bar-be-que, or party.  How to choose...

    I am keeping things short and sweet today, because I have family in town!  That means wandering shops on Charlottesville's Downtown Mall, stopping for gelato, lunch on a patio, pampering with my Momma, vinho verde on the back deck, sausages on the grill.  And that's just today!  Oh, the weekend we'll have.

    I hope that yours is just as lovely.  What are your plans?  (I really do want to know!)

    Perhaps you could make these cupcakes?  Lemony and chock-full of bright bursts of blueberry, they absolutely scream summer.  You'll love them, I'm sure.

    Blueberry Hill Cupcakes with Blueberry Glaze

    cupcakes from bon appetit, glaze from bella eats I've heard good things about the frosting that accompanies this recipe on bon appetit, but wanted something lighter and with a bit of color.  I bet a lemon buttercream or a lemon glaze would also be really delicious. Also, my "glaze" originally started out as a full-blown buttercream frosting.  I frosted one cupcake, but found the very sweet topping to be very overpowering.  The cake itself is so delicious that you really want to let it shine. Cupcake Ingredients
    • 3 1/4 cups all purpose flour
    • 1 1/4 cups sugar
    • 1 tablespoon baking powder
    • 1/2 teaspoon coarse kosher salt
    • 1/4 teaspoon baking soda
    • 6 tablespoons (3/4 stick) unsalted butter, melted
    • 1/4 cup canola oil
    • 2 large eggs
    • 1 cup buttermilk or low-fat yogurt
    • 1 cup whole milk
    • 1 teaspoon vanilla extract
    • 1 teaspoon grated lemon zest
    • 1 1/4 cups fresh blueberries, frozen for 4 hours
    Glaze Ingredients
    • 2-3 tablespoons blueberry puree (about 1/2 cup blueberries, pureed and strained if desired...I did not strain)
    • 4 tbsp butter (1/2 stick), room temperature
    • 1-1/2 cups powdered sugar
    Method
    1. Preheat oven to 350* F.  Line two 12-cup muffin pans with paper liners.  Sift flour and next 4 ingredients into a large bowl.  Whisk the melted butter and oil in a separate, medium bowl.  Add eggs; whisk to blend.  Whisk in buttermilk, milk, vanilla extract, and zest.  Add buttermilk mixture to dry ingredients; whisk just to blend.  Stir in frozen blueberries.
    2. Divide batter among liners.  Bake cupcakes until a tester inserted into center comes out clean, 23-27 minutes. Transfer cupcakes to racks; cool.
    3. Beat butter in electric mixer with whisk attachment until creamy.  Add about 1/2 the sugar slowly.  Add 2 tbsp of the blueberry puree and continue whisking to blend.  Add the last of the sugar and whisk to blend. Taste, and add more blueberry puree if desired.  You want the consistency to be like a loose buttercream; easy to spread but also easy to control (you don't want it running down the sides of your cupcakes).
    4. When the cupcakes are nearly cool, brush them lightly with the glaze.  You will find that the glaze will harden nicely in about an hour.
    5. Keep stored at room temperature in an air-tight container.
    Read More

    a persuasive cake

    Andrea

    Here we are at the end of March. Spring has claimed her space and unpacked her bags, kicked off her shoes and accepted a glass of lemony iced tea. She's fully settled in and ready to chat for awhile, her pony-tail bobbing enthusiastically as she shows you what's in store for the next few months.

    There are predictions of 83* sunny days in Charlottesville this weekend...83*! That is shorts weather, my friends, and tank tops and strappy sandals and [eek!] swim suits weather. It was all very exciting until I pulled out a pair of those shorts last night and realized that this month coming to an end, the month full of birthdays and cake and cocktails, has done a number on certain, *ahem*, areas. Those well-intentioned New Year’s resolutions set in January were shaken with the arrival of Brian’s birthday 29 days ago, and continued to slowly slip away as we celebrated our way through March.

    This last weekend was the culmination of all of that good cheer. With my Daddy in town for four days spoiling us rotten, there were indulgent meals shared at favorite restaurants and bottles of wine Brian and I could never justify buying ourselves. As a “thank you!” for all of that generosity we had a little barbeque Saturday afternoon, complete with Double H Farm baby back ribs smoked on the Big Green Egg, the best baked beans I’ve ever had, salad with a hearty base of [local!] emerald green spinach and a delightfully moist lemon mousse cake. Although the air was a crisp 50*, we had a cloudless Caribbean-blue sky and a brilliantly radiant sun to warm our skin and confirm the departure of [old man] Winter.

    And now today, with all of those birthdays behind us and the very last of that lemon mousse cake tossed away in the trash (but not before a bite or two passed my lips to verify its staleness) it is time to think of April, the second to last month before the water flowing steadily through our surrounding rivers warms to a point that justifies the loading up of kayaks and the donning of swim suits. It’s time to welcome the farmers back to downtown Charlottesville, to our Saturday morning City Market that starts this weekend(!), and to embrace the first gifts of Spring. It’s time to lighten up and brighten up, to take a break from all the sugary-sweet goodness of March and indulge in the green that comes with April.

    But first, I want to give you more cake.

    With a buoyant crumb that bounces back at the poke of a finger and an airy, lemon-tinted mousse so cool and refreshing you'll have to fight yourself not to finish the entire bowl in one sitting, this cake seems to be the perfect welcome for Spring. It's a persuasive cake, the kind that you want to always have under a dome on your counter, ready to share with important guests while sitting on the front porch drinking a tall glass of iced tea. It seems that, when being offered a cake like this one, it would be impossible for those guests to leave.

    That's my hope anyway, as I embrace Spring and ask her to stick around for awhile.

    This is a very long recipe, but is actually very simple.  Especially if you divide the tasks between two days - the cake and lemon curd on the first, the mousse, frosting and assembly on the second.

    Lemon Mousse Cake

    from the greyston bakery cookbook, pg. 46

    serves 8 to 10

    Ingredients

    for the cake

    • 5 eggs, separated
    • 1/4 cup (1/2 stick) unsalted butter, melted and cooled
    • 1/2 cup milk
    • 1-1/2 tsp vanilla extract
    • 1-1/2 cups unbleached all-purpose flour
    • 1-1/4 cups sugar
    • 2-1/2 tsp baking powder
    • 1/4 tsp salt
    • 1/2 fresh lemon, seeds discarded

    for the lemon curd

    • 2 large eggs
    • 1 egg yolk
    • 1/2 cup granulated sugar
    • 1/3 cup fresh lemon juice (from about 2 medium lemons)
    • 1/8 tsp salt
    • 1/4 cup (1/2 stick) unsalted butter, cut into small pieces
    • 1 tsp finely grated lemon zest
    for the lemon mousse
    • 1 cup heavy cream
    • 3/4 cup lemon curd
    for the lemon buttercream frosting
    • 6 tbsp (3/4 stick) unsalted butter, room temperature
    • 2 cups confectioners' sugar, sifted
    • 3 tbsp heavy cream
    • 1-1/4 tsp vanilla extract
    • 1 tsp lemon extract
    Method make the cake (up to one day ahead)
    1. Position a rack in the center of the oven and preheat oven to 350*.  Grease and flour two 8" round cake pans and line the pan bottoms with parchment rounds.
    2. In a small bowl, combine the egg yolks, butter, milk and vanilla.  Set aside.
    3. In a large bowl, whisk together the flour, 1 cup of sugar, baking powder and salt to blend.  Add the egg yolk mixture and stir until well combined.  Set aside.
    4. In a clean dry bowl, using clean dry beaters, beat the egg whites on medium-high speed until they hold soft peaks.  Lower the mixer speed to medium and gradually add the remaining 1/4 cup sugar, beating the whites until they hold stiff peaks.  Stir about one-third of the egg whites into the batter to lighten.  Gently fold the remaining whites into the batter, in two batches, to blend thoroughly.
    5. Transfer the batter to the prepared pans, filling them equally.  Bake for 30 to 35 minutes, or until the sides of the cakes begin to pull away slightly from the pans and a wooden skewer inserted near the center of the cake comes out clean.
    6. Set the pans on a wire rack for 10 minutes to cool.  Turn the cakes out onto the rack and carefully remove the parchment.  Reinvert the cakes and allow them to cool completely on wire racks.
    7. If making the cakes the night before (as I did), wrap them tightly with plastic wrap once entirely cool and keep at room temperature.
    make the lemon curd (up to one week ahead)
    1. In a small saucepan set over medium-low heat, whisk the eggs and egg yolk with the sugar, lemon juice and salt.  Continue to cook, whisking constantly, for 10 minutes or until thickened.
    2. Remove the curd from the heat and add the butter, stirring until melted.  Strain the mixture through a mesh sieve into a small bowl.  Stir in the lemon zest.
    3. Cover with plastic wrap, pressing the plastic directly on the entire surface of the lemon curd to prevent a skin from forming.  Chill the curd in the refrigerator until firm.
    make the lemon mousse
    1. In the bowl of an electric mixer set on medium-high speed, beat the cream until it holds soft peaks.  Working in three batches, gently fold the cream into the lemon curd.  Refrigerate for at least 1 hour before using.
    make the lemon buttercream frosting
    1. In a clean bowl of an electric mixer, combine the butter, sugar, cream, vanilla and lemon extract.  Mix on medium-low speed until well combined.
    assemble the cake
    1. With a long serrated knife, trim the rounded top off each cake layer to create a flat surface.
    2. Squeeze half of the juice from the lemon over the cut side of one layer of cake.  Place that layer, cut side up, on a serving plate. Spread the lemon mousse evenly on top.
    3. Carefully place the next layer, cut side down, on top of the first layer.  Squeeze the rest of the juice from the lemon on top. Frost the top and sides of the cake with the lemon buttercream frosting.  Place the cake in the refrigerator for at least an hour to set.  Keep refrigerated until ready to serve.

    Read More

    easy as...pie?

    Andrea

    pie logo 2 Last Thursday at approximately 12:00pm I learned of the C’ville Pie Fest. Upon reading Jenée’s tweet about the event, I quickly sent an inquiry to the organizers, asking if I could join in the fun. They said “yes!”, I rejoiced...and then I panicked. I had 48 hours until the tasting and judgement and no idea what to make. A couple of frantic emails later, I had a plan. The Italian Plum Cake I’d made the weekend before had been a huge success in our household and with the friends we’d shared it with - why not turn that cake into a pie? The flavors were spot-on, I just needed to find a good pie crust to modify and a reliable ratio of raw fruit to sugar to thickener for the filling. Easy as pie, right? plum pie merge 3 I told myself that there was a reason for that expression and that, despite my lack of knowledge of pie baking, the task at hand was really a simple one. I had Thursday night to make two test pies trying out two different crust recipes and two different filling combinations, Friday evening to make a final test pie using the knowledge I gained from my first two pies and Friday night to assemble and bake my final entry. No problem. plum pie-5 I found two reliable sources for the base pie crust (or, pâte brisée) recipes, Martha Stewart and Julia of Mélanger (who just experimented with various pastries during the month of August on her lovely blog), and got to work planning my own modifications. Because pie doesn’t lend itself to the sprinkling of almonds across its top as cake does, I decided to substitute some ground almonds for a portion of the flour in each crust recipe. I also added a healthy heap of lemon zest because, lets be honest, everything is better with a little citrus. Seriously. plum pie-4 For the filling, I found a handy ratio in Joy of Cooking.
    5 cups raw fruit 3/4 cup sugar 3 tbsp thickener (if using flour or cornstarch, 1-1/2 tbsp if using tapioca)
    The exact measurements vary a bit based on the sweetness and juiciness of your fruit, and because my plums were quite juicy I made adjustments accordingly. Or so I thought. Both initial pies became miniature swimming pools in my oven, so full of juice that at one point I was using a turkey baster to pull as much liquid out as possible. They sat on the counter overnight and thickened a tiny bit, but not enough to count. The bottom crust was still soggy and there was no hope of a slice holding together as you removed it from the pie dish, let alone once you slid it onto a plate. plum pie merge 2 plum pie merge But still, Friday morning Brian helped me carry the two pies (one apple-plum, one pure plum), a server, plates and forks to our office, where I received feedback from seven more people. We all agreed on the too much juice issue, but opinions varied on the preferred crust and filling. In the end, I went with my preference (and luckily Brian’s too, whose palate I trust implicitly) and advice from Tara, who always comes through in matters involving taste and technique. Over lunch I went home to rewrite my recipe and make dough for that evening’s test pie. plum pie-11 I was so convinced that the third test pie would be a winner. So convinced. We invited a couple of friends over for the final testing and pulled the lattice-topped beauty out of the oven to great fanfare and raised glasses. We let it sit on the stovetop for an hour, until we could stand the wait no longer, and then dug in. And the pie was soggy. And less cohesive than the first two pies had been. And I had no more ideas about how to fix it. plum pie-13 By this point it was 11:30pm, 12 hours before I was supposed to be at the Pie Fest with pies in hand. We were all exhausted after long weeks at our jobs, but sat around the dining table for 30 minutes hashing out the potential issues and solutions.  Our friends left and Brian and I sat across from each other on the couch, glassy-eyed and covered in flour, as I debated whether or not to stay up all night baking pies that might not be contest-worthy.  And then we went to bed.  Pie-less. plum pie-14 As I mentioned previously, the C'ville Pie Fest experience was fantastic.  Even without my own entry.  Not only did I meet new friends AND win a raffle (I NEVER win raffles!) I learned a lot about fruit pie.  Namely that its messy, and meant to be that way. Not one to take personal failure easily, I continued to brainstorm possible solutions to my runny pie issues before, during and after the contest.  And, lucky for me, I have a husband who is very good at reconnaissance missions.  Brian scored an important piece of information about raw fruit pies for me while we were at the Fest last Saturday...use tapioca as a thickener instead of corn starch.  Of course.  Had I not been completely exhausted the night before (and had tapioca in my pantry) I might have remembered that I use tapioca for my cranberry apple pie at Thanksgiving.  Works like a charm. And so, finally, pie number four was a winner.  The filling was perfectly cohesive, the crust delightfully flakey, the flavors incredibly delicious.  If only I'd had one more day for testing... plum pie-15 The use of tapioca wasn't the only important lesson learned in this process, either through my own experimentation or from the numerous websites and cookbooks I consulted.  Below is a list of points about raw fruit pies that I plan to never forget, and I hope that you all will chime in with any lessons of your own. Important Points for Raw Fruit Pies
    Freeze your chopped butter for at least 15 minutes before adding it to your flour to form your pie crust dough. Add the water to your pie crust dough in small batches, to ensure that you don't add too much.  The final dough should be soft and supple, but not tacky. Use a glass baking dish, not the disposable aluminum dishes you find at the grocery store. Use tapioca as a thickener instead of cornstarch, especially for very juicy fruits like plums and berries. Once the filling is in the pie crust, you want to top the pie and get it into the oven as soon as possible to prevent the uncooked bottom crust from getting soggy. Egg wash works better than milk or water to achieve a lovely golden, shiny crust. Bake the pie in the lowest part of your oven, so that the bottom of the crust is cooked thoroughly.  This is another good reason to use a glass baking dish - you can see the color of the crust as it bakes. Don't pull the pie out of the oven until the filling is bubbling thickly through the lattice or vent holes.  When you think it is ready, give it five more minutes, just to be sure. Bake the pie the day before you plan to eat it.  The filling will thicken as it comes to room temperature overnight. I prefer to eat pie at room temperature, but if you want to heat it before serving do so in its baking dish in the oven.
    plum pie-17 Sugar Plum Pie with Lemon Almond Crust crust adapted from Martha Stewart and Mélanger, filling adapted from Joy of Cooking for the crust...
    • 2 cups all-purpose flour
    • 1/2 cup finely ground almonds or almond flour
    • 1/4 cup sugar
    • 1/2 tsp salt
    • zest of 1 lemon
    • 1/2 pound of unsalted butter (2 sticks)
    • 3 tbsp fresh lemon juice
    • 1 egg
    • 1-2 tbsp ice water, as needed
    • an egg and 1 tbsp of water, whisked together, for an egg wash after assembly
    • 2 tbsp turbinado sugar, to sprinkle on top of assembled pie
    for the filling...
    • 5 cups of Italian plums, quartered
    • zest of 1 lemon
    • 1 tbsp fresh lemon juice
    • 3/4 cup sugar
    • 2-3 tbsp quick-cooking tapioca (depending on the juiciness of your fruit - Italian plums (also called sugar plums) are VERY juicy, so I used 3 tbsp)
    method
    1. Chop your butter into 1/2 inch cubes.  Place on a plate and put in the freezer for at least 15 minutes.
    2. In an electric mixer with paddle attachment, stir together your flour, ground almonds, sugar, salt and lemon zest.  Add the chopped butter and mix on low speed for 2-3 minutes, until most of the butter pieces are the size of peas.  If there are any larger pieces remaining, pinch them between your fingers to break them up.
    3. Whisk together the lemon juice and egg.  Pour into flour mixture all at once, mixing on low speed as you pour.  Dough should start to come together in small clumps.  Add ice water as needed, a bit at a time.  You should be able to pick up a few small clumps of dough and pinch them together to form a larger ball, this is how you'll know it is ready.
    4. Form dough into two equal balls, then flatten each ball into a disk about 1-inch thick.  Wrap each disk in plastic wrap and refrigerate for at least one hour.
    5. When you're ready to assemble the pie, preheat your oven to 425*.  Pull one dough disk out of your refrigerator and let sit on the counter for 5 minutes, so that it will be a little easier to work with.  Generously flour a silpat or piece of parchment paper and turn dough out onto it.  Flour the top of the dough and then roll out to a 14-inch circle about 1/8-inch thick.  Place dough in glass baking dish, pressing bottom down into corners of dish and letting dough overhang edges of dish by at least 1/2-inch.  Refrigerate.
    6. Repeat with second dough disk, but before refrigerating the rolled-out dough, cut it into strips 3/4-inch thick for the lattice top.  Refrigerate.
    7. Place your chopped plums in a large bowl and toss with 1 tbsp lemon juice.  In a small bowl, mix together the tapioca, sugar and lemon zest.  Pour over fruit and mix well to coat.
    8. Pull pie dish with dough out of refrigerator.  Pour fruit mixture into pie dish.  Assemble lattice on top of pie as quickly as possible (photos above).  Brush crust with egg wash and sprinkle with turbinado sugar.
    9. Bake at 425* on the lowest rack in the oven for 30 minutes.  Turn oven down to 350*, move pie up one rack, place a baking sheet on rack below pie and bake for an additional 30-45 minutes, until top of pie if deep, golden brown and filling is bubbling thickly between the lattice.  If it seems like your pie crust is going to burn, you can tent it with foil to slow down the process.
    10. Remove pie from oven and let cool overnight before serving.  When completely cool, cover with aluminum foil or plastic wrap.  Pie should keep for 3 days on the counter.
    plum pie-16 Next up:  Chocolate Mousse Pie
    Read More

    many happy moments

    Andrea

    I've been trying to write this post for days (days, I tell you!).  As you'll see eventually, its about a plum cake.  The problem is, I don't have much experience with plums.  Other than eating them raw at their peak of ripeness - the sweet-tart juice running down my arms to my elbows - plums and I haven't made a close acquaintance.  We've flirted a bit in the past after a quick saute' in a pan along with a dab of butter and some brown sugar, strengthening our relationship with the aid of a scoop of vanilla bean ice cream.  And, there was that lovely marriage of blackberries and plump black plums that produced a few jars of delicious jam this summer...  But when it comes down to memories - the kind of memories evoked by the first bite of a beloved (or even hated) food - plums and I are complete strangers. plum cake-1 I’m fairly new to the world of writing, having only started forcing myself to practice regularly when I started this blog and discovered how much I enjoy it. I’ve learned in the six months since defining the direction of bella eats that writing about personal experience is much easier than writing about something I lack a connection with. Occasionally, I won’t even realize that I have something to write about until suddenly, the words start pouring out of my fingertips as memories flash through my head in a slideshow of my past - ranging in age from 2 days to 25 years. And so, these last couple of days I’ve sat behind my computer writing a sentence here and there, just waiting for those hidden plum-inspired memories to present themselves. plum cake-2 This evening, as I was in the middle of my uninspired third draft, my Momma called for a chat. She had some bad news about an elderly relative, my grandfather’s sister. My Great Aunt isn’t doing very well, in fact hasn’t been for awhile, and Momma wanted to update me on her status. Our conversation eventually turned to more trivial subjects to lighten our mood, and my unsatisfying third draft came up. As I explained my writer’s block my Momma chuckled, and proceeded to share with me a few of her own childhood memories of plums, of which she has many. plum cake-3 She told me about “plumjum”, my grandfather’s favorite spread for toast, and how his sister (yes, the very same as mentioned above) used to make him jars of it with plums from another sister’s trees. She laughed about how surprised she was when, at an older age, she learned that the coveted spread was in fact a simple plum jam. Those family trees that produced the fruit that formed the jam were a favorite playground for my Momma and her cousins, a treetop haven where they ate as many plums as they could stomach while spitting the pits at each other (she was a bit of a tomboy, my mother, having grown up with all male cousins). As we laughed about her memories, events she probably hasn’t thought about in years, I was reminded again of how powerful food is, and thankful that even though she hasn’t read it yet, this post evoked happy thoughts of her past during a time of sadness. plum cake-5 As far as my future with plums goes - and based on my family history with the fruit - I feel pretty confident when I say that we've got many happy moments ahead of us. And you can bet (a plum cake, perhaps?) that a few jars of "plumjum" will be produced this weekend from the best possible specimens, packed up and shipped to Florida for my Momma and grandfather to enjoy. With love. plum cake-7 In the last few weeks, I’ve seen plums pop up in magazines and on some of my favorite blogs, tempting me with their deep red-purple skin and sunset-hued flesh. I'd always thought of them as a summer fruit, but apparently this is the time of year when the European varieties hit their peak. I came across a container of Italian Plus last week and, unable to resist the petite, egg-shaped beauties, immediately started plotting their fate. We decided to host a little brunch at our house last Saturday morning, and so the idea of a plum coffee cake was born. On Friday I consulted numerous recipes before deciding on an adaptation of one I'd had my eye on since August. Perhaps it wasn't meant to be a breakfast treat, but I think it served our purposes just fine. Better than fine, actually, as this cake was one of the best things I've ever tasted. Truly. The tartness of the fruit was nicely balanced by the not-too-sweet dough, the perfect compliment to a cup of black french-roast coffee. plum cake-8 
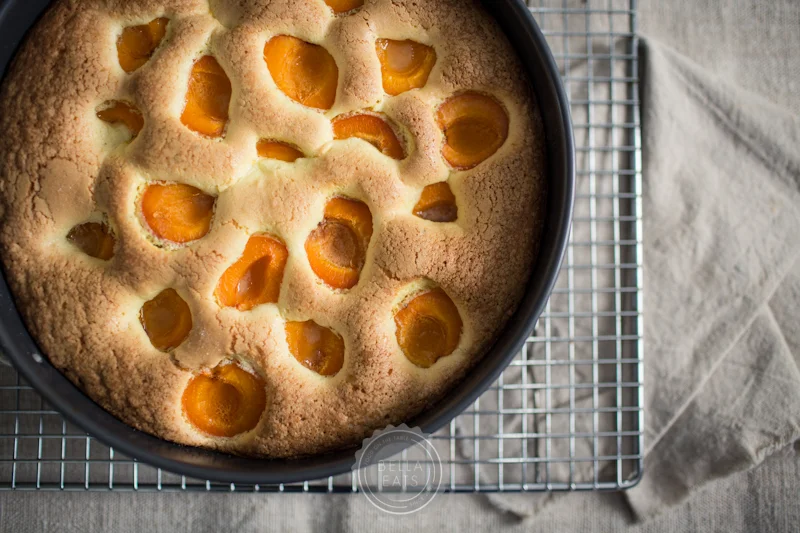
If you'd like this cake for breakfast, make it the night before and wrap it tightly in plastic, letting it sit on your counter until the morning. Then, about 15 minutes before you're ready to eat it remove the plastic, pop it in the oven to re-heat for a few minutes before turning on the broiler to crisp the top and caramelize the edges.
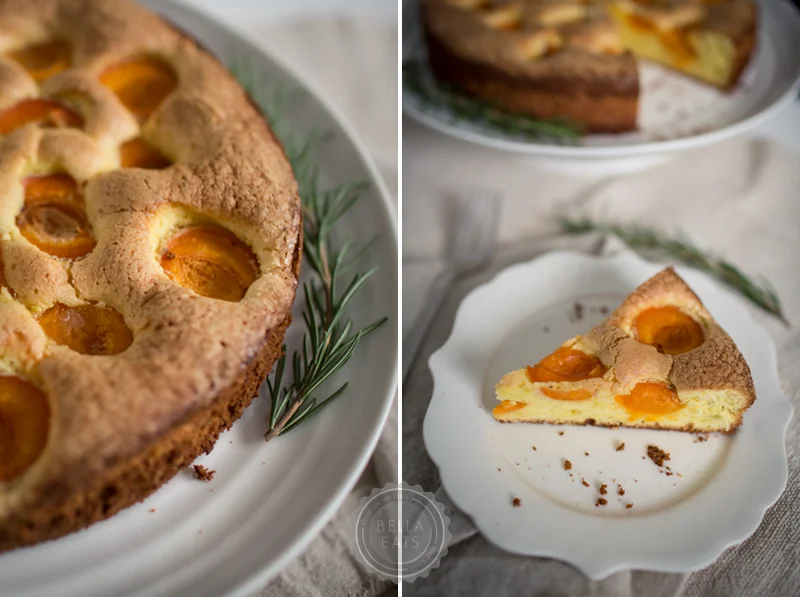
 Plum Cake adapted from Rustic Fruit Desserts by Cory Schreiber and Julie Richardson
    P. 39 August 2009 Gourmet magazine
    inspired by Whitney in Chicago Ingredients
    • 1 tablespoon unsalted butter, at room temperature, for pan
    • 2 1/4 cups all-purpose flour
    • 1 teaspoon baking powder
    • 1 teaspoon fine sea salt
    • zest from one lemon
    • 1 cup granulated sugar
    • 3/4 cup (1 1/2 sticks) unsalted butter, at room temperature
    • 3 eggs
    • 1 tablespoon pure vanilla extract
    • 2 1/2 cups stone fruit, halved then sliced to about 1/4" thick. [I used 18 Italian plums. You'd probably use 1/2 as many if you used a larger variety]
    • juice from 1/2 a lemon
    • 1-2 tbsp granulated sugar
    • 1 tablespoon turbinado sugar
    • 1/4 cup sliced almonds, chopped a bit
    Method
    1. Mix the flour, salt, baking powder and lemon zest together in a bowl, set aside.
    2. In a stand mixer with paddle attachment (or with a handheld electric mixer) cream the butter and sugar together on medium-high speed for 3-5 minutes, until light and fluffy. Add the eggs, one at a time, beating well and scraping down the sides of the bowl after each addition. Add the vanilla and mix.
    3. Add the flour mixture to the wet mixture and stir just until a smooth dough forms. Pull together in a ball and wrap with plastic wrap, flattening to a disk about 1-inch thick. Freeze for 30 minutes.
    4. While the dough rests, place your sliced plums in a bowl and drizzle with lemon juice and 1-2 tbsp sugar, depending on the sweetness of your fruit. Let sit until dough is ready.
    5. Preheat oven to 375*. Butter a 10" spring-form pan. Remove dough from freezer and divide into two equal pieces. Pat one piece into the bottom of the buttered pan, making sure to cover the surface evenly. Spread your fruit over the dough, distributing evenly. Break the remaining dough into 1-inch globs and distribute over the surface of the fruit. Sprinkle with the turbinado sugar and the almonds.
    6. Bake for 30 to 40 minutes, until bubbly and golden. [mine took closer to 40 minutes]
    This cake keeps on the counter, wrapped tightly in plastic, for about 3 days. I think, in fact, that it is best on the second day. plum cake-11 I followed the original recipe closely except for the following adaptations: 
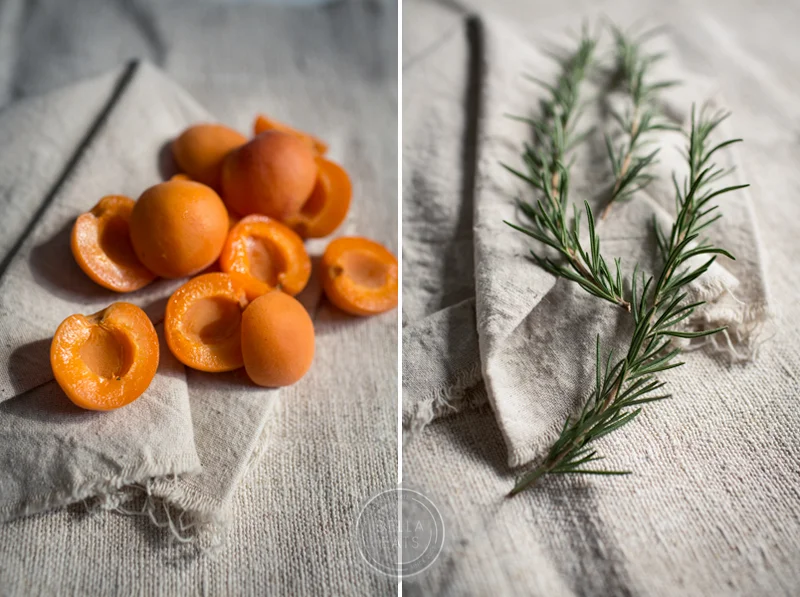
Because about 1/2 of my plums were still a little green on the inside and therefore quite tart, I chose to macerate the fruit for a bit before layering it with the dough. Even if I use very sweet fruit in the future, I won't skip this step. The sugar helped the fruit to caramelize at the edges, producing a wonderful texture. The addition of lemon zest to the dough and slivered almonds to the top of the cake are two tricks that I use quite often in fruit cakes and crumbles. I think that everything is better with a touch of lemon and a few almonds. plum cake merge 1
    Read More

    there are worse things

    Andrea

    Hello.  My name is Andrea.  I have a food blog...and an addiction.  To cake.  Specifically, lemon cake.  If you've ever visited my recipes page, you may have noticed that I have a cake section.  In that section there are currently just three cake recipes, and one of them is Molly Wizenburg's Lemon Yogurt Cake which is absolutely delicious.  Soon there will be two more cake recipes, just after I hit "publish" on this post.  And those two recipes will also be for lemon cakes.  See?  I think that 3 out of 5 recipes warrants the declaration of an addiction. lemon cake 1 I noticed my problem as I was flipping through magazines and cookbooks trying to decide on a dessert for an upcoming barbeque.  I knew I wanted something manageable at an outdoor party, a treat that could be eaten with one’s fingers while holding a napkin rather than dirtying a plate and fork.  As I flipped pages and placed stickies on the recipes of interest I started to notice a trend - lemon cupcakes with raspberry glaze, lemon cream cheese bars, lemon cooler cookies - lemon, lemon, lemon.  Hmmm... lemon merge 2 The issue became even more apparent when I opened my drafts folder and came across two more lemon recipes that have graced our kitchen in the last month, Lemon Drenched Lemon Cakes and Lemon Bundt Cake with Strawberry Rhubarb Syrup.  Clearly, I have a problem.  I’ve since decided to go with chocolate for the barbeque...I think. lemon cake 5 In my defense, there are some things that you should know about lemon cakes (besides the obvious, which is that they are delicious) - and the first is that there are so many variations that one can make a different lemon cake recipe every week and never get bored.  I promise.  Take, for example, the Lemon Drenched Lemon Cakes that I found on Joy’s site, which she herself declares are the best pound-type cake she’s ever had.  Ever.  Who can resist trying that recipe? lemon pound 3 And then there’s the Lemon Bundt Cake that Food Network named one of the top 7 Cakes For All Occasions.  And they just had to go and drizzle it with a Strawberry Rhubarb Syrup.  I dare you to defy that temptation.  I certainly gave in and made it over Memorial Day weekend for a cook-out at a friend’s house.  It was delicious, even though I made it the day before (as recommended) but didn’t have the proper cake covering apparatus that would have kept it from getting a little dry.  Its a good thing there was that syrup to pour all over the top... lemon merge 1 Another thing you should know about lemon cakes is that they are very refreshing.  This makes them especially tempting when the event for which the cake is planned will take place outdoors, during the hot Virginia summer, after a few rounds of rowdy backyard games.  And, they pair nicely with a chilled glass of white wine, always a bonus.  That argument alone makes me want to ditch my chocolate cupcake idea for next week's barbeque...what do you think? So, dear readers, I fear that I lack the proper motivation to get over this little addiction of mine, and I’m pretty sure I don’t want to.  Which means you may be subjected to additional lemon cake recipes in the future, most likely several before the end of the summer.  There are worse things, I suppose. lemon pound merge 2 This recipe makes 2 cakes.  After reading some comments from Joy's readers I would not recommend trying to bake this cake in any pan other than loaf pans.  Also, I used ALL of the syrup.  I just kept brushing layer upon layer of syrup over the tops of the cakes, allowing each application to soak in before adding another.  And, when there was just a bit left in the bowl, I poured it onto the serving plate and plopped the cakes right on top of it, allowing the bottoms to soak it up and get nice and lemon-y.  If you're not a lemon fanatic like me, you might want to only use 1/2 the syrup. Lemon Drenched Lemon Cakes Recipe adapted from Dorie Greenspan via Joy the Baker.  Be sure to check out the lovely pictures of this cake on Joy's site, since I was a bit of a slacker and didn't get many... Cake:
    • 2-2/3 cups all-purpose flour
    • 2-1/2 tsp baking powder
    • pinch of salt
    • 2-1/3 cups sugar
    • 1-1/2 tsp vanilla
    • 6 large eggs, preferably at room temperature
    • 2/3 cup heavy cream
    • zest of 2 lemons, finely grated
    • 1 stick, plus 7 tbsp unsalted butter (15 tbsp total), melted and cooled
    Syrup:
    • 1/3 cup water
    • 1/4 cup sugar
    • juice of two lemons
    Method:
    1. Center a rack in the oven and preheat the oven to 350 degrees F. Butter two 9x5-inch loaf pans, dust the insides with flour and tap out the excess. Even if the pans are nonstick, it’s a good idea to butter and flour them.
    2. Sift together the flour, baking powder and salt.
    3. Put the sugar and the lemon zest in a large bowl, working with your fingers, rub them together until the sugar is moist and thoroughly imbued with the fragrance of lemon.
    4. Add the eggs and whisk them into the sugar, beating until they are thoroughly incorporated. Whisk in the extract, then whisk in the cream. Continuing with the whisk, or switching to a large rubber spatula, gently stir in the dry ingredients in 3 or 4 additions; the batter will be smooth and thick. Finish by folding in the melted butter in 2 or 3 additions. Pour the batter into the pans, smoothing with a rubber spatula.
    5. Bake for 55 to 60 minutes, or until a knife inserted into the center of the cakes comes out clean. As soon as the cake goes into the oven, make the syrup. After about 30 minutes in the oven, check the cakes for color- if they are browning too quickly, cover them lightly with foil tents.
    6. Stir the water and sugar together in a medium saucepan over medium heat until the sugar melts, then bring to a boil. Remove the pan from heat and stir in the lemon juice. Pour the syrup into a heatproof bowl and let cool.
    7. When the cakes test done, transfer them to a wire rack to cool for 5 minutes before unmolding them and turning them right side up on the rack. Place the rack over a baking sheet lined with wax paper and, using a thin skewer, cake tester or thin-bladed sharp knife, poke holes all over the cakes. Brush the cakes all over with the syrup, working slowly so that the cakes sop it up. Leave the cakes on the rack to cool to room temperature.
    lemon merge 3 The recipe recommends that you make this cake the day before you plan to consume it.  If you do, be sure to wrap it very well to keep it fresh overnight, or keep it in a cake dome.  My gentle tenting over a dinner plate didn't work so well.  And don't spoon the glaze over it until you are ready to serve. Lemon Bundt Cake with Strawberry Sauce recipe adapted from foodnetwork.com Cake:
    • 3-1/4 cups cake flour, sifted (I used 1/2 cake flour and 1/2 whole wheat pastry flour)
    • 2 teaspoons baking powder
    • 1/2 teaspoon baking soda
    • 1/2 teaspoon fine salt
    • 3/4 cup sour cream
    • zest from one lemon, finely grated
    • 1/4 cup fresh lemon juice
    • 2 tablespoons pure vanilla extract
    • 4 large eggs
    • 2 1/4 cups sugar
    • 3/4 cup vegetable oil
    Syrup:
    • about 6oz of fresh or frozen rhubarb, chopped finely
    • 1-1/2 cups strawberry jam
    • 1/4 cup fresh lemon juice
    • pinch of salt
    • 1 tsp vanilla extract
    Method:
    1. Position a rack in the middle of the oven and preheat to 350 degrees F. Generously brush the bundt pan with butter and dust with flour.
    2. Whisk the flour, baking powder, baking soda and salt together in a large bowl and set aside. In another bowl, whisk the sour cream, lemon zest, lemon juice and vanilla and set aside.
    3. Whisk the eggs and sugar together in another bowl, stirring vigorously to lighten the eggs. Gradually whisk in the oil until evenly combined. Add the sour cream mixture and stir together. Add the dry ingredients and stir with a wooden spoon just until combined but still a bit lumpy. Pour the batter into the prepared pan.
    4. Bake the cake until it pulls away from the sides of the pan and a skewer inserted into the center of the cake comes out clean, about 1 hour. Cool 10 minutes; then unmold cake onto a rack placed over a baking sheet. Cool. (The cake can be prepared to this point a day ahead.)
    5. When ready to serve. Combine the rhubarb, jam, lemon juice and salt in a small saucepan and simmer until the rhubarb gets translucent and syrupy, almost jewel like,, about 10 minutes. Add a bit of water, if the glaze gets too thick . Remove from the heat and stir in vanilla. Let cool slightly. Spoon some of the glaze over the top of the cake, and reserve the rest for serving with sliced cake. Serve with fresh strawberries.
    Read More

    a homemade...lemon yogurt cake

    Andrea

    I just had to go and say it, didn't I?  I had to shout from the roof tops (or at least my blog and maybe once or twice out my car window) that Spring had arrived.  That the time had come for running in shorts, lunches in the park and open windows while sleeping.  My glove box was reorganized as I giddily thought to myself "I won't be needing you guys 'till next November!", and  I even made myself a few smoothies...a meal/snack reserved for warmer days in our household.  lemon-1 I spoke too soon.  Imagine my surprise when I woke up Friday morning to a dusting of fresh snow on the ground.  So. Very. Disappointing. The unfortunate weather coincided with my Momma's arrival from Florida, where sunny 75* days have been the norm for weeks now.  The weekend plans that originally included vineyard tours, outdoor meals and grunt work in the garden quickly shifted to making a big pot of soup, going to the movies (twice!) and evening coffee in the den rather than white wine on the deck.   lemon-3 But there was still a race.  The glorious 8K that - while being cheered on by friends and family brave enough to weather the cold, damp air - my running buddy Kelly and I conquered in 49:15 with smiles on our faces.  Between mile 4 and the finish line Kelly commented that she was still able to smile, and wondered how far she would have to run before she stopped smiling.  I decided that I never want to know.  I like smiling while running.   lemon-7 One of the thoughts that kept me smiling through the race?  Cake.  I run so that I can continue to eat cake (and other wonderful baked goods of course, but cake is very near to the top of the list...).  Because, you see, the other important event that coincided with my Momma's visit to Virginia was my Momma's birthdaylemon-5 I wanted to make a cake that would remind us all of warmer days, in celebration of Momma's birthday and as a thank you for standing in the cold to watch me run.  Luckily, I stumbled upon a variation of this recipe in Molly's lovely book, A Homemade Life.   If you love Orangette you will love this book.  I anxiously awaited its arrival after pre-ordering it in January and have been devouring it since it landed on my doorstep.  It is written beautifully, of course, and each recipe I've read so far sounds delicious.  I thought I would have a hard time deciding which to make first, but knew instantly that this was the one when I found it.  Because, not only do I love lemon, but in the book this cake coincides with the story of how Molly met her husband.  It is such a great story, almost fairy tale-like, and if you haven't read it you should.  Right here. lemon-8 And this cake?  Its almost fairy tale-like as well.  I recommend that you make it as soon as possible, for the positive thoughts it invokes are sure to make Spring come a little bit faster. lemon-112 Lemon Yogurt Cake from A Homemade Life by Molly Wizenburg (of Orangette) Ingredients: Cake
    • 1-1/2 cups unbleached all-purpose flour
    • 2 tsp baking powder
    • pinch of salt
    • 2 tsp grated lemon zest
    • 1/2 cup well-stirred plain whole-milk yogurt (I used Greek - Molly says NOT to use low or non-fat)
    • 1 cup sugar
    • 3 large eggs
    • 1/2 cup vegetable oil, such as canola
    Syrup
    • 1/4 cup powdered sugar, sifted
    • 1/4 cup lemon juice
    Icing
    • 1 cup powdered sugar, sifted
    • 3 tbsp lemon juice
    Method:
    1. Preheat oven to 350*.  Grease 9-inch round cake pan with cooking spray.  Line the bottom of the pan with a round of parchment paper and spray it too.
    2. In a medium bowl, whisk together the flour, baking powder and salt.  Add the lemon zest and whisk to mix thoroughly.
    3. In a large bowl, combine the yogurt, sugar and eggs, stirring to mix well.  Add the flour mixture and stir to just combine.  Add the oil and stir well. Don't worry when it looks like an oily mess - just keep mixing until a smooth batter forms.  Pour into the prepared pan.
    4. Bake for 25-35 minutes, until a toothpick inserted in the middle comes out clean.
    5. Cool the cake in the pan on a wire rack for 15 minutes.  Run a knife around the edge of the pan and invert onto wire rack.  Remove parchment paper.  Flip back over so that rounded top is up.  Set the rack over a pan or large plate.
    6. In a small bowl, whisk together the syrup ingredients.  Spoon the syrup slowly over top of warm cake.  Let cake cool completely.
    7. In a small bowl, combine the icing ingredients.  Whisk well so that sugar is completely dissolved.  Spoon the icing over the cooled cake.
    8. Cake can be served immediately, but icing will be set after about 1 hour.
    lemon-10
    Read More

    bella terra : preparation

    Andrea

    We had perfect weather in Virginia this weekend.  75*, sunny, a light breeze.  The kind of weather that makes you believe that Spring may finally be here, that leads to lovely outdoor runs and white wine on the deck.  The same weather that in years past has caused you to put your cold-sensitive plants outside because "they'd like a little sunshine" only to have them frozen by a freak late-March storm (not this year my friends...I won't be fooled again.)  It was the kind of weather that got me thinking about our vegetable garden, and how the time for sowing seeds is just around the corner and I still hadn't amended the beds with fresh compost.   garden-2 It was perfect weather for wandering around the local garden center, picking up spring-harvest seeds and dreaming about how, if only I had my own cold-frame set up in the backyard, I could already have baby lettuce peeking out of the soil.  Hmm...maybe next year. This will be our third year with the garden, and over the last two we've started to sort out which veggies work and which don't.  There were disappointments last year...the Virginia heat was too much for the brussels sprouts to handle and the squirrels got 75% of the corn.  We unearthed the secret to keeping flea bugs off of the eggplant and had an abundant harvest, only to discover that there are really only two eggplant recipes that we like and the farmer's market can more than provide the fruit needed for those.  No need to take up valuable garden space.  garden-3 On Saturday I bought lettuce and spinach, beets, peas and broccoli, all seeds that can go in the ground in the next couple of weeks and provide a harvest in as few as 45 days.  In May, after danger of Virginia frost, I'll be sowing green beans and okra seeds to be harvested in July.  Baby tomato, cucumber, bell pepper and squash plants will go into their assigned beds and parsley, basil and dill will join the perennial chives, thyme and oregano already starting to show some green. broc-1 I think I am most looking forward to growing our own broccoli, although each veggie has a special place in my heart and becomes my instant favorite the minute it is ripe.  But broccoli...it gave us trouble last year, or at least the squash bugs that enjoyed most of the harvest gave us trouble.  And I enjoy a challenge.  We will persevere with broccoli this spring and when we do we will make it this way, at least once. broc-2 There are a few things about this recipe that I need to share, things I will do differently when I make it again.  First, I used whole coriander but will definitely use ground next time.  Biting into the occasional coriander seed was an intense, unpleasant experience for me.  If you love coriander feel free to use whole seeds, but I think spreading the flavor more evenly by using ground would be more enjoyable. broc-3 Second, the tofu needs to go in the oven first.  I put the tofu and broccoli in at 425* together, and the broccoli was done well before the tofu.  To speed things up I wound up removing the tofu from the oven and quickly pan-frying it, but I think it  would be really good roasted.  I've specified in the recipe below to put the tofu in first and roast it until golden brown on one side before flipping it and adding the broccoli for the last 20 minutes. broc-6 Roasted Broccoli with Glazed Tofu inspired by the wednesday chef, via orangette serves 2, with a portion leftover for lunch the next day Ingredients:
    • 2 pounds broccoli, cut into bite-size florets
    • 4 tablespoons extra virgin olive oil, divided
    • 1 teaspoon whole coriander seeds (or 1/2 teaspoon ground...i'll use ground next time)
    • 1 teaspoon whole cumin seeds (or 1/2 teaspoon ground...i used ground)
    • 1 1/2 teaspoons kosher salt, divided
    • 1 teaspoon freshly ground black pepper, divided
    • 1/8 teaspoon hot chili powder
    • 12 oz firm tofu
    • 1 1/4 teaspoons lemon zest (from 1 large lemon)
    • 1 tbsp honey
    • lemon wedges, for serving
    Method:
    1. Preheat oven to 425 degrees.
    2. Slice tofu into eight 1/2" slices, then slice again on the diagonal to make 16 pieces total.  Place on paper towels and press for 10 minutes.
    3. In a large bowl, toss broccoli with 2 tablespoons oil, coriander, cumin, 1 teaspoon salt, 1/2 teaspoon pepper and chili powder. In a separate bowl combine remaining 2 tablespoons oil, lemon zest, honey, remaining 1/2 teaspoon salt and remaining 1/2 teaspoon pepper, and whisk together.
    4. Individually rub each piece of tofu with the oil/lemon/honey mixture.  Place on a baking sheet and bake until top is golden brown.  Pull baking sheet from oven and flip tofu.  Add broccoli to baking sheet, spreading in a single layer.  Put pan back in oven and roast for 10 additional minutes.  Stir broccoli and roast for another 10 minutes.
    5. Serve over rice, with fresh-squeezed lemon juice.
    broc-4 A few notes: First, my cousin Kelly (Meghann's sister) was in a scary accident this evening while riding her bike.  Thankfully she was wearing a helmet and is going to be ok.  I'll let Meghann give us details if she wishes, but I do want to stress how important it is to wear a helmet.  Kelly's may very well have saved her life. Second, I'm going to make bella terra posts a regular occurrence, to share with you all the happenings in the garden and recipes to go along with harvests. I don't yet know the frequency, but I hope that by this summer they will be weekly.  I'd love any feedback you have or suggestions for content.  What would you like to see? Third, thank you all for your continued support!  I'm so pleased with the feedback I've received regarding the new format and am so happy that you all seem to be open to whatever direction I go.  I will say that I've enjoyed my week of recipe-based posts and would like to continue with them, although I wouldn't be surprised if a food diary post pops up every once in awhile.  I just can't help but to take pictures of my daily food, and I still have overwhelming urges to share them with you.  So I think that I'm not going to set any rules, not limit the blog in any way.  I'm going to let the day and life and food inspire me and see where it goes, and I hope you'll all continue to follow. I welcome all constructive feedback and would love to hear more from you.  Have a great Monday!  :)
    Read More