Contact Us

Use the form on the right to contact us.

You can edit the text in this area, and change where the contact form on the right submits to, by entering edit mode using the modes on the bottom right. 


123 Street Avenue, City Town, 99999

(123) 555-6789

email@address.com


You can set your address, phone number, email and site description in the settings tab.
Link to read me page with more information.

Blog

tall, dark, handsome and dreamy

Andrea

March is a month full of birthdays, a month for celebrating family and friends.  Twelve family members and good friends, to be exact.  It seems that every other day Brian and I are passing a card between us, signing our names and licking an envelope, sending our best wishes and good cheer zipping across the country to loved ones. Each of these special days surely contributes to my attachment to this third month of the year, with so many excuses to reach out and connect with people we don’t see or talk to nearly enough.

It is a part of the start of Spring, the phone calls and cards and Facebook messages, a routine as comfortable and happy as the emergence of lemon-hued daffodils and the pop of blushing cherry blossoms.  We send wishes for a year better than the last, marvel at the changes that have come in just twelve months' time.  Across the line there are promises to visit, promises to talk more, promises to write often. The phone disconnects and we return to our routines, our hearts a little more full with the knowledge that we are better for knowing that other person, for being able to share another year with them even if from a distance.

I’ve come to think of March as the beginning of the new year, with all of its fresh growth and rekindled promises to keep in better touch, rather than the dreary gray and reclusive hibernation that is typical of January.  I find myself with renewed motivation, making plans while seeking spontaneity, striving to keep up with the ever-changing state of the surrounding environment. Each new clump of tiny chartreuse leaves, each cotton ball puff of Bradford Pear blossoms is a reminder of time's quick passage, a kick in the backside that jolts the gears in my head to life, prompts me to take action on the ideas swirling through my brain.

I realize that these feelings come in part because Brian and I each celebrate our birthdays in March, his falling on the 2nd and mine on the 29th. We can’t help but to reflect on years passed as yet another draws to a close, setting goals for the coming weeks or in our case, the next two years before we hit the big Three-Oh.  Three.  Oh.  Wow.
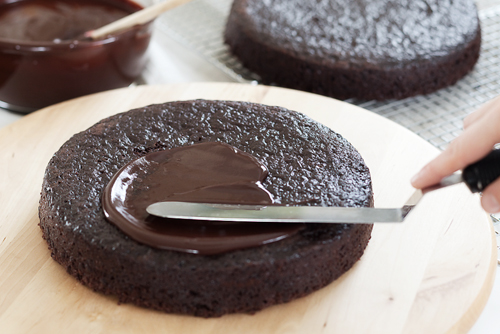
We've started a ‘thirty before thirty’ list, although I don’t think either of us has finalized the catalog of things we’re set to accomplish. A lot can happen in two years’ time, and I’ve come to terms with the reality that is a sliding scale of goals, an evolving list of priorities. The point is to think about it, to make an effort towards trying new things, towards bettering and challenging ourselves in the smallest or biggest of ways.
One of the ways I am seeking to improve upon what is already a lovely life is to increase the connections we have with distant friends and family beyond the every-few-months phone calls. I want to follow through on the March promises, pick up the phone more frequently to catch up with those we hold dear.  This is a goal I'm not willing to let slide, a priority at the top of my list as I embark on my 29th year.  Phone calls to loved ones.  Often.

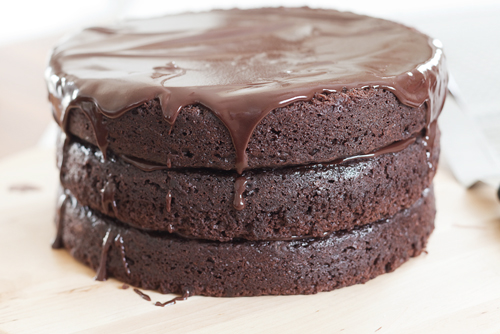
And, if I had my way, along with those phone calls there would be more cake.  Shared on actual birthdays.  We'd sit across from each other at my dining table, forks in hand, three-layer pillar between us.  There would be wine and coffee, stories and laughter, a vase of Spring flowers in the corner.  It would be so simple if only I could convince each person we love to move to Virginia, to live within a few hours of Charlottesville. Perhaps a task for the 'forty before forty' list...
This cake I'm sharing today was made for Brian, on his 28th birthday, just 3 weeks ago.  It is the same chocolate cake that I baked for him last year, which was the first from-scratch cake I'd ever made.  When I asked Brian what I should make for his birthday this year he requested the same chocolate cake, and left the frosting and adornment up to me.

The praline was a good choice, the crunchy texture a nice contrast to the dense, moist crumb of the cake and the creamy, stick-to-your-tongue ganache.  The whole ensemble is tall, dark, handsome and dreamy, just like my Hubb.

Happy 29th year, my love.  I feel certain it will be a good one.

I said it last year and I'll say it again, this is the best chocolate cake recipe.  Ever.

Double Chocolate Cake with Praline Topping

Makes 12-14 servings. Cake recipe from Epicurious, praline recipe from Bon Appetit Ingredients for cake layers:
  • 3 ounces fine-quality semisweet chocolate such as Callebaut
  • 1 1/2 cups hot brewed coffee
  • 3 cups sugar
  • 2 1/2 cups all-purpose flour
  • 1 1/2 cups unsweetened cocoa powder (not Dutch process)
  • 2 teaspoons baking soda
  • 3/4 teaspoon baking powder
  • 1 1/4 teaspoons salt
  • 3 large eggs
  • 3/4 cup vegetable oil
  • 1 1/2 cups well-shaken buttermilk (for dairy free variation: mix 1 1/2 cups soymilk with 1 tablespoon cider vinegar and set aside to curdle)
  • 3/4 teaspoon vanilla
for ganache:
  • 1 pound fine-quality semisweet chocolate such as Callebaut
  • 1 cup heavy cream (or soy creamer)
  • 2 tablespoons sugar
  • 2 tablespoons light corn syrup
  • 1/2 stick (1/4 cup) unsalted butter (or margarine)
for praline topping:
  • 3/4 cup (packed) dark brown sugar
  • 1/4 cup heavy whipping cream
  • 3 tbsp unsalted butter
  • 3/4 cup powdered sugar
  • 1 tsp vanilla extract
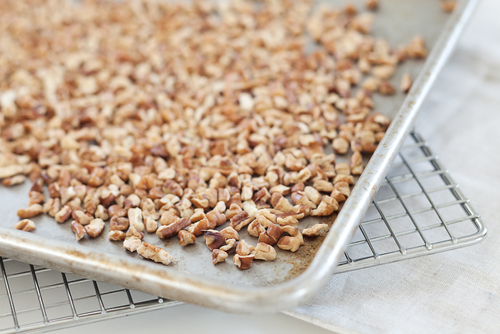
  • 1 cup pecans, toasted, chopped
Method make cake layers:
  1. Preheat oven to 300* F and grease two 10″ cake pans, or three 8″ or 9″. Line bottoms with rounds of wax paper and grease paper.
  2. Finely chop chocolate and in a bowl combine with hot coffee. Let mixture stand, stirring occasionally, until chocolate is melted and mixture is smooth.
  3. Into a large bowl sift together sugar, flour, cocoa powder, baking soda, baking powder, and salt. In another large bowl with an electric mixer beat eggs until thickened slightly and lemon colored (about 3 minutes with a standing mixer or 5 minutes with a hand-held mixer). Slowly add oil, buttermilk, vanilla, and melted chocolate mixture to eggs, beating until combined well. Add sugar mixture and beat on medium speed until just combined well.
  4. Divide batter between pans (pans should only be half full – if you use 8″ pans you will have some batter leftover) and bake in middle of oven until a tester inserted in center comes out clean, 1 hour to 1 hour and 10 minutes for 10″ pans, 50 minutes for 8″-9″ pans.
  5. Cool layers completely in pans on racks. Run a thin knife around edges of pans and invert layers onto racks. Carefully remove wax paper and cool layers completely. Cake layers may be made 1 day ahead and kept, wrapped well in plastic wrap, at room temperature.
make ganache:
  1. Finely chop chocolate. In a 1 1/2- to 2-quart saucepan bring cream, sugar, and corn syrup to a boil over moderately low heat, whisking until sugar is dissolved. Remove pan from heat and add chocolate, whisking until chocolate is melted. Cut butter into pieces and add to frosting, whisking until smooth.
  2. Transfer frosting to a bowl and cool, stirring occasionally, until spreadable (depending on chocolate used, it may be necessary to chill frosting to spreadable consistency). I found that stirring this over a bowl of ice water did a great job of cooling it off quickly and evenly.
assemble cake:
  1. Use a serrated knife to cut off domes of cakes if needed (mine came out perfectly flat, so there was no need to take a knife to them).
  2. Place first layer on the plate you'd like to keep the cake on.  Spread a layer of ganache across the top of that layer, about 1/8-inch thick. Place the second layer on top of the first, and spread ganache on top of it.  Place the third layer on top of the second, and cover the sides and top of the cake with ganache.
make praline:
  1. Stir first 3 ingredients in a large, heavy sauce pan over medium-high heat until butter melts.  Boil 1 minute without stirring.
  2. Remove pan from heat, whisk in sugar and vanilla.
  3. Add pecans, stir just to incorporate.
  4. Pour praline over top of cake and spread to edges, working quickly to get even coverage before praline sets.
Cake will keep stored in an airtight container at room temperature for 3-5 days (and will stay incredibly moist, too!)
Read More

on a whim

Andrea

As Spring quickly approaches, I’m finding that the evening meal has become a very relaxed affair. With daylight extending itself to an hour that allows for chatting with a glass of wine on the back deck after work, thoughts of dinner don’t start to cross the mind until the sun dips behind the trees and the temperature drops to a point that requires either a move inside or the addition of a lightweight sweater. It is only then that we notice the clock (and our bellies!) telling us that it is past 7pm, and time to pull something together in the kitchen.

I haven’t been planning our meals very far in advance, something that is unusual to my character. Typically our weekly menu is fully laid out by Saturday afternoon, neatly written in bright-white across our pantry doors coated with black chalkboard paint. I consider the menu carefully before finalizing my grocery list, receiving feedback from Brian and swapping days according to the longevity of ingredients to be purchased. The planned meals may vary slightly after Sunday’s trip to the store, when I discover that there are perfect golden beets that I hadn’t counted on calling my name, or that red cabbage has been particularly popular lately, and therefore its typical spot in the produce department is empty save for one sad, wilted purple leaf.

Lately our trips to the grocery have been more rushed than usual, the product of two very busy schedules finding only slivers of overlap in which to make the drive to and wander the aisles of the market. Oftentimes we wind up stopping in on our way to or from other errands, on days not typically designated as ‘grocery days’, leaving me standing in the middle of the produce department, overwhelmed and without a list. And so we rely on stand-by ingredients, items we purchase most weeks religiously, and add in whatever else looks or sounds good at that moment. I quickly assemble meals in my head, substituting ingredients in and out of pastas and soups, making sure that we’ll be able to use whatever we purchase and not be left with a bag full of yellow brussels sprouts at the end of the week. It still happens occasionally, but at least I try.

Which brings me back to the weeknight, post-7pm. Brian and I stand in our kitchen, him ravenous and me a little chilly, peering into the pantry and refrigerator, pulling out ingredients to assemble a spontaneous meal together. Our preferences are changing with the season, moving from heavy and hearty to light and bright.  'Quick' is a new requirement now that we’re getting started on preparation later in the evening, and 'warm' still plays a role for me after having been outside, barefoot and sweater-less, after the sun has set. The results have been fantastic; pasta tossed with leftover chicken, local ham and a light parmesan broth; a mélange of roasted chickpeas, potatoes and brussels sprouts; an on-a-whim creamy soup of potatoes, parsnips and asparagus.

The best part has been creating these recipes, together, according to our own at-that-moment preferences rather than the recommendations of a book, magazine or blog.  It is easy, when I have a plan, to lose myself in the kitchen to the preparation of dinner, excusing Brian to take care of one of the many items on his ever-growing ‘to do’ list. But when there is no plan, and the task is to create quickly, we come at it from both sides, each tossing in our own suggestions to make a dish that is so much more than the sum of its parts.

I’ll admit that this egg drop soup is a recipe that has been in our repertoire for years, but it is so simple and satisfying, and we nearly always have its ingredients in our kitchen, that it is perfect for a spontaneous lunch or dinner.  It is not enough on its own, which lead to the creation of the vegetable fried rice variation below, on a whim.

Egg Drop Soup

serves 2 Ingredients
  • 4 cups chicken or vegetable broth, divided
  • chunk of fresh ginger root, 1/4-inch thick by 1-inch diameter
  • 2 tbsp chopped fresh scallions
  • ¼ tsp salt
  • 4 tsp cornstarch
  • 2 eggs
  • 1 egg yolk
Method
  1. Reserve 3/4 cup of the broth, and pour the rest into a large saucepan. Add the salt, ginger and scallions, and bring to a rolling boil.
  2. In a cup or small bowl, stir together the remaining broth and the cornstarch until smooth. Set aside.
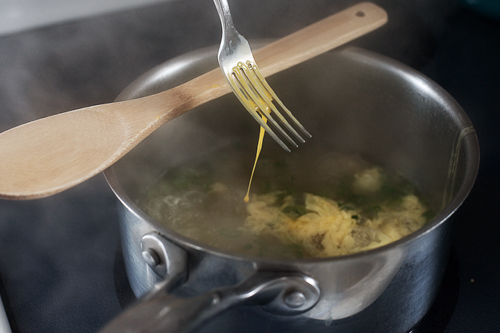
  3. In a small bowl, whisk the eggs and egg yolk together using a fork. Drizzle the egg a little at a time from the fork into the boiling broth mixture. The egg should cook immediately.
  4. Once all of the egg has been dropped, stir in the cornstarch mixture gradually until the soup is the desired consistency.

This dish was nearly spontaneous, the only forethought being that I made extra brown rice a few days prior, so that it would be ready and waiting in the fridge for some version of fried rice that had yet to be determined.  It just so happened that the night we decided to make egg drop soup was also the night that the leeks were starting to look a little haggard, and I wanted to use the brussels sprouts before they reached that same state.  Thus, a new star was born.

Fried Rice with Leeks and Brussels Sprouts

serves 6 Ingredients
  • 2 tbsp peanut oil, divided
  • 2 medium leeks, sliced thinly
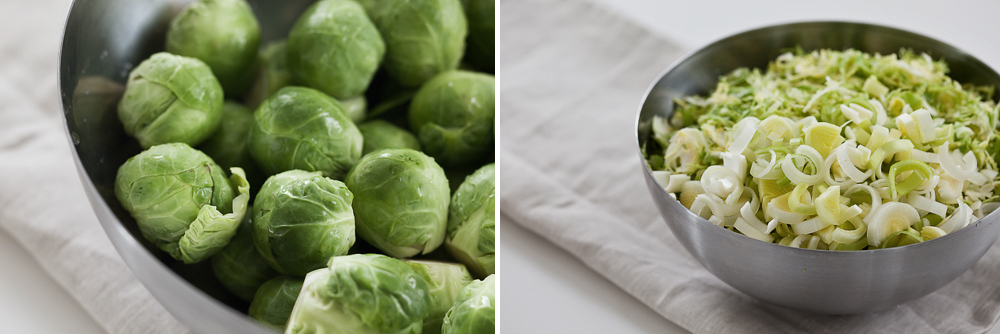
  • 1 pound brussels sprouts, ragged outer leaves removed, sliced thinly (a food processor is a wonderful tool for this task)
  • 4 large eggs, lightly beaten
  • 4 cups steamed brown rice, cold (ideally, leftover from the night before)
  • sea salt and pepper to taste
Method
  1. Heat 1 tbsp of oil in a large nonstick skillet over medium-high heat.  Add the sliced leeks and brussels sprouts, and saute' until tender and bright green, about 5 minutes.  Remove from pan and set aside.
  2. Wipe skillet clean, then heat over high heat, until a drop of water vaporizes upon impact.  Add the remaining 1 tbsp peanut oil, swirling to coat pan evenly, and heat until just starting to smoke.  Add eggs, tilting pan and swirling eggs to form a thin, even layer, and cook for 30 seconds.  Add rice and stir-fry, breaking up eggs and letting rice rest several seconds between stirs, until rice is hot, about 2-3 minutes.
  3. Add the brussels sprouts and leeks, stir-frying to combine and heat through.  Add salt and pepper to taste.
Read More

ready and waiting

Andrea

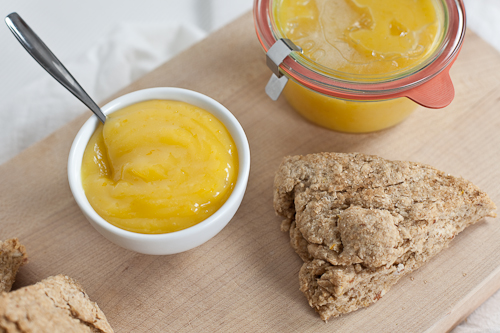
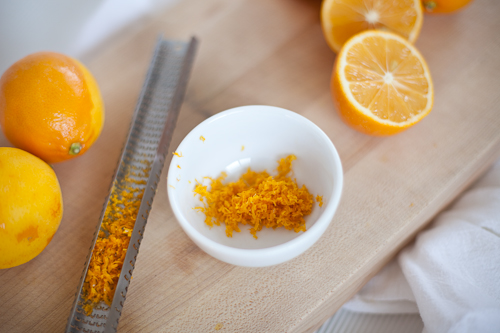
Many weeks ago, around the time of our last snowfall, I made a batch of bright, happy lemon curd. It was a chilly evening, but the sky was a lovely shade of blue dappled with streaky silver clouds, and the setting sun shone through the windows of our house at just the right angle. On our table sat a bowl full of Meyer lemons, so vibrant in color that they were closer to the shade of a tangerine than the typical pale, lemony yellow. Snow was forecast for the coming days, but it didn’t seem possible when you looked across the room at those orange globes streaked with the sun’s last rays.

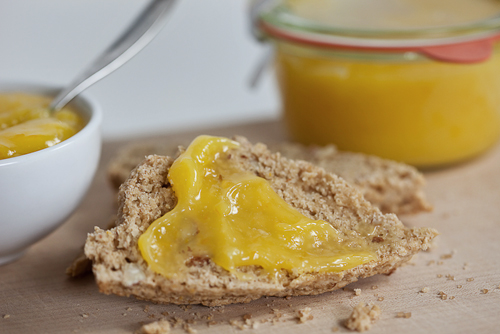
The lemon curd was an effort to preserve some of that sunshine, to bottle it up and stash it away on a shelf in our fridge, ready and waiting for the gloomiest of days. 36 hours later, the snow started to fall...and fall and fall. Plump, wet flakes spiraling quickly and quietly from an endlessly gray sky, eventually coating the ground with a heavy, 15-inch blanket of white. After a quick run to the store for groceries and some DVDs, Brian and I settled in for the storm. Out came the lemon curd, with all of its promise of warmer days, ready to spread over almond scones just pulled from the oven. It continued to make appearances over the next week, on all manner of baked goods and even swirled into a bit of Greek yogurt, topped with thawed blackberries leftover from last Summer’s harvest.

Recently, we've had a few rainy, gray days here in Charlottesville.  I haven't minded so much, really. The constant thrum of tiny drops hitting metal gutters has been quite soothing, and the misty air feels nice on skin dried from over-usage of our heater these last few months.  The temperature has been fairly warm with highs in the 50's, leaving me thankful that it's been rain falling from the sky rather than sleet or snow.  I can handle slipping on boots and a light waterproof jacket to dash outside to the car, rather than boots and coat and scarf and hat and gloves.  That gets a little old.

I did find myself craving sunshine yesterday afternoon though, and for some reason convinced myself that there must be some of this lemon curd still stashed away at the back of the refrigerator. After much rummaging and removing and rearranging I disappointedly concluded that, in fact, there was no remaining curd to be found. It was a silly thought, anyway, because any that was left would surely have been spoiled after weeks in a forgotten corner of the fridge. But still, I really, really wanted this curd.

And so I jumped onto Bella Eats to track down the recipe, going back through the last few weeks of posts to find the one where I’d shared it with you. And I realized, I never did! How silly of me, when Meyer lemons have been at their peak, when their deep golden flesh calls to you from across the produce department, begging you to take them home so that they can grace your fruit bowl with their beauty. Not that you need an excuse to purchase them, but if you’re looking for one, this is it.

Now go, hurry to the store, buy a bag of plump Meyer lemons before they disappear until next Winter, and make a pot of this lemon curd. We’ve got rainy Spring days ahead, and everybody can use a little sunshine in their fridge.

Lemon Curd

from Gourmet, December 2003 Ingredients
  • 3/4 cup fresh lemon juice
  • 1 tbsp finely grated fresh lemon zest
  • 3/4 cup granulated sugar
  • 1 stick (1/2 cup) unsalted butter, cut into bits
  • 2 tbsp cornstarch
  • 1/2 tsp salt
  • 4 large egg yolks
Method
  1. Simmer lemon juice, zest, sugar, butter, cornstarch and salt in a 2-quart heavy saucepan over moderately high heat, whisking constantly for 1 minute.
  2. Lightly beat eggs in a small bowl, then add 1/4 cup of lemon mixture, whisking constantly.  Add yolk mixture to remaining lemon mixture on stovetop, then reduce heat to low and cook, whisking constantly, until curd is thick enough to hold marks of whisk, about 2 minutes.
  3. Transfer to a bowl and cover surface with plastic wrap.  Chill.

The almond scones weren't quite right yet, so I'll share the recipe once I've tweaked it a bit more.  In the meantime, if you're craving scones, these citrus scones with cranberries and ginger are quite delicious this time of year...

Read More

the clearest route

Andrea

Why, hello March! How sneaky of you, creeping up behind me quickly and quietly, propelling past February’s tail just outside of my peripheral vision. It was nice of you to bring gifts - warm, sunshine-filled afternoons set against a bright, sapphire sky.

Walking through the park on Thursday, I noticed that beds are filled with the lime green leaves of young daffodils, and the tiny bell-shaped snowdrops are in full bloom. I even unbuttoned my coat, let it drape open to expose my sweater-clad chest, loosening the protective shell I’ve encased my body in for months.

Friday morning I glanced out my kitchen window and a bright spot of yellow caught my eye. Crocuses(!), peeking out from underneath a layer of leaves and mulch.

And yesterday, out taking care of errands with Brian, wandering in and out of shops, I had to dig my sunglasses out from their hiding place in our car. Oh Ray-Bans, how I’ve missed you!

As I write this, there is bright southern light streaming through the back door of my kitchen, the pattern of the glass casting a gridded shadow across the floor. And the window right over the sink, open as wide as it will go, grants permission to the cool breeze to filter through, picking up the scent of banana bread before moving on to the rest of the house. So motivating, the near-Spring feel of the space is calling to me, luring me to the pantry to gather ingredients for my next project.

I am constantly amazed at the affect that weather has on moods, on preferences, on behavior.

I am inspired to cook again, to browse my books and magazines in search of the perfect use for the local spring produce arriving any week now. Arugula and swiss chard, broccoli and kale. Green, green and more green.

The need to see something grow, to cover my hands with soil and coax tiny seeds to life, is overwhelming. The desire to walk out my back door with clippers in hand, returning with arms full of fresh produce, is palpable. Soon, so very soon.

Oh, and we've been talking about moving. Wanting to start over on a new (old) house, to tackle different renovation projects and to pick out brighter paint colors. I am addicted to our local real estate site, checking my email for new listings first thing each morning.

And then there's photography, which I've been practicing regularly. Photographs of people and flowers and jewelry and food are popping up on my newly established Flickr page. It seems that inspiration is everywhere, and I am desperate to capture it all.

It's a very nice change, this desire to invent, to create, to produce in place of the urge to sit still with a mind devoid of motivation. I credit the Spring-ish weather, feeling as if I am emerging from hibernation, stretching my legs and taking confident strides towards goals set with the new year. Some personal, some professional. Some big, some small. All important.

At any given moment my mind is flickering between half a dozen thoughts, trying to decide which to settle on and move forward with.  I am often overwhelmed, the trails in front of me not entirely clear and me standing at the head of them with my shoes laced up, ready to go but not sure of which to choose.

But when the kitchen is an option, it is undoubtably the route that I embark on.  Always the clearest, with a succinct set of instructions to accompany me, the outcomes are mostly joyous. Even if I get lost. And then there's that southern light, and the crisp breeze, and the possibility of banana-scented air.  Who can say no to that?

And so, in this time of overwhelming possibility I’ve busied myself with baking, covering my hands (and face, and hair, and thighs) with flour, watching cakes and cookies rise to gentle domes through the oven door. I enjoy the satisfaction of this productivity, of harnessing some of the energy emanating from the Earth as it prepares for this next season, directing it towards bowls of sifted sugar and flour, creamed butter and silky eggs. As my hands work to chop walnuts and mash bananas my mind is able to wander, to slowly wrap itself around all those other thoughts, to sort through and file them away for a different time when the sun isn't shining through the window quite so perfectly.

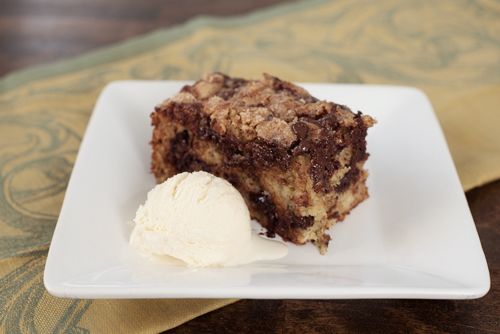
This cake, while not the prettiest kid on the block, certainly has the possibility of being the most popular with its stellar personality. So dense, so moist, the banana-scented crumb is perfectly balanced with dark chocolate and toasty walnuts. I brought it in to share with my office, a group notoriously hesitant about sweets, and it was polished off within a day.  That says something, something very good, I assure you.

banana cake with dark chocolate and walnuts

from gourmet, february 2008 serves 8-10 Ingredients
  • 2-1/4 cups all-purpose flour
  • 1 tsp baking soda
  • 1/2 tsp salt
  • 1 stick unsalted butter, softened, plus 2 tbsp, melted and cooled
  • 1 cup sugar, divided
  • 2 large eggs
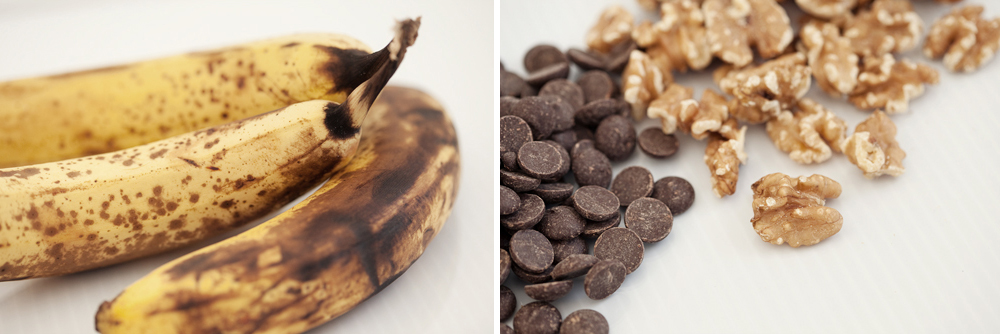
  • 1-1/4 cups mashed very ripe bananas (about 3 medium)
  • 2/3 cup fat-free, vanilla, greek yogurt
  • 1 tsp vanilla extract
  • 1 (3-1/2 to 4-ounce) bar bittersweet chocolate, or 1 cup bittersweet chocolate chips
  • 1 cup walnuts, toasted, cooled and coarsely chopped
  • 1/2 tsp cinnamon
Method
  1. Preheat oven to 375* with rack in middle.  Butter a 9-inch square cake pan.
  2. Stir together flour, baking soda and salt.
  3. Beat together softened butter (1 stick) and 3/4 cup sugar in a medium bowl with an electric mixer at medium speed until pale and fluffy.  Beat in eggs one at a time until blended. Beat in bananas, yogurt and vanilla (mixture will look curdled).
  4. With mixer at low speed, add flour mixture and blend until just incorporated.
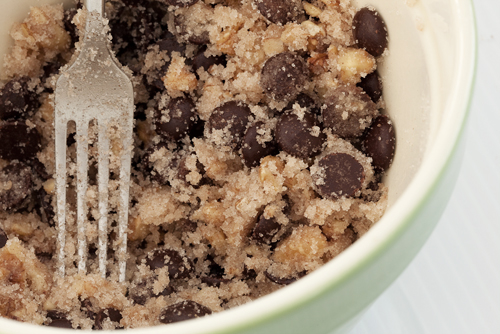
  5. Toss together chocolate, nuts, cinnamon, melted butter and remaining 1/4 cup sugar in a small bowl.  Spread half of banana batter in cake pan and sprinkle with half of chocolate mixture.  Spread remaining batter evenly over filling and sprinkle remaining chocolate mixture on top.
  6. Bake until cake is golden and a wooden pick inserted in center of cake comes out clean, 35-40 minutes.  Cool cake completely before cutting.

retail relay

Charlottesville folks, have you heard of Retail Relay?  I had my first experience with the company last week, and am so impressed by the service they are providing to local consumers and businesses.  It's a one-stop shopping experience for most of your favorite local food providers, at no additional cost to you.  Our order included items from Foods of all Nations, Feast, The Organic Butcher, Belle Haven Farm Bakery and Mona Lisa Pasta. I'll be doing a post about the experience soon, but wanted to extend a coupon code they've offered my readers as soon as possible.

**For $10 off your Retail Relay order of $50 or more, enter 'bellaeats' in the coupon bar on the online order form.**

Read More

winter's setting sun

Andrea

Winter and I have had a rocky go of it this year. We’ve waffled back and forth in a love / hate relationship that rivals the one I’ve currently got going on with my gym membership. On one hand, I’ve loved the quiet beauty a good snowstorm lays gently across my world and the resulting desire to cozy up on the couch with a hot cup of tea and a season of Entourage. On the other, I am tired of feeling stuck indoors, the outside ice, mud and frigid air enough to keep me hibernating under a quilt with the lights turned low. The result has been a bit too much cozying, and my motivation to cook, write, or log miles on the treadmill seems to be hiding in the same dark place as the sun. I am lost in the monotony of February, floating through scenes of white and gray, desperately seeking a reprieve in the form of a warm day, tiny chartreuse buds on the backyard Maple tree, fresh produce from local farmers that isn’t squash or cabbage.

There have been some brighter moments lately, a few shrieks of excitement released from my heart after witnessing the sun pierce a hazy layer of clouds, revealing a small patch of brilliant blue sky. I was thrilled to notice last week that two copper-toned birds have chosen to make a nest in the cold, drab ally outside my office window, and just this morning heard a woman excitedly discussing the yellow crocuses popping out from under a blanket of snow in her yard. All are sure signs of Spring’s impending arrival and moments I am desperate to capture permanently. Should snow fall again in the coming weeks I’d like to have a photograph stashed away in my back pocket to remind me that the end is near, that productivity will return with a sunshine-filled sky and baby birds chirping on the sill.

In the meantime, the meals I am managing to cook seem to have several similar qualities.  They are simple.  They are hearty and warm and filling.  They incorporate some ingredient that brightens the dish at multiple levels; to the eyes, to the nose, to the tongue. Whether it be golden citrus tossed in a salmon salad, vibrant leeks bobbing amongst emerald isles of kale, the scent of fresh lime wafting from my oven, each recipe is very carefully chosen to lift our spirits and carry us through these last (25!) days of Winter.

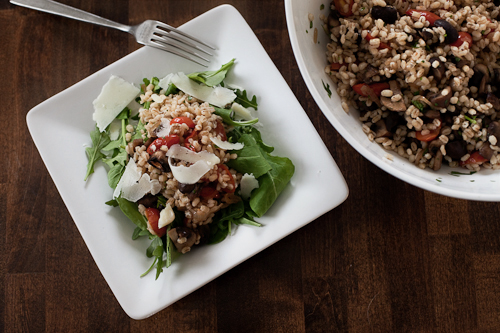
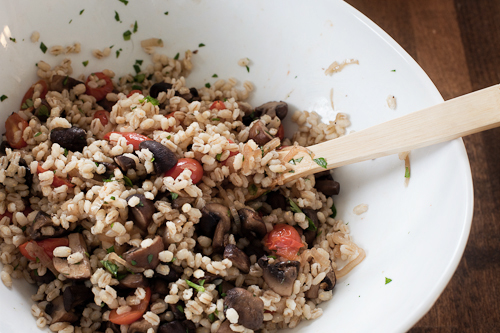
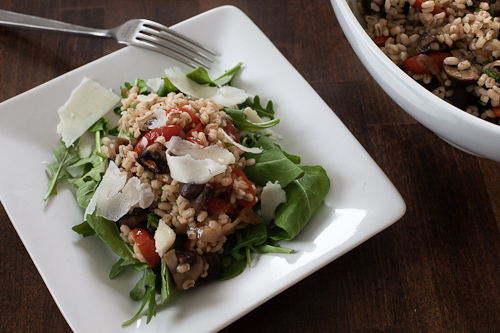
This salad is no exception to my new rules.  Hearty grains are joined by warm, earth-scented mushrooms to create a salad base as warm and satisfying as a family quilt enveloping shivering shoulders. Jewel-toned grape tomatoes and bright flecks of fresh parsley are the harbingers of this dish, reminders that Spring, followed closely by Summer, will be joining us soon. Served over a bed of spicy arugula and layered with shavings of Pecorino Toscano, this salad makes for a lovely, filling, early dinner, and is best enjoyed beside a window in the rays of Winter's setting sun.

Warm Barley Salad with Roasted Tomatoes and Mushrooms

adapted from A Year in a Vegetarian Kitchen by Jack Bishop serves 4 as a main course Ingredients
  • 1 pound cremini mushrooms, trimmed and quartered
  • 1 cup grape or cherry tomatoes, halved
  • 4 medium shallots, thinly sliced
  • 5 tbsp extra-virgin olive oil
  • salt and pepper
  • 1 quart water
  • 1-1/2 cups pearl barley
  • 1/4 cup minced fresh parsley
  • 6 cups packed baby arugula, spinach, or mix
  • 4 oz Pecorino Toscano, feta or goat cheese, diced or crumbled (I used a hard pecorino, shaved over the top of the salad)
Method
  1. Move an oven rack to the middle position and heat oven to 425*.
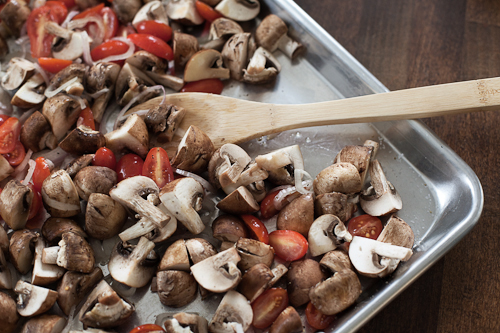
  2. Toss the mushrooms, tomatoes, shallots and 2 tbsp of the oil together on a rimmed baking sheet.  Season with salt and pepper to taste.  Toast the veggies, stirring once, until the mushrooms and shallots are browned nicely, about 25 minutes.  Let cool slightly.
  3. Meanwhile, bring water, barley and pinch of salt to a boil in a large saucepan.  Reduce the heat, cover and simmer gently, stirring occasionally, until the barley is tender but still a bit chewy, about 30 minutes.  Drain the barley well in a strainer and transfer to a large bowl.
  4. Toss the barley with the remaining 3 tbsp oil until coated evenly.  Add the roasted vegetables and parsley and toss to combine.  Cool slightly and then season with salt and pepper to taste.
  5. Divide the arugula or spinach among four large plates.  Spoon warm barley salad over each plate, sprinkle with cheese, and serve.
  6. Store barley salad separately from arugula or spinach and reheat for lunch the next day, if desired.
Read More

sugar on a cookie

Andrea

When I was a very young girl, I broke a little boy's heart on Valentine's Day. It is not a moment for which I am proud. In fact, like my Momma, guilt sticks with me as tightly as my own shadow, no matter how many years have passed since the event that forced the creation of those feelings and their permanent lodging in my gut.

And so I still think of that towheaded little boy who, on February 14th, 1988 gifted me a very special heart-shaped puzzle, red with tiny white and pink flowers, that professed his adoration of a very young, pigtailed Andrea. I was only five, and still believed whole-heartedly that little boys had highly-contagious cooties, passable even by touching the same paper card. Mortified, I clutched the present, not even pausing to whisper "thank you" to the shy child, and turned as quickly as I could to the girl at the neighboring cubby.

I thrust the puzzle in her direction, saying something along the lines of "he wants me to give this to you" and fled the scene as quickly as possible. Finding comfortable ground in a nearby gaggle of little girls, I turned back towards my cubby just in time to see the devastated look on a heartbroken freckled face. Oh, the guilt.

I received quite the lecture from my Momma that night, about feelings and how not to hurt those of others. I came to embrace Valentine's Day with its red and pink decorations, the elementary school parties with tiny cards displaying cartoon characters and the frosted cookies from our Room Mom. Future Valentines found a much more amiable object of their affections, one who said "thank you" after receiving a gift and who even sometimes had one to give in return. There were flowers and balloons and candy, hand-holding and blushes and shy middle school kisses.

The holiday intensified in high school, when suddenly having a boyfriend on February 14th was a very big deal. Girls would walk around all day with balloons from their beloved tied to their backpacks, a vase of flowers in their hands. I received gold jewelry from two sweet boys two separate years, and eagerly compared the baubles to those my girlfriends had received. Gold! In high school!

Valentine's Day was a competition, full of pressure to find a date, to go out for a fancy dinner, to give and receive gifts that displayed an accurate level of affection. Until I met Brian.

When you meet your One, the novelty of Valentine's Day wears off quickly. It's corny to say, I know, but Brian and I truly do strive to make all of our days together special, to write love notes and give gifts on days other than those we're "supposed" to. We have a comfortability that comes after years of marriage, and with the knowledge that we're each other's Only. There are no expectations of flowers and heart-shaped boxes of candy, no exchange of red lingerie for boxer shorts covered in tiny Cupids, no giddy phone calls to my girlfriends to compare our jewelry, no disappointment if none of the above happens. We simply enjoy spending the evening with each other. Anything extra is just icing on the cake, or sugar sprinkled on a cookie.

These are Brian's very favorite cookies, an old family recipe slipped to us by his Aunt Lynn. So soft and moist, they very nearly have the consistency of cake. The hint of nutmeg is the perfect amount, I urge you not to mess with it.

The dough is extremely sticky and troublesome to work with, so don't be afraid to use flour liberally as you roll it out.  If you'd like to decorate the cookies with icing when they are cool, I recommend Martha Stewart's Royal Icing, which, although tooth-achingly sweet, dries beautifully.

Sugar Cookies

from Aunt Lynn and Uncle Scott (thank you!) makes 3 dozen, 3-inch cookies Ingredients
  • 2 sticks unsalted butter (1 cup), room temperature
  • 2 cups sugar
  • 1 egg, beaten
  • 1/4 tsp salt
  • 1/4 tsp nutmeg
  • 1 tsp baking soda
  • 1 cup buttermilk
  • 1 tsp vanilla
  • 4-1/2 cups all-purpose flour
Method
  1. In a large mixing bowl, cream the butter and sugar until light and fluffy. Add beaten egg, salt and nutmeg and blend well.
  2. Mix together the baking soda and buttermilk in a small bowl until foamy thin. Add to the creamed mixture, along with the vanilla.
  3. Sift the flour into the creamed mixture and blend well.  Place plastic wrap in mixing bowl directly on top of the dough, and refrigerate overnight.
  4. The next day, preheat your oven to 375* and line two sheet pans with parchment paper.
  5. Remove 1/3 of the dough from the mixing bowl and place on a moderately-floured surface, leaving remaining 2/3 dough in refrigerator.  Roll to a heavy 1/4-inch thickness, liberally flouring the dough as you go to keep it from sticking to the rolling pin.  Cut quickly with cookie cutters of choice, moving cookies to sheet pans and spreading them about 2-inches apart. Sprinkle with sugar if you don't plan to ice them after baking.  Repeat with remaining dough.
  6. Bake for 10-12 minutes until cookies are just starting to turn golden at the edges.  Be careful not to over-bake them, as you want to maintain the soft interior texture.
  7. Let cookies cool on pan for 5 minutes before moving them to racks to cool completely. Store in airtight containers for up to one week (good luck keeping them around for that long...).
This recipe appeared on SuzySaid - Charlottesville this week, as part of my weekly recipe contribution.
Read More

a lovely ending

Andrea

Last week, while sharing lunch with a friend, standing in line at the post office, answering phones at work, passing a stranger on the sidewalk, Charlottesville folks were discussing snow. Big snow...at least for our little city. The forecasters were predicting another huge storm, rumored to rival the December 19th event that pushed its way into the #4 slot on Charlottesville’s list of historic snowfall totals. It was all very exciting, and a tad bit scary. We were warned of the heaviness of this snow, expected to be so much wetter than the last accumulation. We were told to prepare for power outages and potential roof collapse, to be ready to spend days in our homes and to have the supplies required to get us through that time.

The city was a flurry of activity (ahem...pun intended) as residents scrambled to buy stores out of their supply of milk, eggs, and toilet paper. Snow shovels were a hot commodity, with those shops that managed to receive shipments putting a one-shovel-per-customer limit on purchases. We bought ice melt and candles, bread and cans of tuna, charcoal for our grill and meat and potatoes to place over the flame should we lose power and the use of our oven. We settled in, prepared for the worst, ready to weather the storm.

In the end we wound up with nearly 15 inches of snow, 10 inches less than predicted after sleet clinked against our windows and prevented substantial accumulation for most of Friday night. We were lucky enough to lose power only once, and then for only an hour. Although the city did a fine job of clearing primary roads during and after the storm, we still chose to remain at home, warm and cozy, for the entire weekend.

Brian and I have become quite adept at preparing for long periods of isolation in our house. We stock up on the necessities already mentioned, along with certain items that help to keep us entertained and pass the time - wine, multiple disks of Entourage, magazines and books, baking supplies. The last is the most important for me, as I take comfort in the fact that even if the sky were to dump 48 inches of snow across our lawn and we were to lose power for 7 full days, I could still make bread and cookies in our Big Green Egg. Also, I really like to bake, and the thought of three, uninterrupted days to do so makes me very, very happy.

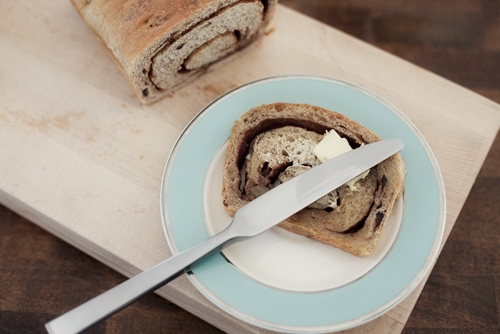
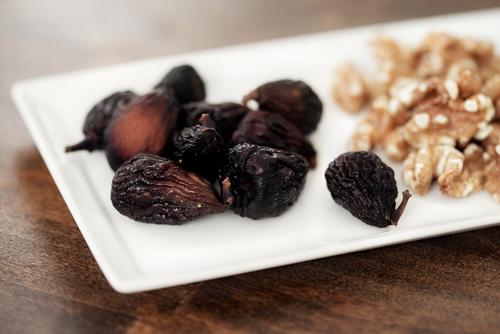
And so, along with the necessary non-perishables and paper goods, my grocery bags contained milk and eggs, flour and yeast as I left the market Thursday afternoon. I browsed through my cookbooks that evening, imagining each one of my mixing bowls tucked into various corners of the kitchen, plastic wrap stretched tight across their tops, plump balls of dough slowly rising within. Brian requested something sweet, a dessert-ish bread to smear soft butter across as an after-dinner snack. Not one to ever pass on the suggestion of something sweet, I dove right into thoughts of a bread swirled with cinnamon and sugar, laced with figs and walnuts, the crumb sweetened by a touch of honey.

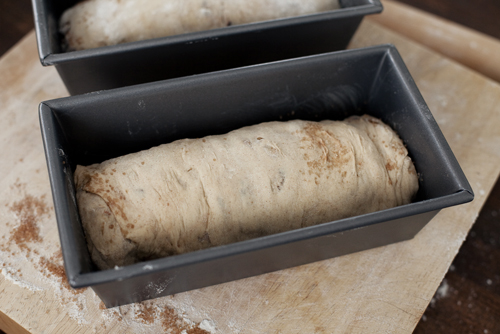
The loaf I was hoping for emerged from the oven just as the snow started to lighten Saturday evening. The intoxicating mélange of fresh-baked bread, sultry cinnamon, earthy walnuts and syrupy figs will forever bring to mind the vision of a silver-cloaked sun setting behind frosty trees, their limbs glimmering with a mask of tiny diamonds. A lovely ending, indeed.

Cinnamon Fig Walnut Bread

adapted from The Bread Baker's Apprentice, by Peter Reinhart, with inspiration from Tara of Seven Spoons

makes two 1-1/2 pound loaves

Ingredients

  • 1/2 cup buttermilk (or whole milk), at room temperature
  • 2 tbsp honey
  • 3-1/2 cups unbleached bread flour, plus extra
  • 1-1/4 tsp salt
  • 2 tsp instant yeast
  • 1-1/4 tsp ground cinnamon
  • 1 large egg, slightly beaten
  • 2 tbsp vegetable shortening, at room temperature
  • 3/4 cup water, at room temperature
  • 1 cup dried figs, chopped
  • 1 cup walnuts, chopped
  • 1/2 cup turbinado sugar (for cinnamon sugar swirl)
  • 2 tbsp ground cinnamon (for cinnamon sugar swirl)
  • 2 tbsp butter, melted
Method
  1. Dissolve the honey in the buttermilk by heating both over low heat.  Allow to cool to room temperature.
  2. Sift together the flour, salt, yeast and cinnamon in a large mixing bowl.  Add the egg, shortening, buttermilk mixture and water. Stir together with a large spoon (or mix on low speed in a stand mixer with the paddle attachment) until the ingredients come together and form a ball.  Adjust with flour and water if the dough seems too sticky or too dry and stiff.
  3. Sprinkle flour on a counter and transfer the dough to the counter.  Knead (or mix on medium speed with the dough hook).  The dough should be soft and pliable, tacky but not sticky.  Add flour as you knead (or mix), if necessary to achieve this texture. Knead by hand for approximately 10 minutes (or by machine for 6 to 8 minutes). Sprinkle in the figs and walnuts during the final 2 minutes of kneading (or mixing) to distribute them evenly. If you are kneading with a mixer, you'll want to finish kneading by hand to avoid crushing the figs and walnuts, and to be sure to distribute them evenly.
  4. Lightly oil a large bowl and transfer the dough to the bowl, rolling it to coat it with oil.  Cover the bowl with plastic wrap and allow to ferment at room temperature for approximately 2 hours, or until the dough doubles in size.
  5. Mix together the 1/2 cup turbinado sugar and 2 tbsp ground cinnamon.  Set aside.
  6. Butter two 4x8 loaf pans.
  7. Divide the dough into 2 equal pieces.  On a lightly floured surface, roll one piece into a 5x8 rectangle. Sprinkle half of the cinnamon sugar mixture over the dough, leaving a small border around the edge of the dough.
  8. Starting at the short end, carefully roll the dough into a tight log*, sealing the seam as best you can. Tuck the ends up towards the seam, sealing as best you can. Place the log in a buttered loaf pan, seam-side down. Repeat with the second piece of dough. Spray the tops of the loaves with spray oil and cover loosely with plastic wrap.  Place in a warm, draft-free location to proof for 60 to 90 minutes.
  9. Preheat the oven to 350* with the rack in the middle of the oven. Uncover the loaves and brush the tops with melted butter.  Sprinkle the tops with turbinado sugar.
  10. Bake the loaves for 20 minutes. Rotate the loaf pans 180 degrees and continue baking for another 20 to 30 minutes, until the loaves are golden brown on top and lightly golden on the sides and bottom. They should make a hollow sound when thumped on the bottom.
  11. Immediately remove the loaves from their pans and cool on a rack for at least an hour before slicing and serving.
*I'm guessing that my loaf pulled apart along the swirl because it wasn't rolled tightly enough. It is still perfectly textured and delicious, the slices just don't hold together well as you bite into them.

The landscape during and after a winter storm is an amazing sight, always changing, different from one minute to the next. Every few hours I piled on layers of warmth, tucked my jeans into my boots, forced a hat over unruly hair, and trudged outside in the swirling snow to capture some of the magic.

Read More

a backdrop of falling snow

Andrea

Last Saturday another ten inches of snow fell across Charlottesville, blanketing my city in delicate drifts of sparkling white. I awoke in the wee morning hours, just as soft gray light started to seep through the cracks between the blinds over the bedroom window. Aside from the soft snores of the dogs nestled at my feet, all was quiet. The typical sounds of tires meeting asphalt, wind rustling tree branches and birds chirping from their power line perch were nonexistent, lost in the insulation provided by a muffling snow.

I slid out of bed, thankful that I'd kept socks on my feet and wouldn't have to endure the cold hardwood floor against bare skin. Padding out to the kitchen I paused at a window to peek outside and was greeted with an idyllic view. Three inches of snow does wonders for an imperfect ground, provides each and every limb of surrounding trees with sugary peaks along their length, silences a high-trafficked road. I couldn't deny that I enjoyed this scene - my outside world painted white; bright and shiny and devoid of mud. I stood there, mesmerized by my transformed street and the plump flakes still spiraling down from a silver sky, and made up with Winter.

Finally, the promise of a cup of coffee and a long kitchen agenda were enough to pull me from my trance. To have an entire Saturday with no errands, no obligations, no sunshine-filled sky tempting me to leash up the dogs for a hike in the woods, seemed luxurious. Despite the snowflake-clogged air, the light pouring through our windows was clear and bright, the ground having become a natural reflector as I slept. My camera screamed at me to get started, to not waste a single, brilliant moment. I simmered and sauteed and baked and photographed all day, stopping every once in awhile to marvel at the still-falling snow that had gifted me this time.

This soup emerged with perfect timing, the kale softening just as Brian came in from shoveling our sidewalks and driveway. Hearty with potatoes and greens, flavored by bright leeks and spicy sausage, it promises to warm the coldest of bodies and satisfy the grayest of minds. You can't help but to be thankful for Winter as the thick broth slides down your throat, the heat of the sausage spreading from inside out, a sensation not necessarily welcome during the Summer months but oh so tasty against a backdrop of falling snow.

This soup is very easy to make, coming together in just 45 minutes. The hot Italian sausage is a key player, infusing the broth with wonderful flavor and heat.

Spicy Sausage, Potato and Kale Soup

serves 6 Ingredients
  • 2 large leeks, rinsed and sliced to 1/4-inch strips (about 3 cups total)
  • 2 cups diced onion
  • 3 large Russet potatoes, cut into 1-inch cubes (leave about 1/2 the skin on the potatoes)
  • 4 tbsp unsalted butter
  • 8 cups low-sodium chicken or vegetable broth
  • 1 pound of hot Italian sausage, removed from casings
  • 3 cups of chopped kale (stems removed)
  • 1/2 cup heavy cream
  • salt and pepper
Method
  1. Melt butter in large, heavy-bottomed saucepan over medium heat. Add leeks, onions and potatoes and stir to coat with butter.  Cover pot, reduce heat to low and let vegetables sweat for 15 minutes.
  2. Remove cover and add broth. Bring to a boil, then reduce heat to simmer.  Drop sausage in small chunks into soup.  Cover and let simmer for 20-25 minutes, until potatoes are fork-tender.
  3. Remove 2 cups of soup from pot, avoiding large chunks of sausage.  Puree those 2 cups in a blender until smooth.  Add back to soup pot and stir to incorporate evenly.  Add kale and cover pot, allowing to simmer for an additional 5 minutes.
  4. Remove cover and lower heat.  Add heavy cream and stir to incorporate.  Heat through, but don't let the soup simmer again or the cream will curdle a bit (as in my photos).
  5. Salt and pepper to taste.

This recipe, and Bella Eats,  made its debut on SuzySaid - Charlottesville on Monday. I have been asked to contribute a recipe each week to the site, and am so excited to be part of such a wonderful online resource for women in my city.  If you're from Charlottesville or the surrounding area, check out SuzySaid - Charlottesville for information on upcoming events and local businesses.  And tune in each Monday for a new recipe from Bella Eats!

Read More

a respite from gray skies

Andrea

Coconut and Lime.  A combination that brings to mind a stretch of white sand, bright hot sunshine, palm trees swaying in a warm ocean breeze, the scent of sunscreen permeating salty air.  From the vantage point of a low-seated, brightly-striped beach chair I can see the topaz water spread before me, a lovely backdrop for my fuchsia-coated toenails.  On my right a fruity cocktail with a lemon-hued umbrella waits patiently for my next sip.  In my lap rests a delightful book, set aside for a moment while I take in the view before me.

A tropical island.  Are you with me?  I hope so.  Pull up a chair, apply your sunscreen, grab a drink and settle in for a nice long chat.  We need this, don't we?  A respite from gray skies that threaten to pour ice and snow over grass that has just recently emerged from underneath the last snowfall.  An opportunity to replace bulky sweaters, scarves and overcoats with swimsuits, gauzy tops and sandals.  An excuse to make Mojitos and Margaritas instead of Hot Toddies and Irish Coffee.

If only I could escape to such a place.  Right now.  Just hours before the first few flakes of the impending snowstorm start to fall. Unfortunately, neither my bank account nor my work schedule can afford such a jaunt to the South at a moment's notice. Instead, I pushed my weekly grocery trip up by one day, stocking up tonight on items needed for a Saturday to be spent testing recipes as snow softly falls outside the kitchen window.

Rather than a polka-dot bikini and broad-rimmed hat I'll be shuffling around in slippered feet and comfy sweats.  On the agenda? Spicy sausage and potato soup, some sugar cookies, a chickpea salad.  All are good cold weather fare, but I can't help but think that maybe I should be thinking a little differently. That maybe I should be whipping up another pan of these Coconut Lime Bars that cured my Winter woes two weeks ago.

How does a tropically-themed dinner party in the middle of Winter sound?  That's not such a bad idea, is it?  We'd gather some friends, make a pan of enchiladas, a bright salad, some guacamole, and a tangy citrus dessert. We could pull the last few limes off of our little indoor tree (the only way citrus could possibly survive a winter in Virginia) and shake up some zippy margaritas.  I'll load the iPod with Jimmy Buffett and Bob Marley and turn the heat way up.  We'll chat about food and travel and books until the 'ritas kick in and folks start climbing on my dining table to belt out "one love...one heart...let's get togeeeeether and feel alllll right!" with their arm slung across their neighbors shoulder for support.  And nobody is allowed to mention the snow outside. Nobody.

Would you come?  I hope so.  These bars might just be worth your trip.

I made these gluten-free and dairy-free for a friend that shared them with us two weeks ago.  Feel free to substitute all-purpose flour and regular butter for my ingredients.

Coconut Lime Bars

adapted from Gourmet, January 1995 makes 9 bars For Crust
  • 3/4 cup plus 2 tbsp gluten-free all-purpose blend flour (or regular all-purpose flour)
  • 3/4 stick (6 tbsp) Earth Balance vegan butter (or regular unsalted butter)
  • 1/3 cup unsweetened flaked coconut, toasted and cooled
  • 1/4 cup confectioners' sugar
  • 1/4 tsp salt
For Custard
  • 4 large eggs
  • 1 cup granulated sugar
  • 1/3 cup gluten-free all-purpose flour (or regular all-purpose flour)
  • 1/2 cup plus 2 tbsp fresh lime juice (from about 5 limes)
  • 1 tbsp freshly-grated lime zest (from about 2 limes)
  • 1/3 cup unsweetened flaked coconut, toasted and cooled
Method
  1. Preheat oven to 325* and butter and flour an 8-inch square baking pan, knocking out excess flour.
  2. In a medium-sized bowl blend together flour, butter substitute, 1/3-cup coconut, confectioners' sugar and salt until mixture resembles coarse meal.  Pat mixture into prepared pan and bake in middle of oven for 25-30 minutes, or until golden brown.  Allow to cool for 10 minutes before pouring custard in.
  3. Reduce oven temperature to 300*.
  4. In a medium bowl whisk together eggs and granulated sugar until combined well.  Stir in flour, lime juice and zest.
  5. Pour mixture over crust and bake in middle of oven for 20-25 minutes until just the center of the custard is not set.  Top custard with 1/3 cup toasted coconut and bake for an additional 5-10 minutes until all of custard is just set.
  6. Cool in pan on rack for 1 hour, then chill in refrigerator for 1 hour before serving.
Read More

a bright spot

Andrea

Let me start by saying that I am completely smitten with the city in which Brian and I live.  Charlottesville wooed us from afar with her top-notch university, her small-town feel just two hours from Washington D.C., her close proximity to the Blue Ridge Mountains and dozens of Virginia wineries.  We were drawn in by the qualities of a city that look good on paper: the quaint downtown district, public parks, academic culture, good hospitals.  What we received in addition to those important qualities was greater than we could have ever imagined: a strong local food movement, an impressive number of independently-owned restaurants that have kept us out of Chili's, Friday's and the like for the last five years, a health-concious population that promotes dozens of foot races year-round, like-minded classmates, co-workers and farmers who have become incredible friends.  And, especially exciting for two Floridians who lived without them for the first 22 years of our lives, four distinct seasons.

Nobody could have prepared me for the magic that is October in Charlottesville, the golden light that flares through the brightly-colored leaves and the festivals that occur every weekend.  And then there's April, with her daffodils and tulips and cherry trees that resemble cotton candy attached to smooth, silvery bark. Late June brings the first of the summer vegetables to the farmer's market and the intoxicating, oh-so-sweet scent of wild multiflora rose to the air.  For eleven months of the year I sing the praises of this place, this gem of a city nestled into the shadow of the Blue Ridge, and am pleased to call Charlottesville my home.

But there are those other four weeks, the weeks that span the end of January and beginning of February, when the first snow of the year has melted and left the yard a muddy mess, when the cuteness of the six sweaters in my closet has worn off and I stare longingly at the bright, sleeveless tops meant for warmer months.  These are the days that I resent pulling socks on instead of strappy sandals, when I crave a glass of white wine while sitting in a sunbeam on the back deck, when I'd give anything to not have skin flaking from my too-dry face.  These are the days that I wish I were still a Floridian, with 70* winter days and a year-round farmer's market.

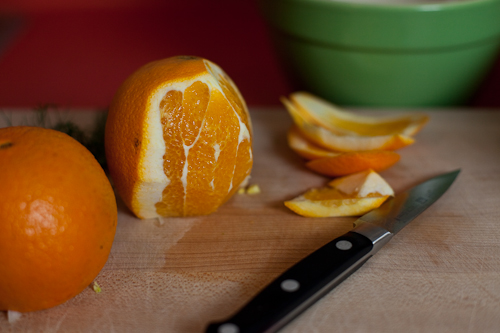
These are the days when citrus plays a prominent role in my diet, producing little sparks of Florida warmth with each juicy bite. Citrus fruit will get me through the worst days of winter, when the sky is gray and the air is moist and my boots make suction noises as I walk across my saturated front yard. There will be lemon cakes and orange juice-glazed tofu, citrus-flavored martinis and key lime pies. Clementines are tossed in my bag daily to be eaten as an afternoon snack, the draft leaking through my office window hardly noticeable as I savor each sunshine-filled wedge.

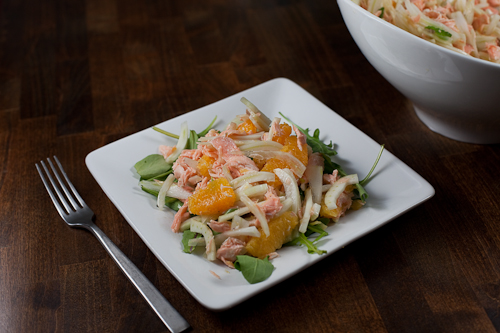
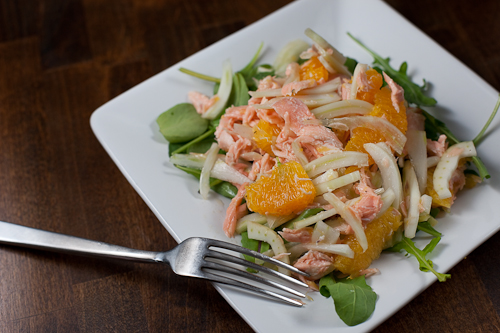
Also, there is this salad.  So light, so fresh, so summer, yet made with mostly seasonal ingredients.  It is a bright spot on the dreariest of winter days, sure to bring cheer and warmth to the coldest of winter nights.

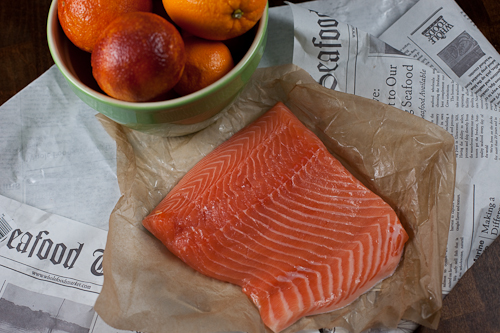
The fennel provides a delightful crunch, similar to a slaw, that serves as a nice contrast to the soft oranges and the salmon that nearly melts in your mouth.  Poaching the fish creates a mild flavor that is enhanced by the juice from the oranges and a hint of mint.

Salmon Salad with Fennel, Orange and Mint

from bon appetit, january 2010 serves 4 Ingredients
  • 1/4 cup sugar
  • 1/4 cup unseasoned rice vinegar
  • 2 whole star anise
  • 4 cups cold water
  • (1) 1-pound salmon fillet with skin
  • 2 navel oranges (I think 3 would be better...)
  • 4 cups very thinly sliced fennel (from 2 medium bulbs)
  • 1 cup small fresh mint leaves (I only used 1/4 cup, and it was plenty for us...)
  • 2 tbsp olive oil
  • 6 cups of arugula salad mix
Method
  1. In a large, deep skillet, combine water, sugar, vinegar and star anise.  Bring to a boil over high heat, stirring until sugar dissolves.  Add salmon filet, skin side up, to skillet.  Cover skillet and remove from heat.  Let stand 10 minutes.  Using slotted spoon, turn salmon over.  Cover and let stand until salmon is just opaque in center, 5 to 6 minutes longer.
  2. Remove salmon from liquid and cool.  Coarsely flake salmon into bowl, removing any bones and skin, and set aside.
  3. Cut top and bottom 1/4-inch off each orange.  Stand 1 orange on 1 flat end.  Using small sharp knife, cut off peel and white pith.  Working over large bowl, cut between membranes, releasing segments into bowl.  Repeat with remaining orange.
  4. Add salmon, fennel, mint and olive oil to bowl with oranges.  Gently toss to combine.  Season with salt and pepper.  Serve over bed of arugula.

Speaking of Florida, my good friend Jenn has started a new blog about fitness and running.  She's a doll, so energetic and positive, and is sure to bring an infectious spark to the healthy living blog world.  Check her out at Reason 2 Run, and take note of the helpful fitness facts that accompany each post.  She's a fitness professional, runner and balanced living enthusiast, and has a wealth of knowledge to share with us all.  Welcome, Jenn!

Read More

just can't help myself

Andrea

I have a bit of an issue with baked goods.  One might actually be more inclined to call my 'issue" a minor addiction, as my mind seems to focus on one track when I find myself in a room that also harbors some form of baked treat.  Like a moth to a flame I am drawn to whatever chocolate-y, vanilla-y, fruity, fluffy, cakey, crumbly goodness my eyes or nose pick out.  It takes an immense amount of willpower to resist the temptation of dessert no matter the time of day, and there are certain months of the year when what little willpower I have takes off on vacation and leaves me defenseless to the siren song of sweets.

Those months would be November and December, when it is nearly impossible to take ten steps without encountering a variety of cookie, cake or brownie that somebody is offering up. I brought the temptation upon myself even earlier last year, filling the month of October with various types of pie in preparation for the upcoming holidays.  I grew accustomed to dessert every night until finally, in the first week of the new year my practical self, the side of me that recognized that my pants were getting a little *ahem* snug in certain areas, intervened and told my over-indulgent self to lay off the 'goods.

Not one to jump on board with any overly restrictive, treats-prohibiting, quit-cold-turkey diets, I recognized the fact that I simply needed to find some healthier options to satiate my cravings for sweets rather than eliminating them from my life completely.  I browsed the archives of Bella Eats' leaner, more fitness-focused days and came across this recipe for banana date bread*, an old favorite and one that I'd nearly forgotten about.  In no time my kitchen smelled of baking banana and cinnamon as I pulled a loaf from the oven.  Spread with a bit of almond butter and paired with fresh fruit it served as breakfast for Brian and I several mornings in a row.

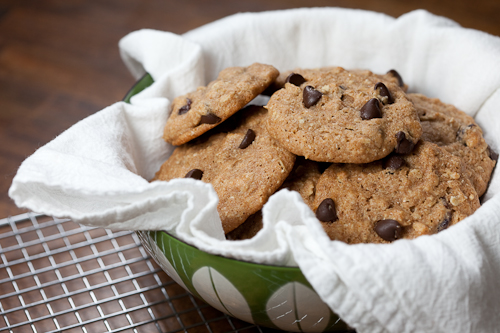
Inspired by my first healthy baking activity in months, I decided that afternoon to start experimenting with a new type of cookie. Or, rather, a granola bar masquerading as a cookie.  That was my hope, anyway, to create a cookie so chock-full of good-for-me ingredients like oat bran, rolled oats, dried fruit and whole grain flour, without the less desirable ingredients such as butter and refined sugar, that I'd be able to eat several of them for breakfast.  Or for a snack before my new workout routine.  Or right before I go to bed while I'm waiting for the dogs to come in from outside.  You get the idea.

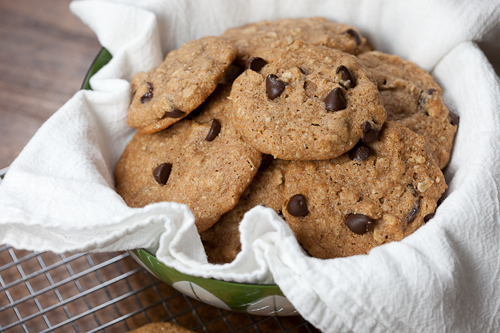
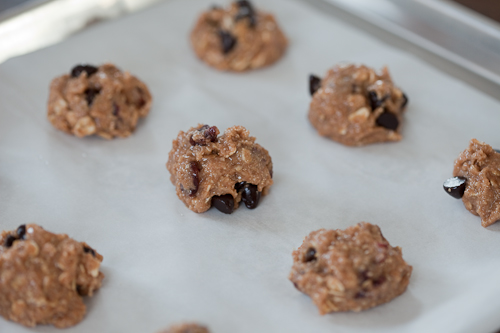
What resulted is a soft, chewy cookie that IS full of delicious and hearty ingredients, minus butter, refined sugar and even eggs. The whole grains provide a flavorful backdrop for the dried cherries and dark chocolate that punctuate each bite.  I made them three times within two weeks, tweaking the recipe until I was satisfied with the final result.  The photographs in this post are actually of the second batch - the final batch saw the addition of a bit more baking soda and the resulting cookies weren't as flat as those pictured below, so don't be surprised if yours look a little different.

In the end, I don't know that there is actually any caloric difference between these cookies and your standard variety.  But I can assure you that they are delicious, and any calorie savings I might have seen were made up for when I reached for another cookie. And another.  I just can't help myself. I've decided to start running again instead.

Chocolate Cherry Granola Cookies

(dairy free, egg free, naturally sweetened) adapted from Sweet & Natural Baking makes 20 cookies Ingredients
  • 1-3/4 cups spelt flour (if you can't find spelt flour, use white whole wheat flour instead and only 1 tsp of baking soda)
  • 1-1/2 tsp baking soda
  • 1/2 tsp cinnamon
  • 1/4 tsp salt
  • 1/4 cup oat bran
  • 1/2 cup rolled oats
  • 3/4 cup liquid fruit juice concentrate (I use FruitSweet, which I find at Whole Foods)**
  • 6 tbsp canola oil
  • 1-1/2 tsp vanilla
  • 1/2 cup semi-sweet chocolate chips
  • 1/2 cup unsweetened dried cherries
Method
  1. Position oven racks in center and top third of oven.  Preheat to 350*.  Line 2 large baking sheets with parchment paper.
  2. Sift the flour, baking soda, cinnamon and salt together in a large bowl.  Add the oat bran and rolled oats and whisk to combine.  Make a well in the center.
  3. Whisk the fruit juice concentrate, canola oil and vanilla together in another bowl.  Pour into the well and mix together with a wooden spoon.  Stir in the chocolate chips and the dried cherries.  Cover and refrigerate until firm enough to scoop, about 1 hour.
  4. Using about 3 tbsp dough per cookie, transfer the dough to the baking sheets and space 2-inches apart.  Bake the cookies until the edges are lightly browned and they feel firm in the center, 12-15 minutes.  Halfway through baking, switch the position of the baking sheets.  Cool the cookies for 2 minutes on the baking sheets, then transfer to a wire rack to cool completely.
* A note about that bread - I substituted  a 1/2-cup of fat-free vanilla greek yogurt for the applesauce and it was absolutely divine.  Try it! ** The third time I made these cookies I only had a 1/2-cup of FruitSweet left, so I substituted a 1/4-cup of pure maple syrup for the remaining sweetener.  It was delicious, and I loved the extra flavor added to the cookies.  If you can't find liquid fruit juice concentrate, I'd try substituting maple syrup for the full amount of sweetener.  Maybe leave out the vanilla though.  And then tell me how they turn out!
Read More

new to the rotation

Andrea

Sunday Morning.

Sunlight streams through our east-facing window.  The electric blanket has kept our bed toasty warm, too toasty for my fuzzy socked-feet sticking out from underneath our quilt.  Brian still sleeps quietly beside me, the dogs have nestled themselves into any nook or cranny on the bed they can find.  My eyes open, I stretch, and immediately start thinking about breakfast.

I've talked about my love for Sundays in the past - the one day of the week that we actually sleep in, make multiple pots of coffee to sip while laying around in our pajamas, read chapters upon chapters in our current books, experiment with some new and indulgent breakfast recipes in the kitchen.  I haven't shared any of these special morning meals lately because, well, basically every Sunday in December involved the panettone french toast that I already shared with you here. We love that dish in our house, and get our fill while panettone is readily available.

I count last Sunday as the first real Sunday of our new year.  The weekend before, the actual first Sunday, we had just said goodbye to house guests and, while we certainly laid around lazily for much of the day, there was no elaborate cooking happening in our kitchen.  It, and I, was just too tired.  But this past Sunday, after my self-imposed cooking hiatus, I woke up dreaming of stuffed French toast.

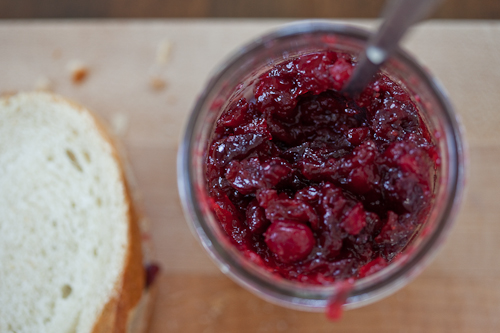
Cranberry and cream cheese-stuffed French toast, to be exact.  We happened to have a jar of Cranberry Chutney with Crystallized Ginger and Dried Cherries from Molly Wizenburg's book, A Homemade Life, in our fridge, leftover from holiday appetizer trays.  I adore this chutney, completely and totally.  I've found all manner of ways to use the three pints the recipe made, from spreading it across chevre-coated table water crackers to pairing it with thick-sliced ham, triple-cream cheese and arugula between two slices of crusty bread for the ultimate holiday leftovers sandwich. This chutney has been good to us these last 4 weeks, and I am incredibly disappointed that I didn't think to make extra batches of the spread to preserve for the cranberry-free months ahead.

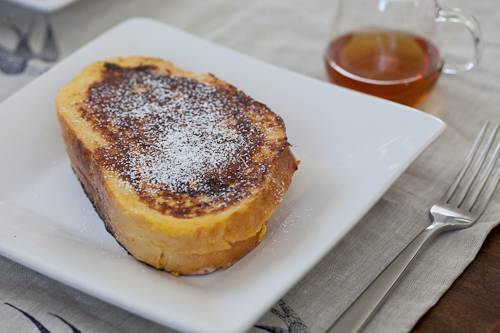
As a final hurrah (the very last jar is getting heart-breakingly low...) I decided the chutney deserved a role in the first official Sunday Morning breakfast of 2010.  Paired with softened cream cheese, spread in the middle of a thick slice of bread from a French or Italian loaf that is then soaked in a simple custard before being pan-fried in butter and sprinkled with confectioner's sugar...its not a bad way to end a good run.

We enjoyed the meal immensely, and plan to add the Stuffed French Toast to our regular rotation for Sundays, substituting whatever jam we've made from the fresh fruit of the season we are in.  I hope you'll try it this weekend, and if you can still find fresh cranberries in your grocery store you should make this chutney as well.  You don't want to wait another ten months to try it.

Stuffed French Toast

serves 2 Ingredients
  • 2 slices French or Italian bread, 1-inch thick (you may want more slices depending on the size of your baguette)
  • 4 tbsp fruit preserves (or Molly's cranberry chutney)
  • 2 tbsp soft cream cheese or marscapone
  • 2 eggs
  • 1/2 cup milk
  • 1 tbsp butter
  • confectioner's sugar
  • pure maple syrup
Method
  1. Lay slices of bread flat on cutting board.  Using a serrated bread knife, slice bread horizontally through middle, stopping short of cutting all the way through, to create an envelope of sorts.
  2. Spread 1 tbsp of cream cheese and 2 tbsp preserves in each envelope.
  3. In a shallow dish that will hold both stuffed slices, whisk together eggs and milk.  Lay stuffed slices in custard mixture, turning after 2 minutes, for a total of 4-5 minutes.
  4. Melt butter in a large, non-stick skillet over moderate heat.  When butter is fully melted, add stuffed slices to skillet.  Cook for 5 minutes on each side, until deep brown and no egg runs when you press down on the slices.
  5. Serve with confectioner's sugar and pure maple syrup.
Read More

the perfect solution

Andrea

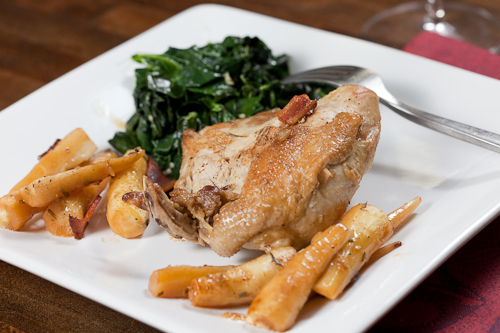
I’ve been in a funk, dear readers. Well, not a funk exactly...more of a rut. A frosty weather-induced, post house-full-of-company rut that had me holed up every night last week in my yoga pants, fuzzy socks and Brian’s old sweatshirt. Meals consisted of leftovers pulled hastily from our refrigerator and freezer, thrown together haphazardly with as little effort expended as possible, eaten on the sofa in our den. I was tucked into bed by 8pm most evenings - electric blanket on high, humidifier humming away, Burt’s Bees coating my lips, book in hand.  When the air temperature hasn't come close to 40* since well before Christmas it becomes very difficult to motivate oneself to climb out of a toasty bed to be productive.  Even more so when you're a little burnt out from all of the cooking and cleaning and entertaining that took place the month prior. Now, don’t for a second feel sorry for me. I was in my own little world, a vacation from cooking and socializing and looking decent after 6pm. I needed to lose myself to my thoughts for a few days, indulge in some guilty-pleasure reading, take lots of bubble baths while sipping red wine, ponder some 2010 projects. It was a lovely way to spend five evenings and quite a bit of last weekend, the only elements to improve the situation might have been a wood-burning fireplace and a view of the snow-dusted mountains to the west. I emerged Saturday afternoon with a renewed desire to reacquaint myself with my kitchen beyond refrigeration and microwaves, a small stack of recipes in my hand and a posting schedule for Bella Eats on my iphone. The main criteria for dishes on that schedule is basic...they must be warm, they must be whole, they must be satisfying.  Even better if they require that my oven be operating for at least 30 minutes, heating the kitchen and my fuzzy-socked feet.  Braising seemed to be the perfect solution. I've been reading reviews of Molly Stevens' All About Braising for quite some time now, noting that many foodies count the cookbook as one of their favorites.  Its been on my wishlist, and was finally purchased in December to add to our collection, along with additional copies for family and friends.  We've tried just two recipes so far, but have received enthusiastic comments from those we gifted the book to who didn't come out of the holidays in quite the same unmotivated rut as I. Between us all we've tested 10-12 of the dishes featured, from spicy green cabbage to pork sausage with grapes and wine to this chicken braised in hard cider with parsnips.  There hasn't been a dud yet - the cookbook certainly seems to be living up to its IACP and James Beard Foundation award-winning name.  Our copy has had a permanent home on the end of our dining room table, just off the kitchen, for daily browsing and recipe selection.  You're sure to see a few pop up here in the next few months. Hard apple cider infuses the chicken in this recipe with a light tang and incredible moisture as it cooks in a covered pot.  The cider turns to a silky glaze that coats the sweet parsnips which, mingled with bits of salty bacon, provide the perfect accompaniment to the chicken. We served ours with garlicky collard greens on the side for a comforting meal hinting at our southern roots. Oh!  Our hard cider is local, from Albemarle Ciderworks, and highly recommended if you live in the area. It's wonderful in this recipe, but especially good on its own.

Chicken Breasts Braised with Hard Cider & Parsnips

from All About Braising by Molly Stevens, pg. 151  (Molly gives excellent instruction on braising in her book, which I could never properly repeat here.  I highly recommend purchasing it if you enjoy this recipe and think braising will be a regular part of your repertoire.) serves 4 Ingredients
  • 2 tsp extra-virgin olive oil
  • 4 slices thick-cut bacon, cut into 1/2-inch wide strips
  • 4 bone-in, skin-on chicken breasts (about 3 pounds total)
  • coarse salt and freshly ground black pepper
  • 1 large shallot, minced (about 3 tbsp)
  • 2-1/2 cups hard cider (still or bubbly)
  • 1 tbsp finely chopped fresh rosemary
  • 1 pound parsnips, peeled, any woody core removed, and cut into sticks about 3 inches by 1/2 inch
Method What I love most about braising (so far) is the one-pot meal aspect of the technique.  Instructions seem long and lengthy, but in reality are uncomplicated and make for a very easy clean-up.
  1. Preheat oven to 325*.
  2. Combine the oil and bacon in a large deep lidded skillet or shallow braising pan. (the pan needs to be large enough to hold the parsnips and 4 chicken breasts eventually, as you'll be using the same pan throughout the recipe) Heat over medium heat, stirring a few times, until the bacon renders most of its fat and is just crisp, about 6 minutes.  Remove bacon pieces to a paper towel-lined plate to drain.
  3. Rinse the chicken breasts under cool running water and try thoroughly with a paper towel.  Season the chicken breasts with salt and pepper all over all sides.
  4. Pour off and discard all but about 2 tbsp of the olive oil and rendered bacon fat from the original pan.  Heat the remaining fat over medium-high heat.  Place the chicken breasts, skin-side down, in the pan and brown, without disturbing, for a few minutes.  Check the underside of the chicken breasts to see if they are crisp and bronzed, which should take about 5 minutes.  Turn with tongs once brown, and repeat on other side for another 4-5 minutes.  If the breasts are very plump, stand them on the side rounded edge, leaning them against the sides of the pan or holding them upright with the tongs, and brown this edge for about 2 minutes.  Transfer the chicken breasts to a large plate or tray to catch the juices, and set aside.
  5. Add the shallot to the braising pan.  Heat over the same medium-high heat, stirring occasionally, for 1 minute.  Quickly pour in 2 cups of the cider to deglaze the pan, scraping the bottom with a wooden spoon to dislodge and dissolve the browned bits.  Let the cider boil to reduce down to about 1/2 cup, 10 to 15 minutes.  Add the rosemary and the remaining 1/2 cup cider and boil down again until there's about 3/4 cup total, another 6 to 8 minutes.  (watch carefully, you want to be sure to have liquid left for the braising)
  6. Add the parsnips to the pan and season with generous grindings of black pepper and a pinch of salt.  Sprinkle the bacon over the parsnips and arrange the chicken pieces on top, skin side down.  Cover with parchment paper, pressing down so that the paper nearly rests on the chicken pieces and hangs over the sides of the pan by about an inch, and set the lid in place.  Slide the pan onto a rack in the lower third of the oven to braise at a gentle simmer.  After 25 minutes turn the chicken pieces and check the liquid.  If it is simmering too strongly, lower the oven temperature by 10 to 15 degrees.  Continue braising until the meat at the thickest part of the breast is cooked through when you make a small incision with a knife, another 20 to 25 minutes.
Read More

back on track

Andrea

After all of the indulgent foods that we consumed between Thanksgiving and New Year's Day, Brian and I have been more than ready to get back into our typical, mostly healthy*, eating routine.  We've bookmarked page after page of easy-to-prepare, full-of-veggies, yet still homey and comforting meals in some of our favorite cookbooks, and also in some new titles gracing the bookshelf. It is my hope that the month of January on Bella Eats will help all of us to get back on track and break our dependence on cheese plates before and dessert after most meals, as lovely as that may have been.

*To be clear, Brian and I believe in non-restrictive eating and the idea that nothing is off limits as long as moderation is practiced. So don't be surprised when small amounts of butter, cream, bacon etc. still appear in the lists of ingredients for recipes that claim to be healthy. Balance is key to a healthy diet, and we strive to prepare meals that are full of flavor and satisfying so as not to feel deprived of something that is important to us - delicious food!

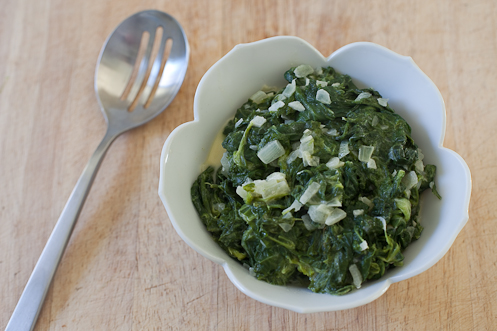
Mustard Greens-6

Whenever I feel off-track, out of balance, the need for a healthy meal after weeks of parties and holidays and travel and restaurants...I turn to dark greens.  Full of nutrients and flavor, the consumption of a heaping pile of kale, collard greens, swiss chard, mustard greens or spinach as a side dish or addition to soup or salads has me instantly feeling like myself again.  The most common preparation for us is to simply saute' any of the above greens with extra-virgin olive oil and garlic, finishing them with a light drizzle of balsamic vinegar or lemon juice and a sprinkle of sea salt and freshly-ground pepper.  Occasionally though, I'll have the desire to try something different, such as when our friends gave us a heaping pile of mustard greens from their garden just before the big snowstorm hit in December.

Mustard Greens-2

Mustard greens have a spicy, peppery taste, and these particular greens were especially flavorful.  We'd sauteed some in our typical fashion and, while still enjoyable, the spiciness was on the verge of being too overwhelming for us.  I turned to Vegetables Every Day for an alternative method of preparation (our go-to book for veggies, always) and was so pleased with the result of my search. The creamy sauce and sweet onion tempers the spiciness of the greens but still allows their mustardy flavor to shine through. I could have eaten the entire bowl-full as a meal on its own.

Brian and I enjoy greens on the side of many dishes, but a recent discovery has been the deliciousness of greens on top of one of our favorite meals, sausage with peppers and onions. We stocked up on pork sausage from Double H Farm to get us through winter, and will throw a few links on the grill for a quick and tasty lunch or dinner quite often. Saute' red bell peppers with sweet onions in a bit of olive oil and garlic until tender. Serve sausage on a bun (whole wheat, for a healthier alternative) topped with peppers and onions and a generous helping of these greens. Add extra Dijon mustard if you're as big a fan as we are.

Mustard Greens-5

Mustard Greens with Creamy Mustard Sauce

from Vegetables Every Day by Jack Bishop serves 4 as a side dish, or topping for sausage in a bun Ingredients
  • 1-1/2 pounds mustard greens (or turnip greens)
  • salt
  • 2 tbsp unsalted butter
  • 1 medium onion, minced
  • freshly ground black pepper
  • 1/4 cup cream (light is fine)
  • 1 tbsp Dijon mustard
Method
  1. Bring 4 quarts of water to a boil in a large pot.
  2. Wash the greens in several changes of cold water, then strip off the leafy green portion from either side of the tough stem.  Discard the stalks and rip the leafy portions into small pieces.  Add the greens and 1 tsp salt to the boiling water.  Cook until the greens are tender, about 8 minutes.  Drain well.
  3. Melt the butter in a large skillet. Add the onion and cook over medium heat until golden, about 5 minutes.  Add the greens and toss to coat with the butter and onion.  Season with salt and pepper to taste.
  4. Whisk the cream and mustard together in a small bowl. Add this mixture to the skillet and cook just until the greens absorb some of the sauce, 3 to 4 minutes. Adjust the seasonings and serve immediately.
Read More

bella terra: 2009

Andrea

The time has come to say farewell to 2009, and HELLO 2010!!!!!!!!!!!!!  I've debated various recaps for the blog, a review of the year that could include the introduction of a new president, my trials and tribulations with running, a trip to New York city, Bella Eats on the local news, Bella Eats Pie Month and many other wonderful memories, but decided instead to keep things simple and give our garden, the source of so many great meals this year, a little tribute.

Brian and I started our garden in the spring of 2007, tilling up a 20-foot by 20-foot patch of lawn on the east side of our house.  We chose the location to take advantage of the southern light that hits the space for most of the day, bathing the vegetables, fruits, and legumes that we grow with plenty of sunshine.  Four cubic yards of topsoil and Panorama Paydirt were delivered to our driveway, on the other side of our house, and we spent an entire Saturday hauling wheelbarrow-load after wheelbarrow-load nearly 100-feet to amend the soil and break up the dense Virginia clay.  Post holes were dug and a fence was constructed, the bottom animal-proofed with chicken wire and a gravel trench.

We based the plan of the garden on Square Foot Gardening, creating 4-foot by 4-foot boxes from borate-treated lumber (which doesn't leach harmful chemicals in the soil, like pressure-treated wood) and divided those boxes into 1-foot by 1-foot squares with twine.  We left 2-foot paths between the boxes to allow for easy harvesting, and covered those paths with weed fabric and organic mulch in order to keep the maintenance as low as possible.  And then, the fun began.

Over the last three summers we've planted blackberries, raspberries, strawberries, tomatoes, cucumbers, every color of bell pepper, green beans, sugar snap peas, edamame, eggplant, corn, kale, yellow squash, collard greens, every type of lettuce, spinach, broccoli, brussels sprouts, red beets, onions, carrots, basil, thyme, oregano, sage, rosemary, chives, fennel, watermelon, cantaloupe and muskmelons, some of those with great success and others with complete failure.  All are grown from organic seeds or plants, and we don't use any sprays or chemicals.

Early each spring we spend a weekend covering each box with organic compost to prepare the soil for the seeds and plants that will grow through the next 8 months.

Bella Terra: Preparation

The chives are typically the first green in the garden, emerging from the protective cover the previous season's growth provided through the winter.

Bella Terra: Chives for a Mushroom and Herb Frittata and Cheddar Chive Biscuits and Cheddar Chive Cornbread, among other things. The other herbs follow shortly after. Bella Terra: Herbs for an Earthy Risotto, among other things.

The garden really started filling out by June, with the blackberry bush loaded down with little green berries and the herb and lettuce boxes overflowing.

The Sugar Snap Peas were one of our first vegetable harvests. Bella Terra: Sugar Snap Peas for a special Caesar Potato Salad and Spicy Pickles In July we saw some major progress, with the garden getting close to its peak season. Cucumbers. Tomatoes and Bell Peppers. Bella Terra: Beets for a Red Beet Risotto and many, many salads and roasted veggie medleys. Bella Terra: Greens for a Greens Salad with Roasted Vegetables, and lots of sauteed kale. Bella Terra: Cucumbers for a Guacamole-Inspired Salad.

Towards the end of July and into August, our berries, bell peppers and tomatoes exploded.  We had more than we knew what to do with, but luckily froze and preserved as much as we could to get us through the fall and winter months.

Bella Terra: Blackberries for many batches of Jam, and general munching. Bella Terra: Raspberries for more Jam, Raspberry Almond Muffins and Raspberry Buttercream Frosting. Bella Terra: Tomatoes for Creamy Tomato Soup and Slow-Roasted Tomatoes. Bella Terra: Peppers for Stuffed Peppers and Chile Rellenos.

Things slowed down through mid to late Autumn, as Brian and I weren't quite as on top of getting seeds and plants in the ground for a fall harvest.  We have eaten a lot of lettuce and greens, continued to use fresh herbs in most of our cooking and even pulled some carrots out from underneath 2-feet of snow for our Christmas dinner.

It was a great year for the garden, and it is coming to a close on a bittersweet note.  Brian and I are hoping to put our house on the market in the spring or summer, and so don't have plans to put much into the soil this year.  Instead we'll be getting a bunch of pots and whiskey barrels, and trying our hand at container gardening so that we can move plants with us when we find a new place.  I will be incredibly sad to say goodbye to the little patch of earth that has provided us with so much, but look forward to starting again in a different part of Charlottesville.

And now, for the final Bella Terra post of 2009...Rosemary. Our holiday meal was a festive event this year, with my Momma and stepfather in town and 6 additional friends here to share our table.  We decided on an Italian theme, with braised short ribs in a thick tomato sauce over fresh fettucini, brussels sprouts sauteed with pancetta, the carrots pictured above in a white wine and sage glaze, garlic-full mashed potatoes.  And, as a precursor to the actual sit-down dinner, we had rosemary roasted cashews alongside bacon-wrapped dates.  Everybody was pleased, and it was a very merry Christmas day. These nuts are salty and sweet, earthy and spicy.  They solve whatever craving you may have, and are gracing our table again this evening as we ring in a new year.

Rosemary Roasted Cashews

from the kitchen sink recipes Ingredients
  • 1-1/4 pounds cashew nuts (roasted, unsalted)
  • 2 tbsp coarsely chopped rosemary
  • 1/2 tsp cayenne pepper
  • 1 tbsp brown sugar, light or dark
  • 2 tsp kosher salt
  • 1 tbsp melted butter
Method
  1. Preheat oven to 375*.
  2. Place nuts on parchment lined baking sheet.  Bake for 10 minutes.
  3. Meanwhile, mix together rosemary, pepper, sugar, salt and butter in a large bowl.  Toss the warm nuts with the mixture until well coated.
Read More

immediately, if not sooner

Andrea

I know that I am so late in saying this, but,

MERRY CHRISTMAS! HAPPY HOLIDAYS! WARMEST WISHES!

I hope that you all had as lovely a holiday as Brian and I did, filled with family, friends, good food, wine, multiple desserts and maybe even a little bit of snow.

Charlottesville actually had a lot of snow last weekend, just a few days before Christmas.  We did go out and frolic around in the drifts - laughed as the dogs frog-leaped through fluff as high as their shoulders, got in a workout shoveling multiple routes to the car and street, attempted the creation of a snow angel and a snowman - but mostly we watched the accumulation from behind our windows, warm and toasty in fuzzy socks with hot coffee in hand.  It was so peaceful, the snow falling silently on the other side of the glass, the city slipping into a lazy slumber as it was blanketed in white.

I managed to tear myself away from the windows and snow-watching for a short time in order to bake, feeling the need for the tiniest bit of productivity and worrying that we would lose power and the opportunity.  I had cake on the brain, particularly a store-bought, rum-soaked pound cake that my family consumed by the dozens when I was young.  We'd hand the mini cakes out as holiday gifts to all of our friends, and keep a stash of them in our pantry for months after Christmas.  It had been years since I'd had one of those cakes and I wanted  one.  Immediately, if not sooner.

While this isn't exactly the cake of my youth, it has all of the most important attributes.  To me it screams "Winter! Holidays! Friends!".  It is rich and dense, heavy with vanilla flavor and soaked with rum, and will warm you from inside out.  It is the perfect cake to whip up as snow falls outside your window, and lovely to share the next day with friends who walk a mile through two feet of fluff to visit with you.

Vanilla Bean Pound Cake with Rum Caramel Sauce

adapted from Paula Deen and Bon Appetit serves 12 Cake
  • 1/2 pound (2 sticks) unsalted butter, plus more for pan, room temperature
  • 1/2 cup vegetable shortening
  • 2-1/2 cups sugar
  • 5 large eggs
  • 3 cups all-purpose flour, plus more for pan
  • 1/2 tsp fine salt
  • 1/2 tsp baking powder
  • 1 cup milk
  • 1 tsp vanilla extract
  • 1 vanilla bean
  1. Preheat oven to 350*.  Butter and flour a tube cake pan, knocking excess flour from pan.
  2. With an electric mixer, cream together the butter and shortening.  Add the sugar a little at a time, and blend well.  Add eggs one at a time, blending after each addition.
  3. Sift together the flour, salt and baking powder in a separate bowl.  Add to the butter mixture in 3 batches, alternating with the milk, starting with the flour and ending with flour.  Mix in the vanilla and the scraped-out insides of the vanilla bean.
  4. Pour into your buttered and floured baking pan and smooth the top of the batter.  Bake for 60-75 minutes, until the top is starting to turn golden and a toothpick inserted into the center of the cake comes out clean.  Cool on rack completely before removing from pan.
Rum Caramel Sauce
  • 1 cup dark brown sugar
  • 1 stick unsalted butter
  • 1/2 cup heavy cream
  • 2 tbsp spiced or dark rum
  1. In a small, heavy-bottomed saucepan, melt your butter.  Stir in sugar until smooth, about 2 minutes.  Add cream and rum and bring to a simmer, cooking until sauce thickens and is reduced to about 1-1/2 cups, about 5 minutes.
  2. Drizzle rum sauce over individual slices of cake.
Sauce can be prepared up to 2 days ahead.  Refrigerate, and reheat on stovetop when ready to serve.
Read More

homemade gift ideas

Andrea

Christmas is only 5 days away (!), and I'm guessing that most of you already have holiday gifts determined and purchased...right?!?  This post is probably a bit late, but I thought it might be helpful to those of you still looking for last minute gifts for friends, family and co-workers. Brian and I have given homemade gifts out for the last few years, and always enjoy the pleased responses we receive in return.  In a time when spending significant amounts of money is difficult for most, putting personal effort into gifts rather than cash is a nice alternative.  I've compiled a few ideas for you to choose from...enjoy!

Homemade Jam

Homemade jam can be made with fresh and frozen fruit.  Be sure to use a proper method of preservation if you plan to give the gifts un-refrigerated.  If you'd rather not tackle the canning process, tell recipients to keep their jam refrigerated for up to 4 weeks. blackberry peach jam

Homemade Granola

A batch of granola is quick to whip up, and keeps for weeks in an airtight container in the pantry. mixed fruit granola

Homemade Almond Butter

Nut butter made from scratch is so much better than store-bought because you can mix your own interesting combinations.  It can be a bit pricey though, depending on the nuts you choose. cinnamon vanilla almond butter

Homemade Hot Cocoa Mix and Marshmallows

Homemade marshmallows are nothing like their store-bought cousins.  So light and fluffy, they truly melt in your mouth (or your hot cocoa).  For a little twist, add some peppermint extract in place of vanilla.  If you don't have vanilla sugar for the cocoa mix (it takes about 2 weeks to make your own) just substitute regular sugar. hot cocoa mix marshmallows

Homemade Baked Goods

Always a winner, nobody frowns at a box/tin/basket/bag full of baked treats. triple ginger cookies dark chocolate almond bites peppermint eggnog scones citrus scones with cranberries and ginger
Read More

perfect for a 'snow day'

Andrea

As I write this post snow is softly falling outside, turning my little city into a winter wonderland.  In the five winters that Brian and I have spent in Virginia, we've never seen a snowfall like this.  Its breathtakingly beautiful, the 22-inches we've received so far softening the landscape with a blanket of white, turning our street into an unrecognizable scene dotted with pedestrians in bright winter parkas out enjoying the snow. Holed up inside for the day, I managed to pull myself away from the window for about an hour to satisfy the urge to bake.  An urge  that is unavoidable when your outside world is blanketed with snow and inside, curled up in your favorite chair, under a quilt, with hot coffee (and perhaps a splash of Bailey's Irish Cream...), you are toasty warm and feeling very domestic.  I'll share the cake that I just pulled from the oven in the next day or two, but on this snowy afternoon I feel it appropriate to give you a recipe for some chewy ginger cookies.  They feel so very 'snow day', the perfect snack waiting on the counter when you come in from making snowmen and snow angels. Ginger cookies have been a longtime favorite in our household, but I do believe that this is the first time I've ever made them myself.  I've helped my momma on many past Christmas Eves to roll out perfect little balls of ginger snap dough, the delightfully crunchy cookies a staple between meals on Christmas day.  But last year Brian and I were introduced to a different variety of ginger cookie, one that was chewy rather than crispy in texture, and laced with chunks of crystallized ginger. Brian declared them his favorite cookie, ever, and I vowed to find a recipe to replicate them prior to the next Christmas.  Lucky for me, Bon Appetit read my mind. We love the soft, chewy interior texture of these cookies, complemented perfectly by the crunchy shell of turbinado sugar that coats the exterior.  The bits of crystallized ginger throughout are wonderful surprises.

Triple Ginger Cookies

adapted from bon appetit, december 2009 Ingredients
  • 2-1/2 cups all purpose flour
  • 1/3 cup minced crystallized ginger
  • 2 tsp baking soda
  • 1/4 tsp salt
  • 3/4 cup (1-1/2 sticks) unsalted butter, room temp
  • 1 cup (packed) light brown sugar
  • 1 large egg, room temp
  • 1/4 cup blackstrap molasses
  • 1-1/2 tsp finely grated fresh peeled ginger
  • 1-1/2 tsp ground ginger
  • 1 tsp ground cinnamon
  • 1/2 tsp ground cloves
  • 1/2 cup turbinado sugar (for rolling cookies in)
Method
  1. Position 1 rack in top third of oven, 1 rack in bottom third; preheat to 350*.  Line two baking sheets with parchment paper.
  2. Whisk together flour, crystallized ginger, baking soda and 1/4 tsp salt in a medium bowl.
  3. Using an electric mixer, beat butter until creamy and light in a separate bowl for about 2 minutes.  Gradually add brown sugar and beat on medium-high speed until creamy, about 3 minutes.  Add egg, molasses, fresh ginger, ground ginger, cinnamon and cloves.  Beat to blend.
  4. Add flour mixture to wet mixture in two additions, beating on low speed just to blend between additions.
  5. Place 1/2 cup of turbinado sugar in small bowl.  Measure 1 tbsp of dough (a 1-tbsp ice cream scoop works really well) and roll into a ball between palms of hands.  Roll dough in sugar and place on baking sheet.  Repeat with remaining cookie dough, spacing cookies 1-1/2 to 2-inches apart.
  6. Bake cookies until surfaces crack and cookies are firm around edges but still slightly soft in center, about 15 minutes.  Cool completely on sheets on rack.
Read More

small packages

Andrea

I’d been wanting some of these little tart tins for, oh, at least one year. Its not that I make a lot of tarts and require a variety of vessels for filling...it really comes down to the fact that I love the tiny proportions of the tins themselves.  There's just something very appealing about baked goods in small packages. Although the tins aren’t that expensive, I hadn’t been able to justify purchasing them for their aesthetic appeal alone. I felt that I needed to have in mind a specific recipe that absolutely required the use of such tins. Or perhaps, at the very least, to have gone through some serious experimentation in the full-size tart pan that I already owned to justify my graduation to experimentation with its smaller siblings. Lucky for me, my stepfather came to my rescue and put me out of my indecisive misery. While home for Thanksgiving, Joe took me shopping. For baking pans. Many, many baking pans. So many pans that Brian and I had to reorganize our entire kitchen. I now have my tiny tart tins, a beautiful tube cake pan, additional sheet pans and cooling racks, even some ice cream scoops for balling cookie dough. Suddenly recipe searching has taken on a whole new agenda, with me thinking “oh! I could use my new [insert baking tool here]!”. And so, although things have been quiet on this little blog of mine this last week I assure you, I’ve been busy in the kitchen. And busy shopping. And busy wrapping. And busy writing out holiday cards. But mostly, I’ve been busy enjoying my new toys. I have a few recipes I still want to share with you prior to Christmas Eve and so, in the interest of getting all of the items on my holiday ‘To Do’ list crossed off [and therefore maintaining my own sanity...I'm just a little bit OCD...] I’m going to have to keep posts a bit shorter than usual. I hope you won’t mind.  My guess is, you all are pretty busy too.  :) I was certain that the debut of these little tins would involve sharing something sweet with you all, and so was surprised when the urge to make a savory tart struck me first. The possibilities for fillings are endless, truly, but we were pretty pleased with the results of our first attempt, which I’ve shared below. I think they would be a great addition to the buffet table at a party, easy to pick up with one hand while holding your cocktail glass in the other.

Savory Winter Tarts

makes (6) 4-inch tarts Ingredients
  • 9-inch pie crust dough (the rolled dough, not the kind in the aluminum dish)
  • 1/2 pound bacon, fried
  • 1 medium leek, light green part only, sliced
  • 1 medium red potato, very thinly sliced
  • 4 large mustard green leaves, washed and chopped finely
  • 3-oz chevre, crumbled
  • 2 eggs
  • 3/4 cup whole milk
  • salt + pepper
Method
  1. Thaw your pie crust dough according to the instructions on the package.  Preheat oven to temperature indicated on package.  Roll out the dough until it is 1/8-inch thick, and cut into roughly 5-inch by 5-inch squares.  You'll probably only get 4 squares from this first pass.  You'll want to gather the scraps, ball them up, and roll the dough back out to cut the remaining squares.  Place a square of dough into each tart tin, pressing the dough into the bottom and sides of the tin.  Trim the dough to be flush with the top of the tin.  Place tart shells on a baking sheet covered with aluminum foil and bake according to the instructions on the dough package.
  2. Gather your filling ingredients (other than the eggs, milk, salt and pepper) and set aside.
  3. Whisk together the eggs and milk.  Add salt and pepper to taste.
  4. Remove the tart shells from the oven once they are starting to turn golden brown. Set oven temperature to 400*.
  5. Once the tart shells have been baked and cooled about 10 minutes, you can fill them.  Fill tarts first with potatoes, mustard greens, leeks then bacon.  Do not overfill the tarts, you may not use all of the ingredients.
  6. Carefully pour the egg/milk mixture into each tart, dividing it evenly amongst all 6 tart tins, being careful not to let the custard overflow.  Drop chevre on top of the tarts in bits.
  7. Bake the tarts on the cookie sheet at 400* for 25-35 minutes, until custard is set and toppings are starting to brown.
*Note - Tiny tart tins aren't absolutely necessary for this recipe, (1) 10-inch tart tin will accommodate these ingredients.  But, the miniature tins sure are fun...
Read More

'tis the season...

Andrea

...for giving! Still looking for the perfect gift for a family member or friend? In addition to some of my favorite things in the Bella Eats Store powered by Amazon, I wanted to share  some of my favorite hand-crafted and vintage finds on Etsy.  If you haven't shopped on Etsy before, beware.  This little site is incredibly addicting.  Buying handmade and vintage pieces from individual artists is very, very satisfying.

Aprons from Joy the Baker

How completely adorable are these aprons?!?  Just about as cute as Joy herself.  Who wouldn't want a little bit of Joy, and her mom, in their kitchen? $27.00Joy the Baker on Etsy

Tea Towels from Skinny LaMinx

I've coveted tea towels from Skinny laMinx for what seems like years.  Her original drawings, screen printed in bold colors on hopsack, would brighten any kitchen. $12.00. Skinny laMinx on Etsy

Table Linens from Elizabeth Bentz

I love these abstract illustrations screen printed on 100% linen.  I think the "collander" design is my favorite. prices range from $18.00 - $68.00. Elizabeth Bentz on Etsy

Coasters from FilzFelt

I have an unhealthy obsession with all things felt, and these coasters are no exception.  They come in a slew of fun colors, in round and square shapes. set of 4 for $14.00. FilzFelt on Etsy

Pottery from Whitney Smith

I love these simple cake and cupcake stands with a touch of whimsey, and the lotus bowls...*swoon*. lotus bowls $325.00, cupcake stand $38.00.  Whitney Smith Pottery on Etsy

Custom Napkin Rings from Rae Dunn

When I think of napkin rings, I think of fancy, fussy parties.  This more casual, personal option is much more suited to our home. set of 2 $24.00, set of 8 $96.00.  Rae Dunn on Etsy

Letterpress Recipe Cards from Dingbat Press

I like to think that even though we live in a digital age of electronic recipe files and iPhone apps for cooks, that I would still sit down and write out my favorite recipes on cards for a friend. I think that these adorable letterpress designs would help to motivate me. set of 10 for $15.00Dingbat Press on Etsy

Photography from Honey and Jam

Hannah's photography is stunning.  If you aren't following her blog, you should be. $18.00 for 8x12 print.  Honey and Jam on Etsy

Vintage Finds on Etsy

There are so many fantastic vintage pieces to be found on Etsy.  I've included some images and links to my favorites available right now, but chances are they will all be gone soon and replaced by other great finds. 1. Cathrineholm enamel nesting bowls from 2BoredBunnies, $155.00 2. Dansk enamel teakettle from LagomProvisions, $26.00 3. Lotus (tulip) bowls from CrankHeartPony, $16.50 4. Vintage loaf pan from susantique, $15.00 5. Three-tiered cake/cookie/candy stand from PourToujours, $30.00 6. Vera Neumann placemats and napkins from IndulgeYourShelf, $24.00
Read More