Contact Us

Use the form on the right to contact us.

You can edit the text in this area, and change where the contact form on the right submits to, by entering edit mode using the modes on the bottom right. 


123 Street Avenue, City Town, 99999

(123) 555-6789

email@address.com


You can set your address, phone number, email and site description in the settings tab.
Link to read me page with more information.

Blog

Filtering by Category: grain

butternut squash risotto

Andrea

butternut squash risotto-3.jpg

Thanksgiving is just one week away. One week! So shocking. I have a list of recipes queued up and ready for you all, all dishes that would accompany a roasted turkey beautifully. In order to get them out to you in time for your big trip to the grocery store, I am going to march them out day after day through Monday. 5 recipes in 5 days. I do believe that will be a new record here at Bella Eats!

I am starting with a Fall staple in our house. Butternut squash is the very first Autumn ingredient that I buy each September, always in anticipation of this recipe. If we were hosting Thanksgiving dinner at our house again this year I would absolutely put this creamy dish on our menu, and can't quite figure out why it has never made it there before. I think it would make a great substitute for the sweet potato casserole that typically winds up on the table. Especially because I just discovered my favorite sweet potato dish ever, and its a dessert, and I don't think I could take two sweet potato courses in one meal. Don't worry, I'll be sharing that one too.

butternut squash risotto-1.jpg
butternut squash risotto-2.jpg
butternut squash risotto-4.jpg

I tried something new this time, adding mushroom broth to the risotto instead of standard vegetable. We loved the earthy depth it added, and have permanently altered our recipe. If you don't have mushroom base, vegetable or chicken broth is good too.

Butternut Squash Risotto
serves 4 for main course, 6-8 as a side
Ingredients
  • 1 small butternut squash, about 1.5 pounds
  • 2-3 tbsp butter, divided
  • 8 fresh sage leaves
  • 1 medium onion, diced, about 1 cup
  • 2 cloves garlic, minced
  • 1-½ cups arborio rice
  • ½ cup dry white wine or dry vermouth
  • 6-7 cups broth made with better than bouillon mushroom base (vegetable if you don't have it)
  • ½ cup freshly grated parmesan cheese
  • salt + pepper
Method
  1. Preheat oven to 425°F.  Cut the butternut squash in half and scoop out the seeds.  Lay the halves cut-side up on a rimmed baking sheet lined with foil.  Place a thin sliver of butter inside the bowl of each half, and another on the flat part of the squash.  Place a small sage leaf over top of each sliver of butter.  Sprinkle with sea salt and fresh pepper.  Roast the squash for 20-30 minutes, until a fork can pierce the flesh with only a bit of resistance.
  2. Remove the squash from the oven and set aside to cool until you can handle it comfortably.  Use a small paring knife to peel the skin from the squash, and dice it into ½-inch chunks.  Set aside.
  3. Melt 1 tbsp of butter in a large skillet over medium heat.  Add the onion and let sauté for about 3 minutes, until it is starting to soften.  Add the garlic and the rest of the sage leaves and sauté for an additional 3 minutes.  Add the arborio rice and stir to combine for 1 minute, until the rice starts to crackle.  De-glaze the pan with the white wine, stirring to get any brown bits off of the bottom of the pan.  Add the squash and stir so that it is evenly distributed with the rice.
  4. Add broth one ladle at a time, stirring constantly so that the rice doesn't stick to the bottom of the pan, and only adding the next ladle when the previous has been absorbed.  Continue until all broth is gone and rice is creamy, about 25 minutes.
  5. Add the remaining butter (about 1 tbsp) to the pan, along with the parmesan cheese, and stir until distributed evenly.  Salt and pepper to taste.
butternut squash risotto-5.jpg

Charlottesville and Richmond folks...Relay Foods beat me again! Richmond, your one-click recipe is here, and Charlottesville yours is here.

a meal for summer's end

Andrea

The final days of summer are upon us.  Already I've worn a scarf, contemplated tights, and polished my boots. The weather this Sunday past was Perfect (yes, with a capital 'P')...temperature in the upper sixties, sunny skies, a crisp breeze. Our windows have been flung wide open, the air conditioner *hopefully* retired until next June.  Brian happily gave our lawn what he wishes to be its last cut, and I've planted the garden beds full with beets, carrots, collards, and lettuce.  We're ready...for Fall festivals, warm jackets, rosy cheeks, mulled cider, creamy soups, firey leaves, golden light, and crisp air.

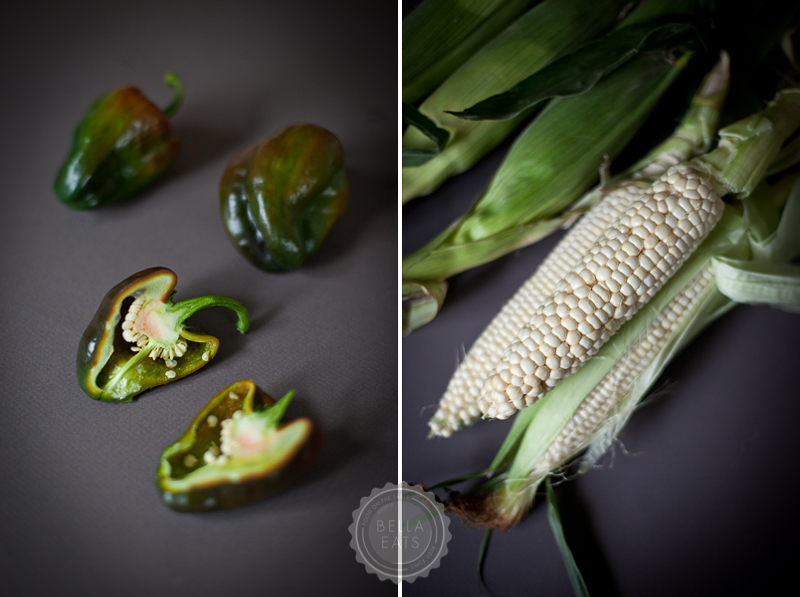
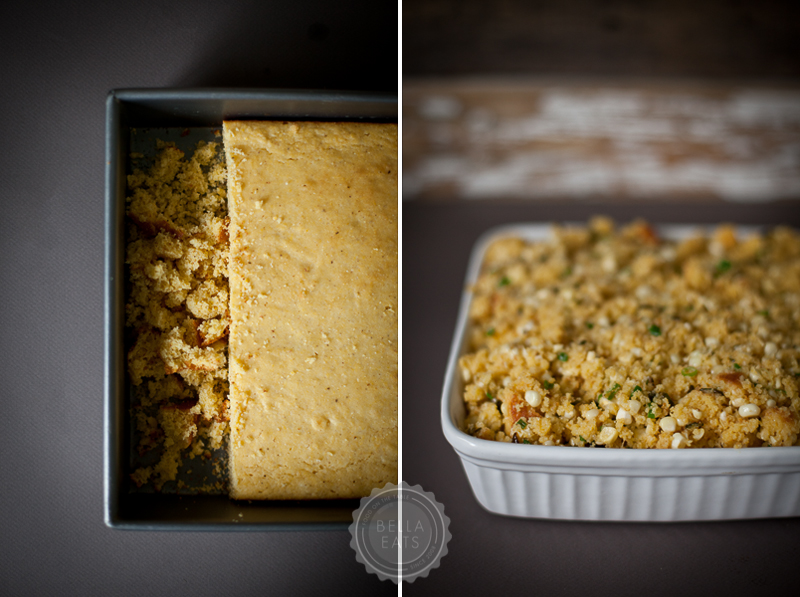
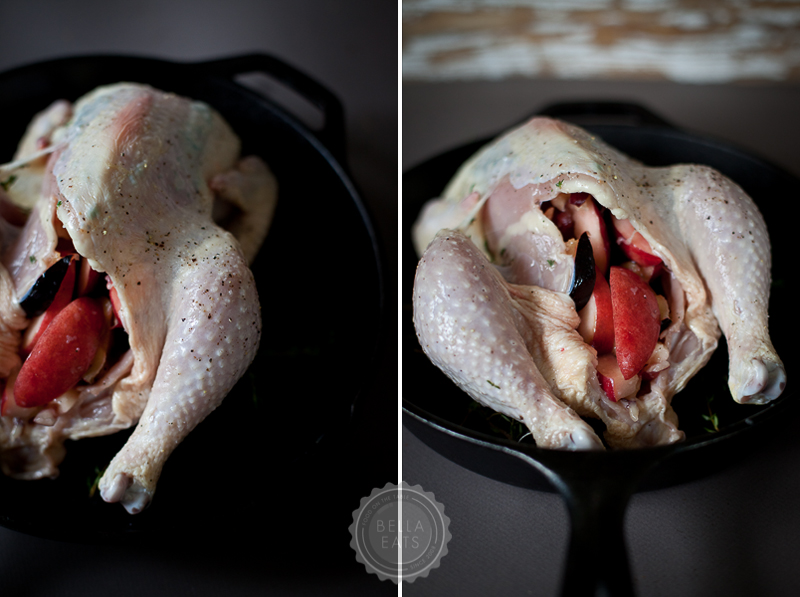
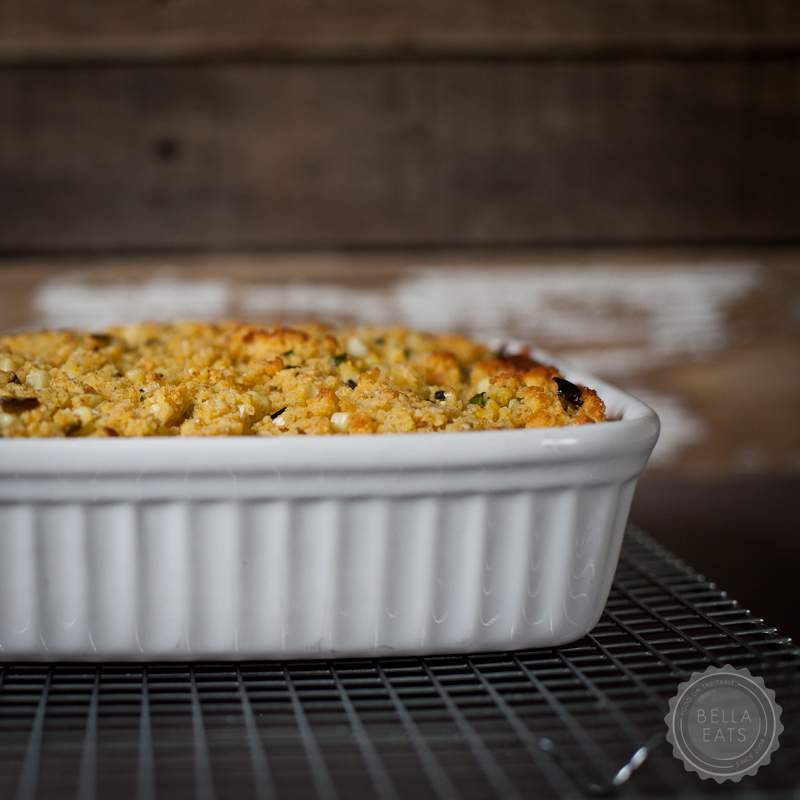
As a send-off to Summer we're embracing her end-of-season bounty.  There are still local peppers and corn to be had and I, ever the fan of fresh, local corn, am consuming as much as I possibly can until it is gone.  We've had corn chowder, corn pancakes, cornmeal cake.  And now, perhaps my favorite thus far, corn bread stuffing laced with green chilies. And alongside that, a roast chicken stuffed with local plums and nectarines.  The perfect meal for these last Summer days, when cooler temperatures have us craving warm and comforting fare at their end.

I expected the stuffing to be very, very spicy, but was pleasantly surprised by the mild heat the chilies provide. Still, if you have an aversion to spice, consider substituting anaheim peppers for the jalapenos.

Roast Chicken with Summer or Fall Fruit

serves 2-4, depending on the size of the bird

Ingredients

  • one fresh, organic, whole chicken (this bird was about 2.5 lbs)
  • a few tablespoons of canola oil
  • salt + pepper
  • 12 fresh thyme sprigs
  • 2-4 nectarines, peachs, or plums (or a mix of all three) cut into wedges (and, when Fall hits full-force, this would be delicious with apples, too)

Method

  1. The morning you are planning to cook the bird for dinner, rub him down with oil. Work your fingers between the skin and meat of the bird's thighs and breast, separating the two to form pockets for the herbs. Stuff the thyme underneath the skin in as many places as you can, reserving a few sprigs. Finally, rub the bird thoroughly with salt and pepper, over top and underneath the skin. Refrigerate the bird until you're ready to cook him.
  2. Preheat your oven to 325° and place a rack in the middle. Lay the remaining thyme sprigs in the center of a medium cast iron pan. Place the bird, breast-side up, on top of the thyme. Stuff as many fruit wedges as you can inside of the cavity, and lay the rest in the pan around the bird.
  3. Cook the chicken for 45 minutes, then remove from oven and turn him over. Cook for another 45 minutes, remove from oven, and turn him again. Make a small incision in the breast to see if the meat is cooked through, white and not pink. For a small bird, 90 minutes is about all you need. If you're cooking a larger bird, he will take longer. Just keep turning him every 45 minutes until the meat is white and the interior juices run clear.
  4. When the chicken is done, turn the oven to broil. Place the chicken, breast side up, back in the oven on the middle rack.  Broil until the skin browns and crisps, about 5 minutes.
  5. Remove the chicken from the pan, retaining the juices and fruit in the pan. Let the chicken rest for about 15 minutes before carving him.
  6. Bring the juices and fruit to a boil on the stovetop. Reduce to a simmer and cook for about 10 minutes, until the juice is reduced to a thicker glaze. Spoon the glaze and fruit over top of the carved chicken, on individual plates.

Corn Bread Stuffing with Green Chilies

adapted from bon appétit

serves 10

Ingredients

  • 10 tablespoons unsalted butter
  • 1-1/2 cups fresh poblano chilies, seeded, chopped
  • 6 small jalapeño chilies, seeded, chopped
  • 6 ears corn, kernels removed from cobs
  • 1-1/4 cups chopped green onions
  • Buttermilk Corn Bread, 1 day old (recipe below)
  • 4 large eggs
  • 1/4 cup sugar
  • 2-1/4 teaspoons salt
  • 1/2 teaspoon ground black pepper

Method

  1. Melt the butter in a large skillet over medium-high heat. Add all of the chilies and saute until they begin to soften, about 8 minutes. Stir in half of the corn and all of the green onions. Transfer the mixture to a large bowl. Coarsely crumble the day-old cornbread into the bowl and mix together.
  2. Blend the rest of the corn, the eggs, sugar, salt, and pepper in a food processor until you have a course puree. Stir the puree into the stuffing mixture.
  3. Preheat oven to 350°. Generously butter a 13x9x2 or a 10x10x2 baking dish. Transfer the stuffing mixture to the baking dish and pat down into dish. Butter a piece of aluminum foil and place the foil, butter side down, over the stuffing. Bake until heated through, about 40 minutes.  Uncover the dish and bake until the stuffing is slightly crisp and golden, about 15 minutes.

Buttermilk Corn Bread

Ingredients

  • 1/2 cup (1 stick) unsalted butter
  • 1 1/2 cups buttermilk
  • 2 large eggs
  • 2 cups yellow cornmeal
  • 1 cup unbleached all purpose flour
  • 1/2 cup sugar
  • 4 teaspoons baking powder
  • 1 teaspoon salt
  • 1/4 teaspoon ground black pepper

Method

  1. Preheat oven to 400°. Butter a 13x9x2 inch baking pan. 
  2. Melt butter in a large saucepan over low heat. Remove from the heat and whisk in the buttermilk, and then whisk in the eggs.
  3. Mix all of the remaining ingredients together in a large bowl. Stir in the buttermilk mixture.  Transfer batter to the buttered baking pan.
  4. Bake corn bread until edges are lightly browned, about 20 minutes. Cool completely in pan. Cover the pan tightly and store at room temperature for at least one day, and up to two days.

Those of you local to Charlottesville or Richmond: I've been providing Relay Foods with recipes and photography for some time now.  I typically try to post recipes here, on Bella Eats, prior to their appearance on Relay, but have been a little swamped lately.  So, this means that if you're interested in adding the ingredients for the Corn Bread Stuffing with Green Chilies to your Relay order with just one click, you can do so here.

red beet risotto

Andrea

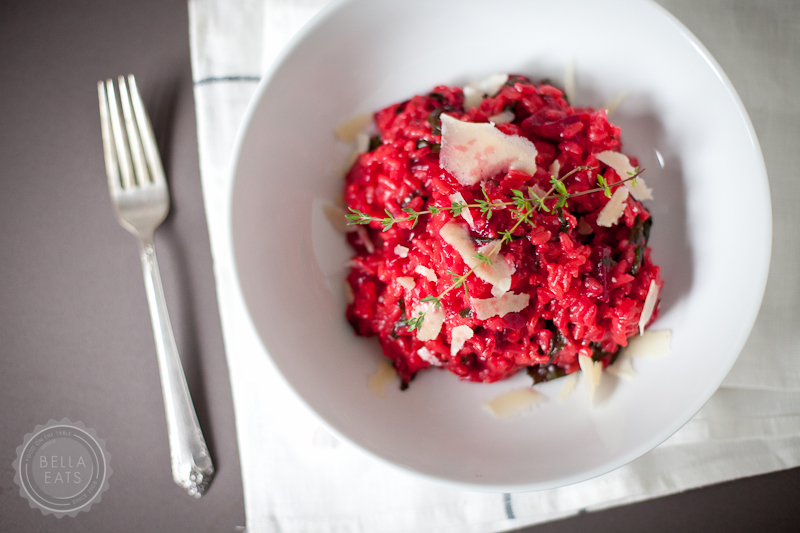
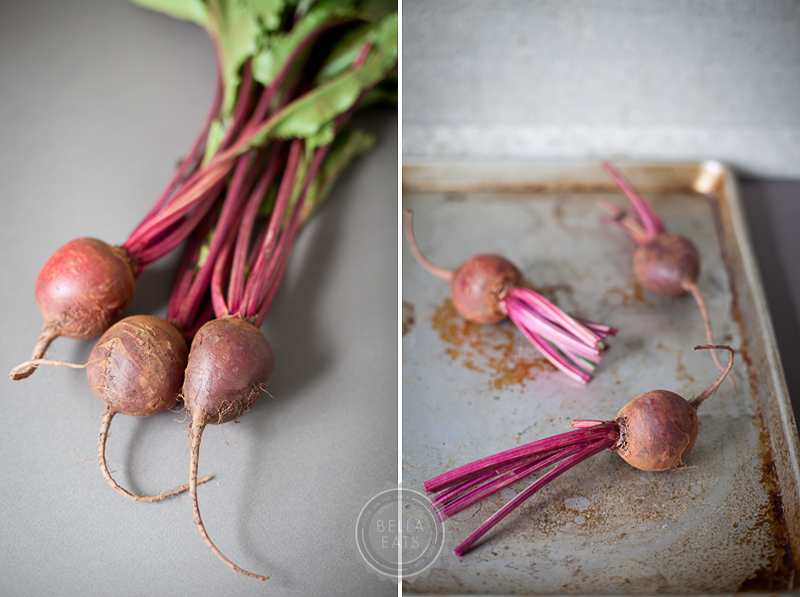
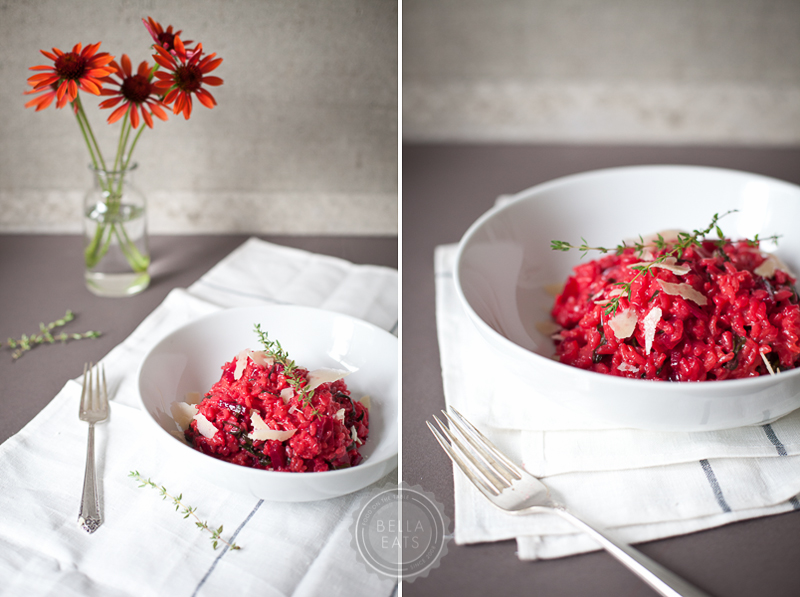
I do believe that beets are my very favorite spring vegetable. They are quickly overshadowed by tomatoes in Summer, but in May and June I could eat beets every other day. Typically I am a fan of simply roasting the globes and tossing them on a salad with chevre and a light vinaigrette. But every now and then, when I am feeling the need for something a bit more toothy and substantial I'll whip up a batch of risotto. I love the sweetness that roasted beets lend to the savory dish, and of course the vibrant hue that even a picky toddler wouldn't be able to resist.

I"ll admit...I've already written about red beet risotto here, years ago, when we were growing beets in our very own garden. The recipe has changed a bit, and the photographs have certainly improved, but I still love that first post because of its words about our little veggie patch. We're still growing beets this year, although out on Maple Hill Farm rather than just to the side of our house. And this recipe is still a favorite, one that I felt was appropriate to bring up again now that we're at the height of beet season here in Charlottesville. Plus, I just couldn't resist the urge to re-photograph the dish in all of its neon-pink glory, in proper lighting, with less distraction. It deserves to be the star of the show!

These days, I'm adding the beet greens directly to the risotto, rather than cooking them up on the side. They don't add much flavor to the dish, but I do like the additional texture and all of the nutrients packed into the deep green leaves. Thanks to the New York Times for that little suggestion.

Red Beet Risotto

from the new york times

serves 4 as a main course

Ingredients

  • 3/4 pound beets (1 small bunch of 3 to 4)
  • 1 bunch beet greens, stemmed and washed (from your beets, if fresh and unwilted. leave them out if they are past their prime)
  • 6 to 7 cups chicken or vegetable stock, as needed
  • 2 tbsp extra virgin olive oil
  • 1/2 cup finely chopped onion
  • 1-1/2 cups arborio rice
  • 2 garlic cloves
  • 1/2 cup dry white wine
  • salt
  • freshly ground pepper
  • 1/2 cup parmesan cheese, grated
  • 2 tbsp finely chopped flat-leaf parsley

Method

  1. First, roast the beets. Preheat your oven to 400°. Wrap the beets in aluminum foil and place on a baking sheet. Roast for about 20 minutes, until the beets are easily pierced with a fork.  Remove from oven and allow to cool, then peel and dice the beets.  The skin should slide off easily.
  2. Slice the greens into 1-inch strips, set aside.
  3. Place the stock in a medium sauce pan and bring to a simmer, then reduce heat to low.
  4. In a large, wide, heavy-bottom saute pan, heat the oil over medium. Add the onion and stir while cooking until it starts to soften, about 3 minutes. Add the rice and the garlic and stir while cooking until the rice is separate and starting to crackle, about 3 minutes.
  5. Stir in the wine and cook over medium heat, stirring constantly. When the wine has just about evaporated, add in 1 ladleful of stock (about 1/2 cup) just to cover the rice. The stock should bubble slowly (adjust heat). Cook, stirring occasionally, until the stock is nearly absorbed, then add another ladleful. Continue to cook in this fashion, not too fast and not too slowly, stirring often and adding more stock when the rice is dry, for about 10 minutes.
  6. Stir in the diced beets and sliced greens. Add more stock and continue cooking as before, for another 10-15 minutes, adding stock when the rice is dry. The rice should be tender but not mushy, with no hardness at the middle. When it has reached the correct consistency, season with salt + pepper. Add the parmesan cheese and the parsley, and stir to combine. The rice should be creamy, if it is not, add another 1/2 cup of stock.
  7. Adjust seasonings and serve.

mushroom barley risotto

Andrea

Happy Friday, friends! What are you up to this weekend? We will be getting our hands dirty in our garden, prepping the beds for a sprinkling of lettuce seeds to hit the soil next week. So exciting! Nothing says "Spring!" like a Saturday spent in the yard. I've got my fingers crossed, hoping that the blue sky I see outside of my window sticks around!

Looking ahead at all of the fresh, green produce arriving in the next couple of months made me realize that I've been holding out on you. I really couldn't let Winter completely slip away without sharing this favorite recipe with you all. This hearty little risotto has made an appearance on our table multiple times these last few months and we just can't seem to get enough of it! In fact, there are leftovers in the refrigerator right now, and I am very much looking forward to lunch.

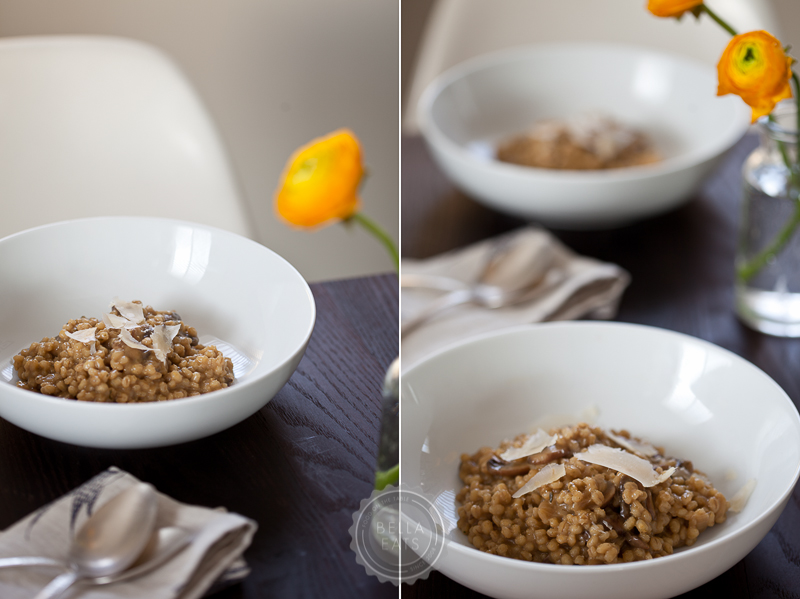
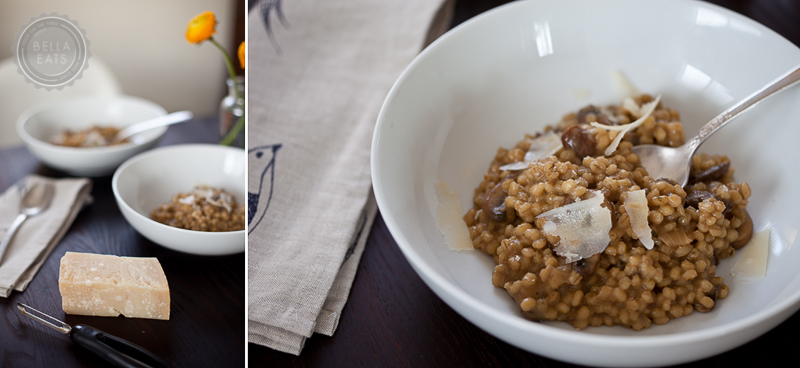
Mushrooms and I got along very well this Winter. That's a change for me, as I've never been a big fan of the stinky fungi. Not that I had anything against them, but I didn't actively seek them out for recipes. Something happened this year, though, and I found myself picking up a half-pound of fresh Cremini mushrooms nearly every week. Usually they were for this risotto, but also for empanadas, and veggie burgers, and a lasagna I haven't yet shared. What I love about the mushrooms in this recipe is that they really are the perfect mate for barley, which replaces the arborio rice typically found in risotto. Both lend an earthiness to the dish that you expect, but they also complement each other texturally. The barley remains a bit firm, providing the slightest resistance as you chew, while the mushrooms are silky and smooth and nearly melt on the tongue. The whole process is relatively quick and simple, not requiring the constant stirring like a traditional risotto, but also makes an impressive side dish for company.

Enjoy the weekend...get outside!

Mushroom Barley Risotto

serves 4

Ingredients

  • 2 tbsp olive oil
  • 1 cup chopped onion
  • 8 ounces cleaned and sliced crimini mushrooms
  • 1/2 cup dried shitake mushrooms, rehydrated and chopped
  • 3 tbsp chopped fresh parsley
  • 1 tbsp chopped fresh thyme
  • 2 cloves garlic, minced
  • 1 cup pearl barley
  • 6 cups chicken or vegetable broth
  • 1 tbsp butter
  • 1/2 cup parmesan cheese, shredded

Method

  1. Heat oil in a large, heavy-bottomed saucepan over medium heat. Saute' onion until starting to brown, about 5 minutes. 
  2. Add all mushrooms and saute' until golden brown, about 10 minutes, adding 1 to 3 tbsp water if they start to stick.
  3. Stir in herbs and garlic, then add barley and stir for 1 minute. Add 4 cups of the broth and bring to a boil. 
  4. Reduce heat to simmer, cover, and cook for 15 minutes, stirring occasionally, until most of liquid is absorbed. Remove lid and add more broth, 1/2 cup at a time, stirring until each addition is absorbed, until barley is tender but still slightly firm. You may not use all of the broth, but you will use most of it. This whole process, from the time you add the first broth, should take 35-40 minutes.
  5. Remove pan from heat and add butter and cheese, stirring until incorporated. Season with salt and pepper, to taste.

finally, a piece of NOLA

Andrea

July.  What a busy month this has been.  I know I've said that a lot these last few months, remarked often about the quick passing of time and my inability to sit behind my computer to put words on this digital page of mine.  Are you tired of that yet?  I sure am.  So, rather than dwell on my mile-long 'to do' list I've decided to share with you one of my favorite places. A city that my mind escapes to when life gets hectic and all I want is a cool spot in a shady courtyard, an ice-laden cocktail in my hand and notes of jazz wafting on the breeze. Am I procrastinating? Maybe a little.  But "write a flippin' post for Bella Eats!" is definitely on my list, so I AM accomplishing something...

It is difficult to explain the draw that Brian and I have to New Orleans.  It just...is. We feel it as soon as we step off the plane, a bubbling of emotion from deep within, a giddy excitement that manifests itself as raised hairs along goose-bumped arms. Neither of us have ever lived in the city, we have no family in the area, our first visit together occurred just seven years ago. Yet after that initial stay in the Big Easy we were hooked. Completely and totally.

NOLA is so much more than Bourbon Street and Mardi Gras and frozen drinks in phallic cups. The city has soul, and to find it one needs only to spend a few hours walking slowly down her cracked sidewalks. Underneath the peeling paint, the sagging balconies, the leaning cottages, and the rusty ironwork is a humble elegance steeped in history and perseverance. She keeps her chin up and dances to her own soundtrack; a mix composed of melancholy notes from a jazz clarinetist on Royal, the rumble and clang of a street car on Saint Charles, the clink of an oyster shell tossed on a pile behind a bar, a “what can I getcha, baby?” from the busy woman behind a restaurant counter.

Her natives are loyal, devoted to the place they’ve called home for most, if not all, of their lives. They are drawn to her magic, held hostage by an appeal that keeps them coming home even after high waters threatened to wash that possibility into the Gulf. Sit down at a table in any well-established restaurant and learn that your waiter has worked there for 40+ years. He loves his job and has been well taken care of for all that time, because that's how they do things in the Big Easy. Filter in and out of shops and restaurants in the French Quarter and be thanked not only for visiting that particular address, but for visiting New Orleans. “Come back soon, y’hear? This city needs you.”

We do go back, as often as we can. With each visit we try to experience new places, new food, new music; but it is difficult to stray from those that have become favorites. It just wouldn’t be a weekend in NOLA without a black ham biscuit, beignets and cafe au lait at midnight, a muffaletta, blackened Louisiana drum, Fritzel’s, Doreen. Tell any lover of New Orleans that you’re planning a visit and watch their eyes light up as they rattle off their own list of places you must see, meals you must eat.  But most of all, they'll be excited that you're going to New Orleans, and that the city will have another set of fans to add to her list.

We last visited NOLA in May.  You might remember me mentioning our trip and making promises to share recipes inspired by the fabulous meals we had while there. Oh, and photographs...I promised those too. I also mentioned the stifling heat we experienced during our stay and my relief that we'd be spared from such temperatures in Virginia for another two-ish months.  Ha. If only I had knocked on wood after hitting 'publish' on that post...

The record-breaking temperatures have kept us from doing much cooking in our kitchen, as even the thought of turning on the stovetop raises a bead of sweat at my hairline. I'd just about given up on the idea of sharing red beans and rice with you anytime before October when I read this article on The Kitchn about slow-cooking in the summer. I know that it seems counter-intuitive to pull out the Crock Pot in the middle of a heat wave, but it actually makes quite a bit of sense.

For this recipe, which I adapted from a traditional stovetop variation, all of the preparation was completed in the morning before work when my house was cool and the setting sun wasn't blaring through the west-facing kitchen window. The ingredients were tossed in the Crock Pot, I turned the heat to low and out the door we went.  When we arrived home that night the house smelled amazing and dinner was ready without either of us laboring over a hot stove.  We ladled up the beans, poured ourselves cold cocktails, and settled into our dark den. Not exactly a shady New Orleans courtyard, but a respite all the same.

These beans were really fantastic; smoked and earthy with just a hint of spice.  My ingredients are very close to Chef Prudhomme's; it was really just the process and the color of the bell peppers that I altered. Also, Brian and I don't have quite the tolerance for spicy heat that most native New Orleanians do, so I knocked that back a bit as well.

Red Beans + Rice with Andouille Smoked Sausage

recipe adapted from Chef Paul Prudhomme's Louisiana Kitchen serves 6 Ingredients
  • 1 pound dried red kidney beans
  • water
  • 2 cups diced onion
  • 2 cups diced celery
  • 2 cups diced red bell pepper
  • 2 large smoked ham hocks, about 2.5 pounds total
  • 5 bay leaves
  • 1 tsp ground black pepper
  • 2 tsp dried thyme
  • 1 1/2 tsp dried oregano
  • 1 1/2 tsp garlic powder
  • 1 tsp ground red pepper (preferably cayenne)
  • 1 pound andouille sausage links
  • salt to taste
  • Basic Cooked Rice (recipe below)
Method
  1. The night before, place the dried red beans in a large saucepan and cover with water 2-inches above the beans. Let soak overnight.
  2. The next morning, drain the red beans and rinse thoroughly.  Refill the saucepan with fresh water to cover the beans by 2-inches.  Bring to a brisk boil and cook for 10 minutes.  Remove the beans from the heat and drain.
  3. Place the boiled beans in a slow-cooker (crock pot) and add ten cups of water over top. Add everything but the andouille sausage, salt and Basic Cooked Rice to the pot and stir well.
  4. Set the slow-cooker to the 'low' setting and let cook for 6 to 7 hours, until the beans are tender and just starting to break apart. (I came home for a late lunch to check on the beans, and turned the slow-cooker to the 'warm' setting for the remaining 4 hours of my work day).
  5. Add the andouille sausage links (split in half or quarters, depending on the size of the links) to the slow-cooker and continue to cook for 1 additional hour.
  6. Salt to taste.
  7. Serve over Basic Cooked Rice.
***UPDATE***

Thank you to InternationalRoutier for bringing to my attention the fact that dried red kidney beans cooked in slow cookers have been known to cause food poisoning!  You can be protected from this possibility by soaking the dry beans for at least 5 hours, and then boiling the beans briskly for at least 10 minutes prior to adding them to the slow cooker.  I've modified my recipe above to reflect this change.

Basic Cooked Rice

from Chef Paul Prudhomme's Louisiana Kitchen makes about 6 cups of rice Ingredients
  • 2 cups uncooked rice (I used brown rice)
  • 2 1/2 cups chicken broth
  • 1 1/2 tbsp very finely chopped onions
  • 1 1/2 tbsp very finely chopped celery
  • 1 1/2 tbsp very finely chopped bell pepper (the recipe calls for green, I used red because I love them)
  • 1 1/2 tbsp unsalted butter, melted
  • 1/2 tsp salt
  • 1/8 tsp garlic powder
  • a pinch each of white pepper, ground red pepper (cayenne), and black pepper
Method
  1. In a 5x9x2 1/2-inch standard loaf pan, combine all ingredients and mix well. Seal pan snugly with aluminum foil. Bake at 350º until rice is tender, about 1 hour, 10 minutes. Serve immediately.*
* I made the rice the night before.  If you are planning to do the same, DO NOT use green bell peppers, as they tend to sour quickly. Reheat the rice in a skillet with a bit of melted butter.

We can't even begin to imagine the affect that the explosion of the DeepWater Horizon oil drilling rig will have on the Gulf, the coast, the country, the world. The stories and images are devastating. If you are able and would like to help the recovery, I've provided links below to organizations that would appreciate your contribution.

Greater New Orleans Foundation National Wildlife Federation International Bird Rescue Research Center
Read More

on a whim

Andrea

As Spring quickly approaches, I’m finding that the evening meal has become a very relaxed affair. With daylight extending itself to an hour that allows for chatting with a glass of wine on the back deck after work, thoughts of dinner don’t start to cross the mind until the sun dips behind the trees and the temperature drops to a point that requires either a move inside or the addition of a lightweight sweater. It is only then that we notice the clock (and our bellies!) telling us that it is past 7pm, and time to pull something together in the kitchen.

I haven’t been planning our meals very far in advance, something that is unusual to my character. Typically our weekly menu is fully laid out by Saturday afternoon, neatly written in bright-white across our pantry doors coated with black chalkboard paint. I consider the menu carefully before finalizing my grocery list, receiving feedback from Brian and swapping days according to the longevity of ingredients to be purchased. The planned meals may vary slightly after Sunday’s trip to the store, when I discover that there are perfect golden beets that I hadn’t counted on calling my name, or that red cabbage has been particularly popular lately, and therefore its typical spot in the produce department is empty save for one sad, wilted purple leaf.

Lately our trips to the grocery have been more rushed than usual, the product of two very busy schedules finding only slivers of overlap in which to make the drive to and wander the aisles of the market. Oftentimes we wind up stopping in on our way to or from other errands, on days not typically designated as ‘grocery days’, leaving me standing in the middle of the produce department, overwhelmed and without a list. And so we rely on stand-by ingredients, items we purchase most weeks religiously, and add in whatever else looks or sounds good at that moment. I quickly assemble meals in my head, substituting ingredients in and out of pastas and soups, making sure that we’ll be able to use whatever we purchase and not be left with a bag full of yellow brussels sprouts at the end of the week. It still happens occasionally, but at least I try.

Which brings me back to the weeknight, post-7pm. Brian and I stand in our kitchen, him ravenous and me a little chilly, peering into the pantry and refrigerator, pulling out ingredients to assemble a spontaneous meal together. Our preferences are changing with the season, moving from heavy and hearty to light and bright.  'Quick' is a new requirement now that we’re getting started on preparation later in the evening, and 'warm' still plays a role for me after having been outside, barefoot and sweater-less, after the sun has set. The results have been fantastic; pasta tossed with leftover chicken, local ham and a light parmesan broth; a mélange of roasted chickpeas, potatoes and brussels sprouts; an on-a-whim creamy soup of potatoes, parsnips and asparagus.

The best part has been creating these recipes, together, according to our own at-that-moment preferences rather than the recommendations of a book, magazine or blog.  It is easy, when I have a plan, to lose myself in the kitchen to the preparation of dinner, excusing Brian to take care of one of the many items on his ever-growing ‘to do’ list. But when there is no plan, and the task is to create quickly, we come at it from both sides, each tossing in our own suggestions to make a dish that is so much more than the sum of its parts.

I’ll admit that this egg drop soup is a recipe that has been in our repertoire for years, but it is so simple and satisfying, and we nearly always have its ingredients in our kitchen, that it is perfect for a spontaneous lunch or dinner.  It is not enough on its own, which lead to the creation of the vegetable fried rice variation below, on a whim.

Egg Drop Soup

serves 2 Ingredients
  • 4 cups chicken or vegetable broth, divided
  • chunk of fresh ginger root, 1/4-inch thick by 1-inch diameter
  • 2 tbsp chopped fresh scallions
  • ¼ tsp salt
  • 4 tsp cornstarch
  • 2 eggs
  • 1 egg yolk
Method
  1. Reserve 3/4 cup of the broth, and pour the rest into a large saucepan. Add the salt, ginger and scallions, and bring to a rolling boil.
  2. In a cup or small bowl, stir together the remaining broth and the cornstarch until smooth. Set aside.
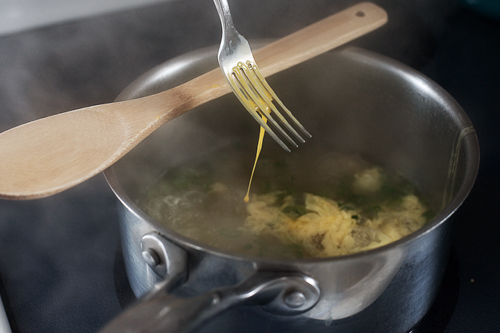
  3. In a small bowl, whisk the eggs and egg yolk together using a fork. Drizzle the egg a little at a time from the fork into the boiling broth mixture. The egg should cook immediately.
  4. Once all of the egg has been dropped, stir in the cornstarch mixture gradually until the soup is the desired consistency.

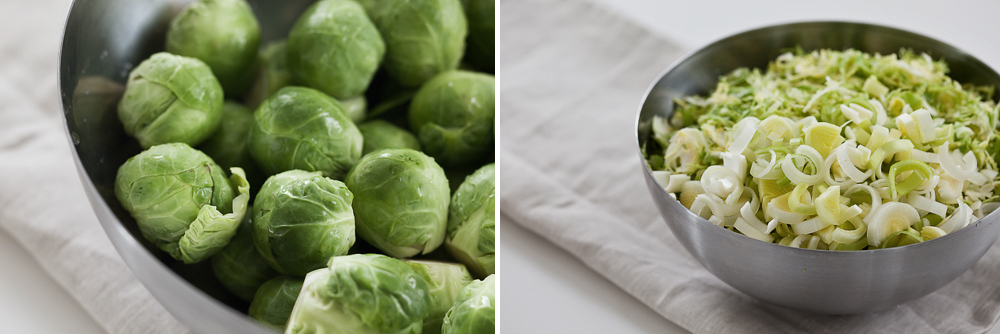
This dish was nearly spontaneous, the only forethought being that I made extra brown rice a few days prior, so that it would be ready and waiting in the fridge for some version of fried rice that had yet to be determined.  It just so happened that the night we decided to make egg drop soup was also the night that the leeks were starting to look a little haggard, and I wanted to use the brussels sprouts before they reached that same state.  Thus, a new star was born.

Fried Rice with Leeks and Brussels Sprouts

serves 6 Ingredients
  • 2 tbsp peanut oil, divided
  • 2 medium leeks, sliced thinly
  • 1 pound brussels sprouts, ragged outer leaves removed, sliced thinly (a food processor is a wonderful tool for this task)
  • 4 large eggs, lightly beaten
  • 4 cups steamed brown rice, cold (ideally, leftover from the night before)
  • sea salt and pepper to taste
Method
  1. Heat 1 tbsp of oil in a large nonstick skillet over medium-high heat.  Add the sliced leeks and brussels sprouts, and saute' until tender and bright green, about 5 minutes.  Remove from pan and set aside.
  2. Wipe skillet clean, then heat over high heat, until a drop of water vaporizes upon impact.  Add the remaining 1 tbsp peanut oil, swirling to coat pan evenly, and heat until just starting to smoke.  Add eggs, tilting pan and swirling eggs to form a thin, even layer, and cook for 30 seconds.  Add rice and stir-fry, breaking up eggs and letting rice rest several seconds between stirs, until rice is hot, about 2-3 minutes.
  3. Add the brussels sprouts and leeks, stir-frying to combine and heat through.  Add salt and pepper to taste.
Read More

winter's setting sun

Andrea

Winter and I have had a rocky go of it this year. We’ve waffled back and forth in a love / hate relationship that rivals the one I’ve currently got going on with my gym membership. On one hand, I’ve loved the quiet beauty a good snowstorm lays gently across my world and the resulting desire to cozy up on the couch with a hot cup of tea and a season of Entourage. On the other, I am tired of feeling stuck indoors, the outside ice, mud and frigid air enough to keep me hibernating under a quilt with the lights turned low. The result has been a bit too much cozying, and my motivation to cook, write, or log miles on the treadmill seems to be hiding in the same dark place as the sun. I am lost in the monotony of February, floating through scenes of white and gray, desperately seeking a reprieve in the form of a warm day, tiny chartreuse buds on the backyard Maple tree, fresh produce from local farmers that isn’t squash or cabbage.
There have been some brighter moments lately, a few shrieks of excitement released from my heart after witnessing the sun pierce a hazy layer of clouds, revealing a small patch of brilliant blue sky. I was thrilled to notice last week that two copper-toned birds have chosen to make a nest in the cold, drab ally outside my office window, and just this morning heard a woman excitedly discussing the yellow crocuses popping out from under a blanket of snow in her yard. All are sure signs of Spring’s impending arrival and moments I am desperate to capture permanently. Should snow fall again in the coming weeks I’d like to have a photograph stashed away in my back pocket to remind me that the end is near, that productivity will return with a sunshine-filled sky and baby birds chirping on the sill.
In the meantime, the meals I am managing to cook seem to have several similar qualities.  They are simple.  They are hearty and warm and filling.  They incorporate some ingredient that brightens the dish at multiple levels; to the eyes, to the nose, to the tongue. Whether it be golden citrus tossed in a salmon salad, vibrant leeks bobbing amongst emerald isles of kale, the scent of fresh lime wafting from my oven, each recipe is very carefully chosen to lift our spirits and carry us through these last (25!) days of Winter.

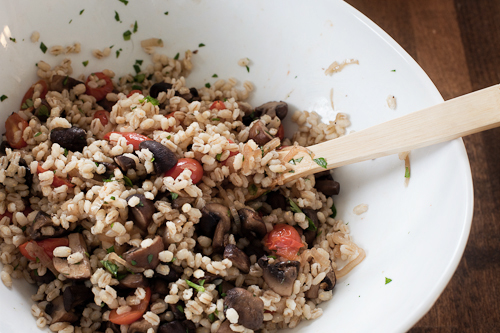
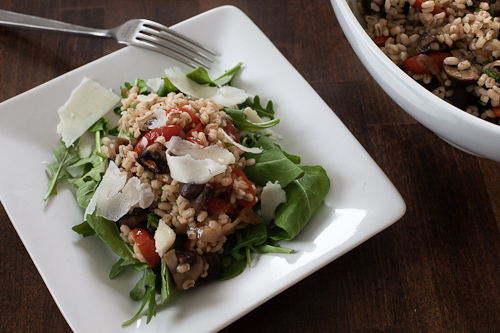
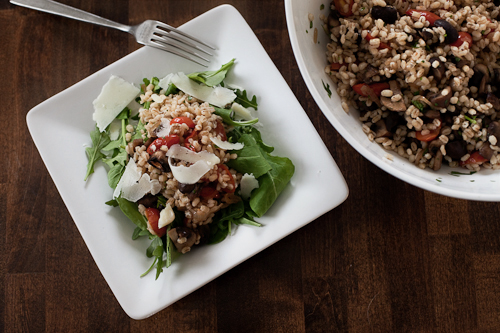
This salad is no exception to my new rules.  Hearty grains are joined by warm, earth-scented mushrooms to create a salad base as warm and satisfying as a family quilt enveloping shivering shoulders. Jewel-toned grape tomatoes and bright flecks of fresh parsley are the harbingers of this dish, reminders that Spring, followed closely by Summer, will be joining us soon. Served over a bed of spicy arugula and layered with shavings of Pecorino Toscano, this salad makes for a lovely, filling, early dinner, and is best enjoyed beside a window in the rays of Winter's setting sun.

Warm Barley Salad with Roasted Tomatoes and Mushrooms

adapted from A Year in a Vegetarian Kitchen by Jack Bishop serves 4 as a main course Ingredients
  • 1 pound cremini mushrooms, trimmed and quartered
  • 1 cup grape or cherry tomatoes, halved
  • 4 medium shallots, thinly sliced
  • 5 tbsp extra-virgin olive oil
  • salt and pepper
  • 1 quart water
  • 1-1/2 cups pearl barley
  • 1/4 cup minced fresh parsley
  • 6 cups packed baby arugula, spinach, or mix
  • 4 oz Pecorino Toscano, feta or goat cheese, diced or crumbled (I used a hard pecorino, shaved over the top of the salad)
Method
  1. Move an oven rack to the middle position and heat oven to 425*.
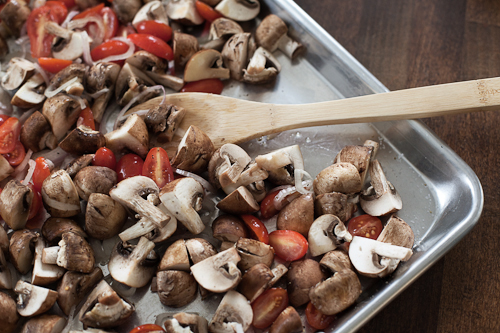
  2. Toss the mushrooms, tomatoes, shallots and 2 tbsp of the oil together on a rimmed baking sheet.  Season with salt and pepper to taste.  Toast the veggies, stirring once, until the mushrooms and shallots are browned nicely, about 25 minutes.  Let cool slightly.
  3. Meanwhile, bring water, barley and pinch of salt to a boil in a large saucepan.  Reduce the heat, cover and simmer gently, stirring occasionally, until the barley is tender but still a bit chewy, about 30 minutes.  Drain the barley well in a strainer and transfer to a large bowl.
  4. Toss the barley with the remaining 3 tbsp oil until coated evenly.  Add the roasted vegetables and parsley and toss to combine.  Cool slightly and then season with salt and pepper to taste.
  5. Divide the arugula or spinach among four large plates.  Spoon warm barley salad over each plate, sprinkle with cheese, and serve.
  6. Store barley salad separately from arugula or spinach and reheat for lunch the next day, if desired.
Read More

a healthy alternative

Andrea

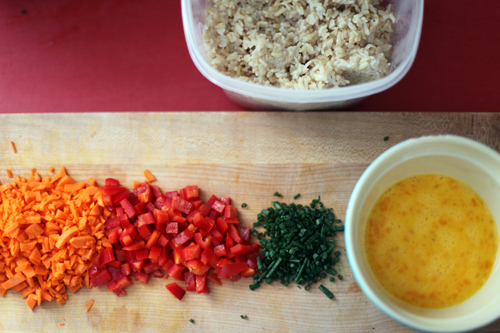
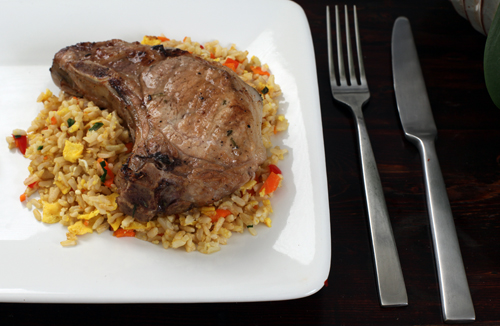
As much as both Brian and I LOVE to cook, there are still nights when we get home from the office and dread stepping into the kitchen.  Sometimes we're lucky enough to have some leftovers floating around in the fridge, other times we resort to ordering steamed veggies and tofu (and maybe some crab wontons, ahem) from the Chinese restaurant down the street.  Even though this happens every few weeks, it has been years since I've ordered fried rice.  I think I had a few too many disappointments with too-old, slightly crunchy, oddly clumping take-out fried rice in the past, and have stuck with steamed for as long as I can remember.  Plus, steamed is healthier, and it makes me feel a little less guilty about the crab wontons I shove in my mouth the minute we close the door behind the delivery boy. rice 1 But recently, we discovered how easy it is to make fried rice.  And that really, when you make it at home, its not that bad for you. Yes, you throw a couple of tablespoons of peanut oil in your pan, but we all know that the right oils in moderation are actually good for you, and when you divide this dish up into four hearty servings  you've got nothing to worry about.  Add the fact that we used brown rice instead of white and threw in some colorful veggies loaded with vitamins and you've got yourself a healthy alternative to take-out.  And I guarantee that you can make it faster than the delivery boy can get the bad stuff to you. rice 2 It does help to have some forethought - you want to have rice already made in order to enhance the texture of the dish and cut down on preparation time. Several Saturdays ago we picked up a couple of beautiful pork chops at the farmer's market from Double H Farm (no website) along with some of their gorgeous eggs.  Pork chops on the grill seemed like the perfect accompaniment to the veggie fried rice I'd been thinking about, so I cooked up some brown rice that weekend and one night after work we put this meal together.  It was quick, simple and incredibly delicious, not to mention colorful.  I briefly thought about healthify-ing the rice even further, by using only egg whites, but when it came time to discard those beautiful orange yolks I just couldn't do it.  I'll leave that up to you, if you wish. rice 4 The flavor of the pork was very good, I'm just not a big pork chop fan.  I ate a few bites and then passed my chop over to Brian, whom I knew would enjoy it far more than I would.  For me, the vegetable fried rice was the star of the show. Vegetable Fried Rice adapted from Gourmet Magazine, via Epicurious makes 4 large servings Ingredients:
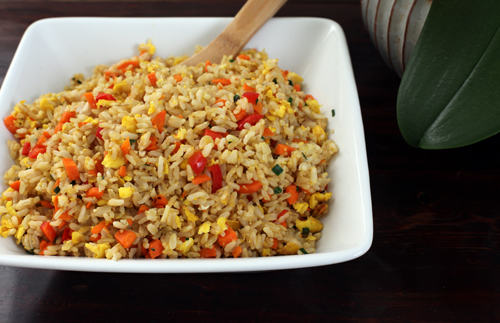
  • 2 tbsp peanut oil
  • 1 large carrot, peeled and chopped finely
  • 1 red bell pepper, chopped finely
  • 2 tsbp fresh chives or scallions, minced
  • 4 large eggs, lightly beaten
  • 4 cups steamed brown rice, cold (ideally, leftover from the night before)
  • 3/4 tsp salt
  • 1-2 tsp Asian sesame oil
Method:
  1. Heat 1 tbsp of oil in a wok or large nonstick skillet (12") over medium-high heat.  Saute' the carrot and bell pepper until tender, then remove to a separate bowl and set aside.
  2. Wipe skillet clean, then heat over high heat, until a drop of water vaporizes instantly upon contact.  Add the remaining 1 tbsp peanut oil, swirling to coat pan evenly, and heat until hot and just starting to smoke.
  3. Add eggs, tilting pan and swirling eggs to form a thin, even layer and cook for 30 seconds.  Add rice and stir-fry, breaking up eggs and letting rice rest several seconds between stirs, until rice is hot, about 2-3 minutes.
  4. Add the carrots, peppers, chives or scallions, salt and sesame oil to taste, stir-frying until well combined.
Pork Chop Marinade from Weber's Big Book of Grilling, by Jamie Purviance and Sandra S. McRae enough for 4 pork chops, about 1-1/4 inches thick Ingredients:
  • 1/4 cup plus 1 tbsp fresh lemon juice
  • 3 tbsp soy sauce
  • 1 tbsp extra virgin olive oil
  • 1/2 tsp light brown sugar
  • 1/4 tsp chopped fresh rosemary
  • 1/4 tsp kosher salt
  • 1/4 tsp freshly ground pepper
Method:
  1. Whisk together all of the ingredients.
  2. Place the chops in a large resealable plastic bag and pour in the marinade.  Press the air out of the bag and seal.  Turn the bag to distribute the marinade over the pork chops.  Refrigerate for 20-30 minutes.
  3. Remove the chops from the bag and discard the marinade.  Allow to stand at room temperature for 20-30 minutes before grilling or baking.
  4. Cook as you wish.  We grilled them, over direct high heat for 12-15 minutes.  Turn them over halfway through.
rice 3 We also whipped together a cucumber salad, to help with our abundance.  It was nice and refreshing on the side, but you really need to like sesame if you're going to enjoy this salad. Asian Cucumber Salad from Vegetables Every Day, by Jack Bishop Ingredients:
  • 3 medium cucumbers - peeled, halved lengthwise, seeded, and cut on the diagonal 1/4 inch thick
  • 1 tbsp kosher salt
  • 2 tbsp rice vinegar
  • 2 tbsp toasted sesame oil
  • 1/2 tsp sugar
  • 1/4 tsp red pepper flakes
  • 1 tbsp sesame seeds, toasted in a dry skillet until golden brown (we left these out, and the sesame flavor was still really strong)
Method:
  1. Toss the cucumbers with the salt in a colander.  Set the colander in the sink and let the cucumbers sit for 30 minutes to 1 hour, to drain excess liquid.
  2. Whisk the vinegar, oil, sugar and pepper flakes together in a small bowl and set aside, stirring occasionally until the sugar dissolves.
  3. Thoroughly rinse the cucumber slices under cold, running water and pat dry with paper towels.  Toss the cucumbers with the dressing and sesame seeds.

other stuff

If you live in or near Charlottesville, the 5th Annual Farm Food Voices Virginia event is this Sunday, August 2nd, from 2:00 - 7:30pm.  Come out to Monticello High School to learn more about current agricultural and local food issues in Virginia.  I'll be there! Food, Inc. has finally opened in Charlottesville! Also, follow me on Twitter!
Read More