Contact Us

Use the form on the right to contact us.

You can edit the text in this area, and change where the contact form on the right submits to, by entering edit mode using the modes on the bottom right. 


123 Street Avenue, City Town, 99999

(123) 555-6789

email@address.com


You can set your address, phone number, email and site description in the settings tab.
Link to read me page with more information.

Blog

simplest roast chicken

Andrea

roastchicken-1.jpg

Well...this is awkward.  

I prepared this post so long ago that it was actually photographed in the kitchen of the house we sold last May.  Not to mention that, actually, the draft date was January of 2013. Two years ago.  Before we even knew that we were having a baby.  A baby who is now a 15-month old toddler.

Sorry, friends.  Better late than never?

My tardiness does help to prove the point of this post, though; that roast chicken is a staple in our house, and this recipe in particular is our favorite.  Because, two years later, these images are as relevant as the day I prepared them.  Except for that kitchen.  

Happy, healthy 2015 to any readers that may still have Bella Eats hooked into their feed reader.  All two of you.  Hi Brian, hi Momma.

roastchicken-2.jpg
roastchicken-4.jpg
roastchicken-6.jpg
roastchicken-7.jpg
roastchicken-8.jpg
roastchicken-10.jpg

Simplest Roast Chicken

from Thomas Keller, via Epicurious

Ingredients

  • one whole, farm-raised chicken, 3-ish pounds
  • kosher salt and freshly-ground pepper
  • 2-3 teaspoons minced fresh thyme
  • unsalted butter
  • dijon mustard

Method (in Thomas Keller's words)

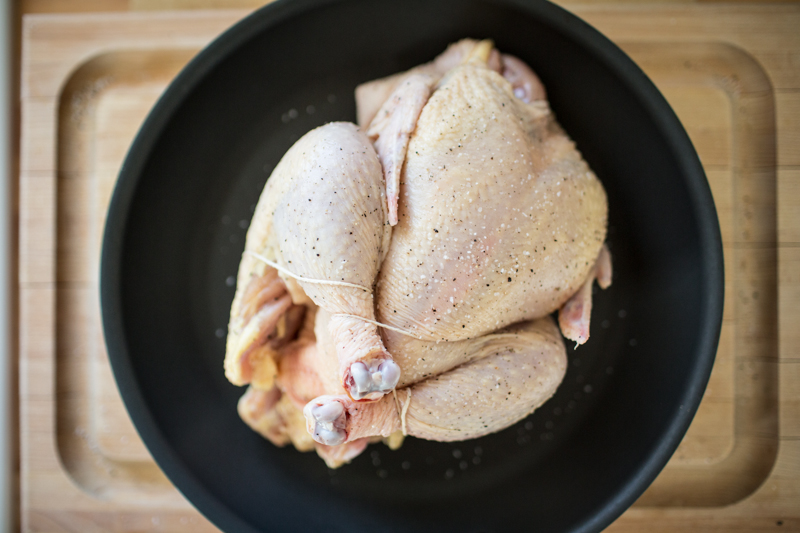
  1. Preheat the oven to 450°F. Rinse the chicken, then dry it very well with paper towels, inside and out. The less it steams, the drier the heat, the better.
  2. Salt and pepper the cavity, then truss the bird. Trussing is not difficult, and if you roast chicken often, it's a good technique to feel comfortable with. When you truss a bird, the wings and legs stay close to the body; the ends of the drumsticks cover the top of the breast and keep it from drying out. Trussing helps the chicken to cook evenly, and it also makes for a more beautiful roasted bird.
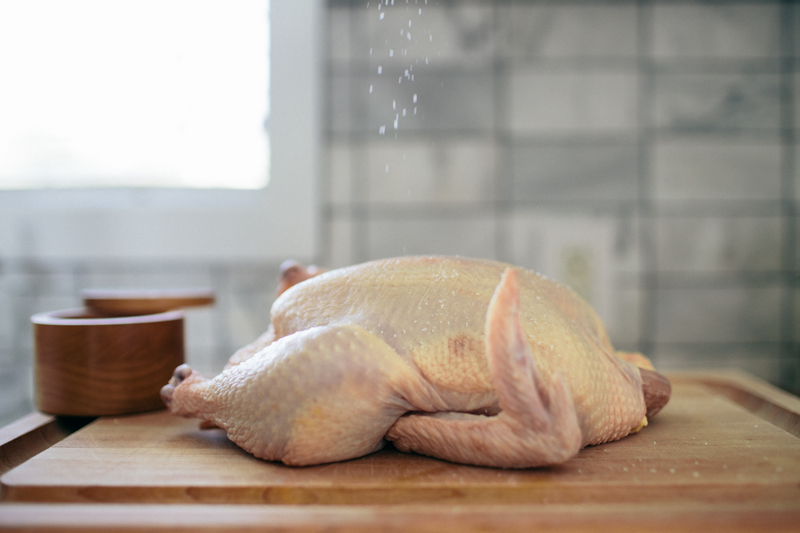
  3. Now, salt the chicken—I like to rain the salt over the bird so that it has a nice uniform coating that will result in a crisp, salty, flavorful skin (about 1 tablespoon). When it's cooked, you should still be able to make out the salt baked onto the crisp skin. Season to taste with pepper.
  4. Place the chicken in a sauté pan or roasting pan and, when the oven is up to temperature, put the chicken in the oven. I leave it alone—I don't baste it, I don't add butter; you can if you wish, but I feel this creates steam, which I don't want. Roast it until it's done, 50 to 60 minutes. Remove it from the oven and add the thyme, if using, to the pan. Baste the chicken with the juices and thyme and let it rest for 15 minutes on a cutting board.
  5. Remove the twine. Separate the middle wing joint and eat that immediately. Remove the legs and thighs. I like to take off the backbone and eat one of the oysters, the two succulent morsels of meat embedded here, and give the other to the person I'm cooking with. But I take the chicken butt for myself. I could never understand why my brothers always fought over that triangular tip—until one day I got the crispy, juicy fat myself. These are the cook's rewards. Cut the breast down the middle and serve it on the bone, with one wing joint still attached to each. The preparation is not meant to be superelegant. Slather the meat with fresh butter. Serve with mustard on the side and, if you wish, a simple green salad. You'll start using a knife and fork, but finish with your fingers, because it's so good.
roastchicken-9.jpg

2012 in review...on beyond the flavor

Andrea

Looking at my list of Bella Eats posts from 2012, it saddens me to see only thirteen. 13! And only nine of those contain recipes. Typically, at this time of year, I do a nice little re-cap post showcasing my favorite recipe from each of the previous twelve months. You can see 2011's summary here. With only nine recipes, and the ability to see them all by going back just three pages, I don't think that's necessary on this January 1st.

2012 was a GREAT year for food. But, because so much of my time was spent helping to launch and provide content over at Beyond the Flavor, my contributions to Bella Eats were severely limited. My top goal for 2013 is to create a better work/life balance, which includes allowing more time to dedicate to this space that I love so very much. Bella Eats is mine; a place to share my own stories surrounding the food on our table, to experiment with styling and to push myself as a photographer. I don't want to lose it. Truly. Please, dear readers (all ten of you that are left), hold me accountable. 

Until then, I want to encourage you to spend some time browsing the recipes we are providing at Beyond the Flavor. We are SO excited by what we've accomplished in our first nine months and the incredible support we've received from our friends, family, contributing chefs, farmers, bakers, and food enthusiasts. We have big plans for 2013. Watch for the launch of our new website in the Spring, complete with an easily searchable recipe database, food + beverage pairings, and more great stories from the people who make good, local food possible.

Here are my twelve favorite recipes shared on Beyond the Flavor this year. It was hard to narrow down, but these are recipes we've adopted into our life and now share at our table. I hope you'll try and enjoy them as much as we do, and continue to follow both Bella Eats and Beyond the Flavor in 2013.

Happy New Year, friends!  xoxo.

*note: recipes are located at the bottom of each post. we know it is tricky to find...which is why we're redesigning our site!

Tara-01.jpg

Dutch Baby - from Tara Koenig, owner of Sweethaus Bakery

Megan-16.jpg

Orrecchiette con Salsiccia e Rapini - from Megan Headley, Food + Wine Editor of Cville Weekly and Writer at Beyond the Flavor

Gerry-1.jpg

Macaroni + Cheese - from Gerry Newman, owner of Albemarle Baking Company

EricaJoel0002.jpg

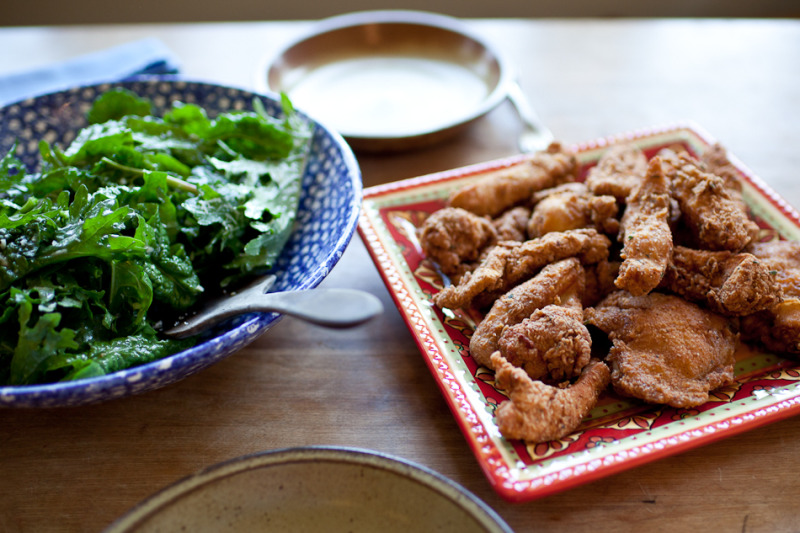
Fried Chicken - from Erica Hellen and Joel Slezak, owners/farmers at Free Union Grass Farm

Feast0002.jpg

Eggs on Eggs - from Kate Collier and Eric Gertner, owners of Feast!

DinnerAtHome0011.jpg

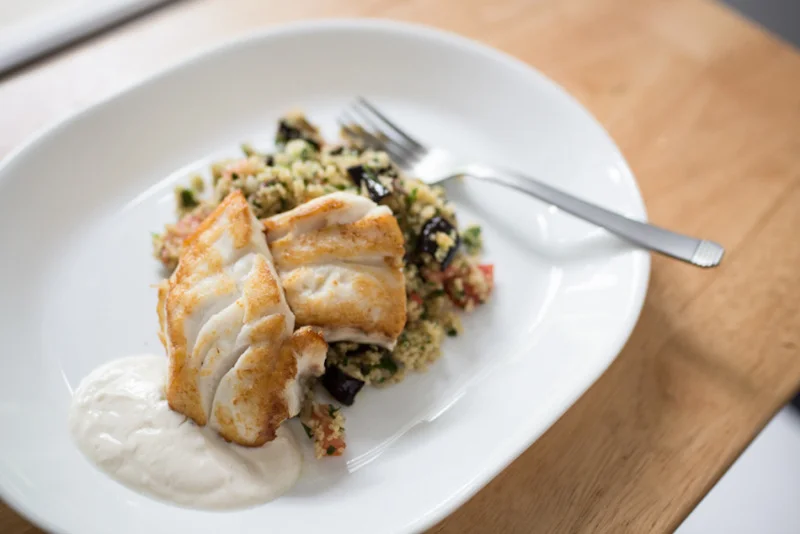
Seared Groupler and Quinoa Salad - from Ashley East, owner/chef at Dinners at Home

Tim0001.jpg

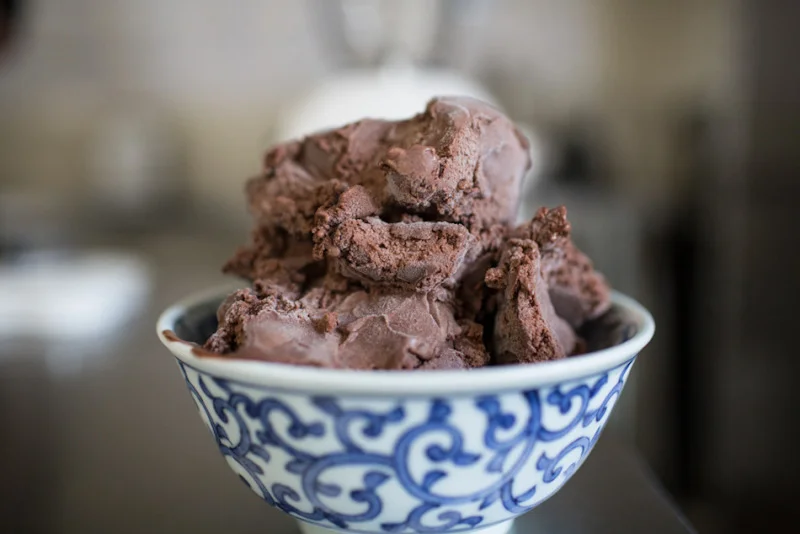
Ancho-Chili Chocolate Milkshake - from Tim Gearhart, owner/chocolatier at Gearharts Chocolate

Maupin-0002.jpg

Steak with Avocado Jalapeno Salad - from Dean Maupin, chef at C+O Restaurant

PottersCraft0015.jpg

Cider-Braised Chicken and Duck Fat Roasted Potatoes - from Dan Potter and Tim Edmond, owners of Potters Craft Cider

SCS0038.jpg

Eggs Shields - from Sarah Cramer Shields, co-creator of Beyond the Flavor

Michael-0039.jpg

Breakfast Pizza - from Michael McCarthy, owner/chef at Dr. Ho's Humble Pie

JennyParadox-0001.jpg

Blackberry Cobbler - from Jenny Peterson, owner of Paradox Pastry

we went to spain!

Andrea

AH merge.jpg

Hi, friends! Since the last time I checked in here at Bella Eats, Brian and I traveled to Spain. It was the most amazing trip, our honeymoon 6.5 years post-wedding, and we still can't quite believe that it's over. I have so much to share, and was so inspired while there, that I can barely contain myself! Once I parse through the thousands of images we captured I will share more, here, along with the recipes sure to emerge from our kitchen. We're already craving tortilla and albondigas like you wouldn't believe.

Also, if you're on Instagram, you can follow me there @andreahubbell. Brian (@brianmhubbell) and I made a special hashtag while abroad, #hubbellsinspain, which I still visit multiple times a day to relive small pieces of our time in Spain. Oh, how we miss it!

Excerpt0002.jpg

Also, have you met Sarah and Megan, the lovely ladies that I work with every week on Beyond the Flavor?

Friendsgiving-0001.jpg

Together, at the beginning of November, we hosted the first annual Beyond the Flavor Friendsgiving. It was the best evening, filled with contributors, supporters, and friends of our project, without whom Beyond the Flavor wouldn't exist. You really should hop over to see our recap of the event, even if only for food inspiration. While the recipes shared were originally intended for the Thanksgiving table, several have made it to our regular menu and would be wonderful for other holiday meals as well. My favorites so far: Autumn Israeli Couscous, Crispy Kale Salad, and Pecan Corn Bread Pudding.

Friendsgiving-0079.jpg

[photo by Sarah]

Coming home from 12 days of travel makes one crave cooking in one's own kitchen, and I am no exception. While I won't make any promises, I do have the best of intentions for Bella Eats. I hope to see more happening here, soon. We made the best, simplest roast chicken on Sunday, and it deserves an audience. Until then...happy December!

roastchicken-0001.jpg

fresh fig tart with lemon cream

Andrea

Fig Marscapone Tart0001.jpg

Figs. Quite possibly the most beautiful edible fruit in existence. They are at their peak in Charlottesville, and I can't get enough of the soft globes that are actually inverted flowers (Did you know? I did not. Thanks, Megan!). We foraged for them over on Beyond the Flavor, joining our friend Daniel as he visited some of his favorite fig-gathering haunts around the city. Eagerly awaiting their arrival each September, I've been known to stake out trees on the University of Virginia grounds; faithfully driving by each day for weeks waiting for the green fruit to turn rosey, only to be foiled by a student who reached the trees an hour before us on the day they were finally ripe. The sight of his retreating form, bag of fresh figs full to bursting at his side, still saddens my heart. 

On Beyond the Flavor, we've asked our readers to submit their favorite fig recipes. (Like us on Facebook and submit your recipe here, if you've got a favorite to share. There's a prize for the winner!) While my preferred way to consume a fig is fresh, straight from the tree, I wanted to try something new for this little contest we're holding. I thought about a savory treat, but settled on sweet because, let's be honest, that's my area. 

A quick internet search resulted in this recipe, whose simplicity and un-touched figs caught my attention.  There were obstacles that stood in my way - a lack of sour cream in the refrigerator and an oven that broke in the middle of baking the crust - but I persevered and was able to share four pieces amongst friends. The firm crust with a cornmeal crunch paired nicely with soft, lemon-scented cream and the pop of tiny fig seeds between teeth. We four enjoyed it immensely, outside under the stars, while our friends' dog enjoyed the leftovers on the countertop in the kitchen upstairs. A disappointment, for sure, as I had at least one more piece earmarked for the next morning's breakfast. 

My craving not fully satisfied, I'll be making this tart again. As soon as we fix the oven.

Fig Marscapone Tart0002.jpg

Fresh Fig Tart with Rosemary Cornmeal Crust + Lemon Mascarpone Cream

modified from Gourmet, July 2003

serves 12

crust ingredients

  • 1 1/2 cups all-purpose flour
  • 1/2 cup yellow cornmeal (not stone-ground)
  • 1 tablespoon sugar
  • 1/4 teaspoon salt
  • 1 stick (1/2 cup) cold unsalted butter, cut into pieces
  • 1 1/2 tablespoons finely chopped fresh rosemary
  • 4 to 5 tablespoons ice water
filling ingredients
  • 1/3 cup sour cream (I used Greek yogurt instead)
  • 1 cup mascarpone cheese (8 oz)
  • 1/4 cup sugar
  • 1 1/2 teaspoons finely grated fresh lemon zest
  • 1/8 teaspoon salt
  • 1 1/2 lb fresh figs

crust method

  1. Pulse together flour, cornmeal, sugar, and salt in a food processor. Add butter and rosemary and pulse until mixture resembles coarse meal with some small (roughly pea-size) butter lumps. Drizzle evenly with 4 tablespoons ice water and pulse until just incorporated.
  2. Gently squeeze a small handful: If it doesn't hold together, add more water, 1/2 tablespoon at a time, pulsing after each addition and continuing to test.
  3. Press dough evenly onto bottom and up sides of tart pan with floured fingers. Smooth dough with a small offset metal spatula or back of a spoon (floured if necessary), then roll a rolling pin over top of pan to trim dough flush with rim. Chill crust until firm, about 30 minutes.

filling + assembly

  1. Preheat oven to 400°F.
  2. Bake crust in middle of oven until center and edges are golden, 25 to 30 minutes (don't worry if bottom of crust cracks), then cool in pan on a rack.
  3. filling + assembly
  4. Whisk together sour cream, mascarpone, sugar, zest, and salt in a bowl.
  5. Remove side of tart pan and spread mascarpone cream in shell. Cut figs lengthwise into 1/4-inch-thick slices and arrange decoratively over cream.
Fig Marscapone Tart0003.jpg

For those of you missing more regular Bella Eats posts, you really should hop over to Beyond the Flavor.  I am there more often than I am here, although I haven't given up on this little corner of the internet. I know I've said this before, many times, but I do hope to carve out more time to spend in this space I created nearly four (4!!!) years ago.  After all, it was the inspiration for everything I am doing today with food and photography, and I can't bear to see it fade away. Many thanks to all of you who stick around, comment, and poke me with emails to say hello. I appreciate each and every one of you.  xoxo.

lemon olive oil cake with apricots and rosemary

Andrea

Apricot Cake0001.jpg

Brian and I have spent a total of maybe thirty nights apart since we were married six and a half years ago. We’ve racked up seventeen of those nights in the last seven months, since the beginning of 2012, and have another ten on the calendar for August and September. We’re each traveling for work more than ever before, being pulled to New York, Connecticut, Chicago, Florida, Philadelphia, New Orleans, and New Hampshire this year alone. 

An essential part of travel, for each of us, is the exploration of local food. Before we embark on a journey we ask friends, Facebook, and Twitter for restaurant recommendations. I look through the archives of Bon Appetit, Saveur, Gourmet, and The New York Times to see what I can find about the culinary scene. While visiting, Instagram is aflutter with food and drinks consumed. If we’re apart, iPhone photos are swapped between Brian and I; visual descriptions of whatever treats have been found both away and at home. We stay connected through the food we eat, never liking to spend a meal separately.

The best part, though, is the gifts given upon return. That little piece of an experience apart that lets the other know they weren’t really that far away at all. From New Orleans there was duck jerky from Butcher and, that one time, two pounds of sliced ham from Mother’s. From Florida, a special spice rub from 4Rivers BBQ. The exchange goes the other way, too, with the homemade pot roast awaiting my return from New York in February, or the whisper of a ‘fruit surprise’ in the kitchen just two weeks ago.

I’d returned early-ish on Sunday morning. Having photographed a wedding in northern Virginia with Sarah the night before, we’d each been anxious to get home to our husbands. An early departure with a quick stop at Starbucks had us back in Charlottesville by 10am, just in time for me to crawl in bed for the last 30 minutes of weekend snuggling with Brian and the pups. As we recapped our two nights apart, Brian rattled off the list of goodies he’d picked up at the farmers’ market the morning before. Excited to see my surprise, I padded out to the kitchen to investigate. And there sat the prettiest, rosiest apricots in my very favorite bowl.

Just the thought of Brian coming across those apricots at the market makes me smile, because I know that he would never have picked them up just for himself. No, he saw the pretty fruits and thought ‘Andrea would like to bake something with these.’ and whisked them away to our house where, two days later, they were the stars of this cake.

Apricot Cake0002.jpg
Apricot Cake0003.jpg
Apricot Cake0004.jpg
Apricot Cake0005.jpg

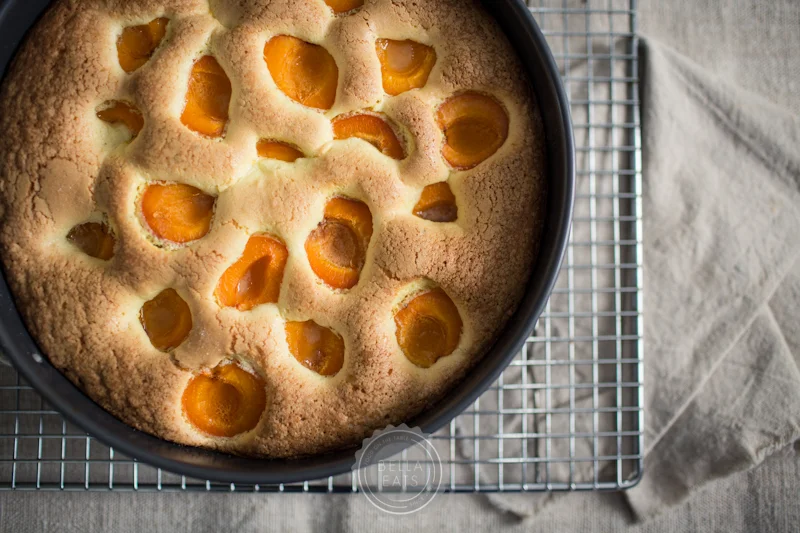
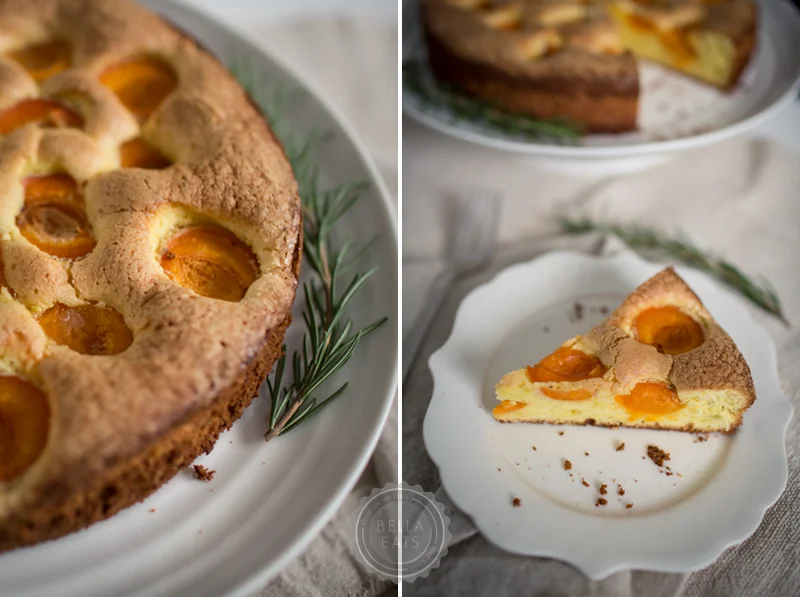
We adored this cake. Not too sweet (Brian's favorite kind) but bursting with the flavor of fresh apricots. The base has an almost poundcake-like consistency...dense and a bit spongey. The earthiness of the rosemary was the perfect compliment to the brightness of the fruit. Be sure to pick good apricots; they'll make all the difference.

Lemon Olive Oil Cake with Apricots and Rosemary

serves 8

adapted from Gourmet, April 2006

Ingredients

  • 3/4 cup olive oil (extra-virgin if desired), plus additional for greasing pan
  • 1 large lemon
  • 1 tsp minced fresh rosemary
  • 1 cup cake flour (not self-rising)
  • 5 large eggs, separated, reserving 1 white for another use
  • 3/4 cup plus 1 1/2 tablespoons sugar
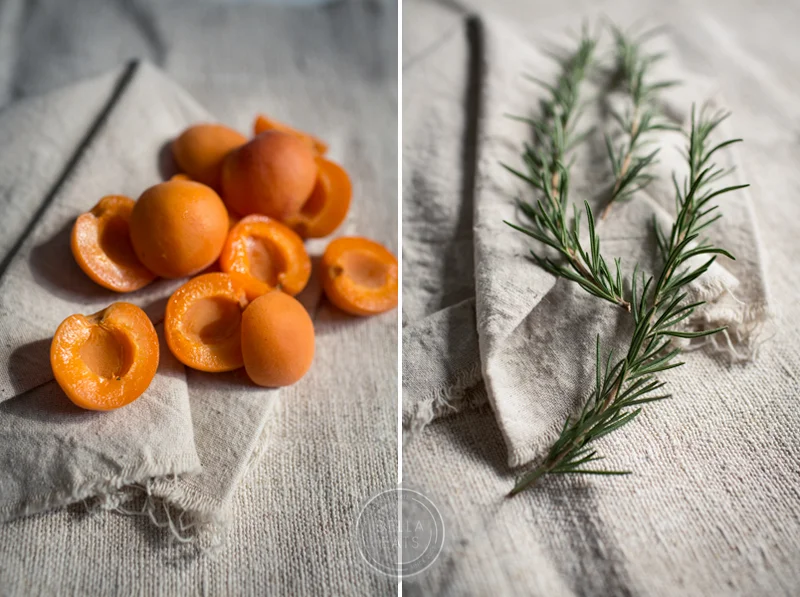
  • 10 fresh apricots, halved and pitted

Method

  1. Put oven rack in middle position and preheat oven to 350°F. Grease a 9-inch springform pan with some oil, then line the bottom with a round of parchment paper. Oil the parchment.
  2. Finely grate enough lemon zest to measure 1-1/2 teaspoons and whisk together with flour. Add the chopped rosemary and whisk. Halve lemon, then squeeze and reserve 1 1/2 tablespoons fresh lemon juice.
  3. Beat together yolks and 1/2 cup sugar in a large bowl with an electric mixer at high speed until thick and pale, about 3 minutes. Reduce speed to medium and add olive oil (3/4 cup) and reserved lemon juice, beating until just combined (mixture may appear separated). Using a wooden spoon, stir in flour mixture (do not beat) until just combined.
  4. Beat egg whites (from 4 eggs) with 1/2 teaspoon salt in another large bowl with cleaned beaters at medium-high speed until foamy, then add 1/4 cup sugar a little at a time, beating, and continue to beat until egg whites just hold soft peaks, about 3 minutes.
  5. Gently fold one third of whites into yolk mixture to lighten, then fold in remaining whites gently but thoroughly.
  6. Transfer batter to springform pan and gently rap against work surface once or twice to release any air bubbles. Place apricot halves in a decorative pattern across the top of the cake, cut-side up. Sprinkle top evenly with remaining 1-1/2 tablespoons sugar. Bake until puffed and golden and a wooden pick or skewer inserted in center of cake comes out clean, about 45 minutes. Cool cake in pan on a rack 10 minutes, then run a thin knife around edge of pan and remove side of pan. Cool cake to room temperature, about 1-1/4 hours. Remove bottom of pan and peel off parchment, then transfer cake to a serving plate.
Apricot Cake0006.jpg

fresh tomato pasta

Andrea

TomatoPasta0004.jpg

In terms of food, I do believe this is my favorite time of year. Summer. Aside from the two outdoor weddings photographed on 100+ degree days, she's been treating me well. Our local market is exploding with color and flavor; eggplant, tomatoes, peaches, melon and squash make it into our basket every Saturday. Our dinners are simple, inspired by the abundant fresh produce and the desire to keep it all as whole as possible. While I do love to cook, the idea of spending an hour preparing dinner over a hot stove is less than desireable in the middle of July. Which is why this recipe is my new favorite.

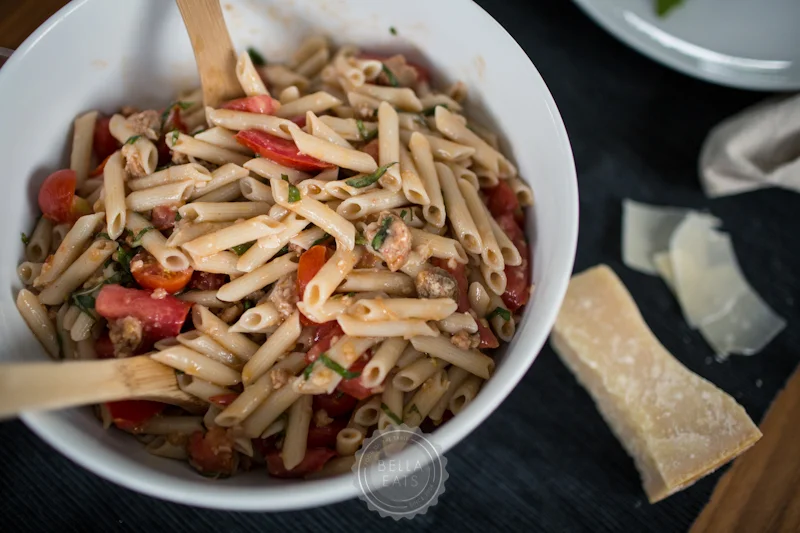
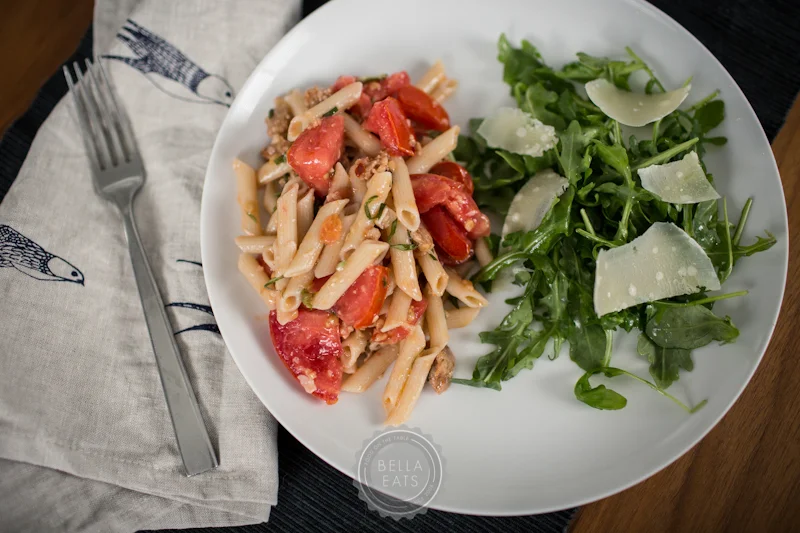
Sarah is my office mate, Beyond the Flavor partner, fellow food lover, and very dear friend. Nearly every afternoon we turn away from our computers and ask what the other is having for dinner. On Monday, when I was clueless about our evening menu but mentioned that I had a bowl full of beautiful, ripe tomatoes, she told me about this dish. It is about as simple as it gets, relying fully on the flavor of summer's best bounty. Tomatoes are chopped to bite-size pieces and tossed with sliced basil, minced garlic, and a generous amount of olive oil. The mixture is then refrigerated for at least an hour before being folded into hot, cooked pasta. Add some sausage (which we'd grilled the previous evening), salt, pepper and Parmigiano, and dinner is served.

Happy weekend, friends!

TomatoPasta0001.jpg
TomatoPasta0002.jpg
TomatoPasta0003.jpg

Summer Tomato Pasta

serves 4

To make this dish vegetarian, remove the sausage and add red pepper flakes to your marinade.

Ingredients

  • 3 large tomatoes
  • 1 cup grape tomatoes
  • 12 leaves fresh basil
  • 6 cloves garlic
  • 1/2 cup good-quality olive oil
  • 1 cup crumbled hot italian sausage, cooked
  • 1 pound brown rice pasta
  • salt + pepper
  • fresh Parmigiano Reggiano

 Method

  1. Chop tomatoes. Slice basil. Mince garlic. Toss all together in a shallow dish with olive oil and refrigerate for at least an hour.
  2. Cook pasta. I like to bring my salted water to a boil, add the pasta, and then turn off the heat and cover the pot with a lid. The pasta should be done in 8-10 minutes.
  3. Drain pasta and add back to pot. Toss with tomato mixture and add crumbled sausage. Salt + pepper to taste.
  4. Serve with shavings of Parmigiano and an arugula salad.

TomatoPasta0005.jpg

double chocolate cake, raspberry filling, vanilla meringue buttercream (oh my!)

Andrea

chocolate cake vanilla buttercream-3.jpg

March 5, 2012. That is the original date on this post, the date that I thought I would be sharing this cake with you. Three days after my honey's birthday, one hundred and four days ago. Bella Eats has not gone this long without a real post since the great silence of 2010, when I took a few months off in the midst of starting my company, teaching architecture to hopeful college students, and redesigning this site. I hoped then that such a long break would never happen again, but I suppose that one can never predict life's ebbs and flows. I won't bore you with what I've been up to. If you're interested, I invite you to visit my other passions, Andrea Hubbell Photography and Beyond the Flavor, for peeks into my latest projects.

Rather than start off with apologies I'd like to have a little celebration. That's what cakes are for, right?! This particular cake was baked to celebrate Brian's 30th birthday. Thirty! 30. The big 3-0. We both reached that milestone in March with mixed emotions, though most of them good. I've never thought of myself as one who is aware of age. But perhaps that was because I was the one still in my 3rd decade while most of my friends were beginning their 4th. Maybe it is my change in career (there are a lot of young, talented photographers that I've surrounded myself with lately) or the launch of Beyond the Flavor (where we find ourselves often interviewing young, talented chefs/farmers/bakers) but I've found myself on several occasions lately thinking 'Gosh, I'm old!'. I know that it's silly, and that those of you reading this who are dancing your way through your fourth, fifth, sixth, and seventh decades are rolling your eyes at this very moment. But, it’s true.

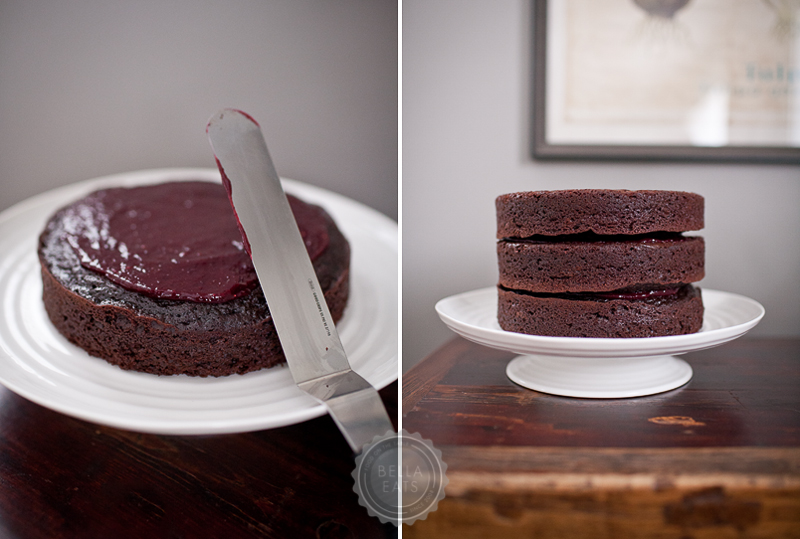
And I’ve realized, each time that I think ‘Gosh, I’m old!’, that it really isn’t a bad feeling. With ‘old’ comes comfort, and experience, and tradition. For example, I love that I can look back over the last few years and see four variations of this chocolate cake. Three years ago, when Bella Eats was in its infancy, I made a double chocolate cake with raspberry filling to celebrate my love’s twenty-seventh birthday. It was my very first layer cake...ever. And the next year, a double chocolate cake with praline topping to celebrate his twenty-eighth. And the following year, a double chocolate cake with mocha cream for his twenty-ninth (although, somehow, this version never made it to the blog). I have, just now, read those first two cake posts, and am completely delighted with how much has changed since then. 

In 2009 I had just lost my first job out of graduate school. I’d completed my master’s in architecture the previous spring unsure of what I wanted to be when I grew up. Employment in architecture was the clear path, but I wasn’t feeling compelled to follow it. Secretly, I hoped that I wouldn’t receive a job offer after school, and that I would be forced to think outside of the box to find my true calling. Instead, a position at a landscape architecture firm landed in my lap, and I took the opportunity to explore something similar, but different, from what I’d been trained to do. 2009 brought the loss of that job, and a position back in an architecture firm. Also, I was baking in my cramped, red countertop kitchen.

In 2010 I was still working for that same architecture firm, although the writing was on the wall that I might not be for long. It was a tough year for architects; a year when the economy forced many of us to find alternate paths. I was beginning to find mine when I wrote Brian’s birthday cake post in March, having recently photographed a few projects for the firm and a few family portraits for friends.  Soon after, I would receive an offer to teach architecture at the University of Virginia. And, I was still baking in my cramped, red countertop kitchen.

Although there isn’t a proper post for Brian’s 29th birthday cake, I can remember with some clarity what was happening in 2011 and feel I should document it here. I’d recently quit my architecture job, declined a second semester of teaching at UVA, and launched into my photography company as a full-time career. It was scary, and unpredictable, and I had no idea what I was doing. Brian found a new job that same month, sending himself off in a new direction entirely. We were hopeful, and excited, and ready for what the world had to offer. But still, I was baking in my cramped, red countertop kitchen.

And here we are in 2012. Life has more certainty to it. My career path is clear, Brian’s career path is clear, we are both loving our jobs. After a decade together (yes, we started dating when we were 20!) and six years of marriage we’ve finally planned a honeymoon to Spain.  Looking back on B’s 28th birthday post, my favorite lines are these: We've started a ‘thirty before thirty’ list, although I don’t think either of us has finalized the catalog of things we’re set to accomplish. A lot can happen in two years’ time, and I’ve come to terms with the reality that is a sliding scale of goals, an evolving list of priorities. The point is to think about it, to make an effort towards trying new things, towards bettering and challenging ourselves in the smallest or biggest of ways. We definitely didn’t complete the items on the list, and probably never completed the list itself, but I like to think that we still approach life in the same way. And yes, I baked his thirtieth birthday cake in our cramped, red countertop kitchen.

Much has changed these last three years. My job. My career path. My writing and my photography. Even our kitchen, since we just spent the last month remodeling it (!!!!!!!). But the one constant, that one element in each of these posts aside from the double chocolate cake, is Brian. He who makes growing old comfortable, enjoyable, and welcome. May we have many more birthdays to celebrate, with some variation of this double chocolate cake. xoxo.

chocolate cake vanilla buttercream-1.jpg
chocolate cake vanilla buttercream-4.jpg

Double Chocolate Cake with Raspberry Filling and Vanilla Meringue Buttercream

Makes 12-14 servings. Cake recipe from Epicurious, Vanilla Meringue Buttercream recipe adapted from Martha Stewart

Ingredients

for cake layers:

  • 3 ounces fine-quality semisweet chocolate such as Callebaut
  • 1 1/2 cups hot brewed coffee
  • 3 cups sugar
  • 2 1/2 cups all-purpose flour
  • 1 1/2 cups unsweetened cocoa powder (not Dutch process)
  • 2 teaspoons baking soda
  • 3/4 teaspoon baking powder
  • 1 1/4 teaspoons salt
  • 3 large eggs
  • 3/4 cup vegetable oil
  • 1 1/2 cups well-shaken buttermilk (for dairy free variation: mix 1 1/2 cups soymilk with 1 tablespoon cider vinegar and set aside to curdle)
  • 3/4 teaspoon vanilla

for raspberry filling:

  • 2 10-oz bags frozen raspberries, thawed
  • 1/2 cup sugar
  • 2 tbsp cornstarch

for vanilla meringue buttercream:

  • 5 large egg whites
  • 1 cup plus 2 tbsp sugar
  • pinch of salt
  • 1 lb (4 sticks) unsalted butter, at room temperature
  • 2 tsp vanilla extract

    Method

    make cake layers:

    1. Preheat oven to 300* F and grease two 10″ cake pans, or three 8″ or 9″. Line bottoms with rounds of wax paper and grease paper.
    2. Finely chop chocolate and in a bowl combine with hot coffee. Let mixture stand, stirring occasionally, until chocolate is melted and mixture is smooth.
    3. Into a large bowl sift together sugar, flour, cocoa powder, baking soda, baking powder, and salt. In another large bowl with an electric mixer beat eggs until thickened slightly and lemon colored (about 3 minutes with a standing mixer or 5 minutes with a hand-held mixer). Slowly add oil, buttermilk, vanilla, and melted chocolate mixture to eggs, beating until combined well. Add sugar mixture and beat on medium speed until just combined well.
    4. Divide batter between pans (pans should only be half full – if you use 8″ pans you will have some batter leftover) and bake in middle of oven until a tester inserted in center comes out clean, 1 hour to 1 hour and 10 minutes for 10″ pans, 50 minutes for 8″-9″ pans.
    5. Cool layers completely in pans on racks. Run a thin knife around edges of pans and invert layers onto racks. Carefully remove wax paper and cool layers completely. Cake layers may be made 1 day ahead and kept, wrapped well in plastic wrap, at room temperature.

    make raspberry filling:

    1. Puree the raspberries in a food processor or blender. Press the puree through a fine-mesh strainer with the back of a spoon, removing the seeds. Heat the puree in a small pot with the sugar and cornstarch until mixture boils, stirring constantly. As it boils, it should quickly thicken. Let cool.

    make frosting:

    1. To make the frosting, combine the egg whites, sugar and salt in a heatproof bowl set over a pot of simmering water.  Heat, whisking frequently, until the mixture reaches 160° F and the sugar has dissolved.
    2. Transfer the mixture to the bowl of a stand mixer fitted with the whisk attachment.  Beat on medium-high speed until stiff peaks form and the mixture has cooled to room temperature, about 8 minutes.
    3. Reduce the speed to medium and add the butter, 2 tablespoons at a time, adding more once each addition has been incorporated.  If the frosting looks soupy or curdled, continue to beat on medium-high speed until thick and smooth again, about 3-5 minutes more (don’t worry, it will come together!)  Stir in the vanilla extract and mix just until incorporated.
    4. Keep buttercream at room temperature if using the same day, or transfer to an airtight container and refrigerate up to 3 days or freeze up to 1 month. Before using, bring to room temperature and beat with paddle attachment on low speed until smooth again, about 5 minutes.
    chocolate cake vanilla buttercream-2.jpg

    saying hello, oysters, and beyond the flavor goodness

    Andrea

    Hello friends! I just wanted to say hi, that I miss you all, and that I will try to be better about getting recipes up on Bella Eats a little more frequently! Life has been amazing....and busy. Until I can get another recipe up (I have high hopes for this weekend...we shall see!) I wanted to share a few fun things happening in Charlottesville at the moment. 

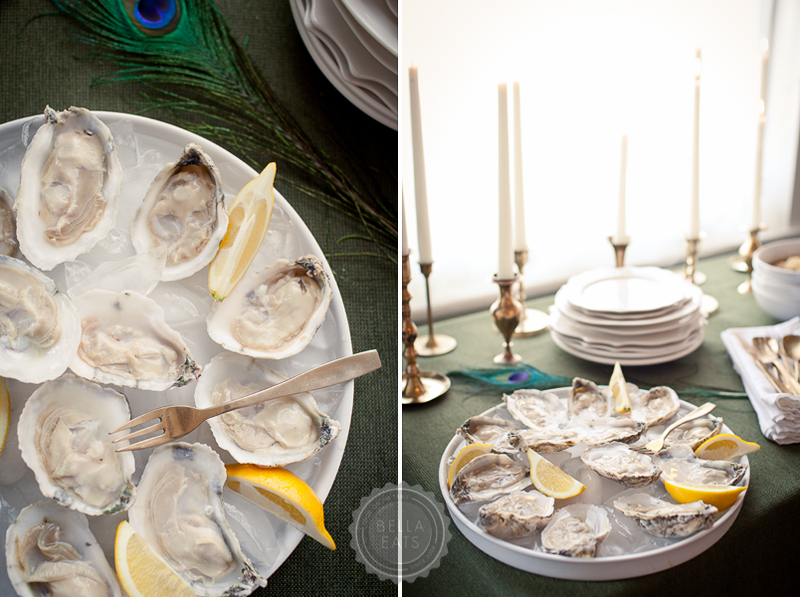
    The Blue Ridge Oyster Festival is on Saturday!!! We're going, are you? There will be oysters from Mobjack Bay, amazing food from Ben Thompson of The Rock Barn, and beer + wine from Devils Backbone, Starr Hill, Cardinal Point, and Blenheim Vineyards.  See you there!

    [above images from my styled bridal brunch for the Clutch Guide!]

    Beyond the Flavor is going strong and has had tremendous support from our community! Sarah and I are so excited about this project, and thrilled with the feedback we've had so far. Please stop by to check out some of the wonderful recipes that have been submitted by food folks in the Charlottesville area!

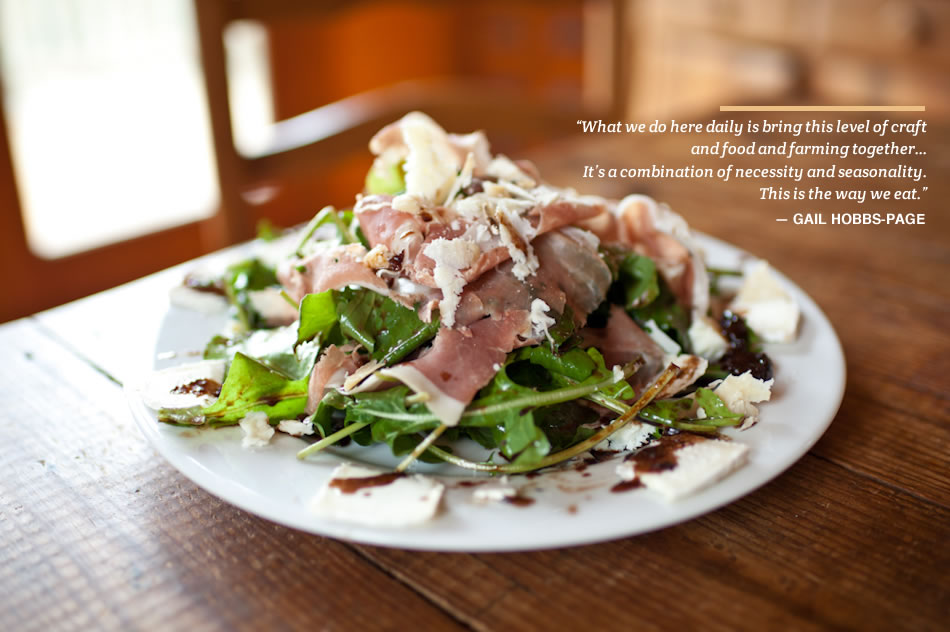
    Above, Arugula with Prosciutto and Fig-Sherry Vinaigrette from Gail Hobbs-Page of Caromont Farm.

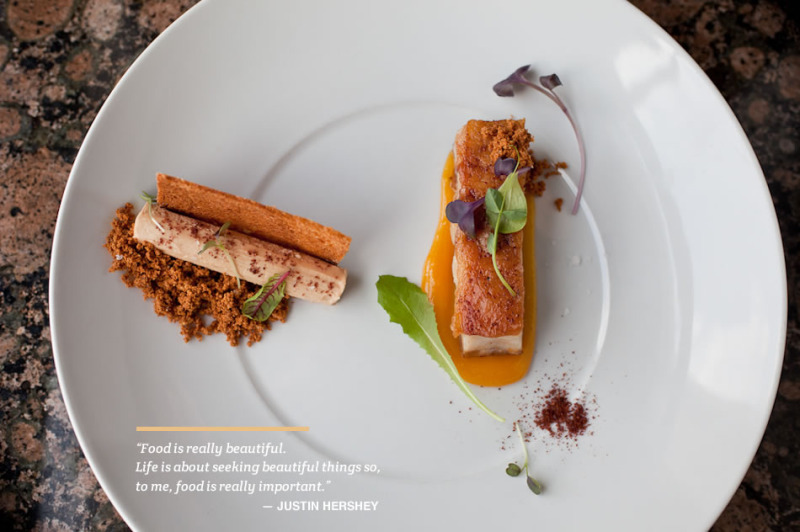
    Fois Gras + Pork Belly from Justin Hershey of Zinc.

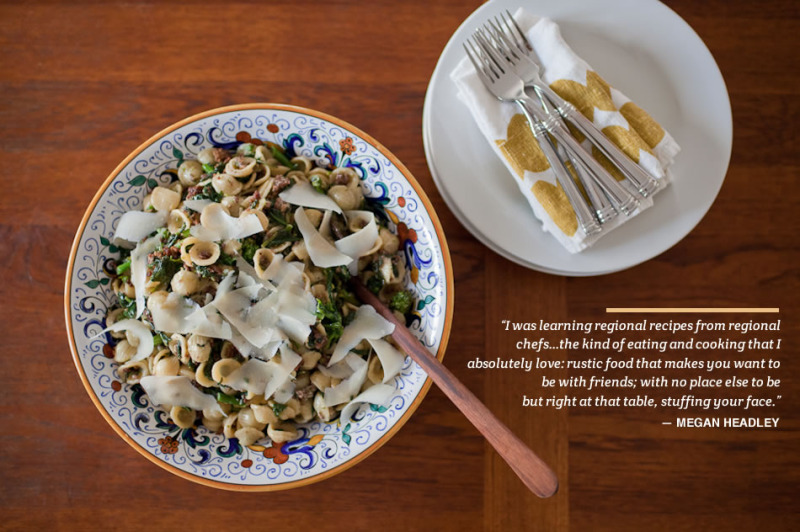
    Orecchiette con salsiccia e rapini from Megan Headley, the Food + Wine Editor of Cville Weekly.

    Thank you for your patience!  See you soon!!!

    blackened pork chops with red gravy + creamy cheddar polenta

    Andrea

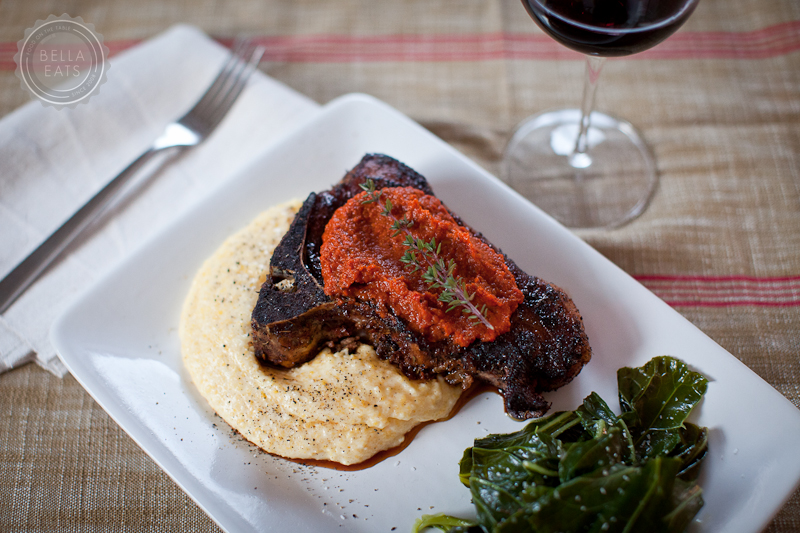
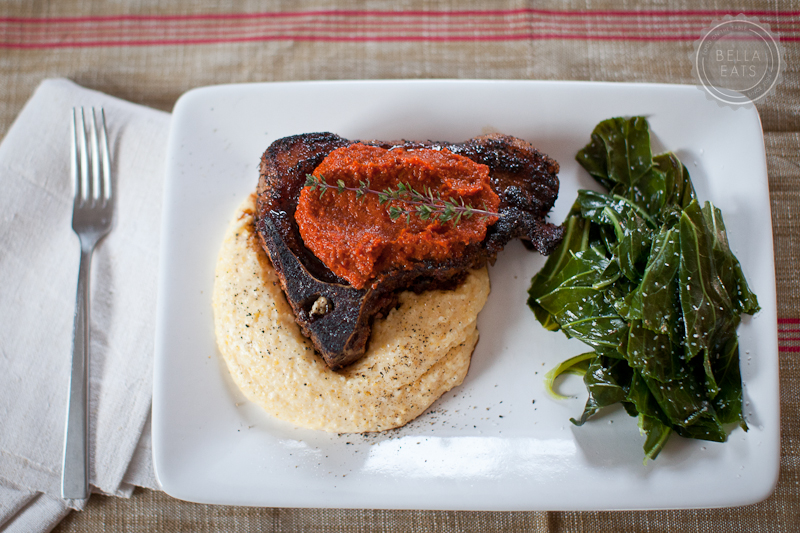
    We've felt like spring in Virginia since, oh, February 1st. Despite the incredible temperatures, it was just last week that suddenly, happily, grilling season hit me hard. I'm not sure if it was the trees pushing open tiny buds of vivid green amongst blossoms in bright white and rosy pink, or the craving for rosé and sauvignon blanc in place of sultry red wines, or the backyard grass growing a foot overnight. Whatever the trigger, the need to add a smokey layer to the hyacinth-scented air is suddenly foremost on my mind. I am ready for charred burgers, and grilled pizzas, and sizzling bratwursts. Or, these blackened porkchops with red gravy. They, too, would satisfy my cravings.

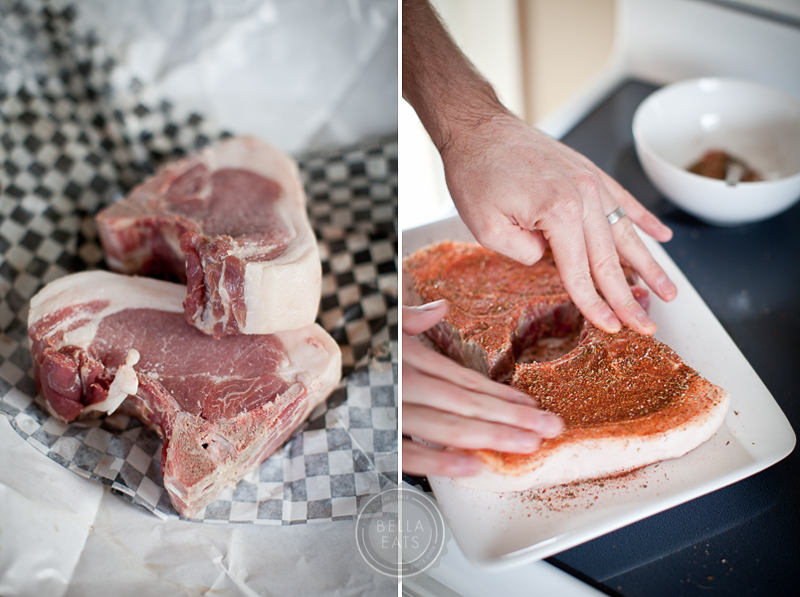
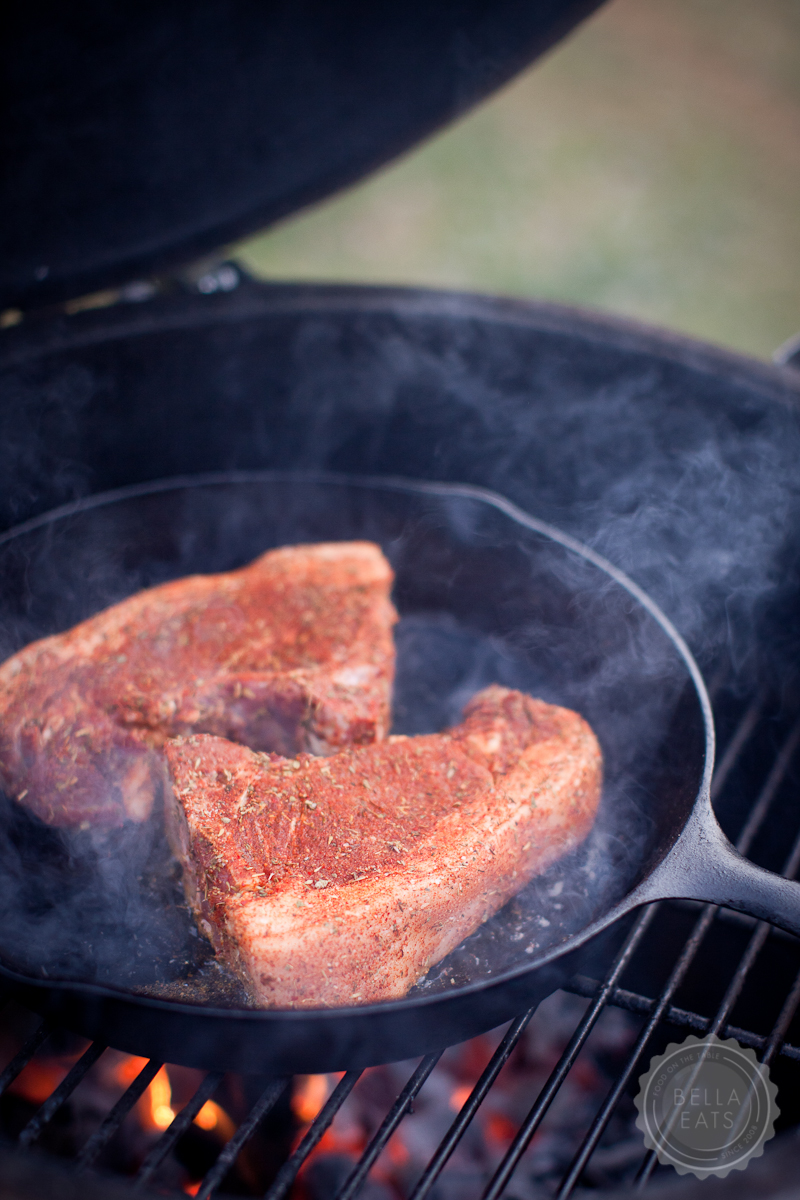
    These 'chops were prepared after a quick trip to Richmond in February, which always involves a stop at Belmont Butchery. Along with lamb bacon (a necessity, truly) and a beautiful pork shoulder, I brought home these cut-to-order, 1.5-inch thick, local porkchops for Brian. He was thrilled. The quickest way to my carniverous husband's heart is to present him with a lovely cut of pig. He immediately pulled out his favorite cookbooks, searching for a quick but worthy preparation. The Big Green Egg was fired up (another sure way to put a smile on B's face), the cast iron pan heated to 600°, and a shimmering pool of melted butter added. The sizzle and pop of meat followed and dinner was served just 15 minutes later. Oh, Spring. Welcome; please stay awhile, won't you?

    Blackened Pork Chops with Red Gravy

    adapted from Weber's Big Book of Grilling

    serves 2

    • 2 bone-in, center-cut pork chops, 1-1.5 inches thick each
    • 4 tbsp butter, melted

    for the sauce:

    • 1 tbsp unsalted butter
    • 1/2 cup finely chopped yellow onion
    • 1/4 cup finely chopped red bell peppers
    • 1/4 cup finely chopped celery
    • 1 tsp minced garlic
    • 1/2 tsp dried thyme
    • 1/2 tsp paprika
    • 1/8 tsp cayenne
    • 1/8 tsp freshly ground black pepper
    • 1/4 cup dry red wine
    • 1 can (14.5oz) chopped tomatoes
    • 1/2 tsp kosher salt

    for the rub:

    • 1 tsp paprika
    • 1 tsp dried thyme
    • 1 tsp ground oregano
    • 1/2 tsp dried onion powder
    • 1/2 tsp garlic powder
    • 1/2 tsp kosher salt
    • 1/4 tsp cayenne

    method:

    1. First, make the sauce. In a medium sauté pan over medium-high heat, melt the butter. Add the onion, bell pepper, celery, garlic, thyme, paprika, cayenne, and pepper. Stir occasionally until the vegetables are brown, 4-5 minutes. Add the red wine and cook until all the liquid is evaporated. Add the tomatoes and salt. Stir and simmer for about 5 minutes. Transfer to a food processor and purée. Return the mixture to the sauté pan and simmer until smooth. Set aside.
    2. Second, make the rub. In a small bowl combine the rub ingredients. Season the pork chops evenly with the rub and let stand at room temperature for 20-30 minutes before grilling.
    3. Start your grill, heating it to as hot as it will go. Add a large cast iron pan and let heat until white ash starts to form across the inside bottom of the pan. Pour in the melted butter and immediately add the chops, which will sizzle and pop and smoke. Close the lid of the grill and let the chops sear for about 3 minutes per side, then continue to cook until the juices run clear when the chops are sliced into, another 4-6 minutes. 
    4. Warm the sauce over medium heat.  Serve the chops over a bed of polenta with a generous helping of sauce over top.

    Creamy Cheddar Polenta

    adapted from Emeril Lagasse

    serves 4

    ingredients: 

    • 4 cups water
    • 4 cups heavy cream
    • 3 tbsp butter
    • 2 tsp salt
    • 2 cups polenta (corn grits)
    • 1/2 cup high-quality cheddar cheese, grated

    method:

    1. In a large saucepan bring the water, cream, and butter to a boil. Add the salt to the liquid and whisk in the polenta, whisking constantly for the first 3-4 minutes to prevent clumps. Lower the heat and simmer for 45 minutes, partially covered and stirring every 10 minutes, until the polenta is thick, smooth, and creamy. Add additional cream or water if needed. Add the cheese and stir until melted and smooth. Salt and pepper to taste.  Polenta should be served within 20 minutes of preparation. To reheat leftovers, add additional cream or water to a pan with polenta and stir over heat until creamy.

    introducing...beyond the flavor

    Andrea

    Hello! Hi. Remember me? I've been busy. I promise, there are a few recipes queued up for you here at Bella Eats and it is my goal to post them this week. But first, I am so excited to share a project I've been working on at Andrea Hubbell Photography, in collaboration with Sarah of Cramer Photo. We are both lovers of food, photography, and life. Together we are reaching beyond the flavor to capture the stories behind meals shared at the tables of local chefs, farmers, bakers, and food enthusiasts, because we believe that recipes are deeper than the ingredients used to prepare them. 

    This project has been an independent dream for each of us over the past couple of years. After several lunches, many glasses of wine, long hikes with our dogs and an inspiring trip to New Orleans with our husbands, we took the leap and combined our two visions to create this delicious collaboration. We love working together, and are thrilled to finally share our new project with you.

    For an introduction to Beyond the Flavor, check out our new website, www.beyondtheflavor.com. I hope you'll sit back and enjoy the stories behind the meals that fill our town. This is just the beginning. 

    raspberry lemonade cupcakes

    Andrea

    On Monday I had the opportunity to bake alongside a professional baker. A real, owns-her-own-shop, specializes-in-sweets, baker. Tara, of Sweethaus in Charlottesville, invited me to be a guest baker in her kitchen this week. She likes to bring in members of the community on occasion, to share a favorite recipe of theirs with the patrons of her business.  I jumped at the opportunity, as owning a bakery has been 2nd on my list of coolest-jobs-ever for quite some time. The first is photography. :)

    I had such fun hanging out with Tara for the day, learning her story and methods. Her sweets have a very hand-made quality to them, simple yet elegant, never sacrificing taste for appearance. I am so grateful to have met her, and especially excited that her shop is walking distance from my office.  I see many, many cupcakes in my future...

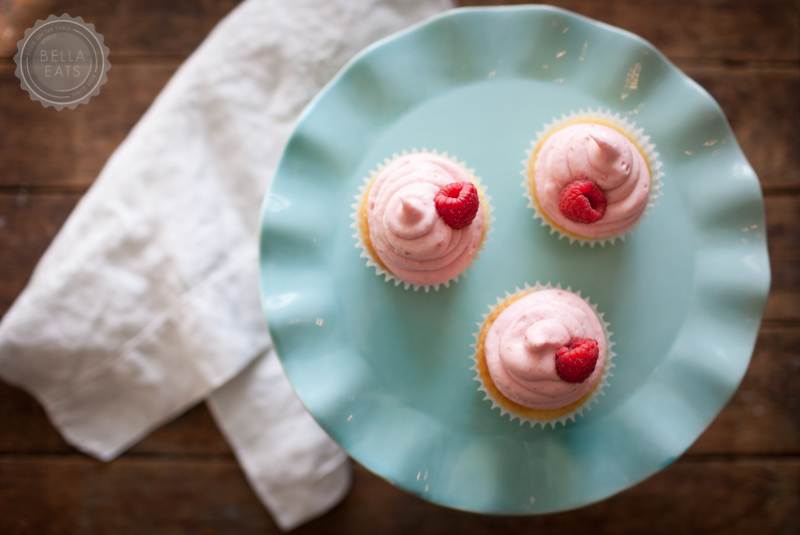
    If you live in Charlottesville stop by Sweethaus to taste the special this weekend, Raspberry Lemonade Cupcakes. They will be available Thursday-Sunday.  And say hi to Tara, she's a doll.

    I chose this recipe to share because, as you may already know, I LOVE lemon. And raspberries are pretty special too. This would make for a great Valentine's Day treat on Tuesday, in case you're looking for something sweet for your sweetie.

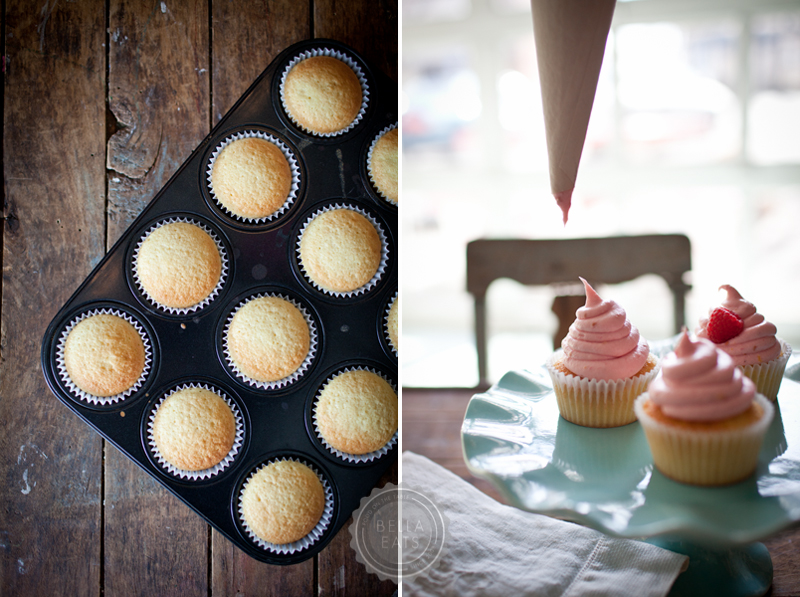
    The lemon cupcake is based off a chiffon cake recipe, so the crumb is very light and spongey. And the frosting, raspberry cream cheese, is divine. Enough said. :)

    Rasberry Lemonade Cupcakes

    Cupcake Ingredients

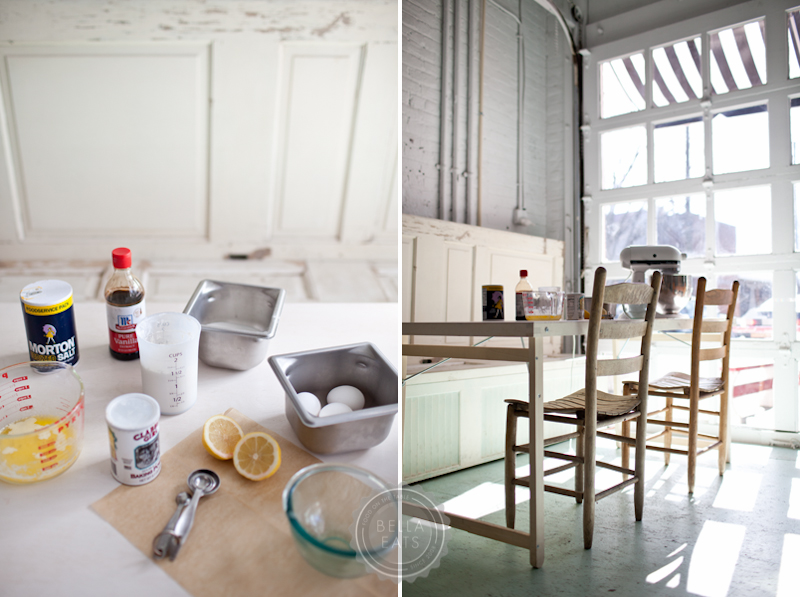
    • 5 eggs, separated
    • 1/4 cup (1/2 stick) unsalted butter, melted and cooled
    • 1/2 cup milk
    • 1-1/2 tsp vanilla extract
    • 1-1/2 cups unbleached all-purpose flour
    • 1-1/4 cups sugar, divided
    • 2-1/2 tsp baking powder
    • 1/4 tsp salt
    • 3 tbsp lemon zest
    • 1/2 fresh lemon, seeds discarded

    Method

    1. Position a rack in the center of the oven and preheat oven to 350º. Line 1 standard muffin tin with 12 liners, and another with 6 liners.
    2. In a small bowl, combine the egg yolks, butter, milk and vanilla.  Set aside.
    3. In a large bowl, whisk together the flour, 1 cup of sugar, baking powder and salt to blend.  Add 3 tbsp of lemon zest and blend with your fingers to separate clumps. Add the egg yolk mixture and stir until well combined.  Set aside.
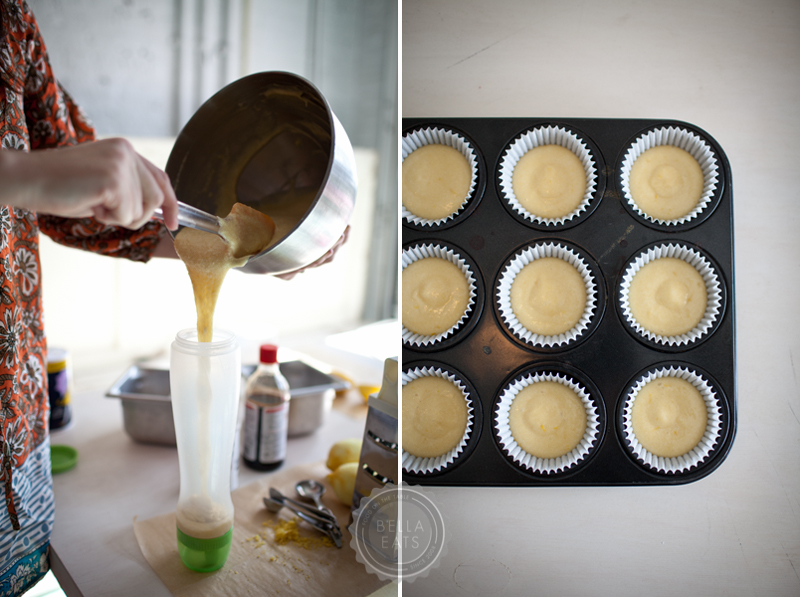
    4. In a clean dry bowl, using clean dry beaters, beat the egg whites on medium-high speed until they hold soft peaks.  Lower the mixer speed to medium and gradually add the remaining 1/4 cup sugar, beating the whites until they hold stiff peaks.  Stir about one-third of the egg whites into the batter to lighten.  Gently fold the remaining whites into the batter, in two batches, to blend thoroughly.
    5. Transfer the batter to the prepared pans, filling each muffin cup 3/4 of the way full.  Bake for 12-15 minutes, or until a wooden skewer inserted near the center of a cupcake comes out clean.
    6. Set the pans on a wire rack for 10 minutes to cool.  Gently squeeze the lemon over the cupcakes to sprinkle a bit of the juice on each one. Remove the cupcakes from the pans and allow them to cool completely on wire racks.

    Frosting Ingredients

    • 1 stick (1/2 cup) unsalted butter, softened
    • 16oz cream cheese, cold
    • 1/4 cup raspberry puree
    • 1/2 tbsp lemon juice
    • 1 tbsp lemon zest
    • 3-4 cups confectioner’s sugar

    Method

    1. Beat the butter and cream cheese in the bowl of an electric mixer until well incorporated. Scrape down the sides of the bowl. Add the raspberry puree, lemon zest, and lemon juice and beat again. Scrape down the sides of the bowl.  With the mixer on medium speed, slowly add the powdered sugar and beat until the frosting is fluffy and lighter in color, tasting after 3 cups to see if you need more.
    2. Garnish with fresh raspberries or candied lemon peel.

    pasta with portobello mushrooms, caramelized onions, + chèvre

    Andrea

    pasta mushroom onion-1.jpg

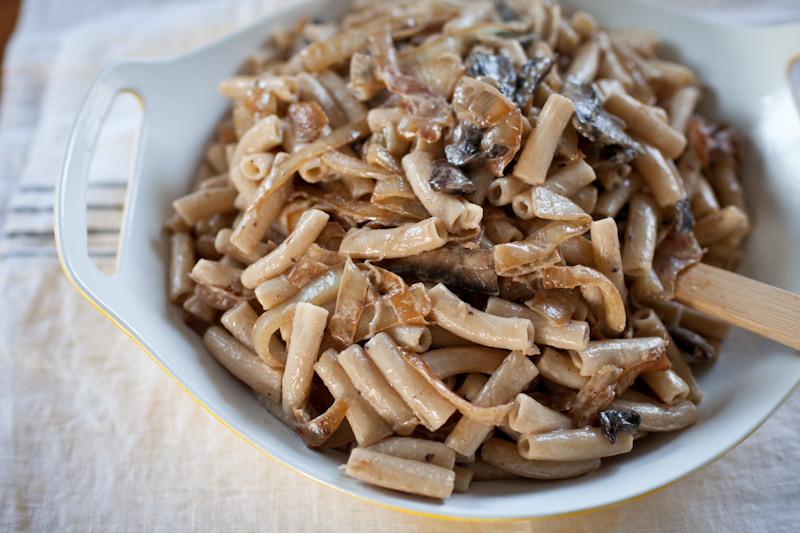
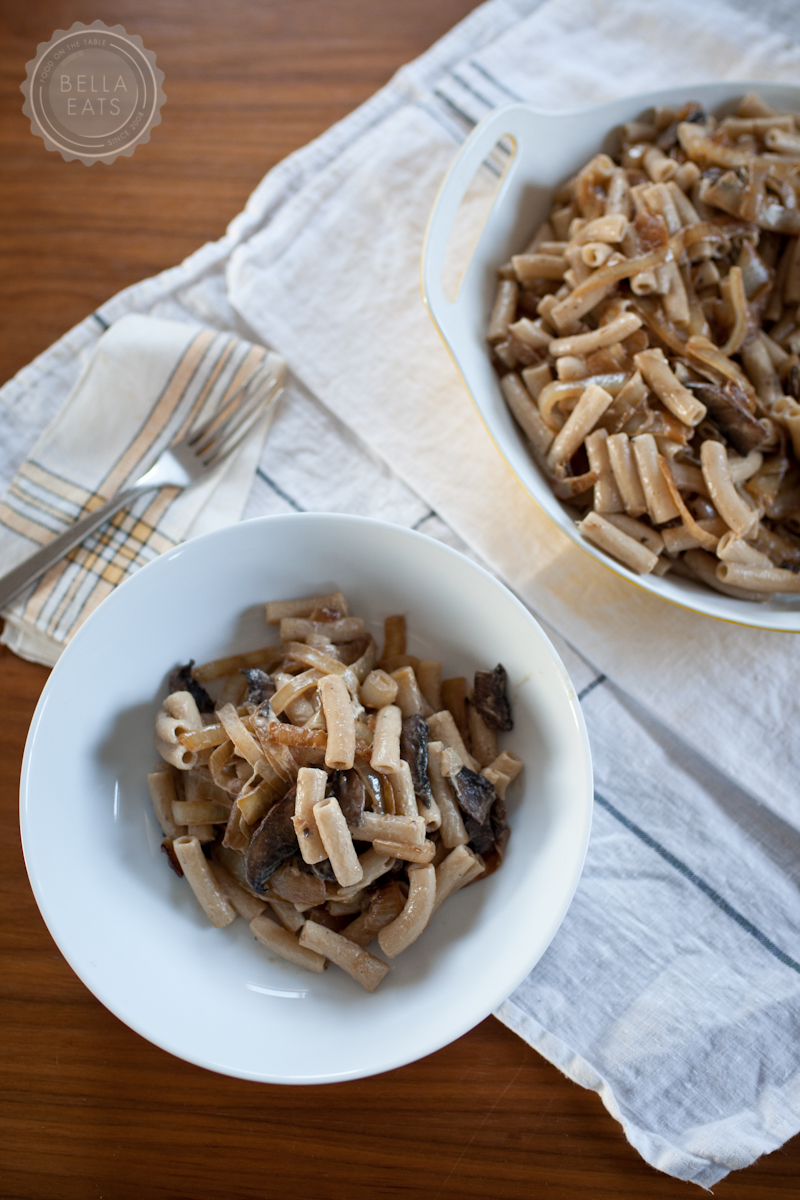
    Goodness, I am not doing so well in the beauty department with the recipes I've shared in 2012. But again, this one is worth trying even with the overall brownness of the dish. It is relatively quick and involves inexpensive ingredients that we typically have every day. With little flecks of green parsley it is even more tasty and just a tad prettier but, as you can see, parsley wasn't in my fridge when I prepared this meal (for the 3rd time in a month, I'll add) and it was still really wonderful. Maybe not 'share with company' delicious, but perfect for a weeknight with family, or with friends who are family.

    Virginia is in a weird, in-between phase of weather right now. One day we'll have sleet and snow dust and misty skies, the next sunshine and fluffy clouds and crocuses peaking from beneath fallen leaves. Mother Nature can't decide if she should buckle down and get serious about Winter or skip on ahead to Spring. I'll take either, but the back and forth is really throwing me off. I waver between wanting a thick + meaty stew for dinner or a light salad with citrus. Grocery shopping is nearly impossible since the chances of my craving what I actually buy are slim, given that the weather is bound to drastically change 2 days later. I am falling back on old staples; meals that have proven themselves worthy no matter the time of year. Like this one, which I'll either fill my bowl to the brim with (cold, Winter day) or pair equally with a fresh salad (warm, Spring day). Either way it's a winner, and sure to stay in our rotation year-round.

    pasta mushroom onion-2.jpg

    Ziti with Portobello Mushrooms, Caramelized Onions, + Chevre

    from Food + Wine

    4 servings

    Ingredients

    • 2 tbsp butter, divided
    • 4 tbsp olive oil, divided
    • 3 large onions, chopped
    • 1 tsp salt, divided
    • 1/2 tsp sugar
    • 1 lb portobello mushrooms, stems removed, caps halved and then cut into 1/4-inch slices
    • 3 tbsp chopped fresh parsley
    • 1/4 tsp fresh-ground black pepper
    • 3/4 lb ziti (we use brown rice pasta in our house...just as silky as semolina, but whole grain)
    • 3 oz soft goat cheese, crumbled
    • 3 tbsp grated parmesan cheese, plus more for serving

    Method

    1. In a large sauté pan, melt 1 tbsp of the butter with 2 tbsp of the oil over moderate heat. Add the onions, 1/2 tsp of the salt, and the sugar and cook, stirring frequently, until the onions are well browned, about 20 minutes (I let them go for closer to 30). Remove from the pan.
    2. In the same pan, melt the remaining 1 tbsp butter with 1 tbsp of the oil over moderate heat. Add the mushrooms and 1/4 tsp of the salt and cook, stirring occasionally, until tender and brown, about 8 minutes. Add the reserved onions, the parsley, the remaining 1/4 tsp salt, and the pepper.
    3. In a large pot of boiling, salted water, cook the ziti until just done. Reserve 3/4 cup of the pasta water and drain. Toss the ziti and 1/2 cup of the reserved pasta water with the mushroom mixture, the remaining 1 tbsp oil, the goat cheese, and the Parmesan. If the pasta seems dry, add more of the reserved pasta water. Serve with additional Parmesan.
    pasta mushroom onion-3.jpg

    galatoire's!

    Andrea

    You guys...while in New Orleans, I had one of the best culinary experiences of my life. Read all about it here!!!

    My five days in NOLA left me so inspired. Unfortunately it has been a busy week since getting back, but I hope to have some new recipes ready for you soon. Until then, welcome to Galatoire's!

    curried cauliflower + chickpea stew

    Andrea

    I know what you're thinking...this isn't a very exciting way to kick off 2012. A mash-up of cauliflower, tomatoes + chickpeas served over rice...what's the big deal? The deal is, I have consumed this dish forty-two times in the last week, or close to it, and am still not tired of it. This mildly spicy recipe is fast, healthy, cheap, and makes a TON of leftovers. I've wanted to share it with you for, oh, nearly 3 years now, but have never been able to get a decent photograph to share. Finally, I've accomplished a task that has been on my list for far to long. And THAT, my friends, is an excellent way to kick off the new year.

    We usually have the canned ingredients in our pantry, and pick up a cauliflower every few weeks when I know we're going to have some busy nights on the calendar. At this time of year when we're all working towards goals of healthy habits and more quality time with our families, recipes like this one are so valuable. The stew isn't too spicy, but if you're not a fan of heat I would use regular canned tomatoes rather than those laced with green chiles. We like to serve the stew over brown rice.
    Curried Cauliflower + Chickpea Stew
    serves 4-6
    Ingredients
    • 2 tbsp vegetable oil
    • 2-½ cups chopped onions
    • 5 tsp curry powder
    • 6 cups small cauliflower florets (from 1 medium head)
    • (2) 14-oz cans garbanzo beans (chickpeas), drained
    • (2) 14-oz cans diced tomatoes with green chiles
    • (1) 14-oz can unsweetened, light coconut milk
    • ½ cup chopped fresh cilantro (I rarely have this and so usually leave it out)
    Method
    1. Heat oil in a large (really, large!) skillet over medium-high heat.  Add the onions and sauté until golden brown, about 8 minutes.  
    2. Add curry powder and stir for 20 seconds.  
    3. Add cauliflower and garbanzo beans and stir for 1 minute.
    4. Add diced tomatoes, then the coconut milk, and bring the entire mixture to a boil.
    5. Reduce heat to medium-low, cover, and boil gently until cauliflower is tender and liquid thickens slightly, stirring occasionally, about 16 minutes.
    6. Season to taste with salt and pepper.  Stir in cilantro and serve.

    12 favorites from 2011

    Andrea

    Happy New Year, friends! While I am excited for all that 2012 has in store, 2011 contained some of my favorite recipes and images I've ever shared here on Bella Eats. i've got a little recap of the lovely year, just in case you're looking for inspiration this cold January day. Or, maybe just the sunny hope that Summer and her tomatoes will, indeed, be here eventually.

    Wishing you, and yours, a happy and healthy 2012!

    xoxo, Andrea

    January - Banana Date Bread

    February - Red Velvet Cupcakes with Cinnamon Cream Cheese Frosting

    March - Mushroom Barley Risotto

    April - The Best Egg Salad

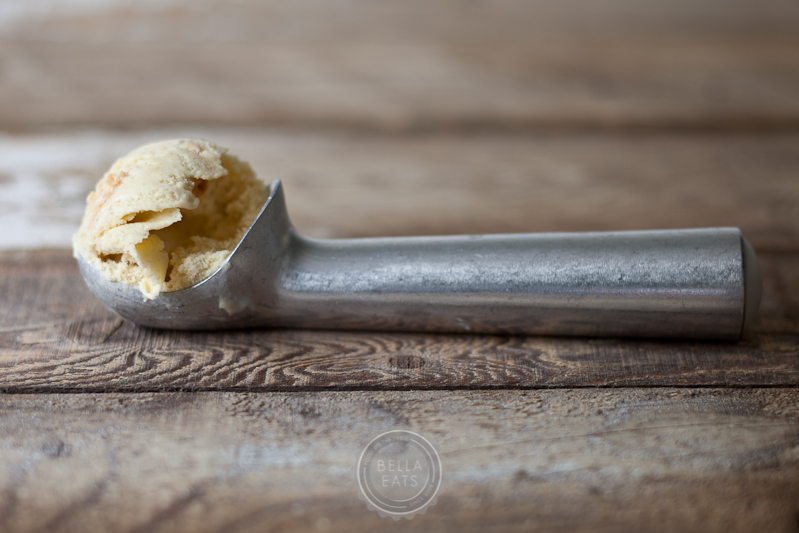
    May - Banana Pudding Ice Cream

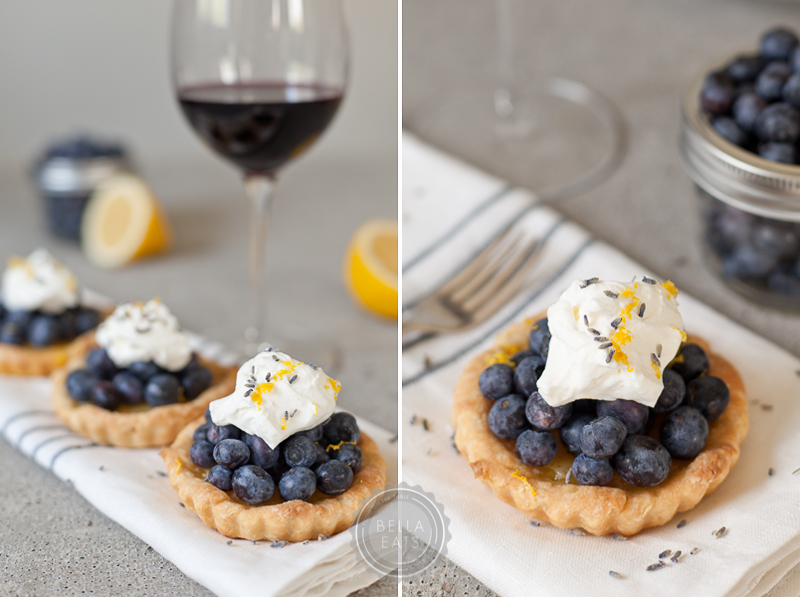
    June - Blueberry Lemon Tartlets

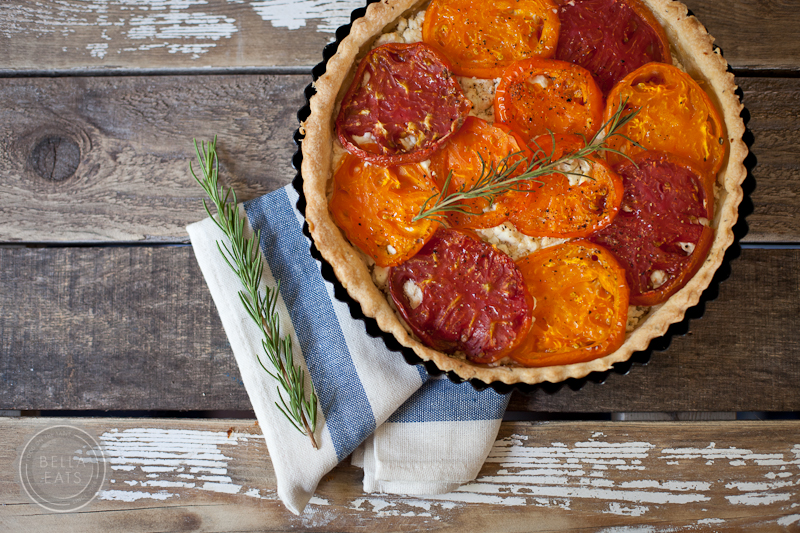
    July - Tomato + Goat Cheese Tart

    August - Cornmeal Cake with Peaches + Rosemary

    September - Orecchiette Carbonara

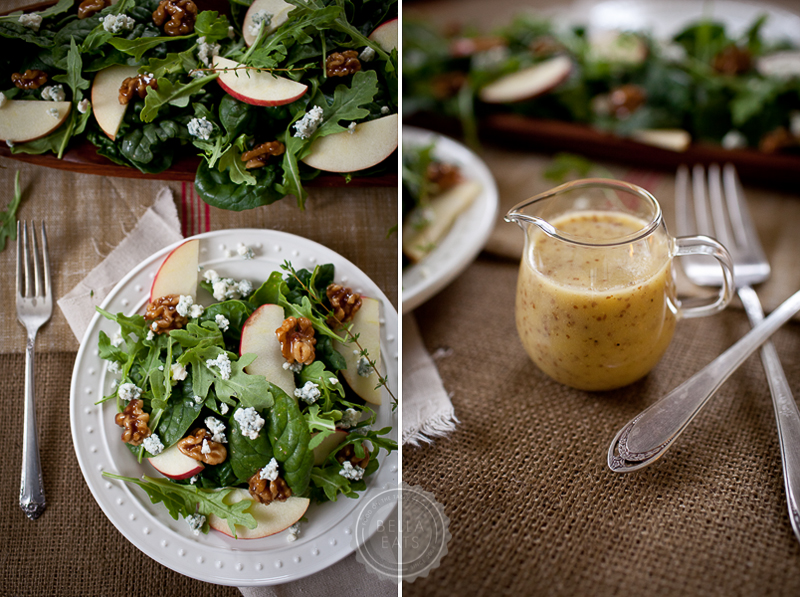
    October - Autumn Salad with Blue Cheese, Apples, + Walnuts

    November - Sweet Potato Bread Pudding

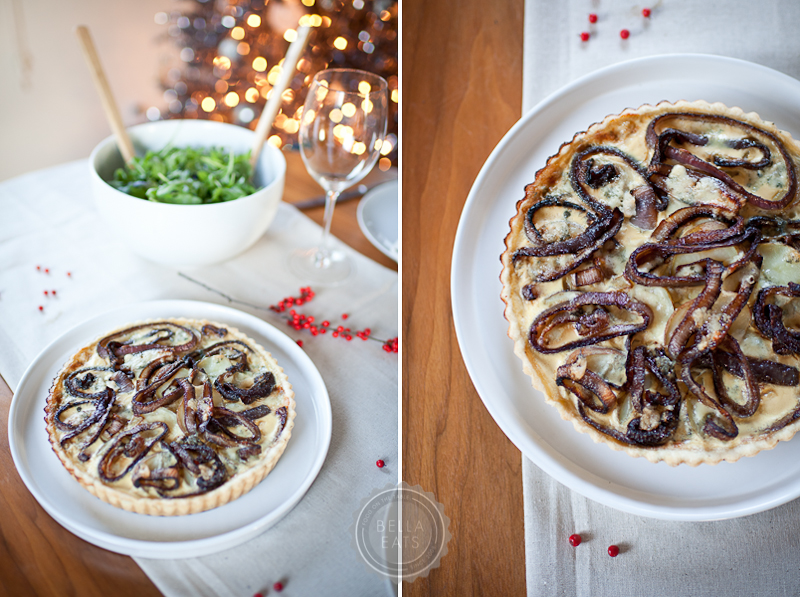
    December - Potato, Red Onion, + Blue Cheese Tart

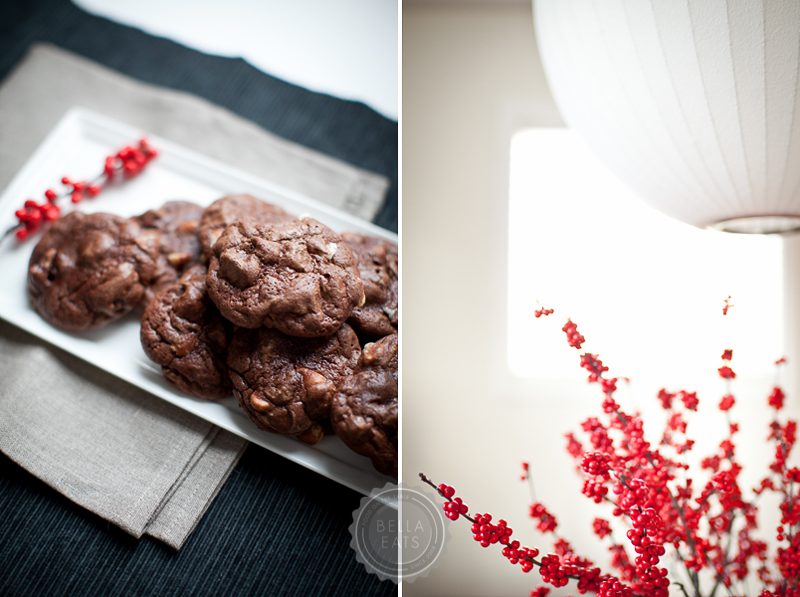
    black forest chocolate cookies + an old favorite

    Andrea

    Happy holidays, friends! Wow, they sure snuck up quickly this year. Brian and I are staying home in Charlottesville after having traveled to see family in Florida for Thanksgiving, and I truly thought that there would be all kinds of time for baking and hot cocoa and homemade marshmallows in the last few weeks. But here we are, days away, and I've baked exactly two kinds of cookies and drunk exactly zero cups of cocoa. To be clear, I use the term 'baked' loosely...one of them requires no heat whatsoever. I may feel that I've failed as a holiday baking goddess this year, but the presents are wrapped and shipped, the tree is up and trimmed, and Christmas music plays from my computer the majority of the time. And, as of tomorrow evening, I'll be unplugging for 4 full days to hang out with my honey.  I. Can't. Wait.  That right there is what the holidays are about; cherishing those you love and taking time just to be.  But, having a few cookies laying around never hurts either.  :)

    All things merry to you and yours!!!  xoxo.

    Brian is originally from Michigan, making the chocolate + cherry combination dear to his heart and stomach. I am always looking for recipes that combine the two, and this one from Baked in New York is quite perfect.  The dough is very sticky and fudge-like, and the resulting cookies are super-moist and chewy.  The dried cherries provide the perfect burst of tartness to counter the rich chocolate.  I realized as I typed up the recipe that I completely left out the brown sugar, but the cookies were still delicious.  In fact I think I like them better than what they should have been, as I really can't imagine them being any sweeter than the version I made.  

    Black Forest Chocolate Cookies
    makes 24 large cookies, or 48 small (1 tbsp scoop)

    accidentally modified from Baked

    Ingredients
    • ¾ cup all-purpose flour
    • 1 tsp baking powder
    • ½ tsp salt
    • 16oz dark chocolate (60 to 72% cocoa), coarsely chopped
    • 10 tbsp unsalted butter, cut into 1-inch pieces
    • 6 large eggs
    • 1-¼ cups granulated sugar
    • 1 cup firmly packed light brown sugar
    • 1 cup semisweet chocolate chips
    • 1 cup white chocolate chips
    • 1 cup dried cherries (we used tart cherries straight from Michigan)
    Method
    1. Sift the flour, baking powder, and salt together into a medium bowl and set aside.
    2. In a large nonreactive metal bowl, combine the dark chocolate and butter.  Set the bowl over a saucepan of simmering water and cook, stirring with a rubber spatula, until the chocolate and butter are completely melted and the mixture is smooth.  Set aside to cool.
    3. In the bowl of an electric mixer fitted with the whisk attachment, beat the eggs and sugars on high speed until the mixture is pale and thick, about 5 minutes.
    4. Add the cooled chocolate mixture and the vanilla and beat until just combined.  Scrape down the bowl and beat again for 10 seconds.
    5. Add the flour mixture and mix on low until just combined, about 10 seconds.  Do not over mix.
    6. Using a spatula or wooden spoon, fold in the chocolate chips, white chocolate chips, and dried cherries.  The dough will look very loose, but it will harden in the refrigerator.  Refrigerate for 6 hours or overnight.
    7. Preheat oven to 375℉.
    8. Spread two cookie sheets with parchment paper. Using a 1 tbsp scoop or a spoon, place dough in rounded mounds on sheets, about 1-1/2 inches apart. Bake for 12-15 minutes until the tops of the cookies are beginning to crack. Let cool on sheet for 10 minutes and then move to a cooling rack to cool completely. Cookies can be stored in an airtight container for 3-5 days.

    Speaking of Michigan (Brian's home state), this cookie comes from his Nana, and has been a staple since he was a little boy. I think that this may be his very favorite cookie recipe. I get the best reaction from him when I make a batch, way better than any layer cake I labor over for a full day. They take 10 minutes to whip up, another 20 to harden, and you're done. So simple. Plus, we always have the ingredients needed to pull these treats together, so they are perfect for last-minute guests or a holiday pot luck.

    I tried once, years ago, to make these cookies healthier by substituting out the butter, using less sugar, etc.  Big mistake.  Just keep them as are and enjoy.

    Chocolate No-Bake Cookies
    makes 4 dozen cookies

    Ingredients
    • ¼ cup unsweetened cocoa powder
    • 2 cups granulated sugar
    • ½ cup butter
    • ½ cup milk
    • ½ cup peanut butter (go for the non-natural stuff…like Jif or Peter Pan)
    • 1 tsp vanilla extract
    • 3-½ cups instant oatmeal
    Method
    1. Combine cocoa, sugar, butter, and milk in a medium-size sauce pan over medium heat.  Simmer for 2 minutes and remove from heat.
    2. Add peanut butter, vanilla, and oatmeal to pan and stir to combine well.
    3. Spoon onto waxed paper in 1 tbsp lumps (a small ice cream scoop works well for this) and let sit until the cookies are set.
    4. Store in a sealed container for 3 days.

    spicy cheese straws

    Andrea

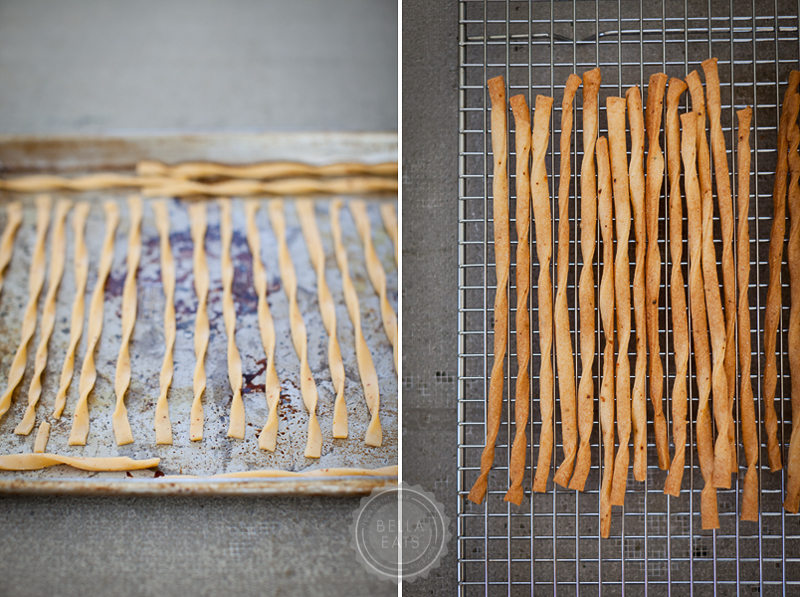
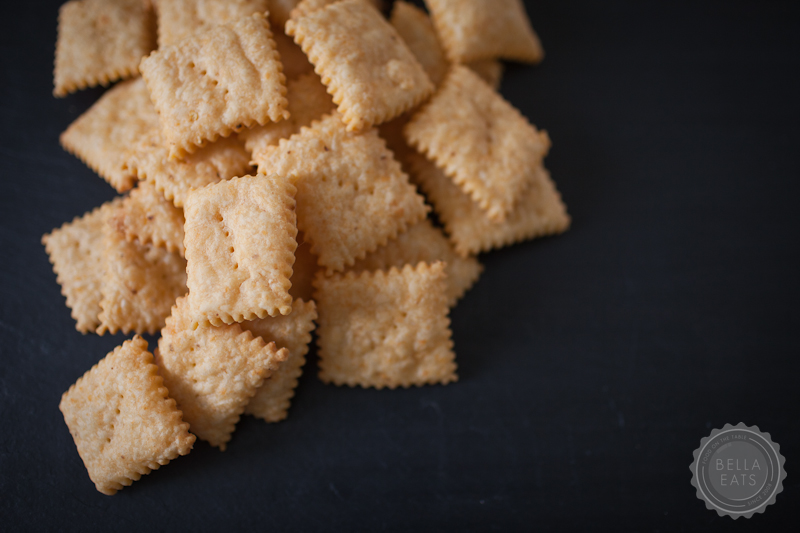
    I love finding quick, delicious, impressive snacks to make on a whim. It can be dangerous, sure, to have an arsenal of last minute recipes from which to choose whenever the mood strikes you for a salty or sweet treat. But, you'll never regret having those favorites when you recieve an impromptu invitation to dinner at a friend's abode. I've got quite a few on the 'sweet' side of the list, but the salty side was lacking until I found these spicy cheese straws over at Smitten Kitchen. I've made them twice in the two weeks since seeking out the recipe for an editorial assignment, and have no doubt they'll make an appearance many more times in the coming weeks. I even discovered that the dough makes an excellent cracker, especially when paired with sweet/tart apples and a little bubbly champagne. And maybe a little Harry Potter and the Sorcerer's Stone with a girlfriend on a Monday evening. Hey, who said Mondays had to be dreary? These fiery cheese straws/crackers will certainly help to spice things up. Har-de-har. 

    Cheese Straws or Crackers

    from Smitten Kitchen

    Ingredients

    • 1-1/2 cups shredded sharp cheddar cheese
    • 4 tbsp unsalted butter, cut into pieces
    • 3/4 cup flour, plus more for dusting
    • 1/2 tsp kosher salt
    • 1/2 tsp crushed red pepper flakes
    • 1 tbsp milk

    Method

    1. Preheat oven to 350℉.
    2. In a food processor, combine the cheese, butter, flour, salt, and pepper, pulsing until the mixture resembles coarse crumbs. Add the milk and process until the dough forms a ball.
    3. On a lightly floured surface, roll the dough to an 8x10 rectangle about 1/8-inch thick. Cut the dough into 1/4-inch wide strips, or 1-inch crackers. (I used a pizza cutter and a pastry cutter to make easy work of this.) Gently transfer the strips or crackers to an ungreased cookie sheet, spacing 1/4-inch apart. You can twist the straws as I did, if you like.
    4. Bake the straws/crackers in the middle rack of the oven...about 12 minutes for the straws and 15-18 for the crackers, until they turn golden brown.  Remove from oven and transfer to cooling rack.
    5. Straws/crackers will keep in a sealed container in the refrigerator for 2 days.  I highly suggest multiplying this recipe for a party, as two people can easily finish these off as a meal. It may have happened at our house...

    potato, red onion + blue cheese tart

    Andrea

    Gosh, I seem to have been in some kind of post-Thanksgiving funk these past 2 weeks! There was that big push to get recipes out to you before the holiday, and then I stopped cooking. Seriously, I was proud on nights that I picked up prepared sauce and fresh fettucini from the local pasta shop and managed to throw together a salad for the side. It has been a busy couple of weeks for our household, with me finishing up a bunch of photography projects and Brian wrapping up his most complicated website build yet. Hopefully life will return to a regular schedule these last weeks of 2011 (ha! when are the weeks before and after Christmas ever regular!) and I'll manage to get some holiday baking slipped onto my schedule!

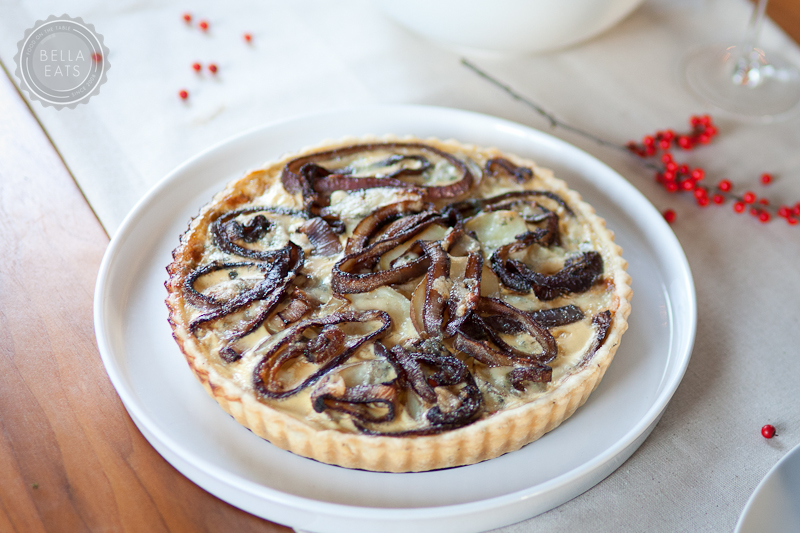
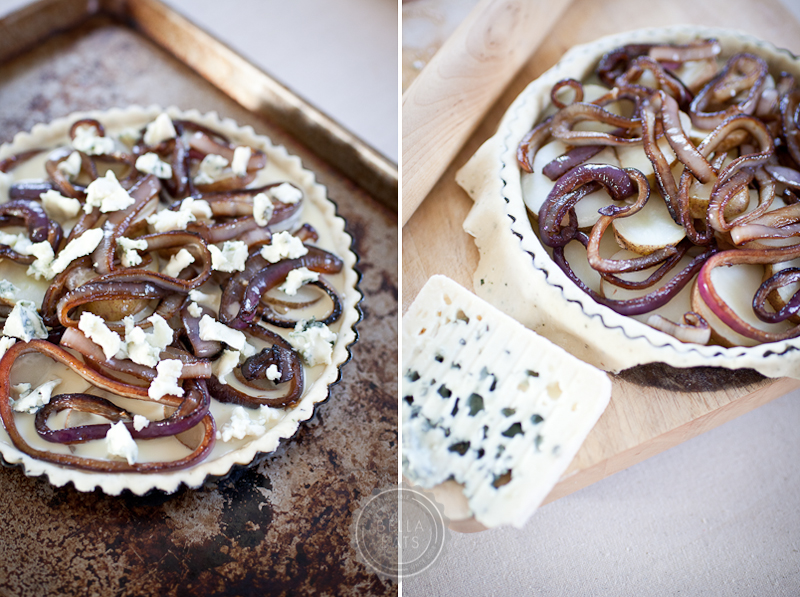
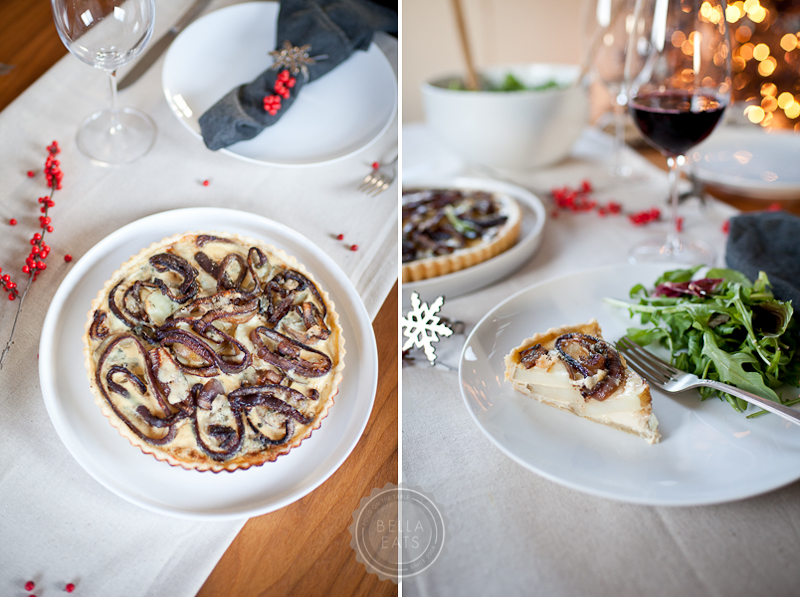
    This tart recipe has been on my list for, oh, about 3 months now. I'm not really sure why it popped into my head, but one day the idea of a potato tart with caramelized red onions and stinky blue cheese landed and stuck. Last Friday I finally got around to experimenting, first doing a little research to see how others had tackled similar recipes. I wasn't sure whether the potatoes should be cooked first etc., and luckily found a similar dish to launch mine from over at Smitten Kitchen. I can't even tell you how amazing this tart smelled as it was finishing its time in the oven. If only there were some way to bottle scent and upload it here on my Charlottesville computer, to be distributed to you all through your own computer speakers. Come on Apple, why haven't you figured that one out yet?

    I guess you'll just have to make it yourselves, and I'm thinking a holiday potluck could be the perfect excuse. You know you have a few of those on your calendar...

    I am so glad that I found the foundation recipe on Smitten Kitchen because I was alerted to the fact that the filling for the tart doesn't set up as solidly as a quiche would.  Good to know, because this cook likes to make sure her eggs are good and done, and I definitely would have over-cooked the tart had I not been warned.

    Potato, Red Onion + Blue Cheese Tart

    inspired by this recipe at Smitten Kitchen

    serves 4 with a salad

    Crust Ingredients (this is my favorite, all-purpose savory tart crust)

    • 1-1/4 cups all-purpose flour
    • 1/2 tsp salt
    • 1/2 tsp chopped rosemary
    • 8 tbsp unsalted butter, cut into 8 pieces
    • 4-5 tbsp cold water

    Filling Ingredients

    • about 1 pound of potatoes (I used russet, but red potatoes would be fantastic too)
    • 1 large red onion, sliced to 1/4-inch rings
    • 1 tbsp olive oil
    • 1 cup milk (I used 1%)
    • 2 egg yolks
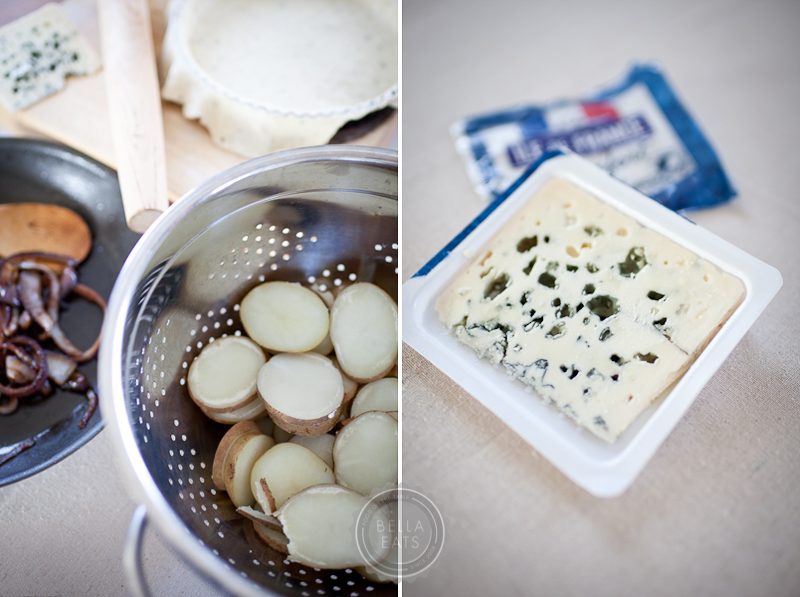
    • 1/4 cup crumbled blue cheese (I used Ile de France Roquefort, which was sent to me as a sample to try)
    • salt + pepper

    Method

    1. First, make the crust dough (about 1 hour before you're ready to assemble the tart). Place the flour, salt, and rosemary in a food processor and pulse several times to combine. Add the butter and pulse until the mixture resembles pea-sized crumbs, about ten 1-second pulses. Add the water, 1 tbsp at a time, and pulse briefly after each addition. After 4 tbsp of water have been added, process the dough for several seconds to see if it will come together. If not, add the remaining 1 tbsp water. Process just until the dough comes together in a rough ball. Do not overprocess or the dough will not be flakey. Transfer the dough to a lightly-floured work surface and knead briefly to for a smooth ball. Flatten the dough into a 5-inch disk and wrap it in plastic wrap. Refrigerate the dough for at least 1 hour and up to 2 days.  Note: My dough was very sticky with just 4 tbsp of water, so I wound up adding some flour to help it to come together. The final dough should be smooth and supple before refrigerating. Also, if you don't have a food processor, you can still make the dough by using forks or a pastry blender to cut the butter into the flour mixture, then add your water.
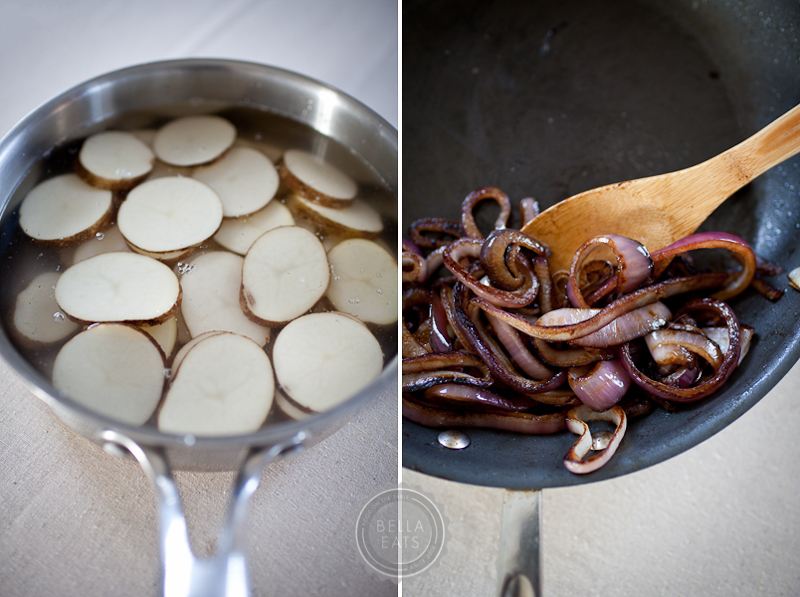
    2. While the dough is chilling, prepare the filling ingredients.  Scrub the potatoes and remove any eyes or rough patches, leaving most of the skin in place.  Slice potatoe into 1/4-inch thick rounds. Place in a large pan and cover with water. Bring to a boil, and simmer for about 10 minutes until the potatoes are just tender. Drain and set aside.
    3. Meanwhile, heat the olive oil over medium-high heat in a large skillet.  Add the onion rings and stir to coat with oil.  Drop heat to medium-low and allow unions to caramelize, stirring occasionally, for 20-30 minutes.  Remove from heat and set aside.
    4. Whisk together the milk and egg yolks, set aside.
    5. Preheat oven to 350℉.
    6. After an hour, remove the dough from the refrigerator.  Roll to a round about 12 inches in diameter. Place the dough in a 9-inch tart pan with removable bottom.  Press the dough to the bottom and sides of the pan, and remove excess dough from around edge of pan.
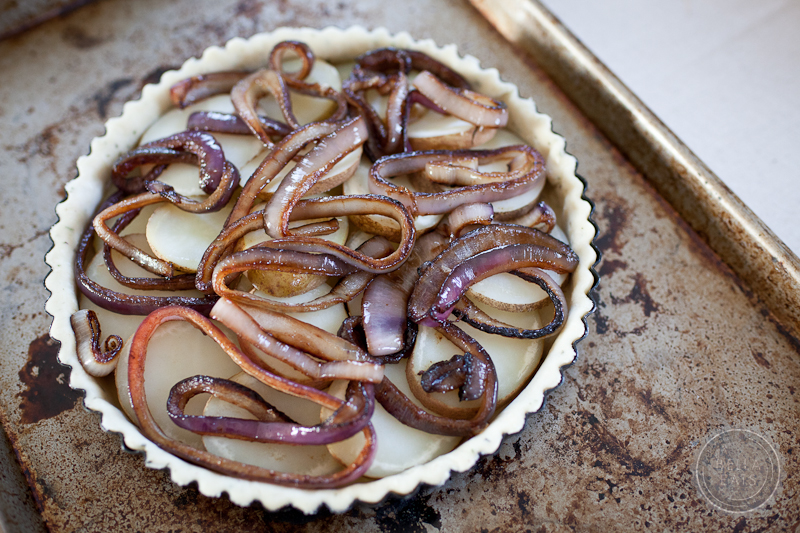
    7. Place cooked potatoes in concentric rings along the bottom of the pan, overlapping and adding layers until pan is full. Distribute the caramelized onions across the tops of the potatoes. Pour the milk/egg mixture over the potatoes and onions. Drop bits of blue cheese evenly across the surface of the tart.  Sprinkle with sea salt and freshly ground pepper.
    8. Bake the tart for 45-55 minutes, until browning at edges.  Filling will still be slightly jiggly, as the milk to egg ratio doesn't allow for it to set as a quiche would.  The final consistancy should be creamy.

    leftover bird + orzo soup

    Andrea

    Happy Thanksgiving, friends! I hope you are all enjoying a leisurely morning of coffee and cooking with loved ones.  We are about to embark on our meal prep, after a bit of time invested last night. Oh, and the Wizarding World of Harry Potter is magical...in case you were wondering. :)

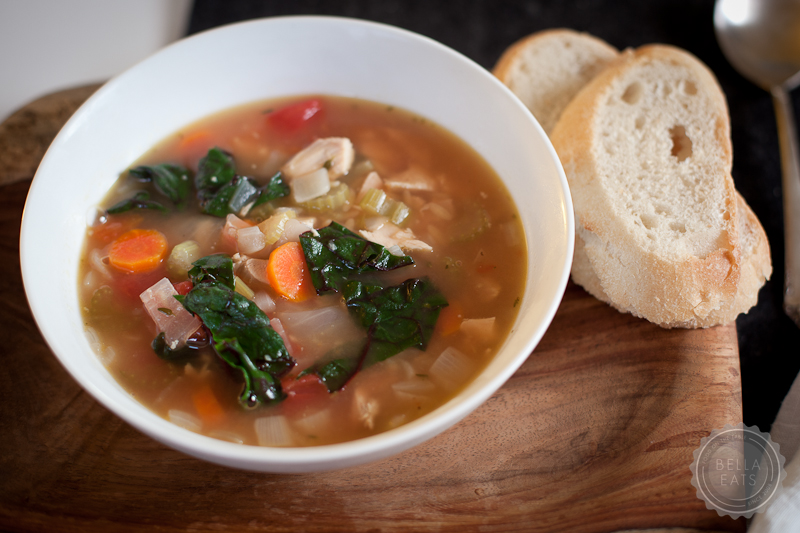
    I have a day-after recipe for you this morning; a hearty, veggie-filled soup that uses your leftover turkey meat as well as the carcass. We're all about using the whole animal around here, and fresh stock is truly the best base for any soup you can make. So chop some extra onions, celery, and carrots today and stow them away in a ziplock bag in your refrigerator. You can even make the stock tonight to keep things really simple tomorrow. Because tomorrow is all about relaxation and dirtying as few dishes as possible, right?  :)

    Again, Happy Thanksgiving! I am thankful for so many things this year, including each one of you for continuing to read and share your comments here at Bella Eats. Have a wonderful holiday, all!!!

    Leftover Bird + Orzo Soup

    for the stock:
    • 3 tbsp vegetable oil
    • 2 medium onions, diced (about 2 cups)
    • 3 large carrots, chopped (about 1 cup)
    • 3 ribs of celery, chopped (about 1 cup)
    • water
    • 1 turkey or chicken carcass
    for the soup:
    • 3 tbsp vegetable oil
    • 2 medium onions, diced (about 2 cups)
    • 3 large carrots, chopped (about 1 cup)
    • 3 ribs of celery, chopped (about 1 cup)
    • 2 garlic cloves, minced
    • 10 cups of stock (if you have less than that, add water. more, simmer it until it reduces)
    • 2 bay leaves
    • 3 large sprigs of thyme
    • (1) 15-oz can of diced tomatoes, drained
    • 2 cups leftover chicken or turkey, chopped or torn into bite-size pieces
    • 1 cup dried orzo
    • 3 large handfuls of swiss chard leaves, stems removed, torn into bite-size pieces
    • salt + pepper
    method:
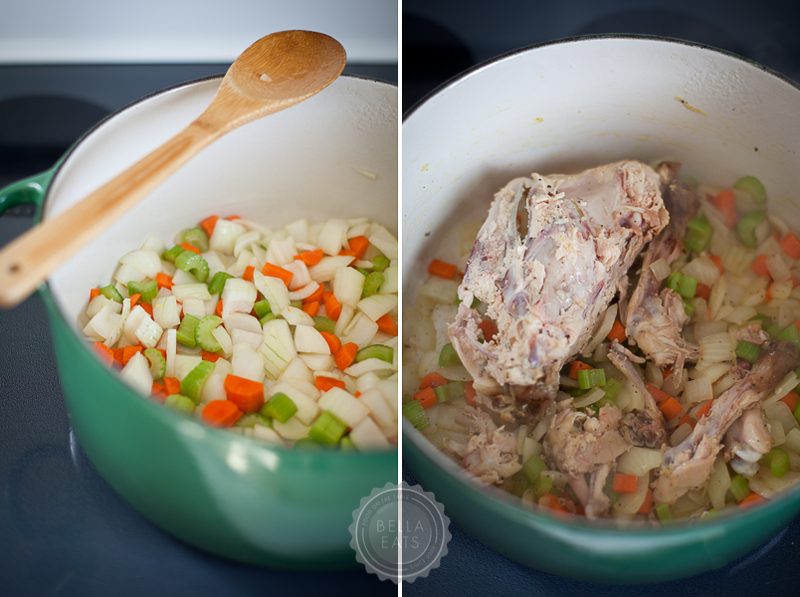
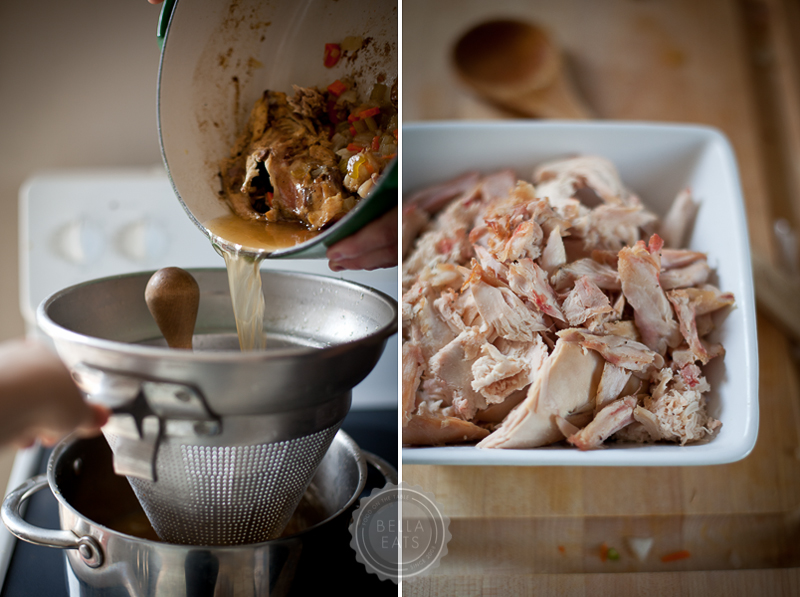
    1. First, make the stock.  Heat the oil in a large pot over medium-high heat.  Add the onions, carrots, and celery and sauté until soft and translucent, about 8 minutes.  Add the bird carcass and enough water to mostly cover, about 16 cups.  Bring everything to a boil and then drop the heat to medium-low, letting the stock simmer for 2-3 hours until full of flavor and reduced to 8-10 cups.  Strain the stock through a fine sieve, and discard the bird carcass and all vegetables.  Let the stock cool completely before refrigerating if you're not going to use it the same day.
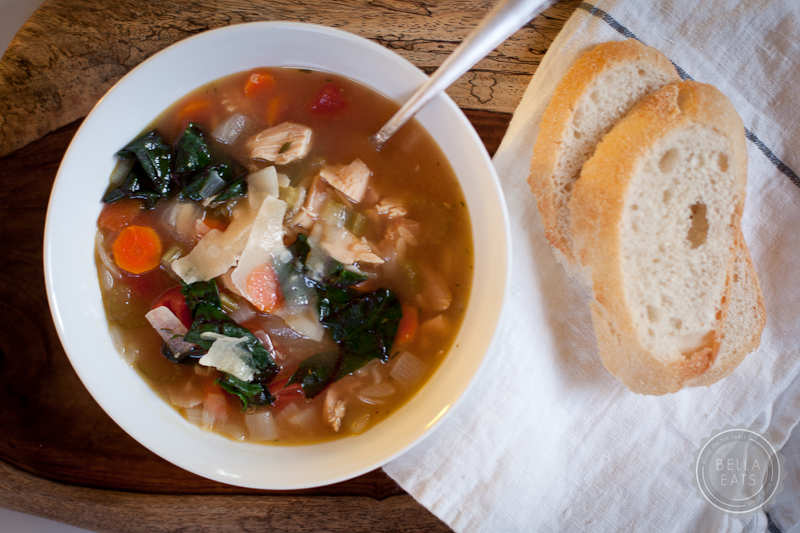
    2. Clean the pot, and start again with heating the oil and sautéing the second batch of onions, carrots, celery, and garlic.  After 3 minutes, add the stock, herbs, tomatoes, and leftover meat.  Bring to a boil and drop to medium-low, letting the soup simmer until the vegetables are tender, about 20 minutes.  Add the orzo and continue to simmer until tender, another 10 minutes.  Add the swiss chard and cook until wilted, about 3 minutes.  Season with salt + pepper and serve, being careful to remove the thyme sprigs and bay leaves.