
Last Thursday at approximately 12:00pm I learned of the
C’ville Pie Fest. Upon reading
Jenée’s tweet about the event, I quickly sent an inquiry to the organizers, asking if I could join in the fun. They said “yes!”, I rejoiced...and then I panicked. I had 48 hours until the tasting and judgement and no idea what to make.
A couple of frantic emails later, I had a plan. The
Italian Plum Cake I’d made the weekend before had been a huge success in our household and with the friends we’d shared it with - why not turn that cake into a pie? The flavors were spot-on, I just needed to find a good pie crust to modify and a reliable ratio of raw fruit to sugar to thickener for the filling.
Easy as pie, right?

I told myself that there was a reason for that expression and that, despite my lack of knowledge of pie baking, the task at hand was really a simple one. I had Thursday night to make two test pies trying out two different crust recipes and two different filling combinations, Friday evening to make a final test pie using the knowledge I gained from my first two pies and Friday night to assemble and bake my final entry. No problem.
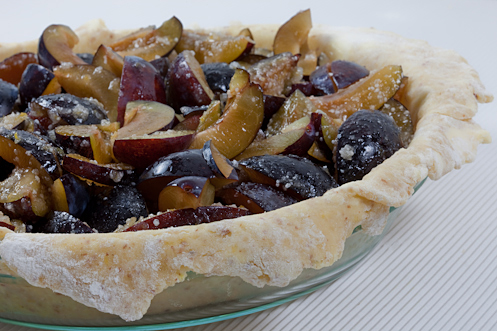
I found two reliable sources for the base pie crust (or, pâte brisée) recipes,
Martha Stewart and
Julia of Mélanger (who just experimented with various
pastries during the month of August on her lovely blog), and got to work planning my own modifications. Because pie doesn’t lend itself to the sprinkling of almonds across its top as
cake does, I decided to substitute some ground almonds for a portion of the flour in each crust recipe. I also added a healthy heap of lemon zest because, lets be honest, everything is better with a little citrus. Seriously.

For the filling, I found a handy ratio in
Joy of Cooking.
5 cups raw fruit
3/4 cup sugar
3 tbsp thickener (if using flour or cornstarch, 1-1/2 tbsp if using tapioca)
The exact measurements vary a bit based on the sweetness and juiciness of your fruit, and because my plums were quite juicy I made adjustments accordingly. Or so I thought. Both initial pies became miniature swimming pools in my oven, so full of juice that at one point I was using a turkey baster to pull as much liquid out as possible. They sat on the counter overnight and thickened a tiny bit, but not enough to count. The bottom crust was still soggy and there was no hope of a slice holding together as you removed it from the pie dish, let alone once you slid it onto a plate.


But still, Friday morning Brian helped me carry the two pies (one apple-plum, one pure plum), a server, plates and forks to our office, where I received feedback from seven more people. We all agreed on the too much juice issue, but opinions varied on the preferred crust and filling. In the end, I went with my preference (and luckily Brian’s too, whose palate I trust implicitly) and advice from
Tara, who always comes through in matters involving taste and technique. Over lunch I went home to rewrite my recipe and make dough for that evening’s test pie.

I was so convinced that the third test pie would be a winner.
So convinced. We invited a couple of friends over for the final testing and pulled the lattice-topped beauty out of the oven to great fanfare and raised glasses. We let it sit on the stovetop for an hour, until we could stand the wait no longer, and then dug in. And the pie was soggy. And less cohesive than the first two pies had been. And I had
no more ideas about how to fix it.
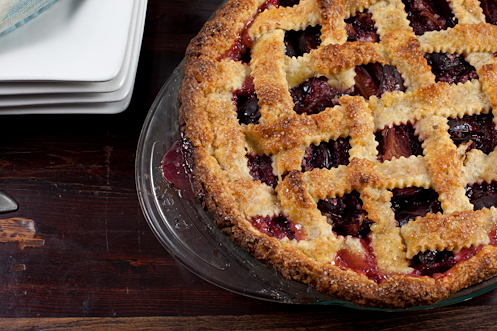
By this point it was 11:30pm, 12 hours before I was supposed to be at the
Pie Fest with pies in hand. We were all exhausted after long weeks at our jobs, but sat around the dining table for 30 minutes hashing out the potential issues and solutions. Our friends left and Brian and I sat across from each other on the couch, glassy-eyed and covered in flour, as I debated whether or not to stay up all night baking pies that might not be contest-worthy. And then we went to bed. Pie-less.
As I mentioned
previously, the
C'ville Pie Fest experience was fantastic. Even without my own entry. Not only did I meet new friends AND win a raffle (I NEVER win raffles!) I learned a lot about fruit pie. Namely that its messy, and meant to be that way.
Not one to take personal failure easily, I continued to brainstorm possible solutions to my runny pie issues before, during and after the contest. And, lucky for me, I have a husband who is very good at reconnaissance missions. Brian scored an important piece of information about raw fruit pies for me while we were at the Fest last Saturday...
use tapioca as a thickener instead of corn starch. Of course. Had I not been completely exhausted the night before (and had tapioca in my pantry) I might have remembered that I use tapioca for my
cranberry apple pie at Thanksgiving. Works like a charm.
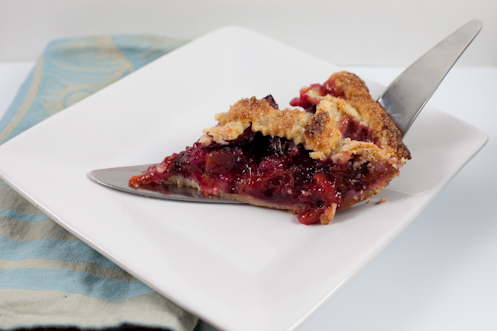
And so, finally, pie number four was a winner. The filling was perfectly cohesive, the crust delightfully flakey, the flavors incredibly delicious. If only I'd had one more day for testing...
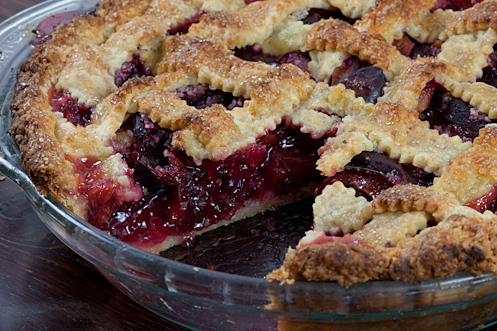
The use of tapioca wasn't the only important lesson learned in this process, either through my own experimentation or from the numerous websites and cookbooks I consulted. Below is a list of points about raw fruit pies that I plan to never forget, and I hope that you all will chime in with any lessons of your own.
Important Points for Raw Fruit Pies
Freeze your chopped butter for at least 15 minutes before adding it to your flour to form your pie crust dough.
Add the water to your pie crust dough in small batches, to ensure that you don't add too much. The final dough should be soft and supple, but not tacky.
Use a glass baking dish, not the disposable aluminum dishes you find at the grocery store.
Use tapioca as a thickener instead of cornstarch, especially for very juicy fruits like plums and berries.
Once the filling is in the pie crust, you want to top the pie and get it into the oven as soon as possible to prevent the uncooked bottom crust from getting soggy.
Egg wash works better than milk or water to achieve a lovely golden, shiny crust.
Bake the pie in the lowest part of your oven, so that the bottom of the crust is cooked thoroughly. This is another good reason to use a glass baking dish - you can see the color of the crust as it bakes.
Don't pull the pie out of the oven until the filling is bubbling thickly through the lattice or vent holes. When you think it is ready, give it five more minutes, just to be sure.
Bake the pie the day before you plan to eat it. The filling will thicken as it comes to room temperature overnight. I prefer to eat pie at room temperature, but if you want to heat it before serving do so in its baking dish in the oven.
 Sugar Plum Pie with Lemon Almond Crust
crust adapted from Martha Stewart and Mélanger, filling adapted from Joy of Cooking
for the crust...
- 2 cups all-purpose flour
- 1/2 cup finely ground almonds or almond flour
- 1/4 cup sugar
- 1/2 tsp salt
- zest of 1 lemon
- 1/2 pound of unsalted butter (2 sticks)
- 3 tbsp fresh lemon juice
- 1 egg
- 1-2 tbsp ice water, as needed
- an egg and 1 tbsp of water, whisked together, for an egg wash after assembly
- 2 tbsp turbinado sugar, to sprinkle on top of assembled pie
for the filling...
- 5 cups of Italian plums, quartered
- zest of 1 lemon
- 1 tbsp fresh lemon juice
- 3/4 cup sugar
- 2-3 tbsp quick-cooking tapioca (depending on the juiciness of your fruit - Italian plums (also called sugar plums) are VERY juicy, so I used 3 tbsp)
method
- Chop your butter into 1/2 inch cubes. Place on a plate and put in the freezer for at least 15 minutes.
- In an electric mixer with paddle attachment, stir together your flour, ground almonds, sugar, salt and lemon zest. Add the chopped butter and mix on low speed for 2-3 minutes, until most of the butter pieces are the size of peas. If there are any larger pieces remaining, pinch them between your fingers to break them up.
- Whisk together the lemon juice and egg. Pour into flour mixture all at once, mixing on low speed as you pour. Dough should start to come together in small clumps. Add ice water as needed, a bit at a time. You should be able to pick up a few small clumps of dough and pinch them together to form a larger ball, this is how you'll know it is ready.
- Form dough into two equal balls, then flatten each ball into a disk about 1-inch thick. Wrap each disk in plastic wrap and refrigerate for at least one hour.
- When you're ready to assemble the pie, preheat your oven to 425*. Pull one dough disk out of your refrigerator and let sit on the counter for 5 minutes, so that it will be a little easier to work with. Generously flour a silpat or piece of parchment paper and turn dough out onto it. Flour the top of the dough and then roll out to a 14-inch circle about 1/8-inch thick. Place dough in glass baking dish, pressing bottom down into corners of dish and letting dough overhang edges of dish by at least 1/2-inch. Refrigerate.
- Repeat with second dough disk, but before refrigerating the rolled-out dough, cut it into strips 3/4-inch thick for the lattice top. Refrigerate.
- Place your chopped plums in a large bowl and toss with 1 tbsp lemon juice. In a small bowl, mix together the tapioca, sugar and lemon zest. Pour over fruit and mix well to coat.
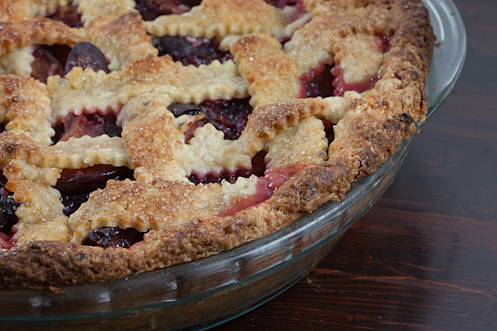
- Pull pie dish with dough out of refrigerator. Pour fruit mixture into pie dish. Assemble lattice on top of pie as quickly as possible (photos above). Brush crust with egg wash and sprinkle with turbinado sugar.
- Bake at 425* on the lowest rack in the oven for 30 minutes. Turn oven down to 350*, move pie up one rack, place a baking sheet on rack below pie and bake for an additional 30-45 minutes, until top of pie if deep, golden brown and filling is bubbling thickly between the lattice. If it seems like your pie crust is going to burn, you can tent it with foil to slow down the process.
- Remove pie from oven and let cool overnight before serving. When completely cool, cover with aluminum foil or plastic wrap. Pie should keep for 3 days on the counter.
Next up:
Chocolate Mousse Pie Last Thursday at approximately 12:00pm I learned of the C’ville Pie Fest. Upon reading Jenée’s tweet about the event, I quickly sent an inquiry to the organizers, asking if I could join in the fun. They said “yes!”, I rejoiced...and then I panicked. I had 48 hours until the tasting and judgement and no idea what to make.
A couple of frantic emails later, I had a plan. The Italian Plum Cake I’d made the weekend before had been a huge success in our household and with the friends we’d shared it with - why not turn that cake into a pie? The flavors were spot-on, I just needed to find a good pie crust to modify and a reliable ratio of raw fruit to sugar to thickener for the filling. Easy as pie, right?
 I told myself that there was a reason for that expression and that, despite my lack of knowledge of pie baking, the task at hand was really a simple one. I had Thursday night to make two test pies trying out two different crust recipes and two different filling combinations, Friday evening to make a final test pie using the knowledge I gained from my first two pies and Friday night to assemble and bake my final entry. No problem.
 I found two reliable sources for the base pie crust (or, pâte brisée) recipes, Martha Stewart and Julia of Mélanger (who just experimented with various pastries during the month of August on her lovely blog), and got to work planning my own modifications. Because pie doesn’t lend itself to the sprinkling of almonds across its top as cake does, I decided to substitute some ground almonds for a portion of the flour in each crust recipe. I also added a healthy heap of lemon zest because, lets be honest, everything is better with a little citrus. Seriously.
 For the filling, I found a handy ratio in Joy of Cooking.

 But still, Friday morning Brian helped me carry the two pies (one apple-plum, one pure plum), a server, plates and forks to our office, where I received feedback from seven more people. We all agreed on the too much juice issue, but opinions varied on the preferred crust and filling. In the end, I went with my preference (and luckily Brian’s too, whose palate I trust implicitly) and advice from Tara, who always comes through in matters involving taste and technique. Over lunch I went home to rewrite my recipe and make dough for that evening’s test pie.
 I was so convinced that the third test pie would be a winner. So convinced. We invited a couple of friends over for the final testing and pulled the lattice-topped beauty out of the oven to great fanfare and raised glasses. We let it sit on the stovetop for an hour, until we could stand the wait no longer, and then dug in. And the pie was soggy. And less cohesive than the first two pies had been. And I had no more ideas about how to fix it.
 By this point it was 11:30pm, 12 hours before I was supposed to be at the Pie Fest with pies in hand. We were all exhausted after long weeks at our jobs, but sat around the dining table for 30 minutes hashing out the potential issues and solutions. Our friends left and Brian and I sat across from each other on the couch, glassy-eyed and covered in flour, as I debated whether or not to stay up all night baking pies that might not be contest-worthy. And then we went to bed. Pie-less.
 As I mentioned previously, the C'ville Pie Fest experience was fantastic. Even without my own entry. Not only did I meet new friends AND win a raffle (I NEVER win raffles!) I learned a lot about fruit pie. Namely that its messy, and meant to be that way.
Not one to take personal failure easily, I continued to brainstorm possible solutions to my runny pie issues before, during and after the contest. And, lucky for me, I have a husband who is very good at reconnaissance missions. Brian scored an important piece of information about raw fruit pies for me while we were at the Fest last Saturday...use tapioca as a thickener instead of corn starch. Of course. Had I not been completely exhausted the night before (and had tapioca in my pantry) I might have remembered that I use tapioca for my cranberry apple pie at Thanksgiving. Works like a charm.
And so, finally, pie number four was a winner. The filling was perfectly cohesive, the crust delightfully flakey, the flavors incredibly delicious. If only I'd had one more day for testing...
 The use of tapioca wasn't the only important lesson learned in this process, either through my own experimentation or from the numerous websites and cookbooks I consulted. Below is a list of points about raw fruit pies that I plan to never forget, and I hope that you all will chime in with any lessons of your own.
Important Points for Raw Fruit Pies
 Sugar Plum Pie with Lemon Almond Crust
crust adapted from Martha Stewart and Mélanger, filling adapted from Joy of Cooking
for the crust...
 Next up: Chocolate Mousse Pie
 I’m fairly new to the world of writing, having only started forcing myself to practice regularly when I started this blog and discovered how much I enjoy it. I’ve learned in the six months since defining the
  This evening, as I was in the middle of my uninspired third draft, my Momma called for a chat. She had some bad news about an elderly relative, my grandfather’s sister. My Great Aunt isn’t doing very well, in fact hasn’t been for awhile, and Momma wanted to update me on her status. Our conversation eventually turned to more trivial subjects to lighten our mood, and my unsatisfying third draft came up. As I explained my writer’s block my Momma chuckled, and proceeded to share with me a few of her own childhood memories of plums, of which she has many.
 She told me about “plumjum”, my grandfather’s favorite spread for toast, and how his sister (yes, the very same as mentioned above) used to make him jars of it with plums from another sister’s trees. She laughed about how surprised she was when, at an older age, she learned that the coveted spread was in fact a simple plum jam. Those family trees that produced the fruit that formed the jam were a favorite playground for my Momma and her cousins, a treetop haven where they ate as many plums as they could stomach while spitting the pits at each other (she was a bit of a tomboy, my mother, having grown up with all male cousins). As we laughed about her memories, events she probably hasn’t thought about in years, I was reminded again of how powerful food is, and thankful that even though she hasn’t read it yet, this post evoked happy thoughts of her past during a time of sadness.
 As far as my future with plums goes - and based on my family history with the fruit - I feel pretty confident when I say that we've got many happy moments ahead of us. And you can bet (a plum cake, perhaps?) that a few jars of "plumjum" will be produced this weekend from the best possible specimens, packed up and shipped to Florida for my Momma and grandfather to enjoy. With love.
 In the last few weeks, I’ve seen plums pop up in
  If you'd like this cake for breakfast, make it the night before and wrap it tightly in plastic, letting it sit on your counter until the morning. Then, about 15 minutes before you're ready to eat it remove the plastic, pop it in the oven to re-heat for a few minutes before turning on the broiler to crisp the top and caramelize the edges.
Plum Cake
adapted from
  I followed the original recipe closely except for the following adaptations:
Because about 1/2 of my plums were still a little green on the inside and therefore quite tart, I chose to macerate the fruit for a bit before layering it with the dough. Even if I use very sweet fruit in the future, I won't skip this step. The sugar helped the fruit to caramelize at the edges, producing a wonderful texture.
The addition of lemon zest to the dough and slivered almonds to the top of the cake are two tricks that I use quite often in fruit cakes and crumbles. I think that everything is better with a touch of lemon and a few almonds.

 I must admit, I’m somewhat happy to see this blackberry season come to an end. In just a couple of weeks I’ll be able to cut back all of this year’s fruited wood, and will have the space needed to train the new growth and reclaim our entrance to the garden. Blackberries bear fruit on the previous year’s growth, so as the new arms have reached out into any space they could creep to, we’ve been powerless to do anything about them. I can’t bear the thought of cutting any of them back, for fear of what that would do to next year’s harvest, but I will be very grateful to not have to play limbo to pass through the garden gate.
 I’ve actually shared this recipe with you
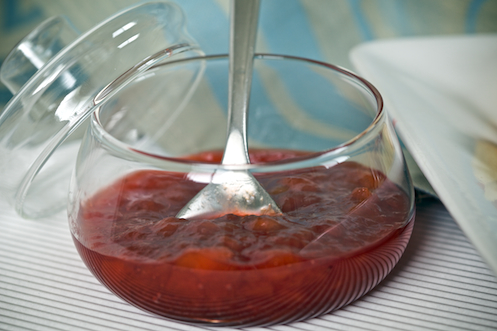
  But our favorite use of our overabundance of the sweet-tart fruit has been jam. So far we’ve tried three different varieties with our blackberries, and we have a few more in mind to try out this weekend. The peaches we’ve been picking have come in handy too, providing a natural sweetness that allows us to cut the sugar used in the original recipe. We’ve been eating jam on biscuits, waffles, pancakes, almond butter sandwiches and even pork tenderloin as a delicious glaze. We have jars upon jars stored up in our pantry, waiting to be given to friends or consumed by us over the next 11 months.
 In fact, one lucky reader will receive a 6oz jar of Bella Eats Jam to enjoy! Just leave a comment on this post telling me your favorite jam/preserves/jelly flavor. Who knows, maybe you’ll see your flavor featured after our next experimentation! I’ll announce the winner on my next post, so comment away until then.
 Blackberry Jam with Peaches or Plums
adapted from
  And, if you're not sure what to do with the 24-ish ounces of jam the recipes above produce, make
  Other Bella Terra posts this season: