Hello bloggies! Thank you for all of the lovely comments about my
cranberry apple holiday pie...it was a big hit at the office holiday party last night! This was my first time using all
butter in the crust instead of a combination of butter and lard (I just can't bring myself to buy a tub of lard anymore, even if it does produce a heavenly crust!!!). It tasted great, but the bottom of the pie was really
hard to cut. Any ideas why?
Would it be the difference in using just butter and no lard? Maybe I should have bought a veggie oil shortening to substitute instead... Any suggestions you have are much appreciated! :) I read a great article in the NY Times Dining & Wine section about the importance of butter in baking, if anybody is interested the article is
here. I'm dying to try
this recipe that they provided too!
We had an awesome dinner over at my boss' house last night. Salmon, green beans, risotto and a beautiful salad. I don't have any pictures as it was a small gathering and neither my boss nor co-worker know about the blog. That's going to be a theme in this post, I've been running around like a crazy woman and haven't had time for meal pictures. Don't worry though, I'll make up for it with
holiday treat photos! :) Other than dinner last night and a lovely breakfast at our friend Amy's house this morning you wouldn't be interested in my eats these last couple of days anyway, especially since my breakfast yesterday consisted of
marshmallows,
hot cocoa, and more
marshmallows! :)
The hubb and I were really busy yesterday making boxes for our friends and co-workers. I decided a week or so ago that I wanted to do something really simple for everybody, so picked out a couple of recipes from
Good Things Catered and
A Kitchen Story. These two ladies have some awesome recipes to share, so be sure to check out their blogs! Of course, the gift boxes wound up being far from simple but we had a great time working on them together.
We started with
marshmallows Saturday night. Katie's recipe is perfect, I didn't change a thing. A note of warning if you want to double the recipe (which I did), still make the recipe in
individual batches. One batch will completely fill your mixing bowl by the time it is done, so you'd never have enough room for two.


Make sure to be
quick with getting the marshmallow goo from your mixer to the pan and smoothing it out, it starts to harden pretty quickly. After we had our batches settled in their pans (we made 2, one
vanilla flavored and the other
peppermint), we let them sit overnight to set. In the morning, I released the marshmallow from the pan to cut it into little 'mallows.

I tried several different methods of cutting, and didn't have any knives that worked for me. The hubb suggested that I use my
stainless steel scraper, and it was perfect. The key is to
push the blade straight down through the marshmallow, don't
pull it through like you would cut a cake. The 'mallow is just too sticky and it deforms if you try to pull a cutting utensil through.

They turned out beautifully, and are so amazingly good. You've never had a marshmallow if you've only had the store-bought variety...these are 100 times better.


After cutting the marshmallows (and eating quite a few!) we moved on to
dark chocolate bark with cherries and walnuts. Four batches of bark. I've never made bark before so I followed Kristin's recipe exactly, the only thing I changed was my method of melting the chocolate. We used a double boiler on the stove top rather than the microwave.

The chopped cherries, walnuts and crystalized ginger were perfect compliments to the dark chocolate.

The chocolate-y goodness spread out nicely on the sheet pan, but at this point I was still skeptical of how the bark would turn out. I was worried that when we cut it into individual pieces it would shatter into much smaller pieces than I was hoping for.
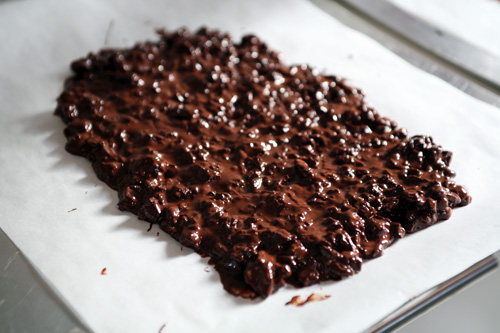
But it came out perfectly. I was shocked at how easy it was to cut and how nicely it sliced into small pieces. And the flavors are amazing together, not too sweet.

We also made
hot cocoa with Katie's recipe, although I was in such a rush at that point that I wasn't taking any pictures. Nothing too exciting though...other than the
vanilla sugar. It turns out vanilla sugar is pretty hard to find in Charlottesville, especially in the quantity that I needed (16 cups, I made 4 batches of cocoa). And the small amounts you can find are
expensive, I found out why when I bought vanilla beans to make my own vanilla sugar.
The beans are $5 each!!! I bought 4, and then read after the fact that Katie recommends
1 bean per 2 cups of sugar, so I actually needed 8. That coupled with the fact that you really need
1-2 weeks for the vanilla flavor to seep into the sugar and I only had 6 days before needing to make my cocoa means that my hot cocoa mix isn't nearly as vanilla-y as it should be. I'll definitely be trying this recipe again next year and will follow it properly because I think it has the potential to be
amazing.
We packed all of our goodies up in
recyclable packaging - brown paper boxes, shredded paper grocery bags and paper ribbon. I had to use cellophane baggies for the marshmallows and bark because I couldn't think of anything else that would be as pretty...


This was so fun. I love doing projects like this with my hubb. It probably took us
two full days with all of the candy making, shopping for ingredients + materials and assembly of the boxes, but it was so worth it. We've had great reactions from our friends and had such a great time putting the gifts together!
Ok lovelies, I'm off to another
holiday party tonight, this one is for the hubb's office. And tomorrow morning, at a VERY EARLY 5am, we are loading the car up with luggage, presents and dogs for our
13 hour drive to FLORIDA!!! YAY!
Have a fabulous evening... :)
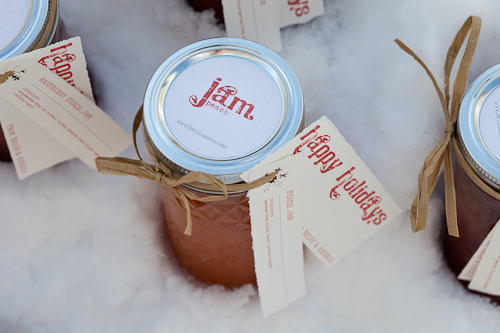


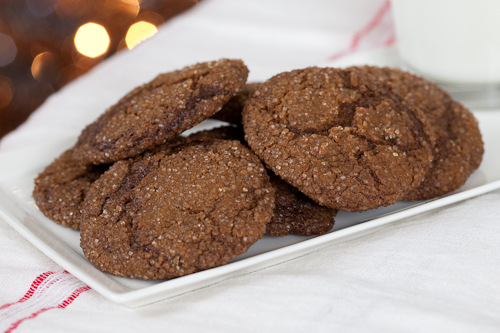 dark chocolate almond bites
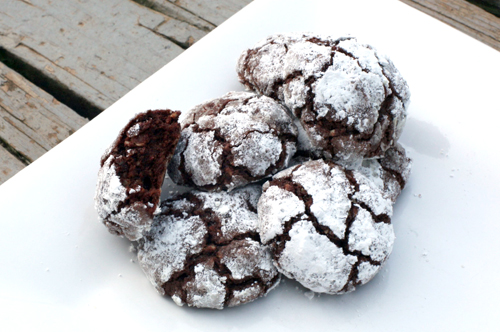 peppermint eggnog scones
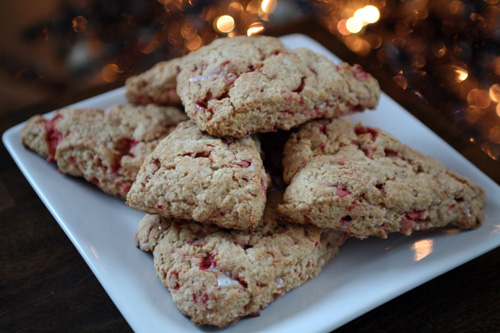 citrus scones with cranberries and ginger


 dark chocolate almond bites
 peppermint eggnog scones
 citrus scones with cranberries and ginger

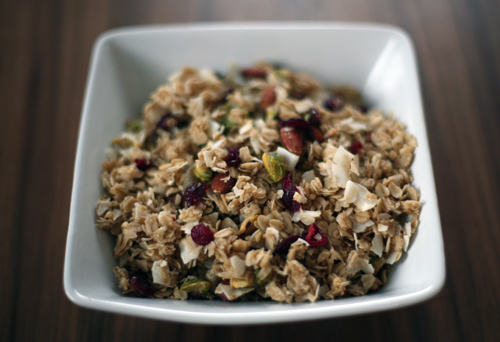 Granola is one of those grocery store items that I hate to buy. It is somewhat expensive and every time I pick up a box or scoop some into a bulk bag I think to myself "I should just make my own!" My good friend Beth sent Brian (my hubb) and I a batch for Christmas which was consumed quickly and similarly to Whitney's. Since then I've had granola on my to-make list, and the arrival of Whitney's package secured its spot at the very top of that list.
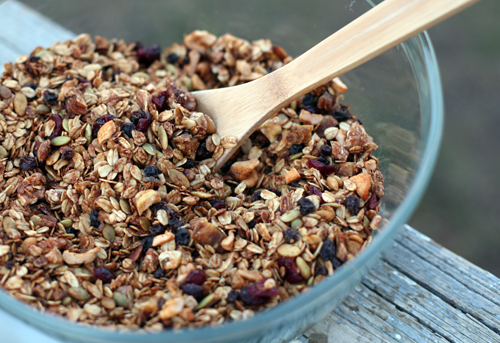
 As I've written before, its spring cleaning time. I've been working through the containers of dried fruits and nuts in my pantry, cleaning out items that have been stored for far too many months to make room for new purchases. Granola seemed like the perfect way to use up the small quantities of miscellaneous dried goods that I had left. I dug around and found currants, cranberries, apples and pineapple along with walnuts, pumpkin seeds and a small amount of finely shredded unsweetened coconut.
 As I gathered my ingredients I eagerly pulled up
  I quickly decided that powdered milk must not be an absolutely necessary ingredient in granola. My reasoning? Everybody loves granola, including Vegans. And a granola that contained powdered milk would not be vegan so powdered milk must not be necessary. This means that honey must not be absolutely necessary either but I chose to keep it in, because I do love honey.
For my kitchen sink granola (or should I say pantry shelf granola?) I decided to hop over to


 Make sure to be quick with getting the marshmallow goo from your mixer to the pan and smoothing it out, it starts to harden pretty quickly. After we had our batches settled in their pans (we made 2, one vanilla flavored and the other peppermint), we let them sit overnight to set. In the morning, I released the marshmallow from the pan to cut it into little 'mallows.
 I tried several different methods of cutting, and didn't have any knives that worked for me. The hubb suggested that I use my stainless steel scraper, and it was perfect. The key is to push the blade straight down through the marshmallow, don't pull it through like you would cut a cake. The 'mallow is just too sticky and it deforms if you try to pull a cutting utensil through.
 They turned out beautifully, and are so amazingly good. You've never had a marshmallow if you've only had the store-bought variety...these are 100 times better.


 After cutting the marshmallows (and eating quite a few!) we moved on to
  The chopped cherries, walnuts and crystalized ginger were perfect compliments to the dark chocolate.
 The chocolate-y goodness spread out nicely on the sheet pan, but at this point I was still skeptical of how the bark would turn out. I was worried that when we cut it into individual pieces it would shatter into much smaller pieces than I was hoping for.
 But it came out perfectly. I was shocked at how easy it was to cut and how nicely it sliced into small pieces. And the flavors are amazing together, not too sweet.
 We also made


 This was so fun. I love doing projects like this with my hubb. It probably took us two full days with all of the candy making, shopping for ingredients + materials and assembly of the boxes, but it was so worth it. We've had great reactions from our friends and had such a great time putting the gifts together!
Ok lovelies, I'm off to another holiday party tonight, this one is for the hubb's office. And tomorrow morning, at a VERY EARLY 5am, we are loading the car up with luggage, presents and dogs for our 13 hour drive to FLORIDA!!! YAY!
Have a fabulous evening... :)