Contact Us

Use the form on the right to contact us.

You can edit the text in this area, and change where the contact form on the right submits to, by entering edit mode using the modes on the bottom right. 


123 Street Avenue, City Town, 99999

(123) 555-6789

email@address.com


You can set your address, phone number, email and site description in the settings tab.
Link to read me page with more information.

Blog

july 4th mixed berry sherbet

Andrea

Happy 4th of July my celebrating friends! I hope you all have fun plans in store for this long weekend, filled with loved ones and sunshine and delicious food.

If you're looking for a festive, summery, oh-so-easy dessert to contribute to a backyard barbecue, I've got just the treat for you. This sherbet is perhaps the best I've had. That may be because the berries were grown in my own backyard and I am a bit biased, but I do think even with store-bought or frozen fruit it would be quite delicious. So tart and refreshing; even the bright fuchsia hue screams summer!

Enjoy, and have a safe and happy holiday!

Mixed Berry Sherbet

from David Lebovitz's The Perfect Scoop (listed as raspberry sherbet), makes 1 quart

Ingredients

  • 4 cups berries, fresh or frozen (I used blackberries, black + red raspberries, and strawberries)
  • 2 cups whole milk
  • 1 cup sugar
  • 1-1/2 tsp freshly squeezed lemon juice

Method

  1. Puree the berries, milk, and sugar in a blender or food processor until smooth. Strain the puree through a fine-mesh sieve to remove all seeds. Stir in the lemon juice.
  2. Refrigerate for at least 1 hour, or up to 1 day.
  3. Freeze in your ice cream maker according to manufacturer's instructions.

red beet risotto

Andrea

I do believe that beets are my very favorite spring vegetable. They are quickly overshadowed by tomatoes in Summer, but in May and June I could eat beets every other day. Typically I am a fan of simply roasting the globes and tossing them on a salad with chevre and a light vinaigrette. But every now and then, when I am feeling the need for something a bit more toothy and substantial I'll whip up a batch of risotto. I love the sweetness that roasted beets lend to the savory dish, and of course the vibrant hue that even a picky toddler wouldn't be able to resist.

I"ll admit...I've already written about red beet risotto here, years ago, when we were growing beets in our very own garden. The recipe has changed a bit, and the photographs have certainly improved, but I still love that first post because of its words about our little veggie patch. We're still growing beets this year, although out on Maple Hill Farm rather than just to the side of our house. And this recipe is still a favorite, one that I felt was appropriate to bring up again now that we're at the height of beet season here in Charlottesville. Plus, I just couldn't resist the urge to re-photograph the dish in all of its neon-pink glory, in proper lighting, with less distraction. It deserves to be the star of the show!

These days, I'm adding the beet greens directly to the risotto, rather than cooking them up on the side. They don't add much flavor to the dish, but I do like the additional texture and all of the nutrients packed into the deep green leaves. Thanks to the New York Times for that little suggestion.

Red Beet Risotto

from the new york times

serves 4 as a main course

Ingredients

  • 3/4 pound beets (1 small bunch of 3 to 4)
  • 1 bunch beet greens, stemmed and washed (from your beets, if fresh and unwilted. leave them out if they are past their prime)
  • 6 to 7 cups chicken or vegetable stock, as needed
  • 2 tbsp extra virgin olive oil
  • 1/2 cup finely chopped onion
  • 1-1/2 cups arborio rice
  • 2 garlic cloves
  • 1/2 cup dry white wine
  • salt
  • freshly ground pepper
  • 1/2 cup parmesan cheese, grated
  • 2 tbsp finely chopped flat-leaf parsley

Method

  1. First, roast the beets. Preheat your oven to 400°. Wrap the beets in aluminum foil and place on a baking sheet. Roast for about 20 minutes, until the beets are easily pierced with a fork.  Remove from oven and allow to cool, then peel and dice the beets.  The skin should slide off easily.
  2. Slice the greens into 1-inch strips, set aside.
  3. Place the stock in a medium sauce pan and bring to a simmer, then reduce heat to low.
  4. In a large, wide, heavy-bottom saute pan, heat the oil over medium. Add the onion and stir while cooking until it starts to soften, about 3 minutes. Add the rice and the garlic and stir while cooking until the rice is separate and starting to crackle, about 3 minutes.
  5. Stir in the wine and cook over medium heat, stirring constantly. When the wine has just about evaporated, add in 1 ladleful of stock (about 1/2 cup) just to cover the rice. The stock should bubble slowly (adjust heat). Cook, stirring occasionally, until the stock is nearly absorbed, then add another ladleful. Continue to cook in this fashion, not too fast and not too slowly, stirring often and adding more stock when the rice is dry, for about 10 minutes.
  6. Stir in the diced beets and sliced greens. Add more stock and continue cooking as before, for another 10-15 minutes, adding stock when the rice is dry. The rice should be tender but not mushy, with no hardness at the middle. When it has reached the correct consistency, season with salt + pepper. Add the parmesan cheese and the parsley, and stir to combine. The rice should be creamy, if it is not, add another 1/2 cup of stock.
  7. Adjust seasonings and serve.

blueberry lemon tartlets

Andrea

There have been a lot of sweets around here lately. I would apologize, but this little blog is a glimpse into my kitchen and sweets are what I am craving these days. Ice cream. And popsicles. And tiny tartlets with fresh fruit mounded on top. Even though Summer has officially just arrived, here in Virginia you'd think she'd been around for at least the last month.  And when Summer lands firmly on our dry + crispy lawn I like for the food passing my lips to be cool and refreshing, laden with flavors of citrus and berry. Of course, there are salads abounding as well, but salads aren't nearly as much fun to photograph, write about, or share here in this space. Except that I've been slicing kumquats to sprinkle overtop of my spinach lately and that, my friends, is a really good idea. If you can find kumquats in your area I suggest you give it a try, I think you'll be pleased.

While you're out, pick up a few pints of fresh blueberries, and then hurry home to whip up these sweet little tartlets. The blueberries are such a nice accompaniment to the sharp tang of lemon curd nestled within the butter pastry. You'll only need one of those pints for this recipe, but if you're like me you won't be able to resist eating berries by the handful as you prep. 

Oh! And if you're in central Virginia, pick up the Summer issue of Flavor Magazine. Not only because Flavor is a wonderful resource for sustainable eating in the Capital Foodshed, but because you may just recognize a photograph in the Pairings section on page 79...!

Happy Summer, friends!

Chantilly cream is one of my great pleasures. I experienced it for the first time at K-Paul's in New Orleans when it was served with my cafe au lait, and I just about licked the bowl. Sprinkled with dried lavender, it is a lovely accompaniment to sweet blueberries. Add in the lemon curd and butter pastry and you've got quite the divine dessert.

I should also note that I've never, ever been able to achieve a non-shrinking tart or pie crust. This recipe is suggested by Joy of Cooking for tartlets specifically because the pastry is not supposed to shrink, but, mine still did. Apparently pastry dough and I just don't get along. I'm working on it.

Blueberry Lemon Tartlets with Chantilly Cream + Lavender

crust and curd recipes from The Joy of Cooking, chantilly cream recipe from Chef Paul Prudhomme's Louisiana Kitchen

makes (6) 4-inch tartlets, with some leftover lemon curd and chantilly cream (darn!)

Pastry

  • 1 cup plus 2 tbsp all-purpose flour
  • 1 tbsp white sugar or 2 tbsp powdered sugar
  • 1/4 tsp salt
  • 6 tbsp (3/4 stick) cold unsalted butter
  • 3 oz cold cream cheese
  • 2 to 3 tbsp cold heavy cream

Lemon Curd

  • 1 cup sugar
  • 8 tbsp unsalted butter (1 stick), cut into small pieces
  • 8 large egg yolks
  • 1/2 cup strained fresh lemon juice (from 2 to 3 lemons)
  • 1 tbsp grated lemon zest, plus more for garnish

Chantilly Cream

  • 2/3 cup heavy cream
  • 1 tsp vanilla extract
  • 1 tsp brandy
  • 1 tsp Grand Marnier
  • 1/4 cup sugar
  • 2 tbsp dairy sour cream

Assembly

  • 1 pint fresh blueberries
  • 1 tsp dried lavender

Method

  1. Place a medium-size bowl and beaters in the refrigerator, to be used for the chantilly cream.
  2. To make the pastry, whisk together the flour, sugar, and salt. Cut the butter and cream cheese into 1/4-inch pieces. Using a pastry blender or 2 knives, cut the butter and cream cheese into the dry ingredients until the mixture resembles coarse crumbs with some pea-sized pieces. Drizzle the heavy cream over the mixture and cut in with the blade side of a rubber spatula, or stir with a fork until the dough begins to gather into moist clumps. Press the dough into a flat disk, wrap tightly in plastic, and refrigerate for at least 1 hour or up to 2 days.
  3. On a lightly floured work surface, roll the dough about 1/8 inch thick, then cut into rounds wide enough to cover the bottom and sides of your tartlet pans, with 1 to 1.5 inches extra dough to spare. Press the dough rounds into the pans, then fold the overhanging dough back on itself over the crust sides, doubling their thickness. Press the doubled dough firmly to seal, then thoroughly prick the sides and bottoms with a fork. Arrange the crusts on a baking sheet and refrigerate for at least 30 minutes.
  4. Position a rack in the center of your oven and preheat to 400°F. Bake the crusts for 5 to 7 minutes, then prick the bottoms of any that have puffed. Continue to bake until the crusts are golden brown and firm to the touch, 12 to 15 minutes more.
  5. For the lemon curd, preheat your oven to 350°F. Combine the sugar and butter in a heat proof bowl. Bring 1-inch of water to a bare simmer in a skillet, and set the bowl of sugar and butter in the skillet. Stir until the butter is melted, and remove the bowl from the skillet. Add the egg yolks and beat until no yellow streaks remain. Stir in the lemon juice and return the bowl to the skillet. Heat the mixture over medium heat, stirring gently until it thickens to the consistency of heavy cream and lightly coats a spoon, 6 to 8 minutes. Strain the lemon mixture through a clean fine-mesh sieve into a bowl, then stir in the lemon zest.
  6. Pour the filling into the tart crusts. Bake the tartlets until the center looks set but still very quivery, like gelatin, when the pan is nudged, for 15 to 20 minutes. Let cool completely on a rack.
  7. Meanwhile, make the chantilly cream. Combine the cream, vanilla, brandy, and Grand Marnier in the chilled bowl and beat with an electric mixer on medium speed for 1 minute. Add the sugar and sour cream and beat on medium just until soft peaks form, about 3 minutes. Do no overbeat!!!
  8. To assemble, pile blueberries on top of each tartlet. Add a generous dollop of chantilly cream and sprinkle with fresh lavender and lemon zest.
  9. If you make the tarts ahead, lightly oil sheets of plastic wrap and press directly on the filling in each tartlet. They can be stored in the refrigerator for up to 1 day. Dress with blueberries and chantilly cream when ready to serve.

dulce de leche cupcakes

Andrea

There's something in the water around here. It seems as if Brian and I are surrounded by friends having babies! We have officially become the only couple amongst our close Charlottesville friends who does not have a tiny addition to the family. And, it kind of freaks me out. Just a bit. We're not ready for all of that yet, but it sure does get the gears in your head turning when you're tickling those tiny toes or witnessing first giggles. Those turning gears, they're something that I was never all that sure I would experience and now that I am...wow. Mind-boggling. Brian has asked me more than once who I am and what I've done with his wife, for this whole biological clock thing was never something that either one of us gave a whole lot of merit. Well it exists, I assure you.

The arrival of these tiny humans brings along something that I can wrap my mind around...baby parties. The kind where both men and women are invited, and the focus is on good food and fun [yard] games and great friends giving advice to the new parents-to-be. I love an excuse to plan a party, and the arrival of a new being sure seems like a wonderful reason to celebrate! 

A couple of Saturdays ago I helped to plan a baby party for our good friends Tommy and Kristin. Their little girl arrives in just over a month, and we couldn't be more excited and happy for them! This party was a fiesta of sorts, decorated with bright balloons and citrus-y hues. We had carnitas tacos, and veggie tacos, and cilantro lime slaw, guacamole, black beans, and dulce de leche cupcakes. I fully intended to photograph the carnitas to share with you but, well, when you're co-hosting the party it is tough to remember to pick up your camera. I did manage to capture some images of the cupcakes, so they will have to do. I promise, you won't be disappointed.

These cupcakes come from Joy, who never ceases to amaze me with the cleverness of her recipes. If I think of something, chances are Joy's already done it. And every single recipe I've ever tried of hers has been a winner, so I typically don't question her methods. This was no exception. Seriously, who could go wrong with cream cheese and dulce de leche whipped into a buttercream frosting? It is one of the best things you'll ever taste, I promise.

Dulce de Leche Cupcakes

from joy the baker

makes 24 cupcakes

For the Cupcakes:

  • 3 cups all-purpose flour
  • 1/4 cup cornstarch
  • 1 1/2 teaspoons baking powder
  • 1 1/2 teaspoons baking soda
  • 1 teaspoon salt
  • 3/4 cup (1 1/2 sticks) unsalted butter, softened
  • 1 cup brown sugar
  • 1/2 cup granulated sugar
  • 1 teaspoon pure vanilla extract
  • 3 large eggs
  • 1 1/2 cup buttermilk

For the Frosting:

  • 8 ounces cream cheese, softened
  • 1/2 cup (1 stick) unsalted butter, softened
  • 3/4 cup dulce de leche (I used canned, Nestle brand, dulce de leche. Not the best, and next time I'll find a better brand, but it still worked well in the frosting.)
  • 1/4 teaspoon salt
  • 2 to 3 cups powdered sugar

To make the cupcakes:

  1. Place racks in the center and upper third of the oven and preheat to 350 degrees F.  Line two cupcake pans with paper or foil liners.  Set aside.
  2. In a medium bowl, whisk together flour, cornstarch, baking powder, baking soda and salt.  Set aside.
  3. In the bowl of an electric stand mixer fitted with a paddle attachment, add butter and sugars.  Beat on medium speed until fluffy and pale brown, about 3 minutes.   Stop the mixer, scrape down the sides of the bowl and add one egg.  Beat on medium for one minute.  Add the remaining eggs, one at a time, beating for one minute between each addition.  Stop the bowl and scrape down the sides as necessary. Beat in vanilla extract.
  4. Add half of the flour mixture to the egg and butter mixture.  Beat on low speed and slowly drizzle in the buttermilk.  Beat until just incorporated.  Stop the mixer, scrape down the bowl and add the rest of the dry ingredients.  Beat on low speed until just incorporated.  Remove the bowl from the stand mixer and finish incorporating with a spatula.  Try not to over mix.
  5. Divide the batter between the prepared cupcake pans, filling each liner about 2/3 full.  Bake for 18 to 20 minutes or until a toothpick inserted in the center of one of the cakes comes out clean.  Let rest in the cupcake pans before removing to a wire rack to cool completely.  Cupcakes should be completely cooled before frosting.

To make the frosting:

  1. Place cream cheese in the bowl of an electric stand mixer.  Beat on medium speed for about 30 seconds, until very soft and pliable.  Stop the mixer, scrape down the sides of the bowl and add the butter and dulce de leche.  Beat on medium speed until well incorporated.  Stop the mixer and add the salt and powdered sugar.  Beat on medium speed for about 3 minutes, until fluffy and lighter in color.  
  2. Use a large frosting tip to swirl the frosting onto the tops of the cupcakes.
  3. Garnish with fleur de sel, or coarse sea salt.

For more pictures of Tommy + Kristin's baby party, visit the AHPhoto blog!

citrus popsicles for grown-ups

Andrea

Two weeks ago I collaborated on a photography session with Soiree. and Rock Paper Scissors. Actually, it was a 6-week process of planning, shopping, meeting, envisioning, and shopping some more. The result was this Mid-Century Modern Wedding concept shoot that I shared on Andrea Hubbell Photography today, and I couldn't be more proud of what we created! I've said it before, but I love my job!!! These adult popsicles were created to help set the mood for a fun afternoon wedding and meal, meant to cool down energetic dancers when they step off the floor. 

I've only recently discovered Aperol, an Italian aperitif similar to Campari, but with more sugar and less alcohol. It is a blend of bitter orange, gentian rhubarb, and an assortment of herbs and roots. It happens to complement grapefruit juice beautifully, and adds a nice kick of color to a classic greyhound, or these popsicles that required an extra bit of orange to fit in with our 'wedding' decor. 

You have no idea how hard it is to find a simple, cylindrical popsicle mold! So, instead, I used double shot glasses and 'cookie sticks' bought at a craft store. The shot glasses worked really well, provided a place to wrap the fun pattern created by Rock Paper Scissors, and looked adorable!

Aperol Citrus Popsicles (fit for a wedding...)

Ingredients

  • 1 cup sugar
  • 1 cup water
  • 3 cups grapefruit or orange juice (pulp free...fresh is best)
  • 1/2 cup Aperol

Method

  1. Mix the water and sugar together in a small pan over a low heat, and bring up to boil until the sugar dissolves. Allow the simple syrup to boil for 4 minutes, remove from heat and cool (makes a little over 1 cup).
  2. Combine the citrus juice and Aperol and add 1 cup of the cooled syrup. Adjust to taste: for the grapefruit pops, you may want to add a tablespoon or two extra syrup if you prefer them less tart. Remember, the mixture will taste slightly sweeter in liquid form than it does when frozen.
  3. Pour into popsicle molds and freeze at least 8 hours or overnight. To remove, run the molds quickly under hot water, and gently pull out the pops.

banana pudding ice cream

Andrea

There are a few foods that take me way, way back to my childhood. Orange danishes. Cheesecake. Anything combining peanut butter and banana. My momma's macaroni and cheese, her banana bread, and especially her banana pudding. Do you see a trend here? Banana popped up several times...I really, really, like banana. So you can imagine my excitement when my Charlottesville friend Stephanie, someone whom I think very well could have been separated from me at birth, brought homemade banana pudding ice cream to her dinner table one evening. And then again when Steph was spending an afternoon at my house, pointed to the pile of overripe bananas on my counter and said "Let's make ice cream! Right now." And now, when I sneak out to the kitchen mid-day, slip a spoon from a drawer, and sink it into the container of what's left for an afternoon pick-me-up. 

This flavor will forever remind me of my Momma. Banana pudding was one of my very favorite edibles while growing up, but sitting here today I can't remember ever making it for myself as an adult. Its the kind of recipe that mommas make, and until I am one, I don't know that I will. But this ice cream, it takes the best of what banana pudding is...the creamy texture, the crunch of vanilla wafers, the real bananas puréed smooth...and creates a simple, elegant, dinner-party-worthy dessert. One that leaves you mostly speechless, lost in thought, and thoroughly happy.

My life has been a little sweeter lately because of banana pudding ice cream mingled with memories of home and youth. Steph, I owe you. Big time.

I wish that I could take credit for this fabulous recipe, but I cannot.  This one I owe to my dear friend Stephanie, ice cream goddess and all-around awesome lady.

Banana Pudding Ice Cream

makes about 1 quart

Ingredients

  • 5 egg yolks
  • 3/4 cup sugar
  • pinch salt
  • 1 cup milk
  • 2 cups heavy cream, divided
  • 1 tsp vanilla
  • 4 very ripe bananas, mashed or puréed
  • 1/2 cup vanilla wafers, broken to small pieces but not crumbs

Method

  1. In a medium-size bowl whisk together the egg yolks, sugar, and salt, and set aside.
  2. In a medium-sized saucepan, heat the milk and 1 cup of the cream just to a slow boil. Remove from heat and add to the egg mixture, whisking constantly.
  3. Pour the mixture back into the saucepan and heat gently, stirring constantly, until a candy thermometer reads 170˚. Do not bring to a boil or it will most likely curdle. Remove from heat and allow to cool for 5 minutes.
  4. Pour custard through a fine-mesh strainer into a large bowl. Add the remaining cup of cream and the vanilla, and stir to incorporate. Add the puréed banana and stir to combine.
  5. Cover the bowl loosely with plastic wrap and refrigerate for 1 hour. When the mixture is cool, cover the bowl completely with plastic wrap and refrigerate overnight.
  6. The next day, pour the mixture into the frozen bowl of your ice cream maker and follow manufacturer's instructions. About 3 minutes before the ice cream is done freezing, add the vanilla wafers. 

bread pudding with amaretto cream

Andrea

bread pudding-8.jpg

Charlottesville is beautiful this time of year...lush new grass, lacy clouds of dogwood blossoms, confetti-hued azalea bushes. But my heart, it lies in another city at the end of April. Far, far south of here, where the air is heavy with music and the scent of chicory. Five years ago this Thursday, Brian and I were married against a cracked brick wall in a classic New Orleans courtyard on the most beautiful day of our lives thus far.  With 35 of our closest friends and family we paraded through the French Quarter, led by a jazz quartet we'd met on Royal Street during our very first visit to the Big Easy. I walked down the aisle to "It's a Wonderful World", we said our vows with our two best friends by our sides, we danced with those we love most, we ate incredible food for hours. What a day...and so hard to believe it was five years ago now.

Yes, this time of year has me longing for New Orleans. We were married in the midst of crawfish season, and luckily for us, we have a local market that brings crawfish into Charlottesville at exactly this time of year, just for our anniversary. Well, maybe not just for us, but the timing sure does work out well. On Friday, Brian brought home with him 1 dozen oysters, 4 pounds of crawfish, and 6 blue crabs. A flash decision was made and I found myself scrambling to make a bread pudding, the perfect ending to the NOLA Seafood Boil suddenly placed on our Friday night agenda. That dinner with dear friends was the next best thing to being in our favorite city, and another evening I won't soon forget.

Bread pudding is a classic New Orleans dessert. It is one that, when we first visited the city, I was entirely unconvinced of. I've come to my senses in the last few years, and might have recently declared bread pudding one of my favorite sweets. I won't deny that. This particular recipe was a new one for me, pulled from Chef Paul Prudhomme's classic cookbook, which hasn't led us astray yet. Chef Paul is a bit of a culinary god in our house...the man did invent the blackening method after all. I expected him to pull through for me again here, and we were not disappointed. This is a traditional bread pudding, made with stale bread and sweet custard and pecans and raisins, topped with Chef Prudhomme's fabulous Chantilly Cream. Because I wasn't expecting to make bread pudding (or any baked good at all, actually) last Friday afternoon, I found myself lacking in some ingredients. But even with a bit of tweaking it was a big hit, and I think the changes made might be permanent.

bread pudding-2.jpg
bread pudding-4.jpg
bread pudding-3.jpg
bread pudding-7.jpg
bread pudding-5.jpg

Bread pudding is best while still warm, but also makes for a really, really good cold breakfast. Trust me...it will sing with your coffee.

Bread Pudding with Amaretto Cream

from Chef Paul Prudhomme's Louisiana Kitchen, with minor modification

serves 8

Ingredients

  • 3 large eggs
  • 1-1/4 cups sugar
  • 1-1/2 tsp vanilla extract (I substituted almond)
  • 1-1/4 tsp ground nutmeg
  • 1-1/4 tsp ground cinnamon
  • 1/4 cup unsalted butter, melted
  • 2 cups milk
  • 1/2 cup raisins (I used golden raisins)
  • 1/2 cup coarsely chopped pecans, dry roasted (I've also used walnuts, and think that almonds would be quite good, too)
  • 5 cups very stale French or Italian bread cubes, with crusts on
  • Amaretto Cream (recipe below)

Method

  1. In a large bowl, beat the eggs on high speed until extremely frothy and bubbles are the size of pinheads, about 3 minutes (or with a metal whisk for about 6 minutes). Add the sugar, vanilla, nutmeg, cinnamon, and butter and beat on high until well blended. Beat in the milk.
  2. Butter (8) small ramekins, (1) 9x5 loaf pan, or (1) 9" square glass dish. (Truly, any of these works.) Place a layer of bread cubes in the greased pan(s). Sprinkle with the golden raisins and nuts and layer bread cubes over top to fill pan. 
  3. Pour the egg mixture over top of the bread cubes and toss (or gently press the cubes down into the liquid so that all are coated, but not covered). Let sit for about 45 minutes, pushing the bread down into the liquid occasionally. Preheat oven to 350°. 
  4. Place the pan(s) in the preheated oven and immediately drop the temperature down to 300°. Bake for 40 minutes, until top is just starting to golden. (If you use small ramekins, bake for just 25-30 minutes). Increase the oven temperature to 425° and bake until pudding is well browned and puffy, about 15 to 20 minutes more.
  5. Serve with Amaretto Cream.

Amaretto Cream

modified from Chef Prudhomme's Chantilly Cream (which is really, really delicious...I just didn't have the right liqueur.)

Ingredients

  • 2/3 cup heavy cream
  • 1 tbsp amaretto
  • 1/4 cup sugar
  • 1 tbsp dairy sour cream

Method

  1. Refrigerate a medium-size bowl and beaters until very cold. Combine the cream and Amaretto in the bowl and beat with a handheld mixer on medium speed for 1 minute. Add the sugar and sour cream and beat on medium just until soft peaks form, about 3 minutes. Do not overbeat!
  2. Try not to eat the entire bowl. But if you do, I understand completely.
bread pudding-6.jpg

the best egg salad...ever

Andrea

egg salad-4.jpg

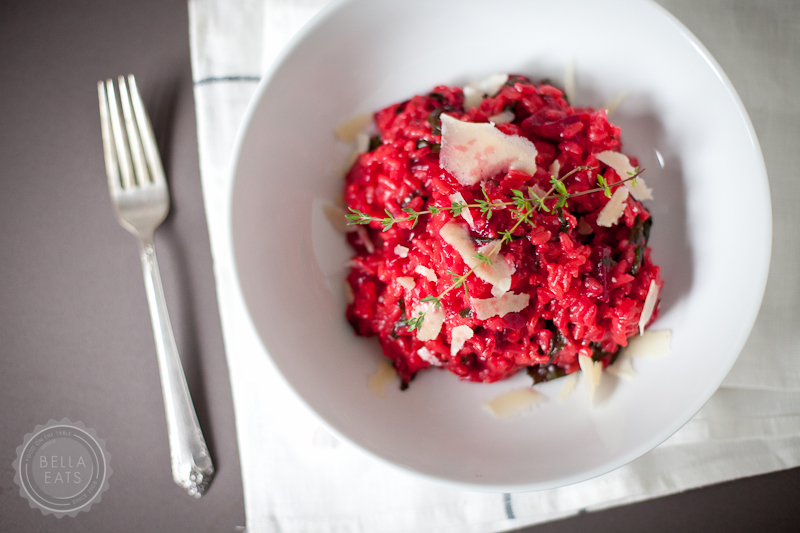
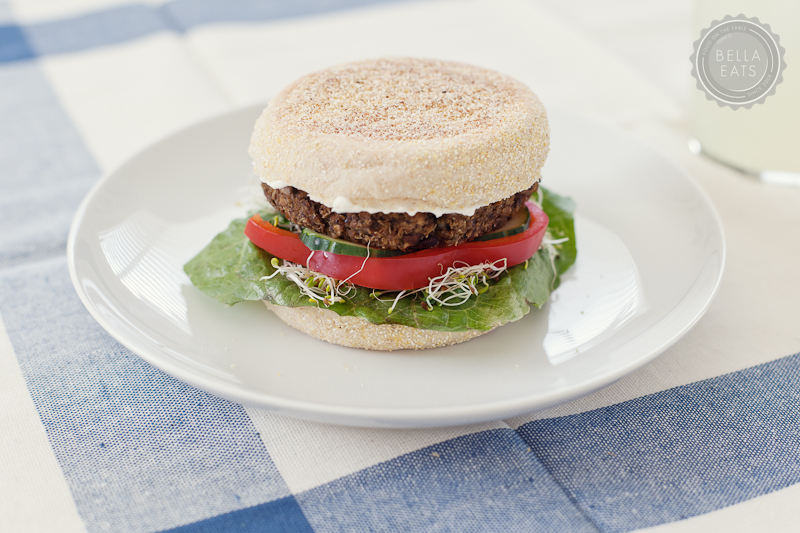
I have big, big plans for picnics in 2011. Last summer, I think, Brian and I were cheated...busy lives kept us from really taking the time to relax on weekends and enjoy each other's company on weekday evenings. Life is still moving quickly, but this year we've adjusted our priorities. And picnics are close to the top of my new list. Nothing quite says summer like packing a basket of simple foods, folding up your favorite quilt, and driving out to the country. Or, if you really want to get your picnic quota up, simply walking out to the backyard and plopping down on a patch of shady grass. That can happen any old day, and this year I plan to make it happen quite often.

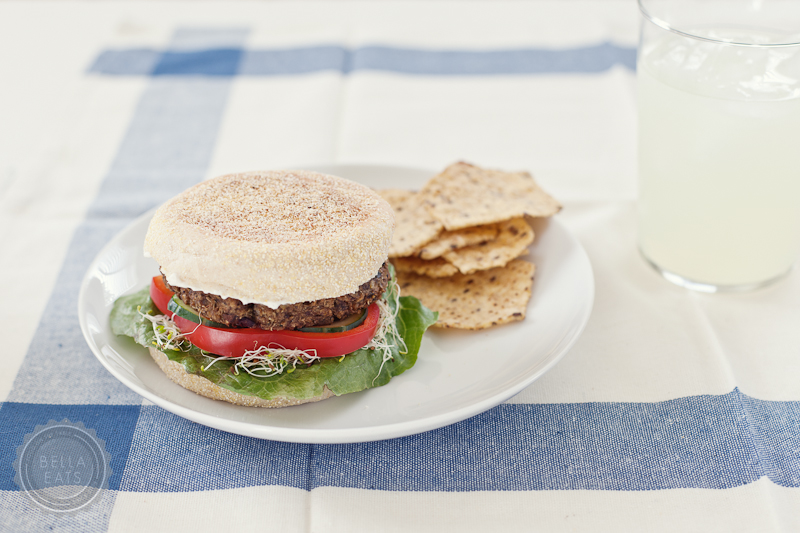
A few weeks ago I started a list. My 'foods fit for a picnic' list, as I call it. On this piece of gridded paper I placed edibles such as 'not-too-crumbly biscuits' and 'pulled pork' and 'spicy coleslaw'. Also, there were 'buttermilk cookies' and 'dill pickles' and 'egg salad'. These were all recipes that I wished to research and experiment with, to really nail down so that I would be prepared for outdoor eating at any point between April and October. As of this week, I've crossed one off.

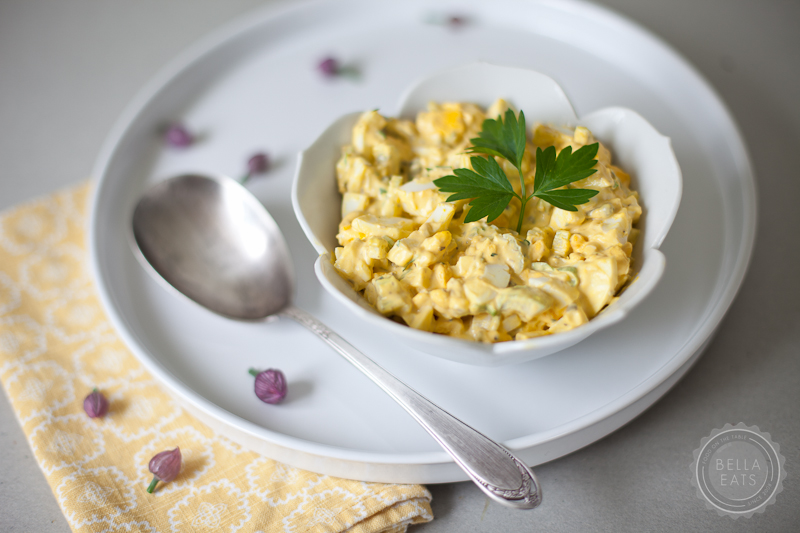
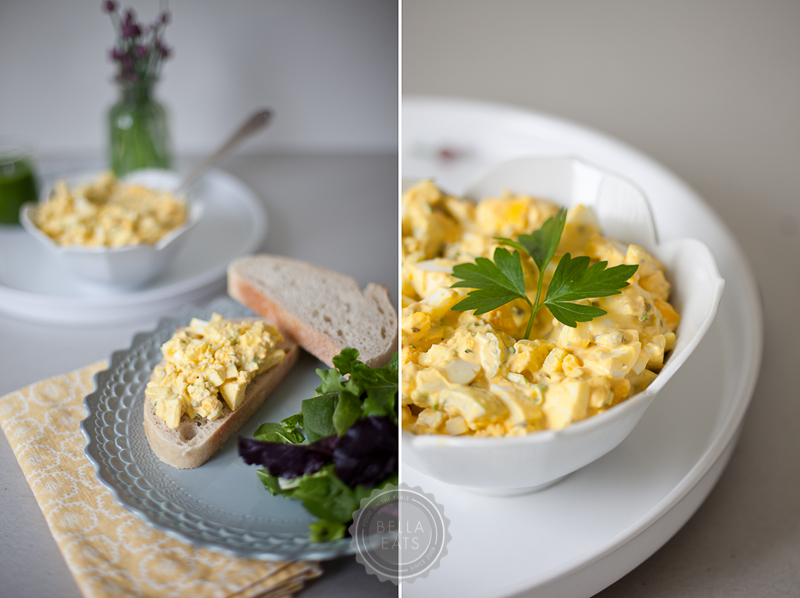
For some reason I've always had a thing for egg salad. Most versions I've ever had have been very bland, and I am never fully satisfied after choosing it for a sandwich over deli meat or roasted veggies. Regardless, for all these years, I've told myself and others "I really love egg salad!" And so when it made an appearance on my 'foods fit for a picnic' list (because of course, egg salad belongs at a picnic) I immediately started thinking about creating a fantastic herbed pesto that I could drizzle over top. You know, to make the egg salad more interesting.

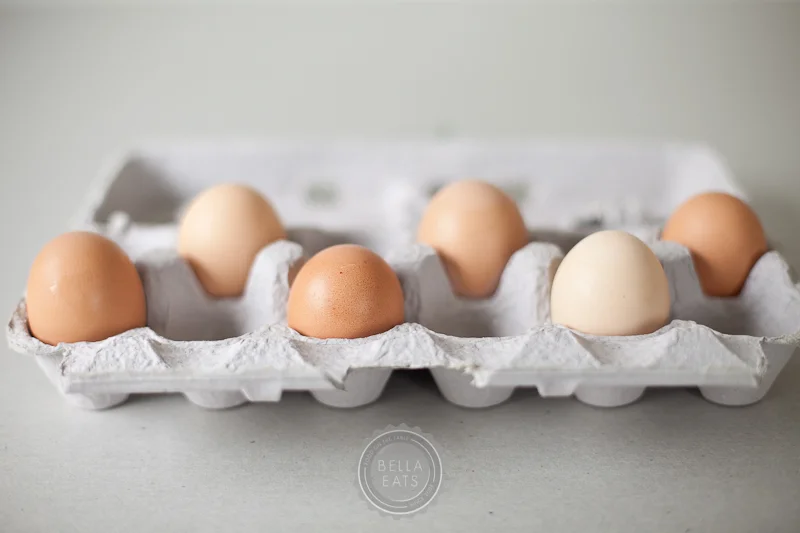
Armed with this Alice Waters recipe recommended by a friend, I set about preparing what was to be the ultimate picnic sandwich...egg salad drizzled with chive pesto served on artisan bread. I smeared one slice of bread with the pesto, piled a heap of egg salad on another slice, and debated how to photograph my creation. While debating, I sampled the salad...and kept eating. This salad is so delicious, the exact opposite of bland, that the beautiful, emerald-toned pesto was immediately packed up and stashed away. Chopped eggs tossed with mayonnaise mixed with fresh chives, dijon mustard, and capers requires no accompaniment aside from a thick slice of good bread. Its the capers that make the salad, truly. I'll never eat egg salad without capers again. That would be like having a whole summer go by without a picnic, and that just won't do.

egg salad-5.jpg
egg salad-2.jpg
egg salad-1.jpg

Egg Salad (the best ever...)

from The Art of Simple Food by Alice Waters

serves 4 (unless you're a big, big fan like me...then you might want to double the recipe)

Ingredients

  • 6 eggs*, at room temperature (if you can, please buy happy, organic, farmer-raised chicken eggs)
  • 2 tsp capers - rinsed, drained, and chopped
  • 2 tbsp chopped fresh chives*
  • 1 tbsp chopped fresh parsley*
  • salt
  • freshly-ground black pepper
  • pinch of cayenne 
  • 1/3 cup mayonnaise (Alice recommends homemade, which I'm sure is simple and lovely, but I used store-bought)
  • 2 tsp dijon mustard
  • 1/2 cup diced celery

Method

  1. Cook the eggs in simmering water for 10 minutes. Remove with a slotted spoon and cool in a bowl of ice-cold water. Peel and chop the eggs coarsely.
  2. Mix together the rest of the ingredients. Add the chopped eggs and mix well.
  3. Adjust seasoning if necessary.

*Eggs from Double H Farm. Chives from the Local Food Hub. Parsley from Stephanie + Evan. Thank you!

egg salad-6.jpg

swedish visiting cake

Andrea

swedish cake-1.jpg

Spring. My backyard has gone from yellow to pink to white (or, daffodils to plum and apple blossoms).  Each afternoon over 60° has me longing to get outside, in the sunshine, with a glass of white wine in my hand. Preferably, with my husband or a girlfriend by my side and my dogs at my feet. This season brings with it a jovial state of mind. And with that comes the desire to be amongst friends, sharing in the pleasantness of open windows and the greenish light of sunbeams passing through new growth.

I believe it is imperative for every person to have a quick and simple cake in their repertoire. One that, when invited over for a last-minute afternoon visit, or next-day weekend brunch, is easy to whip up using ingredients always on hand. I have a few, but I think that this Swedish Visiting Cake is my very favorite. Not too sweet, but with a substantial, moist crumb, it can pass for either dessert or a morning coffee cake. I adore the crunch of almonds atop the dense base, and the way the edge and bottom of the cake crisp to create a shell that keeps it all together. You know, just in case you choose to pick up an entire slice between your thumb and forefinger. No need to dirty a dish if you're sitting outside and your other hand is occupied with a glass...

swedish cake-2.jpg
swedish cake-3.jpg
swedish cake-4.jpg
swedish cake-5.jpg

I found this recipe last year on Melanger, and it is not surprising that after making it once it has remained at the top of my list. Julia's taste in baked goods is steady; never too rich, most often simple and leaning towards rustic, always comforting. If you haven't yet, you should visit her lovely site.

Swedish Visiting Cake

from Baking: From My Home To Yours by Dorie Greenspan, via Melanger

serves 8

I realized this time, after I'd already prepared the pan and staged the table for photographs, that I was out of vanilla extract. So, I used a full teaspoon of almond extract instead. The cake is delicious both ways.

Ingredients

  • 1/2 cup (1 stick) unsalted butter, melted and cooled, plus more to grease pan
  • 1 cup sugar, plus extra for sprinkling
  • zest from 1 lemon
  • 2 eggs
  • 1/4 tsp salt
  • 1 tsp vanilla
  • 1/2 tsp almond extract
  • 1 cup all-purpose flour
  • 1/4 cup sliced almonds

Method

  1. Place a rack in the center of your oven and preheat oven to 350°. Butter a seasoned 9-inch cast iron pan. (If you don't have a cast iron pan, a 9-inch cake pan works as well). 
  2. Pour sugar into a medium bowl and add lemon zest. Use your fingers to rub the zest into the sugar, until the sugar is moist and fragrant.
  3. Add the eggs, one at a time, whisking to combine.
  4. Add the salt and extracts and whisk to combine.
  5. Stir in the flour using a rubber spatula.
  6. Fold in the melted butter.
  7. Pour batter into your prepared pan and smooth top with rubber spatula. Sprinkle almonds over the top of the batter and finish with a sprinkle of sugar.
  8. Bake for 25-30 minutes until the edges are golden brown and starting to pull away from the edge of the pan.
swedish cake-6.jpg

bella terra 2011!

Andrea

A happy Monday to you all! Let's kick off April with an exciting announcement...bella terra is back!  But this year, I've been lucky to have the opportunity to share a bit of space in the green house at Maple Hill Farm, home of the local food hub. if you're not familiar, the local food hub is a community supported nonprofit working to strengthen and secure our local food supply by supporting small, family farms, increasing the amount of fresh food available to our community, and inspiring our next generation of farmers. I am proud to be part of a community that supports such an organization, and thrilled to have the opportunity to share images of their beautiful land and facilities with you on the AHPhoto blog!

This Spring, Summer, and Fall I will be sharing images from my time at the farm with two girlfriends, Emily (local food hub) and Stephanie (flavor magazine) as we grow food for our home kitchens. Most of the seedlings we've started out at the farm will be planted on a little plot I am sharing with these friends, but some will come home to live and grow in my backyard garden. I am planning to share the bulk of the place and detail photography at AHPhoto, and the final dishes and recipes that result from all of that hard work here on bella eats. I hope it won't be confusing, and will try to keep it simple. Let's just see how it goes.

For a recap of my 2009 garden: bella terra | 2009

For images of our first 4 weeks on the farm: bella terra | weeks 1 and 4

So, are any of you gardening this year?  If yes, what are you growing?

a call for your best pizza dough recipe...

Andrea

pizza-1.jpg

Friends...I need you! Here we are on April 1, Spring has sprung and I've already made my first grilled pizza, and I still don't have a pizza dough recipe that I am completely head-over-heels for.  May I ask...do YOU have a favorite pizza dough recipe?  And if you do, would you please, please share it with me?  In exchange, I will give you my very favorite pizza topping combination...do we have a deal? Thank you. :)

Happy weekend, all!

pizza-2.jpg

Andrea's very favorite Pizza Topping Combination, inspired by Dr. Ho's Humble Pie

  • your pizza dough of choice (please share!!!)
  • corn meal for dusting your very hot pizza stone
  • tomato sauce (preferably from this recipe)
  • thinly shaved ham (preferably from your favorite local farm...we always use Double H Farm ham)
  • fresh mozzarella (from Mona Lisa Pasta)
  • caramelized red onions (heat over medium heat in olive oil for about 10 minutes, until golden brown)
  • fresh arugula (also from Double H Farm) dressed with a little bit of olive oil and fresh lemon juice (or, lemon olive oil...yum!)
  • shaved parmesan cheese
  • sea salt to sprinkle on top

We grill one side of the pizza dough before topping, remove the dough and top the grilled side, then put the pizza back on the grill.  The arugula and shaved parmesan go on the pizza once it has come off of the grill and is ready to be served.

pizza-3.jpg

classic lasagna with mushrooms

Andrea

I really like cookbooks. Sit me down on the couch with a glass of wine, sticky notes, and a thick book full of beautiful and evocative culinary images and I am one happy girl. Dissecting recipes can entertain me for hours, methods and timing dancing through my head as I imagine this ingredient melded with that one. But it is a very special book that holds my attention for the space between recipes, where the author's true voice emerges in the stories behind the dishes compiled. When my stepfather, Joe, handed me his copy of The Italian Country Table by Lynne Rossetto Kasper and said "You can borrow it, but only for a little while. And you MUST read the chapter about tomatoes." I had a feeling it would be just that kind of book. I immediately curled up in the corner of my parents' L-shaped couch and sank into that tomato chapter, which begins like this:

"I must begin this chapter with a confession: There is nothing, absolutely nothing that pleasures me more than a bowl of pasta and tomato sauce. When I want to reach out with all my love to my husband, a dish of pasta and tomatoes is almost always in my hands. When I am worn out and the world isn't such a nice place to be in, I make tomato sauce and pasta. When time is short but dear friends must be fed with joy and not pressure, I make pasta with tomato sauce. Never are any two of these pastas alike, because for me, this is the food of instinct." 

Lynn Rossetto Kasper, The Italian Country Table

And...I was hooked. My own copy arrived back home in Virginia the very next week and I immediately began plotting an "Italian Month" on Bella Eats. It didn't happen because, well, life got busy, but we've cooked and loved several of the recipes and I've very much enjoyed getting lost in the spaces between them. 

I made this lasagna last month for very good friends we hadn't seen in many weeks and I must say, it was the perfect dish for a mini-reunion. Simple ingredients create a complex marriage of flavors and textures that you just can't stop eating. We sat around our table for hours catching up, the pan of lasagna between us enticing each of us to a second serving.

The pasta, cheese, and canned tomatoes were purchased at our local pasta shop, Mona Lisa Pasta. It shouldn't be a problem for you to find them in most grocery stores, but do seek out the highest quality cheeses and tomatoes you can.  The simplicity of this lasagna allows their flavors to shine. I did a little happy dance when those sheets of fresh pasta were brought out to me in the shop, soft and supple and brushed with semolina. I'd been contemplating making my own, but with limited time was pleased to have this option. If you can, use fresh pasta, but if not dried will do as well.

Also, the sauce is delicious. It is worth keeping a can of san marzano tomatoes in your pantry for an emergency batch of fresh sauce whenever it may be needed.

I followed the recipe in The Italian County Table almost exactly, adding only the mushrooms.

Home-Style Lasagna with Mushrooms (optional)

from The Italian Country Table

serves 8-12

Tomato Sauce Ingredients

  • 3 tightly packed tablespoons each fresh basil and Italian parsley leaves
  • 1tsp fresh oregano leaves
  • 2 medium onions, coarsely chopped
  • 2 tbsp fruity extra-virgin olive oil
  • 2 large cloves garlic, minced
  • 1 pint basket (3/4 pound) flavorful cherry tomatoes, halved
  • 1 28-ounce can whole tomatoes
  • 1/2 cup water
  • pinch of sugar
  • salt and freshly ground black pepper
  • 1/8 tsp hot red pepper flakes

Lasagna Ingredients

  • 1 cup freshly grated parmesan cheese
  • 1-3/4 to 2 pounds high-quality, creamy ricotta cheese
  • 1/2 pound fresh mozzarella cheese, shredded
  • 8 scallions, trimmed of root ends
  • 2 tightly packed tbsp fresh basil leaves
  • 1 tightly packed tbsp fresh Italian parsley leaves
  • 1 tsp fresh oregano leaves
  • 2 cloves garlic
  • salt and freshly ground black pepper
  • 1 medium large onion, cut vertically into strips about 1/4 inch wide
  • 1/2 pound cremini mushrooms, cleaned and sliced (optional)
  • extra-virgin olive oil
  • 1 pound dried lasagna pasta (or, homemade pasta. or, if you're very lucky, fresh pasta from your local pasta shop.)

Method

  1. Prepare the tomato sauce by mincing together the herbs and chopped onions.  Heat the oil in a 12-inch skillet over medium-high heat.  Saute the onions and herbs to golden brown.  Add the garlic and cook a few seconds, then stir in the cherry tomatoes and the canned ones with their juices, crushing them with your hands as they go into the pan.  Boil, uncovered, over high heat until thick, stirring often.  Add the water and cook a few moments more.  Stir in the sugar and season with salt and black pepper and red pepper flakes to taste. Cool briefly, then pass the sauce through a food mill or puree in a processor or blander.  Cover and set aside.
  2. Holding pack 2 tbsp of the parmesan, blend the cheese in a bowl.  Mince together the scallions, basil, parsley, oregano, and garlic.  Stir into the cheeses, seasoning to taste with salt and pepper.
  3. Toss the onion strips and mushrooms with a little olive oil, salt, and pepper.  Heat a saute pan over high and saute until the onion is starting to brown and the mushrooms have released their liquid. Turn out of the pan.
  4. If you're using dried pasta, cook in fiercely boiling water, stirring often, until barely al dente (it should be underdone). Drain in a colander and hold in a bowl of cold water.  Fresh pasta does not need to be cooked.
  5. Preheat the oven to 350°F. Oil a shallow 2-1/2-quart baking dish. Drain the pasta and pat dry. Moisten the bottom of the dish with sauce. Cover with a single layer of pasta. Daub with one quarter of the cheese mixture and one quarter of the browned onions + mushrooms. Moisten with one sixth of the remaining sauce. Top with a layer of pasta and continue layering, topping the fifth layer of pasta with the remaining sauce. Cover lightly with foil.
  6. Bake for 40 minutes, or until heated through. Sprinkle with the reserved 2 tbsp parmesan. Let rest 10 minutes in the turned-off oven with its door open, then serve.


mushroom barley risotto

Andrea

Happy Friday, friends! What are you up to this weekend? We will be getting our hands dirty in our garden, prepping the beds for a sprinkling of lettuce seeds to hit the soil next week. So exciting! Nothing says "Spring!" like a Saturday spent in the yard. I've got my fingers crossed, hoping that the blue sky I see outside of my window sticks around!

Looking ahead at all of the fresh, green produce arriving in the next couple of months made me realize that I've been holding out on you. I really couldn't let Winter completely slip away without sharing this favorite recipe with you all. This hearty little risotto has made an appearance on our table multiple times these last few months and we just can't seem to get enough of it! In fact, there are leftovers in the refrigerator right now, and I am very much looking forward to lunch.

Mushrooms and I got along very well this Winter. That's a change for me, as I've never been a big fan of the stinky fungi. Not that I had anything against them, but I didn't actively seek them out for recipes. Something happened this year, though, and I found myself picking up a half-pound of fresh Cremini mushrooms nearly every week. Usually they were for this risotto, but also for empanadas, and veggie burgers, and a lasagna I haven't yet shared. What I love about the mushrooms in this recipe is that they really are the perfect mate for barley, which replaces the arborio rice typically found in risotto. Both lend an earthiness to the dish that you expect, but they also complement each other texturally. The barley remains a bit firm, providing the slightest resistance as you chew, while the mushrooms are silky and smooth and nearly melt on the tongue. The whole process is relatively quick and simple, not requiring the constant stirring like a traditional risotto, but also makes an impressive side dish for company.

Enjoy the weekend...get outside!

Mushroom Barley Risotto

serves 4

Ingredients

  • 2 tbsp olive oil
  • 1 cup chopped onion
  • 8 ounces cleaned and sliced crimini mushrooms
  • 1/2 cup dried shitake mushrooms, rehydrated and chopped
  • 3 tbsp chopped fresh parsley
  • 1 tbsp chopped fresh thyme
  • 2 cloves garlic, minced
  • 1 cup pearl barley
  • 6 cups chicken or vegetable broth
  • 1 tbsp butter
  • 1/2 cup parmesan cheese, shredded

Method

  1. Heat oil in a large, heavy-bottomed saucepan over medium heat. Saute' onion until starting to brown, about 5 minutes. 
  2. Add all mushrooms and saute' until golden brown, about 10 minutes, adding 1 to 3 tbsp water if they start to stick.
  3. Stir in herbs and garlic, then add barley and stir for 1 minute. Add 4 cups of the broth and bring to a boil. 
  4. Reduce heat to simmer, cover, and cook for 15 minutes, stirring occasionally, until most of liquid is absorbed. Remove lid and add more broth, 1/2 cup at a time, stirring until each addition is absorbed, until barley is tender but still slightly firm. You may not use all of the broth, but you will use most of it. This whole process, from the time you add the first broth, should take 35-40 minutes.
  5. Remove pan from heat and add butter and cheese, stirring until incorporated. Season with salt and pepper, to taste.

mexican meatball soup

Andrea

meatball soup-4.jpg

We're so close, friends. Spring is just around the corner and making her presence known with sunny days and >50-degree temperatures. There are tiny yellow crocuses blooming in my backyard, and when I spotted them last Thursday I giddily ran inside to grab my camera. I've spent several mornings over the last week outside walking up a mountain and back...in short sleeves. I am even contemplating slipping sandals on today for my afternoon errands. Sandals! This incredible weather has me wanting to spend every moment outside, basking in the warmth and sights and smells of a budding new season. It has me thinking of gardening, the smell of the earth and the feel of dirt under my fingernails. We've ordered the seeds for our tiny plot (and a much bigger one...a project I am excited to share with you once it gets rolling!) and Brian and I have a big date next weekend weeding and mulching and amending. 

One of the first harvests we'll have this spring will be cilantro. It really is the perfect opening crop because it compliments spicy fare so well. I tend to favor food with a little kick this time of year...I'm thinking it has something to do with the drastic temperature swings we see around here, with warm days sliding into very cool nights. A zippy soup that warms from within is quite welcome after the heavy, thick, potato-based stews we consumed to warm us all Winter. This recipe is a favorite, with spicy tomato broth and bite-size, cilantro-laced meatballs. It usually only takes a slight rise in temperature for Brian to request it on the menu, and it stays there until Spring slips into Summer.

PS: I am ignoring the fact that they are calling for sleet and snow tonight, choosing instead to concentrate on the lovely 60-degree hike I went on this morning in the sunshine. If I ignore it...it won't happen. Right?

meatball soup-1.jpg
meatball soup-2.jpg
meatball soup-3.jpg
meatball soup-6.jpg

This soup is quite quick and easy to throw together on a weeknight after work. The most time-consuming task is forming the meatballs, but even that doesn't take terribly long. To speed up the process make them the night before and cover tightly with plastic wrap. The soup itself keeps for a couple of days, but is best the day it is made. Over time the meatballs and rice tend to break down a bit.

Mexican Meatball Soup with Rice and Cilantro

from bon appetit december 2000, via the kitchen sink recipes

serves 6

Ingredients

  • 2 tablespoons olive oil
  • 2 3/4 cups chopped onions
  • 4 garlic cloves, minced
  • 2 small bay leaves
  • 5 14 1/2-ounce cans beef broth
  • 1 28-ounce can diced tomatoes in juice
  • 1/2 cup chunky tomato salsa (medium-hot)
  • 1/2 cup chopped fresh cilantro
  • 1 pound lean ground beef
  • 1/4 pound bulk pork sausage
  • 6 tablespoons yellow cornmeal
  • 1/4 cup whole milk
  • 1 large egg
  • 1/2 teaspoon salt
  • 1/2 teaspoon ground black pepper
  • 1/2 teaspoon ground cumin
  • 1/2 cup long-grain white rice

 Method

  1. Heat oil in heavy large pot over medium-high heat. Add 1 3/4 cups onions, 2 garlic cloves and bay leaves; sauté 5 minutes. Add broth, tomatoes with juices, salsa and 1/4 cup cilantro; bring to boil. Cover and simmer 15 minutes.
  2. Meanwhile, combine ground beef, pork sausage, cornmeal, whole milk, egg, salt, pepper, cumin, then remaining 1 cup onions, 2 garlic cloves and 1/4 cup cilantro in medium bowl. Mix well. Shape meat mixture by generous tablespoonfuls into 1- to 1 1/4-inch balls. 
  3. Add rice and meatballs to soup and bring to boil, stirring occasionally. Reduce heat, cover and simmer until rice and meatballs are tender, stirring occasionally, about 20 minutes. 
  4. Season to taste with salt and pepper. Ladle soup into bowls and serve.
meatball soup-5.jpg

red velvet cupcakes with cinnamon cream cheese frosting

Andrea

We're not big on Valentine's Day plans in our house, typically choosing to stay home for a dinner cooked together paired with a nice bottle of wine. And really, how is that different from most nights around here? But this year Brian has something special up his sleeve, and despite my persistent quest for answers, he hasn't slipped me the slightest hint about what he's up to. It's impressive, really, because we're usually the couple that exchanges gifts as soon as we've purchased them, never able to hold out for the birthday, anniversary, or holiday they are truly meant for. I've got to say, I'm pretty excited. The anticipation is killing me! :)

When you're a recipe blogger you really can't avoid Valentine's Day, despite our typical lack of celebration at home. The red food coloring and sprinkles and heart-shaped cookie cutters are part of the job, and I really am okay with it. Any excuse to bake is fine by me. This year for my Valentine's baking (a week early, so that I could share with you here) I decided to go with a more natural palette - a toned-down burgundy cake and cream frosting, adorned with a simple craft ribbon. Which, I think, makes these red velvet cupcakes the perfect "all-grown-up" Valentine's Day dessert. 

Now I wouldn't call myself a red velvet cake aficionado, as I've never really understood the appeal of it before now. It's just red cake...right?!? Not really. I love the subtle chocolate flavor and soft crumb of these cakes, made light and moist with buttermilk. And the cinnamon cream cheese frosting is so completely delicious that it's a wonder any made it to the domed tops. Seriously, I could have eaten the entire bowl on its own. Don't skip this frosting in favor of a fluffy white version, the cupcakes just wouldn't be the same.

Happy Valentine's Day, all! I hope you spend the day, and each one after that, with those you love.

PS: There's nothing wrong with sprinkles, and if you're looking for some (along with the story of my breaking a little boy's heart), I suggest my Valentine's Day post from last year. :)

Red Velvet Cupcakes with Cinnamon Cream Cheese Frosting

from Hummingbird Bakery Cookbook via Joy The Baker

makes 12 cupcakes. double the recipe to make two 9-inch layer cakes.

Cupcake Ingredients

  • 4 Tablespoons unsalted butter, at room temperature
  • 3/4 cup sugar
  • 1 egg
  • 3 Tablespoons unsweetened cocoa powder
  • 2-1/2 Tablespoons red food coloring (I used a gel food coloring...about 1 tsp mixed with enough water to make 2-1/2 tablespoons...which is why my cupcakes are more burgundy than red)
  • 1/2 teaspoon vanilla extract
  • 1/2 cup buttermilk
  • 1 cup plus 2 Tablespoons all-purpose flour
  • 1/2 teaspoon salt
  • 1/2 teaspoon baking soda
  • 1-1/2 teaspoons distilled white vinegar

Method

  1. Preheat oven to 350*. Line standard muffin pan with paper liners.
  2. In the bowl of a stand mixer with paddle attachment, cream the butter and sugar together until light and fluffy. Add the egg, and beat until well-incorporated, scraping down the bowl as needed.
  3. In a separate bowl, mix together the cocoa, food coloring, and vanilla extract to form a paste. (I used 1 tsp of gel food coloring with water added to equal 2-1/2 tbsp, which is why I think my cupcake color isn't as vibrant as Joy's.) Add to the batter and mix thoroughly, until completely combined. Be sure to scrape the sides and bottom of the bowl to be sure that all of the batter is equally colored.
  4. Turn the mixer to low and slowly add half of the butter milk. Mix to combine. Add half of the flour and mix to combine. Repeat with the last of the buttermilk and the last of the flour. Scrape the bowl, turn mixture to high, and beat until smooth.
  5. Turn the mixer back to low and add the baking soda, salt and vinegar. Turn mixer up to high and beat for 1-2 minutes until smooth.
  6. Spoon the batter into paper-lined cupcake pan and bake at 350* for 20-25 minutes, until a toothpick inserted in the center of a cupcake comes out clean. If you have doubled the recipe and are baking 2 pans at once, be sure to rotate the pans halfway through baking.
  7. Cool on rack in pan for 10 minutes, then remove from pan and allow to cool completely before frosting.

Frosting Ingredients

I go light on frosting, so this made the perfect amount for a double-batch of cupcakes. If you're making a layer cake, you'll probably want to double it.

  • 2-1/3 cups powdered sugar, sifted
  • 3 Tablespoons butter, room temperature
  • 4 ounces cream cheese, cold (I used room temperature)
  • scant 1/4 teaspoon ground cinnamon

Method

  1. Cream the butter in the bowl of a stand mixer with paddle attachment.  Add the powdered sugar and cinnamon and mix at medium-slow speed until well combined. 
  2. Add the cream cheese all at once and beat at medium-high for 5 minutes, or until the frosting is light and fluffy. Do not over-beat as the frosting can become runny quickly.

spring is just around the corner...

Andrea

Hello, Friends! A quick PSA for you today, to let you all know that I am running a culinary photography special at Andrea Hubbell Photography! If you're in the Charlottesville area (that includes you Staunton, Waynesboro, Richmond, Harrisonburg, Washington D.C., Gordonsville, Culpeper, and everyone in between!) and book a culinary session prior to February 28th, you'll receive 10% off of your session fee! The session can be booked for any time this year, but a 50% deposit is required to reserve the date and receive the discount.

I look forward to hearing from you!

EDITED TO ADD: To clear up any confusion, this is not a course I am offering in photography, but an opportunity for chefs, restaurants, groceries, farms, cookbook authors, and other foodies to have me photograph their products and services for marketing materials. 

lentil, olive, + mushroom veggie burgers

Andrea

Mother Nature has been so fickle lately, flitting between gray, dreary, and frigid one day to 63* and sunny the next. She's a tease, I tell you, and I am ready for her to make up her mind. I've spent the last two months hoping for a big, big snowstorm, eager for a Winter as entertaining as last. But now that we're into February with no more than a few inches on record, I'm over it. Spring can dig in her heels and stay permanently, as long as she brings sunshine, warmth, and backyard barbecues with her. There are only so many casseroles and stews and butternut squash one can take in one season!

Last weekend I grew tired of waiting and took matters into my own hands when I made our weekly menu. I've had veggie burgers on the brain for over a year since discovering my favorite veggie patty, ever, at Boylan Heights here in Charlottesville. I am not a vegetarian, but I do eat a mostly vegetarian diet and am a fan of beef only on the rarest of occasions. What I love about that Boylan Heights veggie patty, and now this veggie patty, is that it doesn't try to imitate the taste or texture of meat. Instead, the actual ingredients of the patty are allowed to shine - in this case mushrooms, lentils, and Kalamata olives. Yum. 

For an extra-summery feeling, try serving the patties on english muffins adorned with lettuce, red bell pepper, alfalfa sprouts, sliced cucumber, and tzatziki. I promise you'll feel better about the state of the weather, at least for the evening. Also, if you read through the comments on the Post Punk Kitchen  post linked in the recipe below, you'll find many variations and substitutions for the ingredients in this burger. Just in case mushrooms or olives aren't your thing.

This is not similar in taste or texture to the Boylan Heights veggie patty, and that is not what I was going for. If you're interested in the BH recipe, you can find it here. I'll make it eventually, but it seems a bit complicated/time consuming and at this point I am happy to just visit the restaurant and let the chefs there make it for me. Plus, their sweet potato fries are the best around.

Lentil, Olive, + Mushroom Veggie Burgers
from post punk kitchen
serves 6

Ingredients

  • 1 tbsp olive oil
  • 1 small onion, diced medium (about 1 cup)
  • 1/2 pound cremini mushrooms, cleaned and thinly sliced
  • 3 cloves garlic, minced
  • fresh black pepper
  • 1/2 tsp dried thyme
  • 1/2 tsp dried parsley
  • 1/2 cup pitted kalamata olives
  • 1-1/4 cups lentils (I used dried lentils cooked in veggie broth, but the original recipe calls for canned)
  • 1 cup breadcrumbs, divided (I used panko)
  • 2 tbsp soy sauce
  • 2 tsp fresh lemon juice
  • cooking spray

Method

  1. Preheat oven to 350*F.
  2. Heat a large, non-stick pan over medium-high heat. Saute the onion for about 3 minutes with a pinch of salt. Add mushrooms, garlic, black pepper, thyme, and parsley and saute for 7 to 10 minutes, until mushroom is cooked.
  3. While mushroom mixture cooks, place the olives in a food processor and pulse until finely chopped. Remove from food processor and set aside.
  4. When mushroom mixture is cooked, add to the food processor. Add all of the other ingredients EXCEPT 1/2 a cup of the breadcrumbs. Pulse until mostly smooth, but there should still be some texture. Transfer to a large mixing bowl. Add the remaining 1/2 cup breadcrumbs to the burger mixture, along with the chopped olives, and thoroughly combine.
  5. Divide the burger mix into 6 equal pieces. Line a baking sheet with parchment paper and spray with cooking spray. Form mixture into patties, spray with a little more cooking spray and bake for 15 minutes. Flip burgers and bake for 12 to 15 more minutes, until nicely browned. (I also pan-fried these instead of baking them, which was tasty too).

banana date bread

Andrea

banana date bread-6.jpg

I'll admit...I've shared this recipe before. It was a long, long, time ago, way back in the first few months of Bella Eats' existence. I claimed then that this was the best quick bread I'd made...ever. And now, 2 years and many loaves later, I'm sticking to that statement. This recipe is at the tippy top of my list of favorites, loved so much that the old photographs just didn't do it justice. And so, when the baking urge hit me mid-afternoon last week (as it does most afternoons these days) I decided to capture new images of this old friend.

I love the melded scents of banana and cinnamon punctuated by sweet dates, which take on an almost caramel flavor. Diced apple keeps the bread wonderfully moist while adding its own, very subtle, sweetness. Made without oil, with whole wheat flour, and sweetened naturally, it is not absurd to have several slices of the loaf in one sitting without feeling guilty. Add a smear of almond butter to a thick slab and you have quite the hearty and filling breakfast or afternoon snack, while a quick zap in the microwave and a thin sliver of butter make for a lovely not-too-sweet dessert.

Happy Friday, Friends!

banana date bread-1.jpg
banana date bread-3.jpg
banana date bread-4.jpg

If you've been around since the beginning and already added this recipe to your repertoire, you might notice that I've made a small change in the ingredients. Instead of the 1/2 cup of applesauce previously present, I've substituted non-fat Greek yogurt. I've found that the overall texture is improved and the bread has a better, more shapely, rise. 

This loaf freezes quite well for up to 3 months if wrapped tightly in plastic wrap and again in foil. 

Banana Date Bread

makes 1 loaf

Ingredients:

  • 2 very ripe bananas, mashed
  • 1/2 cup fat free, vanilla, Greek yogurt
  • 1/2 cup turbinado sugar
  • 1 egg
  • 1/2 cup peeled, chopped, tart apple
  • 6 medjool dates, chopped
  • 1-1/4 cup white whole wheat flour
  • 1 tsp baking soda
  • 1/2 tsp salt
  • 2 tsp ground cinnamon
  • 1/4 tsp nutmeg

Method:

  1. Preheat oven to 350*F. Grease a 9x5 loaf pan.
  2. In a large bowl, combine the bananas, yogurt, sugar, egg, apple, and dates. 
  3. In a medium bowl, combine the flour, baking soda, salt, cinnamon, and nutmeg.
  4. Add the dry ingredients to the wet and stir until just combined. Pour batter into prepared pan.  
  5. Bake for 45-55 minutes, until a toothpick inserted into center of bread comes clean. Cool in pan on rack for 10 minutes. Remove loaf from pan and cool on rack completely before slicing.
banana date bread-5.jpg

butternut squash + sweet potato soup

Andrea

I think I owe you all this one. Something healthy, hearty, warming, and veggie-full. If I were you I'd be a little upset with me, returning after 3 months away with sticky buns. And empanadas. And cake. Especially with all of those resolutions floating around at the back of your mind, begging to be broken by a lemon-scented, butter and cream-filled dessert. That's just wasn't fair of me, was it?

So, here you go; my new favorite soup. A version of which I've been making for many years...but there is just something so right about this particular one. Perhaps it is the incredibly frigid winter we're having in Charlottesville; a January full of gray skies that threaten, but haven't truly delivered, a good snow. Cheerful orange soups are especially good during months like that. Or maybe it is the fact that I work out of my home office now, and that every now and then as I sit at my computer, blanket and cat warming my lap, fingers nearly frozen, I'll think "soup would be wonderful for lunch". And then I get up and go to the kitchen and make this one. Soup cooked under those circumstances tastes just a little better, I think, and I'm liking that perk of self-employment very, very much.

Even made in the evening this soup is a big hit. Smooth and rich without the addition of cream, hearty and earthy and rosemary-scented, quick and easy and made in one pot. What's not to like? Please try it, I'd love to hear what you think.

Butternut Squash + Sweet Potato Soup
serves 4

Ingredients:

  • (1) small butternut squash, about 1.5 pounds, diced (1/2-inch)
  • (2) sweet potatoes, peeled and diced (1/2-inch)
  • 1 medium onion, diced
  • 3-inch sprig of fresh rosemary
  • 2 tbsp butter
  • 6 cups vegetable broth
  • salt + pepper

Method:

  1. Melt butter in large pot over medium-high heat. Add vegetables and rosemary and stir to coat. Cover pot and allow veggies to sweat for 10 minutes, stirring occasionally.
  2. After 10 minutes, add broth. Bring to a boil then drop heat to moderate simmer. Let soup simmer for an additional 20 minutes, until potatoes and squash are quite tender.  Remove rosemary sprig.  Using an immersion blender or a regular blender, puree' soup until smooth and creamy.  Salt and pepper to taste.

lemon-drenched lemon cakes

Andrea

Today I made and re-photographed this Lemon Drenched Lemon Cake for a project I am working on with Retail Relay. Also, for a dinner party Brian and I are going to tonight. Except this time, I am topping it with Blackberry Compote. MmmHmm...

Happy Weekend, Everyone!

lemon cake-2.jpg
lemon cake-1.jpg
lemon cake-3.jpg

This recipe makes 2 cakes.  After reading some comments from Joy's readers I would not recommend trying to bake this cake in any pan other than loaf pans.  Also, I used ALL of the syrup.  I just kept brushing layer upon layer of syrup over the tops of the cakes, allowing each application to soak in before adding another.  And, when there was just a bit left in the bowl, I poured it onto the serving plate and plopped the cakes right on top of it, allowing the bottoms to soak it up and get nice and lemon-y.  If you're not a lemon fanatic like me, you might want to only use 1/2 the syrup.

Lemon Drenched Lemon Cakes

Recipe adapted from Dorie Greenspan via Joy the Baker.  Be sure to check out the lovely pictures of this cake on Joy's site, since I was a bit of a slacker and didn't get many...

Cake:

  • 2-2/3 cups all-purpose flour
  • 2-1/2 tsp baking powder
  • pinch of salt
  • 2-1/3 cups sugar
  • 1-1/2 tsp vanilla
  • 6 large eggs, preferably at room temperature
  • 2/3 cup heavy cream
  • zest of 2 lemons, finely grated
  • 1 stick, plus 7 tbsp unsalted butter (15 tbsp total), melted and cooled

Syrup:

  • 1/3 cup water
  • 1/4 cup sugar
  • juice of two lemons

Method:

  1. Center a rack in the oven and preheat the oven to 350 degrees F. Butter two 9x5-inch loaf pans, dust the insides with flour and tap out the excess. Even if the pans are nonstick, it’s a good idea to butter and flour them.
  2. Sift together the flour, baking powder and salt.
  3. Put the sugar and the lemon zest in a large bowl, working with your fingers, rub them together until the sugar is moist and thoroughly imbued with the fragrance of lemon.
  4. Add the eggs and whisk them into the sugar, beating until they are thoroughly incorporated. Whisk in the extract, then whisk in the cream. Continuing with the whisk, or switching to a large rubber spatula, gently stir in the dry ingredients in 3 or 4 additions; the batter will be smooth and thick. Finish by folding in the melted butter in 2 or 3 additions. Pour the batter into the pans, smoothing with a rubber spatula.
  5. Bake for 55 to 60 minutes, or until a knife inserted into the center of the cakes comes out clean. As soon as the cake goes into the oven, make the syrup. After about 30 minutes in the oven, check the cakes for color- if they are browning too quickly, cover them lightly with foil tents.
  6. Stir the water and sugar together in a medium saucepan over medium heat until the sugar melts, then bring to a boil. Remove the pan from heat and stir in the lemon juice. Pour the syrup into a heatproof bowl and let cool.
  7. When the cakes test done, transfer them to a wire rack to cool for 5 minutes before unmolding them and turning them right side up on the rack. Place the rack over a baking sheet lined with wax paper and, using a thin skewer, cake tester or thin-bladed sharp knife, poke holes all over the cakes. Brush the cakes all over with the syrup, working slowly so that the cakes sop it up. Leave the cakes on the rack to cool to room temperature.

Blackberry Compote

Ingredients:

  • 3 cups fresh or frozen blackberries
  • 1/2 cup water
  • 1/2 cup sugar
  • 1 cinnamon stick

Method:

  • Place all ingredients in a medium saucepan over medium heat. Bring to a strong simmer for 20 minutes, stirring occasionally, until compote has thickened and reduced. Allow to cool, and serve over slices of cake.