Contact Us

Use the form on the right to contact us.

You can edit the text in this area, and change where the contact form on the right submits to, by entering edit mode using the modes on the bottom right. 


123 Street Avenue, City Town, 99999

(123) 555-6789

email@address.com


You can set your address, phone number, email and site description in the settings tab.
Link to read me page with more information.

Blog

Filtering by Tag: rosemary

fresh fig tart with lemon cream

Andrea

Fig Marscapone Tart0001.jpg

Figs. Quite possibly the most beautiful edible fruit in existence. They are at their peak in Charlottesville, and I can't get enough of the soft globes that are actually inverted flowers (Did you know? I did not. Thanks, Megan!). We foraged for them over on Beyond the Flavor, joining our friend Daniel as he visited some of his favorite fig-gathering haunts around the city. Eagerly awaiting their arrival each September, I've been known to stake out trees on the University of Virginia grounds; faithfully driving by each day for weeks waiting for the green fruit to turn rosey, only to be foiled by a student who reached the trees an hour before us on the day they were finally ripe. The sight of his retreating form, bag of fresh figs full to bursting at his side, still saddens my heart. 

On Beyond the Flavor, we've asked our readers to submit their favorite fig recipes. (Like us on Facebook and submit your recipe here, if you've got a favorite to share. There's a prize for the winner!) While my preferred way to consume a fig is fresh, straight from the tree, I wanted to try something new for this little contest we're holding. I thought about a savory treat, but settled on sweet because, let's be honest, that's my area. 

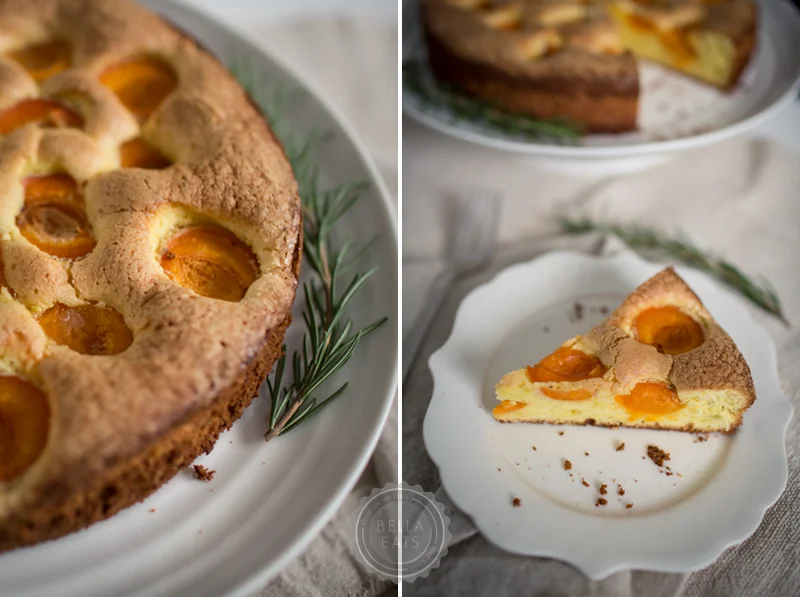
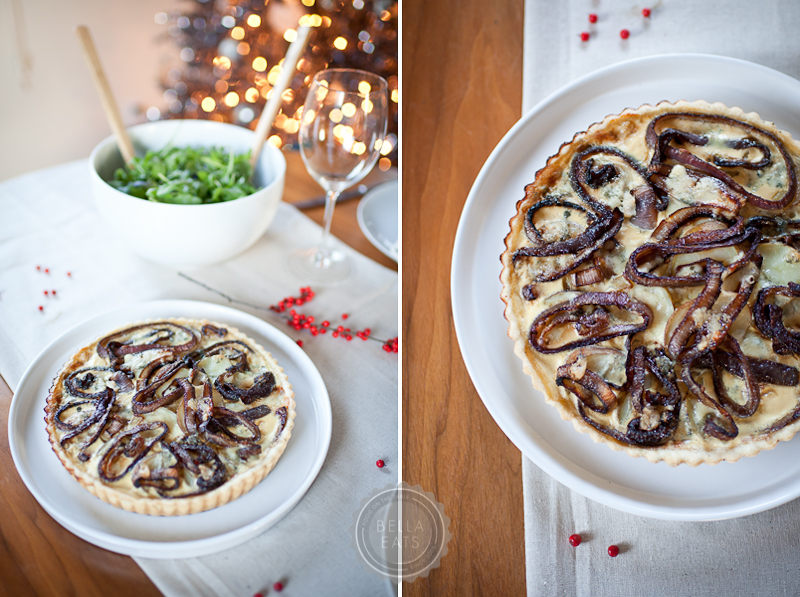
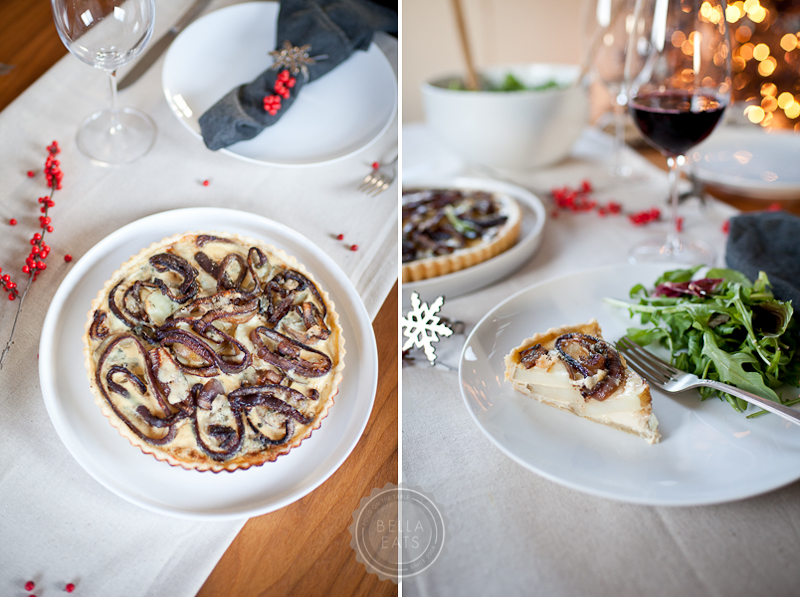
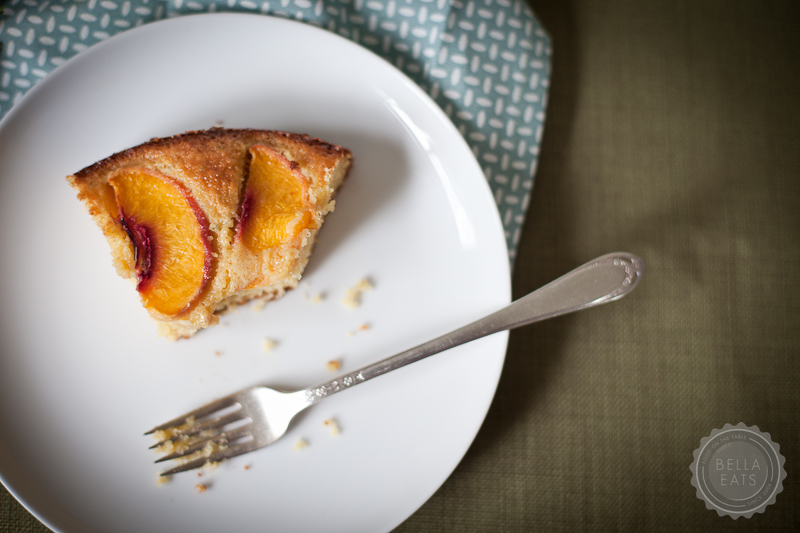
A quick internet search resulted in this recipe, whose simplicity and un-touched figs caught my attention.  There were obstacles that stood in my way - a lack of sour cream in the refrigerator and an oven that broke in the middle of baking the crust - but I persevered and was able to share four pieces amongst friends. The firm crust with a cornmeal crunch paired nicely with soft, lemon-scented cream and the pop of tiny fig seeds between teeth. We four enjoyed it immensely, outside under the stars, while our friends' dog enjoyed the leftovers on the countertop in the kitchen upstairs. A disappointment, for sure, as I had at least one more piece earmarked for the next morning's breakfast. 

My craving not fully satisfied, I'll be making this tart again. As soon as we fix the oven.

Fig Marscapone Tart0002.jpg

Fresh Fig Tart with Rosemary Cornmeal Crust + Lemon Mascarpone Cream

modified from Gourmet, July 2003

serves 12

crust ingredients

  • 1 1/2 cups all-purpose flour
  • 1/2 cup yellow cornmeal (not stone-ground)
  • 1 tablespoon sugar
  • 1/4 teaspoon salt
  • 1 stick (1/2 cup) cold unsalted butter, cut into pieces
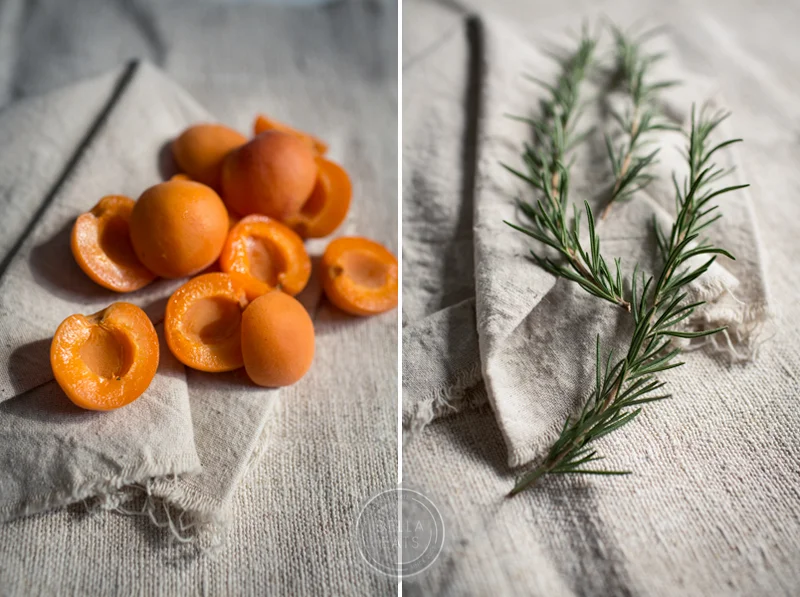
  • 1 1/2 tablespoons finely chopped fresh rosemary
  • 4 to 5 tablespoons ice water
filling ingredients
  • 1/3 cup sour cream (I used Greek yogurt instead)
  • 1 cup mascarpone cheese (8 oz)
  • 1/4 cup sugar
  • 1 1/2 teaspoons finely grated fresh lemon zest
  • 1/8 teaspoon salt
  • 1 1/2 lb fresh figs

crust method

  1. Pulse together flour, cornmeal, sugar, and salt in a food processor. Add butter and rosemary and pulse until mixture resembles coarse meal with some small (roughly pea-size) butter lumps. Drizzle evenly with 4 tablespoons ice water and pulse until just incorporated.
  2. Gently squeeze a small handful: If it doesn't hold together, add more water, 1/2 tablespoon at a time, pulsing after each addition and continuing to test.
  3. Press dough evenly onto bottom and up sides of tart pan with floured fingers. Smooth dough with a small offset metal spatula or back of a spoon (floured if necessary), then roll a rolling pin over top of pan to trim dough flush with rim. Chill crust until firm, about 30 minutes.

filling + assembly

  1. Preheat oven to 400°F.
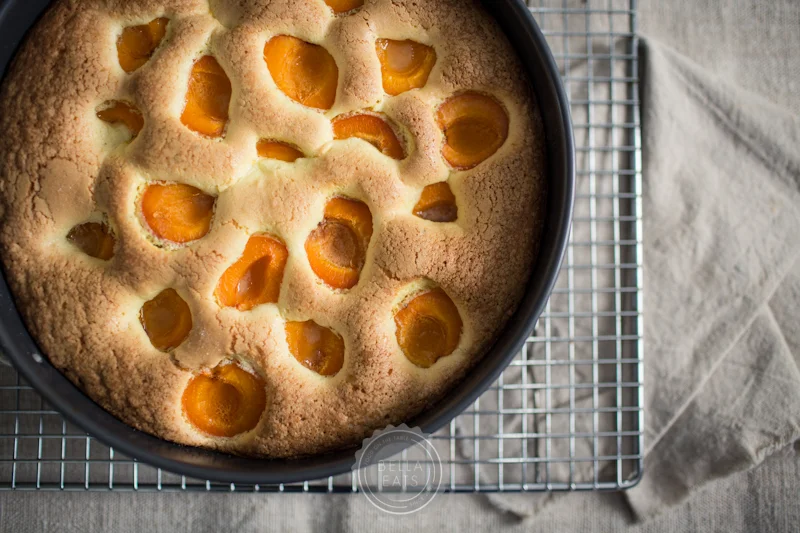
  2. Bake crust in middle of oven until center and edges are golden, 25 to 30 minutes (don't worry if bottom of crust cracks), then cool in pan on a rack.
  3. filling + assembly
  4. Whisk together sour cream, mascarpone, sugar, zest, and salt in a bowl.
  5. Remove side of tart pan and spread mascarpone cream in shell. Cut figs lengthwise into 1/4-inch-thick slices and arrange decoratively over cream.
Fig Marscapone Tart0003.jpg

For those of you missing more regular Bella Eats posts, you really should hop over to Beyond the Flavor.  I am there more often than I am here, although I haven't given up on this little corner of the internet. I know I've said this before, many times, but I do hope to carve out more time to spend in this space I created nearly four (4!!!) years ago.  After all, it was the inspiration for everything I am doing today with food and photography, and I can't bear to see it fade away. Many thanks to all of you who stick around, comment, and poke me with emails to say hello. I appreciate each and every one of you.  xoxo.

lemon olive oil cake with apricots and rosemary

Andrea

Apricot Cake0001.jpg

Brian and I have spent a total of maybe thirty nights apart since we were married six and a half years ago. We’ve racked up seventeen of those nights in the last seven months, since the beginning of 2012, and have another ten on the calendar for August and September. We’re each traveling for work more than ever before, being pulled to New York, Connecticut, Chicago, Florida, Philadelphia, New Orleans, and New Hampshire this year alone. 

An essential part of travel, for each of us, is the exploration of local food. Before we embark on a journey we ask friends, Facebook, and Twitter for restaurant recommendations. I look through the archives of Bon Appetit, Saveur, Gourmet, and The New York Times to see what I can find about the culinary scene. While visiting, Instagram is aflutter with food and drinks consumed. If we’re apart, iPhone photos are swapped between Brian and I; visual descriptions of whatever treats have been found both away and at home. We stay connected through the food we eat, never liking to spend a meal separately.

The best part, though, is the gifts given upon return. That little piece of an experience apart that lets the other know they weren’t really that far away at all. From New Orleans there was duck jerky from Butcher and, that one time, two pounds of sliced ham from Mother’s. From Florida, a special spice rub from 4Rivers BBQ. The exchange goes the other way, too, with the homemade pot roast awaiting my return from New York in February, or the whisper of a ‘fruit surprise’ in the kitchen just two weeks ago.

I’d returned early-ish on Sunday morning. Having photographed a wedding in northern Virginia with Sarah the night before, we’d each been anxious to get home to our husbands. An early departure with a quick stop at Starbucks had us back in Charlottesville by 10am, just in time for me to crawl in bed for the last 30 minutes of weekend snuggling with Brian and the pups. As we recapped our two nights apart, Brian rattled off the list of goodies he’d picked up at the farmers’ market the morning before. Excited to see my surprise, I padded out to the kitchen to investigate. And there sat the prettiest, rosiest apricots in my very favorite bowl.

Just the thought of Brian coming across those apricots at the market makes me smile, because I know that he would never have picked them up just for himself. No, he saw the pretty fruits and thought ‘Andrea would like to bake something with these.’ and whisked them away to our house where, two days later, they were the stars of this cake.

Apricot Cake0002.jpg
Apricot Cake0003.jpg
Apricot Cake0004.jpg
Apricot Cake0005.jpg

We adored this cake. Not too sweet (Brian's favorite kind) but bursting with the flavor of fresh apricots. The base has an almost poundcake-like consistency...dense and a bit spongey. The earthiness of the rosemary was the perfect compliment to the brightness of the fruit. Be sure to pick good apricots; they'll make all the difference.

Lemon Olive Oil Cake with Apricots and Rosemary

serves 8

adapted from Gourmet, April 2006

Ingredients

  • 3/4 cup olive oil (extra-virgin if desired), plus additional for greasing pan
  • 1 large lemon
  • 1 tsp minced fresh rosemary
  • 1 cup cake flour (not self-rising)
  • 5 large eggs, separated, reserving 1 white for another use
  • 3/4 cup plus 1 1/2 tablespoons sugar
  • 10 fresh apricots, halved and pitted

Method

  1. Put oven rack in middle position and preheat oven to 350°F. Grease a 9-inch springform pan with some oil, then line the bottom with a round of parchment paper. Oil the parchment.
  2. Finely grate enough lemon zest to measure 1-1/2 teaspoons and whisk together with flour. Add the chopped rosemary and whisk. Halve lemon, then squeeze and reserve 1 1/2 tablespoons fresh lemon juice.
  3. Beat together yolks and 1/2 cup sugar in a large bowl with an electric mixer at high speed until thick and pale, about 3 minutes. Reduce speed to medium and add olive oil (3/4 cup) and reserved lemon juice, beating until just combined (mixture may appear separated). Using a wooden spoon, stir in flour mixture (do not beat) until just combined.
  4. Beat egg whites (from 4 eggs) with 1/2 teaspoon salt in another large bowl with cleaned beaters at medium-high speed until foamy, then add 1/4 cup sugar a little at a time, beating, and continue to beat until egg whites just hold soft peaks, about 3 minutes.
  5. Gently fold one third of whites into yolk mixture to lighten, then fold in remaining whites gently but thoroughly.
  6. Transfer batter to springform pan and gently rap against work surface once or twice to release any air bubbles. Place apricot halves in a decorative pattern across the top of the cake, cut-side up. Sprinkle top evenly with remaining 1-1/2 tablespoons sugar. Bake until puffed and golden and a wooden pick or skewer inserted in center of cake comes out clean, about 45 minutes. Cool cake in pan on a rack 10 minutes, then run a thin knife around edge of pan and remove side of pan. Cool cake to room temperature, about 1-1/4 hours. Remove bottom of pan and peel off parchment, then transfer cake to a serving plate.
Apricot Cake0006.jpg

potato, red onion + blue cheese tart

Andrea

Gosh, I seem to have been in some kind of post-Thanksgiving funk these past 2 weeks! There was that big push to get recipes out to you before the holiday, and then I stopped cooking. Seriously, I was proud on nights that I picked up prepared sauce and fresh fettucini from the local pasta shop and managed to throw together a salad for the side. It has been a busy couple of weeks for our household, with me finishing up a bunch of photography projects and Brian wrapping up his most complicated website build yet. Hopefully life will return to a regular schedule these last weeks of 2011 (ha! when are the weeks before and after Christmas ever regular!) and I'll manage to get some holiday baking slipped onto my schedule!

This tart recipe has been on my list for, oh, about 3 months now. I'm not really sure why it popped into my head, but one day the idea of a potato tart with caramelized red onions and stinky blue cheese landed and stuck. Last Friday I finally got around to experimenting, first doing a little research to see how others had tackled similar recipes. I wasn't sure whether the potatoes should be cooked first etc., and luckily found a similar dish to launch mine from over at Smitten Kitchen. I can't even tell you how amazing this tart smelled as it was finishing its time in the oven. If only there were some way to bottle scent and upload it here on my Charlottesville computer, to be distributed to you all through your own computer speakers. Come on Apple, why haven't you figured that one out yet?

I guess you'll just have to make it yourselves, and I'm thinking a holiday potluck could be the perfect excuse. You know you have a few of those on your calendar...

I am so glad that I found the foundation recipe on Smitten Kitchen because I was alerted to the fact that the filling for the tart doesn't set up as solidly as a quiche would.  Good to know, because this cook likes to make sure her eggs are good and done, and I definitely would have over-cooked the tart had I not been warned.

Potato, Red Onion + Blue Cheese Tart

inspired by this recipe at Smitten Kitchen

serves 4 with a salad

Crust Ingredients (this is my favorite, all-purpose savory tart crust)

  • 1-1/4 cups all-purpose flour
  • 1/2 tsp salt
  • 1/2 tsp chopped rosemary
  • 8 tbsp unsalted butter, cut into 8 pieces
  • 4-5 tbsp cold water

Filling Ingredients

  • about 1 pound of potatoes (I used russet, but red potatoes would be fantastic too)
  • 1 large red onion, sliced to 1/4-inch rings
  • 1 tbsp olive oil
  • 1 cup milk (I used 1%)
  • 2 egg yolks
  • 1/4 cup crumbled blue cheese (I used Ile de France Roquefort, which was sent to me as a sample to try)
  • salt + pepper

Method

  1. First, make the crust dough (about 1 hour before you're ready to assemble the tart). Place the flour, salt, and rosemary in a food processor and pulse several times to combine. Add the butter and pulse until the mixture resembles pea-sized crumbs, about ten 1-second pulses. Add the water, 1 tbsp at a time, and pulse briefly after each addition. After 4 tbsp of water have been added, process the dough for several seconds to see if it will come together. If not, add the remaining 1 tbsp water. Process just until the dough comes together in a rough ball. Do not overprocess or the dough will not be flakey. Transfer the dough to a lightly-floured work surface and knead briefly to for a smooth ball. Flatten the dough into a 5-inch disk and wrap it in plastic wrap. Refrigerate the dough for at least 1 hour and up to 2 days.  Note: My dough was very sticky with just 4 tbsp of water, so I wound up adding some flour to help it to come together. The final dough should be smooth and supple before refrigerating. Also, if you don't have a food processor, you can still make the dough by using forks or a pastry blender to cut the butter into the flour mixture, then add your water.
  2. While the dough is chilling, prepare the filling ingredients.  Scrub the potatoes and remove any eyes or rough patches, leaving most of the skin in place.  Slice potatoe into 1/4-inch thick rounds. Place in a large pan and cover with water. Bring to a boil, and simmer for about 10 minutes until the potatoes are just tender. Drain and set aside.
  3. Meanwhile, heat the olive oil over medium-high heat in a large skillet.  Add the onion rings and stir to coat with oil.  Drop heat to medium-low and allow unions to caramelize, stirring occasionally, for 20-30 minutes.  Remove from heat and set aside.
  4. Whisk together the milk and egg yolks, set aside.
  5. Preheat oven to 350℉.
  6. After an hour, remove the dough from the refrigerator.  Roll to a round about 12 inches in diameter. Place the dough in a 9-inch tart pan with removable bottom.  Press the dough to the bottom and sides of the pan, and remove excess dough from around edge of pan.
  7. Place cooked potatoes in concentric rings along the bottom of the pan, overlapping and adding layers until pan is full. Distribute the caramelized onions across the tops of the potatoes. Pour the milk/egg mixture over the potatoes and onions. Drop bits of blue cheese evenly across the surface of the tart.  Sprinkle with sea salt and freshly ground pepper.
  8. Bake the tart for 45-55 minutes, until browning at edges.  Filling will still be slightly jiggly, as the milk to egg ratio doesn't allow for it to set as a quiche would.  The final consistancy should be creamy.

cornmeal cake with peaches + rosemary

Andrea

I find it appropriate that I am following up a post about summer tomatoes with a post about summer peaches. Brian and I have long had the argument over which is our favorite summer fruit, with him typically landing on the tomato side of the line and me on the peach. It is a close race, for sure. Both are delicious only during their season, each overlapping the other during July and August in Virginia. We rarely eat tomatoes outside of summer, and never peaches, unless we've put some away in jars and freezer bags. The limited window of availability makes peaches and tomatoes all the more special, precious even, and we indulge ourselves in both when they are available. Right now, as I write this, there are roughly 20 pounds of peaches and 30 pounds of tomatoes spread across my dining room. 50 pounds of fruit, friends. I think we have a problem...

After venturing out to Chiles Peach Orchard with a girlfriend a few days ago, I found the first thought swirling through my head involved a dense, peach-topped, breakfast-y cake. A cake with some heft; a good base to start the morning off just right. After some searching I came across Emeril's Cornmeal Olive Oil Cake with Poached Peaches...(the name goes on...), and modified it to suit my own desire for a simple, one-component breakfast cake. I am so very, very pleased with the result. The rosemary-scented cornmeal crumb is dense and savory with moments of crunch and highlights of salt. It sounds strange, I know, but there really are occasional bites that taste salty, while the majority offer a mild sweetness courtesy of the honey and fruit. It is a cake full of wonderful contrasts; sweet paired with salty, the crunch of cornmeal with the softness of peaches.

I wouldn't pigeonhole this cake into the dessert category; it really could pass as a cornbread side dish at a backyard barbecue. But I think the perfect place for it would be brunch...where savory sweets are wanted and expected. It is a new favorite in our house, for sure, and even further muddies the race between the tomato and the peach...

Cornmeal Cake with Peaches + Rosemary

adapted from Emeril Lagasse via Food Network

serves 8

Ingredients

  • 3/4 cup all-purpose flour
  • 1 tsp baking powder
  • 3/4 tsp salt
  • 1 cup yellow cornmeal
  • 1/2 tsp minced, fresh rosemary
  • 2 large eggs
  • 1 large egg yolk
  • 2/3 cup milk
  • 1/2 cup olive oil
  • 1 tbsp finely grated lemon zest
  • 3/4 cup sugar
  • 1/4 cup honey
  • 1 ripe peach, sliced thinly (1/8-inch thick)

Method

  1. Preheat oven to 350°. Lightly grease and flour a 9 by 2-inch round cake pan. (next time I will use a springform pan so that I can remove the cake whole)
  2. Into a medium bowl, sift together the flour, baking powder and salt.  Stir in the cornmeal and the rosemary. 
  3. In a large bowl, beat the eggs, egg yolk, milk, olive oil, and lemon zest with an electric mixer until frothy. Add the sugar and honey, and mix to combine. Add the dry ingredients and beat until the batter is smooth. Pour into the prepared pan and top with the peach slices.
  4. Bake in the middle of the oven for 35 minutes, or until a tester comes out with a few crumbs attached. Let the cake cool in the pan on a wire rack. If using a springform pan you can remove the cake whole, otherwise you can slice it in the pan and remove individual slices to serve.

tomato + goat cheese tart with rosemary crust

Andrea

tomato goat cheese tart-5.jpg

Summer.

Tomatoes.

Summer. Tomatoes. Summer tomatoes. Summer tomatoes summer tomatoes summer tomatoes. The two words belong together, do they not?

With a high of 101° in Charlottesville today (real feel 115° to 120°...um, when did we move to the equator?!?), I am not finding a whole lot to be happy with Summer about at the moment. Except for tomatoes. We are overrun with summer's favorite fruit right now...big ones, little ones, red ones, orange ones. All picture frames and candles have been removed from my dining room sideboard to make way for our bounty from the farm. It is the official tomato storage and ripening spot in our house, a constantly revolving inventory of heirloom varieties. I've made pints of marinara to store away for winter, and have plans to can soups and salsas in the coming weeks. But still, my very favorite way to consume a perfectly ripe tomato is thickly sliced, with sea salt. It just doesn't get much better than that. Unless you sandwich one of those slices between two hunks of bread with some bacon...that's pretty darn good too.

Most of our meals this week involved, you guessed it, tomatoes. In sauce over pasta, in salsa on fish tacos, sliced with fresh mozzarella on pizza, the 'T' in our BLTs. And this lovely, simple, rustic tart. It breaks my 'don't turn on the oven' rule, but at least it isn't the stove top. 

tomato goat cheese tart-1.jpg
tomato goat cheese tart-2.jpg
tomato goat cheese tart-3.jpg
tomato goat cheese tart-6.jpg

First, I have to say again how much I love Jack Bishop's book, A Year in a Vegetarian Kitchen. I have shared several recipes from there, here, and cannot praise it enough. We have been thrilled with every single dish we've made between its covers, and love how simple and quick they always are. This tart is no exception. The crust dough comes together beautifully and is so easy to work. The filling ingredients are simple. The whole tart is finished with just 15 minutes of prep time, which I love. If the crust weren't so butter-full we'd have this meal multiple days each week.

Be sure to only make this tart when tomatoes are at their peak...a pink and grainy 'mater just wouldn't do...

Tomato + Goat Cheese Tart with Rosemary Crust

from A Year in a Vegetarian Kitchen, by Jack Bishop

Crust Ingredients

  • 1-1/4 cups unbleached all-purpose flour
  • 1/2 tsp salt
  • 1/2 tsp minced fresh rosemary
  • 8 tbsp (1 stick) chilled unsalted butter, cut into 8 pieces
  • 4-5 tbsp ice water

Tart Filling

  • 6 oz fresh goat cheese, crumbled (about 1-1/3 cups)
  • 3 medium, delicious tomatoes, cored, sliced crosswise 1/4-inch thick, and blotted dry between paper towels*
  • 1 tbsp extra-virgin olive oil
  • salt + freshly ground black pepper

Method

  1. First, make the crust dough (about 1 hour before you're ready to assemble the tart). Place the flour, salt, and rosemary in a food processor and pulse several times to combine. Add the butter and pulse until the mixture resembles pea-sized crumbs, about ten 1-second pulses. Add the water, 1 tbsp at a time, and pulse briefly after each addition. After 4 tbsp of water have been added, process the dough for several seconds to see if it will come together. If not, add the remaining 1 tbsp water. Process just until the dough comes together in a rough ball. Do not overprocess or the dough will not be flakey. Transfer the dough to a lightly-floured work surface and knead briefly to for a smooth ball. Flatten the dough into a 5-inch disk and wrap it in plastic wrap. Refrigerate the dough for at least 1 hour and up to 2 days.  Note: My dough was very sticky with just 4 tbsp of water, so I wound up adding some flour to help it to come together. The final dough should be smooth and supple before refrigerating. Also, if you don't have a food processor, you can still make the dough by using forks or a pastry blender to cut the butter into the flour mixture, then add your water.
  2. Move an oven rack to the middle position and heat oven to 375°. 
  3. Unwrap the chilled dough and roll it into a 12-inch circle on a lightly floured surface. Lay the dough over a 10-inch tart pan with a removable bottom, fitting the dough into the bottom and sides of the pan. Run the rolling pin over the top of the tart pan to trim the excess dough. Prick the bottom of the tart shell all over with a fork.
  4. Finally, fill and bake the tart. Scatter the goat cheese evenly across the bottom of the tart shell. Arrange the tomatoes over the cheese in two rings, one around the outside edge of the tart pan and another in the center, overlapping them slightly. Drizzle the tomatoes with the olive oil and sprinkle with salt and pepper to taste.
  5. Bake until the edges of the crust pull away from the sides of the pan and are golden brown, 45 to 50 minutes. Cool the tart on a wire rack for at least 10 minutes. Cut the tart into wedges and serve.  Also, it is really good at room temperature so feel free to make this ahead and let it cool for several hours.

* To dry tomatoes, lay 3 layers of paper towels on a flat surface. Place your tomato slices on the paper towels, and then cover with 3 more layers of towels. Gently press your hands over the tomatoes to extract as much liquid as you can without crushing the tomatoes. When you lift the slices from the towels, many of the seeds should stay behind. This will keep your tart crust from becoming soggy.

tomato goat cheese tart-4.jpg

butternut squash + sweet potato soup

Andrea

I think I owe you all this one. Something healthy, hearty, warming, and veggie-full. If I were you I'd be a little upset with me, returning after 3 months away with sticky buns. And empanadas. And cake. Especially with all of those resolutions floating around at the back of your mind, begging to be broken by a lemon-scented, butter and cream-filled dessert. That's just wasn't fair of me, was it?

So, here you go; my new favorite soup. A version of which I've been making for many years...but there is just something so right about this particular one. Perhaps it is the incredibly frigid winter we're having in Charlottesville; a January full of gray skies that threaten, but haven't truly delivered, a good snow. Cheerful orange soups are especially good during months like that. Or maybe it is the fact that I work out of my home office now, and that every now and then as I sit at my computer, blanket and cat warming my lap, fingers nearly frozen, I'll think "soup would be wonderful for lunch". And then I get up and go to the kitchen and make this one. Soup cooked under those circumstances tastes just a little better, I think, and I'm liking that perk of self-employment very, very much.

Even made in the evening this soup is a big hit. Smooth and rich without the addition of cream, hearty and earthy and rosemary-scented, quick and easy and made in one pot. What's not to like? Please try it, I'd love to hear what you think.

Butternut Squash + Sweet Potato Soup
serves 4

Ingredients:

  • (1) small butternut squash, about 1.5 pounds, diced (1/2-inch)
  • (2) sweet potatoes, peeled and diced (1/2-inch)
  • 1 medium onion, diced
  • 3-inch sprig of fresh rosemary
  • 2 tbsp butter
  • 6 cups vegetable broth
  • salt + pepper

Method:

  1. Melt butter in large pot over medium-high heat. Add vegetables and rosemary and stir to coat. Cover pot and allow veggies to sweat for 10 minutes, stirring occasionally.
  2. After 10 minutes, add broth. Bring to a boil then drop heat to moderate simmer. Let soup simmer for an additional 20 minutes, until potatoes and squash are quite tender.  Remove rosemary sprig.  Using an immersion blender or a regular blender, puree' soup until smooth and creamy.  Salt and pepper to taste.

bella terra: 2009

Andrea

The time has come to say farewell to 2009, and HELLO 2010!!!!!!!!!!!!!  I've debated various recaps for the blog, a review of the year that could include the introduction of a new president, my trials and tribulations with running, a trip to New York city, Bella Eats on the local news, Bella Eats Pie Month and many other wonderful memories, but decided instead to keep things simple and give our garden, the source of so many great meals this year, a little tribute.

Brian and I started our garden in the spring of 2007, tilling up a 20-foot by 20-foot patch of lawn on the east side of our house.  We chose the location to take advantage of the southern light that hits the space for most of the day, bathing the vegetables, fruits, and legumes that we grow with plenty of sunshine.  Four cubic yards of topsoil and Panorama Paydirt were delivered to our driveway, on the other side of our house, and we spent an entire Saturday hauling wheelbarrow-load after wheelbarrow-load nearly 100-feet to amend the soil and break up the dense Virginia clay.  Post holes were dug and a fence was constructed, the bottom animal-proofed with chicken wire and a gravel trench.

We based the plan of the garden on Square Foot Gardening, creating 4-foot by 4-foot boxes from borate-treated lumber (which doesn't leach harmful chemicals in the soil, like pressure-treated wood) and divided those boxes into 1-foot by 1-foot squares with twine.  We left 2-foot paths between the boxes to allow for easy harvesting, and covered those paths with weed fabric and organic mulch in order to keep the maintenance as low as possible.  And then, the fun began.

Over the last three summers we've planted blackberries, raspberries, strawberries, tomatoes, cucumbers, every color of bell pepper, green beans, sugar snap peas, edamame, eggplant, corn, kale, yellow squash, collard greens, every type of lettuce, spinach, broccoli, brussels sprouts, red beets, onions, carrots, basil, thyme, oregano, sage, rosemary, chives, fennel, watermelon, cantaloupe and muskmelons, some of those with great success and others with complete failure.  All are grown from organic seeds or plants, and we don't use any sprays or chemicals.

Early each spring we spend a weekend covering each box with organic compost to prepare the soil for the seeds and plants that will grow through the next 8 months.

Bella Terra: Preparation

The chives are typically the first green in the garden, emerging from the protective cover the previous season's growth provided through the winter.

Bella Terra: Chives for a Mushroom and Herb Frittata and Cheddar Chive Biscuits and Cheddar Chive Cornbread, among other things. The other herbs follow shortly after. Bella Terra: Herbs for an Earthy Risotto, among other things.

The garden really started filling out by June, with the blackberry bush loaded down with little green berries and the herb and lettuce boxes overflowing.

The Sugar Snap Peas were one of our first vegetable harvests. Bella Terra: Sugar Snap Peas for a special Caesar Potato Salad and Spicy Pickles In July we saw some major progress, with the garden getting close to its peak season. Cucumbers. Tomatoes and Bell Peppers. Bella Terra: Beets for a Red Beet Risotto and many, many salads and roasted veggie medleys. Bella Terra: Greens for a Greens Salad with Roasted Vegetables, and lots of sauteed kale. Bella Terra: Cucumbers for a Guacamole-Inspired Salad.

Towards the end of July and into August, our berries, bell peppers and tomatoes exploded.  We had more than we knew what to do with, but luckily froze and preserved as much as we could to get us through the fall and winter months.

Bella Terra: Blackberries for many batches of Jam, and general munching. Bella Terra: Raspberries for more Jam, Raspberry Almond Muffins and Raspberry Buttercream Frosting. Bella Terra: Tomatoes for Creamy Tomato Soup and Slow-Roasted Tomatoes. Bella Terra: Peppers for Stuffed Peppers and Chile Rellenos.

Things slowed down through mid to late Autumn, as Brian and I weren't quite as on top of getting seeds and plants in the ground for a fall harvest.  We have eaten a lot of lettuce and greens, continued to use fresh herbs in most of our cooking and even pulled some carrots out from underneath 2-feet of snow for our Christmas dinner.

It was a great year for the garden, and it is coming to a close on a bittersweet note.  Brian and I are hoping to put our house on the market in the spring or summer, and so don't have plans to put much into the soil this year.  Instead we'll be getting a bunch of pots and whiskey barrels, and trying our hand at container gardening so that we can move plants with us when we find a new place.  I will be incredibly sad to say goodbye to the little patch of earth that has provided us with so much, but look forward to starting again in a different part of Charlottesville.

And now, for the final Bella Terra post of 2009...Rosemary. Our holiday meal was a festive event this year, with my Momma and stepfather in town and 6 additional friends here to share our table.  We decided on an Italian theme, with braised short ribs in a thick tomato sauce over fresh fettucini, brussels sprouts sauteed with pancetta, the carrots pictured above in a white wine and sage glaze, garlic-full mashed potatoes.  And, as a precursor to the actual sit-down dinner, we had rosemary roasted cashews alongside bacon-wrapped dates.  Everybody was pleased, and it was a very merry Christmas day. These nuts are salty and sweet, earthy and spicy.  They solve whatever craving you may have, and are gracing our table again this evening as we ring in a new year.

Rosemary Roasted Cashews

from the kitchen sink recipes Ingredients
  • 1-1/4 pounds cashew nuts (roasted, unsalted)
  • 2 tbsp coarsely chopped rosemary
  • 1/2 tsp cayenne pepper
  • 1 tbsp brown sugar, light or dark
  • 2 tsp kosher salt
  • 1 tbsp melted butter
Method
  1. Preheat oven to 375*.
  2. Place nuts on parchment lined baking sheet.  Bake for 10 minutes.
  3. Meanwhile, mix together rosemary, pepper, sugar, salt and butter in a large bowl.  Toss the warm nuts with the mixture until well coated.
Read More

low effort, maximum return

Andrea

A few years ago Brian and I bought a house.  Its a small house, just 800 square feet, but it has a large backyard for the dogs and a great central location in the city.  Its been a work in progress since before we moved in - first the bathroom, then a new air conditioner and after that a full replacement of all of our plumbing, with lots of little projects in between.  The kitchen has been on the list for quite some time and while we’ve been able to make a few changes, it still hasn’t gotten the full overhaul that it needs deserves. pork-2 We love to entertain and, as everybody knows, company gravitates towards the kitchen.  Why wouldn’t they, when that’s where the good smells, conversation and open bottle of wine are located?  Because our kitchen is small with little space for two cooks let alone extra conversationalists, our guests typically wind up in the doorway, leaning on the frame and trying to stay out of the way as Brian and I hustle about preparing a meal.  We’ve gotten good at the “kitchen dance”, one of us putting a hand on the other’s back as we pass behind them with a hot pan or using a hip to “bump” the other aside so that the oven door can be opened.  Its fun and amusing, but less than ideal. pork-1 Eventually the kitchen will be re-designed and our guests will have a proper place to sit with a spot to rest their drink as they watch us cook.  Until then, when entertaining, we will continue to try and prepare as much as we can ahead of their arrival so as to limit the amount of time that two of us are required in the kitchen together.  Getting the meat in the oven, assembling the cobbler for dessert, chopping the veggies to be sauteed just before the meal - anything that will allow us to enjoy our guests without worrying that in our frenzy we might miss a step of our dance and burn an arm.   pork-5 If you’re looking for a main dish that has a maximum return for your relatively low effort, - that you can dress quickly, pop in the oven and after 40-60 minutes and a few bastings be rewarded with a beautiful and delicious star component of your meal - this is it.  Not only does it make a lovely presentation, but the pork stays incredibly moist with the figs at its center and the flavors compliment each other wonderfully.  There is a wine and fig sauce that came with the original recipe but in the interest of saving time and minimizing effort we chose not to make it.  I’m sure it would be delicious. And the pork is perfect for sandwiches the next day, if you’ve got any leftover. pork-4 Pork Roast Stuffed with Figs recipe from The New York Times Ingredients:
  • 1 boneless pork loin, about 2 pounds
  • 1 cup dried figs
  • about 1 tsp fresh rosemary, minced
  • salt and pepper
  • wine, if necessary
Method:
  1. Cover figs with hot water and allow to soak.  Preheat oven to 425.
  2. Trim pork loin of excess fat as necessary.  Wriggle a thin, sharp knife into each end of meat, making a hole.  Then, use the handle of a long wooden spoon to force a hole all the way through meat, making it as wide as your thumb.
  3. Drain figs when they are tender, but not mushy.  Reserve the liquid.  Stuff the figs into the roast, all the way to the center from each end.
  4. Combine salt, pepper and rosemary and rub it all over meat.  Place meat in a roasting pan and pour about 1/2 cup of fig liquid over top of it.  Roast undisturbed for 20 minutes.
  5. Lower heat to 325 and continue to cook, basting with pan juices every 15 minutes or so.  Add liquid (wine or water) if necessary.  
  6. When an instant-read thermometer registers 145-150 degrees - probably after 40-50 minutes - remove roast to a warm platter. (when checking temperature, be sure that thermometer is in meat, not fruit)
  7. Let sit for 15 minutes.  If you wish, make sauce described here.  I did not, and the roast was still delicious.
pork-3 In The Blog World: My cousin Meghann is hosting an Erin Baker's Wholesome Baked Goods Giveaway!  Be sure to check out her blog and enter to win by midnight Friday. Also, don't forget that she is hosting another Blogger Bake Sale starting next week.  She's been posting daily Baker's Spotlights to introduce all of the talented and generous bakers who are donating their goods for a great cause.  Get to know the bakers so you're ready to bid on your favorite items! The lovely ladies over at Keep It Simple Foods are hosting a Quaker Giveaway...who wants a free box of Quaker Simple Havest Trail Mix Bars?  Me!!! Click here for a FREE Barney Butter sample!  Thanks Hangry Heather for mentioning it.  I'm intrigued by this stuff, aren't you? Bobbi of NHerShoes is giving away a Danskin workout jacket in a beautiful honeysuckle color...one can never have too many workout clothes! I hope you all have a great Friday and weekend!!!
Read More

striking a balance

Andrea

March is a big birthday month in our household.  We kick it off right with Brian's at the very beginning, end it with mine and have a whole slew of friend and family celebrations in between.  I've never attempted to actually calculate the numbers, but if I had to guess I would say that 30-40% of the birthdays we actively celebrate fall within March.  That means a lot of cake and cocktails, which, following a winter of heavy comfort foods makes the whole month seem like a last hurrah for indulgent eats before the panic of a looming swimsuit season sets in.   soup-1 The mostly dreary weather of March has put a damper on my running habit as well.  Although the coldest temperatures of the month are typically much higher than those in January and February, the occasional 60* teaser days make the moderately cold ones completely unbearable.  I have a hard time motivating myself to tie my shoes and hit the road on a 40*, overcast evening (which in February would have felt downright warm) when my previous run had me in shorts and a tank top. soup-2 And now here I am on the eve before the start of April, my legs sore from last night’s run after the prior week’s hiatus, my mouth craving a sweet because its become a daily habit and, dare I say, my body a couple of pounds heavier than it was just one month ago.  I started this blog originally to hold me accountable in my healthy eating and exercise habits, but found (along with an amazing community of people and many new friends) that the creative aspects of photographing and writing about food were more compelling for me than the keeping of a food diary. soup-3 Its been about a month since I switched formats, and although the timing may have been poor what with all of the celebrations that March holds, I think the changes I've seen in my daily habits prove a point.  Food diaries work.  At least for me they do, which is why I'll be keeping a closer tab on myself starting tomorrow.  But don't worry, I won't be switching things up on you again.  I really love the direction the blog is heading and from the positive feedback I've received, I think you do to.  What you will be seeing are some lighter, healthier, simpler and hopefully more economical recipes popping up on Bella Eats this month, starting with this one. soup-4 This soup was delicious.  So good that Brian and I haven't been able to stop talking about it for two days.  Its very simple, using ingredients that we always have on hand - carrots, celery, onion, canned beans, canned tomatoes, dried mushrooms, dried grains, good olive oil and fresh herbs are staples in our kitchen.  The mushrooms added such a wonderful earthiness to the broth that I don't know if I'll ever be able to make vegetable soup without mushrooms again.  And the infused olive oil adds so much depth.  Please - please - don't leave it out.  You won't be sorry. soup-6 Mushroom White Bean Soup with Rosemary recipe inspired by keep it simple foods and the new york times Ingredients:
  • 1/2 oz porcini mushrooms, dried
  • 6 cups veggie or chicken broth (I used chicken)
  • 1 tbsp olive oil
  • 2 carrots, cut in half and sliced into 1/4" pieces
  • 3 celery stalks, sliced into 1/4" pieces
  • 1 medium onion, diced
  • 4 garlic cloves,  minced
  • 1 tsp fresh rosemary, minced
  • 1 tsp fresh thyme, minced
  • 1 can diced tomatoes, drained (15oz)
  • 1/2 cup quick cooking barley
  • 2 cans cannelini or navy beans (15oz each), drained and rinsed
  • salt and pepper
Method:
  1. First make infused olive oil, recipe below.  It will need to sit for 2 hours before serving, so be sure to plan ahead.
  2. Boil 2 cups of water.  Place dried mushrooms in a glass bowl and pour boiling water over them.  Let sit for 30 minutes.  Place a fine mesh strainer over a separate bowl.  Lift mushrooms out of water and squeeze over strainer, collecting liquid in second bowl.  Rinse mushrooms in strainer with cold water and squeeze out excess over sink.  Chop mushrooms and set aside.  Pour the mushroom soaking water through the strainer into the second bowl.  Add water as necessary to make 2 cups.  Set aside.
  3. Heat the oil in a large, heavy-bottom soup pot.  Add the onion, carrots and celery and saute' for 5-7 minutes, until starting to tenderize.  Add the garlic, rosemary and thyme and saute' an additional 30 seconds.  
  4. Add the chicken broth, mushroom liquid, chopped mushrooms and tomatoes and bring to a boil.  Reduce to a heavy simmer and add the barley.  Continue to simmer for 12-15 minutes until the barley is tender.  Add the beans and salt + pepper to taste.
  5. Serve immediately with rosemary + porcini oil drizzled on top.
Rosemary and Porcini Infused Olive Oil recipe modified from bon appetit Ingredients:
  • 1 cup extra virgin olive oil
  • 1 tsp fresh rosemary, minced
  • 1 whole garlic clove
  • 1/2 oz porcini mushrooms, dried
Method:
  1. Place mushrooms in a strainer.  Rinse under hot water and drain well.  Pat dry.  
  2. Combine mushrooms, oil, rosemary and whole garlic clove in small, heavy saucepan.  Cook over low heat until thermometer inserted into oil registers 180*F, about 8 minutes.  (I am currently without a thermometer so left my oil on for 9 minutes, just in case).
  3. Remove from heat, cover and cool to room temperature, about 2 hours.
  4. Oil can be refrigerated for up to 3 weeks.
soup-5 Thank You All for the great comments you write on my posts, they really make my day!  Welcome to my new readers who have found your way here from Tastespotting and Foodgawker, I look forward to hearing from more of you and to sharing some simple, healthy recipes with you this month.  Enjoy!
Read More