Contact Us

Use the form on the right to contact us.

You can edit the text in this area, and change where the contact form on the right submits to, by entering edit mode using the modes on the bottom right. 


123 Street Avenue, City Town, 99999

(123) 555-6789

email@address.com


You can set your address, phone number, email and site description in the settings tab.
Link to read me page with more information.

Blog

Filtering by Tag: food photography

galatoire's!

Andrea

You guys...while in New Orleans, I had one of the best culinary experiences of my life. Read all about it here!!!

My five days in NOLA left me so inspired. Unfortunately it has been a busy week since getting back, but I hope to have some new recipes ready for you soon. Until then, welcome to Galatoire's!

three years! and pumpkin cupcakes

Andrea

Three years ago today I started Bella Eats. This little site was much different then, dedicated to a healthy diet and my progress in training for a 10-mile race. Today I bring you cupcakes. My, how things have changed. :)

Thank you to all of you still here from that first year, and all of you who have found me along the way. I can't wait to see what year four has in store!

Pumpkin Cupcakes with Maple Buttercream Frosting

cupcakes from Ina Garten, frosting my own

makes 10 cupcakes

Cupcake Ingredients

  • 1 cup all-purpose flour
  • 1 tsp baking powder
  • 1/2 tsp baking soda
  • 1/2 tsp kosher salt
  • 1 tsp ground cinnamon
  • 1/2 tsp ground ginger
  • 1/2 tsp ground nutmeg
  • 2 large eggs, at room temperature
  • 1 cup canned pumpkin purée, not pie filling
  • 1/2 cup granulated sugar
  • 1/2 cup light brown sugar, lightly packed
  • 1/2 cup vegetable oil

Frosting Ingredients (you may want to doule this if you like a lot of frosting. this recipe makes enough for a decent dollop on each cupcake)

  • 1/2 cup (1 stick) unsalted butter, room temperature
  • 1-1/4 cups confectioner's sugar
  • 2 tbsp maple syrup

Method

  1. Preheat the oven to 350℉. Brush or spray the top of 10 muffin tins with vegetable oil and line them with 10 paper liners.
  2. Sift together the flour, baking powder, baking soda, salt, cinnamon, ginger, and nutmeg in a medium bowl.  In a larger bowl, whisk together the eggs, pumpkin, sugars, and vegetable oil. Add the flour mixture and stir until combined.
  3. Divide the batter among the prepared tins and bake for 20 to 25 minutes, until a toothpick inserted in the center comes out clean.  Set aside to cool completely.
  4. Cream the butter in a stand mixer with the whisk attachment.  Scrape the sides of the bowl. Add the sugar and beat on medium high until fluffy. Scrape the bowl again. Add the maple syrup and beat until well combined.
  5. Pipe the frosting onto the cooled cupcakes.

caramel apples

Andrea

Caramel apples. The perfect Fall treat, bringing to mind images of carnivals and festivals and Halloween parties. I've made a few variations of candied apples in the past but this version is by far my favorite. This caramel is heavy and dark, laced with mollasses and dark corn syrup for an earthy undertone and not-overly-sweet flavor. If you're not a fan of molasses I'd avoid this recipe as, while not overpowering, the molasses does play a significant supporting role in the dance across the tastebuds. I loved this subtle difference from regular carnival candied apples that can sometimes make your teeth ache with sweetness.  That's not to say that this particular caramel isn't sweet, because it is, it is just balanced nicely by that molasses addition.

I'm not feeling too wordy today, friends, but felt the need to get this recipe out to you while there are still some orange and yellow leaves clinging to the trees.  Especially to all of you northeasterners who are facing the first nor'easter of the year.  What the heck?!?  I assume there will be some time spent indoors this weekend, lamenting the loss of Autumn so early.  Why not spend that time making the perfect Fall treat?

Hello, Winter? Could you back off please?

Happy weekend, friends!

Caramel Apples

from simply recipes

makes 12

note that you will need an accurate candy thermometer for this recipe

Ingredients

  • (1) 1-pound box dark brown sugar
  • 1 cup (2 sticks) unsalted butter, room temperature
  • (1) 14-oz can sweetened condensed milk
  • 2/3 cup dark corn syrup
  • 1/3 cup pure maple syrup
  • 1/2 tsp vanilla extract
  • 1 tsp dark mollasses
  • 1/4 tsp salt
  • 12 sturdy lollipop sticks, chopsticks, or twigs (these aren't great for holding, better for apples you plan to cut into slices)
  • 12 medium apples

Method

  1. Combine sugar, butter, condensed milk, corn syrup, maple syrup, vanilla, molasses and salt in a thick-bottomed 2-1/2 or 3-quart saucepan. Stir with a wooden spoon on medium-low heat until all of the sugar dissolves. You can test this by rubbing a little bit of the caramel between your fingers (let it cool on a spoon a bit first!!!). There should be no grittiness.  Brush down the sides of the pan with a wet pastry brush to dissolve any sugar crystals that might form on the pan sides.
  2. Attach a clip-on candy thermometer to the pan and cook the caramel at a rolling boil until the thermometer reaches 236℉, stirring constantly and slowly with a wooden spatula.  Be sure to scrape the bottom of the pan as you stir, so that the caramel doesn't stick.  Once it sticks it will burn, and you'll have to start over.  Continue to occasionally brush the sides of the pan down with a pastry brush.  Carefully pour the caramel into a metal bowl and allow it to cool until the temperature lowers to 200℉, at which point you are ready to dip the apples.
  3. While the caramel is cooling, prepare a large baking sheet, covering it with parchment paper, butter aluminum foil, or a silpat. Insert your sticks into each apple core (I used a chopstick to poke the holes for the twigs).
  4. When the caramel has cooled enough for dipping, dip the apples in, one by one, by holding on to the stick, and vertically lowering the apple into the caramel, submerging all but the very top of the apple. Pull the apple up from the caramel and let the excess caramel drip off from the bottom back into the pan, then place the apple on the prepared baking sheet. The caramel will pool a little at the bottom of each apple. Place the sheet in the refrigerator to chill for at least 15 minutes.  At this point, if you'd like to add toppings, do so.  Otherwise, allow the apples to chill for at least one hour.
  5. I recommend, after chilling, storing the apples at room temperature.  Otherwise the caramel is hard as a rock.

blueberry scones with lime glaze

Andrea

I hold a firm belief that berries + citrus are one of the best combinations ever. Right up there with caramel + sea salt, peanut butter + banana, tomatoes + pasta. It's a shame that their seasons are opposite each other, with citrus at its height mid-winter and berries abundant mid-summer. That won't stop me, though. Be it berry jam, cobbler, tart, or muffin...it will involve lemons, limes, or oranges.

Also, I am a big fan of scones. If they are the right scones, that is. No dry, crumbly, lumps that turn to paste in the mouth for me. I like them softer; closer to the product of a marriage between scone and muffin. Easy to grab and eat in the car on the way to work, without the spray of crumbs across the lap when you arrive. 

These particular scones, made moist with buttermilk and bright bursts of blueberry, still hold a hearty texture thanks to the white whole wheat flour. I like to think that makes them a healthy breakfast treat, even if all that whole grain goodness does is cancel out the sugary glaze drizzled over top (shhh...just let me have that...please?). If you'd like an even fluffier texture, substitute all-purpose flour for the white whole wheat. And be careful not to overmix your dough, keeping in mind the same principles applied in biscuit-making...work fast and keep your ingredients cold. 

Happy Monday, friends! Have a lovely week.

Although they are best day-of, these scones can be stored in an airtight container for up to three days.

Blueberry Scones with Lime Glaze

makes 8 scones

Scone Ingredients

  • 3/4 cup buttermilk
  • 1 large egg
  • 1/2 tsp vanilla extract
  • 3 cups white whole wheat flour, or all-purpose flour for a fluffier texture
  • 4 tsp baking powder
  • 1/4 tsp salt
  • 1 tbsp lime zest
  • 8 tbsp cold, unsalted butter, cut into 8 pieces
  • 1/2 cup sugar (I used turbinado), plus extra for sprinkling
  • 1 cup fresh blueberries

Glaze Ingredients

  • 1 cup confectioner's sugar
  • 2-3 tsp lime juice

Method

  1. Preheat oven to 375*.  Spray a baking sheet with oil or cover with parchment paper.
  2. Mix buttermilk with egg and extract in a large bowl.
  3. Add flour, baking powder, lime zest and salt to a large food processor. Pulse until blended.  Add butter and pulse until mixture resembles course bread crumbs.  Add sugar and pulse again until blended.
  4. Add flour mixture to egg mixture and stir with a wooden spoon until a soft dough forms. Do not overmix. Add blueberries and carefully fold them into dough.
  5. Turn out dough on a floured board and give 5-6 careful kneads, just until well mixed and cohesive, trying not to crush too many of the berries.  Divide dough into 8 equal pieces and roll into balls before flattening into disks about 4 inches wide.
  6. Bake on prepared baking sheet for 20-25 minutes until medium brown.  Let cool on sheet for 5 minutes before moving to wire rack to cool completely.
  7. To make the glaze, mix the confectioner's sugar with 2 tsp of lime juice. Use a spoon to blend together into a paste, adding more lime juice a bit at a time until the glaze is spreadable.

classic lasagna with mushrooms

Andrea

I really like cookbooks. Sit me down on the couch with a glass of wine, sticky notes, and a thick book full of beautiful and evocative culinary images and I am one happy girl. Dissecting recipes can entertain me for hours, methods and timing dancing through my head as I imagine this ingredient melded with that one. But it is a very special book that holds my attention for the space between recipes, where the author's true voice emerges in the stories behind the dishes compiled. When my stepfather, Joe, handed me his copy of The Italian Country Table by Lynne Rossetto Kasper and said "You can borrow it, but only for a little while. And you MUST read the chapter about tomatoes." I had a feeling it would be just that kind of book. I immediately curled up in the corner of my parents' L-shaped couch and sank into that tomato chapter, which begins like this:

"I must begin this chapter with a confession: There is nothing, absolutely nothing that pleasures me more than a bowl of pasta and tomato sauce. When I want to reach out with all my love to my husband, a dish of pasta and tomatoes is almost always in my hands. When I am worn out and the world isn't such a nice place to be in, I make tomato sauce and pasta. When time is short but dear friends must be fed with joy and not pressure, I make pasta with tomato sauce. Never are any two of these pastas alike, because for me, this is the food of instinct." 

Lynn Rossetto Kasper, The Italian Country Table

And...I was hooked. My own copy arrived back home in Virginia the very next week and I immediately began plotting an "Italian Month" on Bella Eats. It didn't happen because, well, life got busy, but we've cooked and loved several of the recipes and I've very much enjoyed getting lost in the spaces between them. 

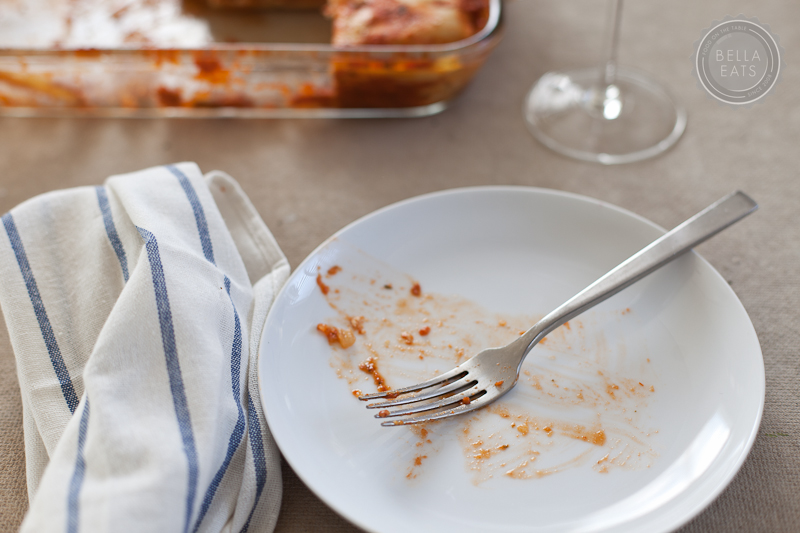
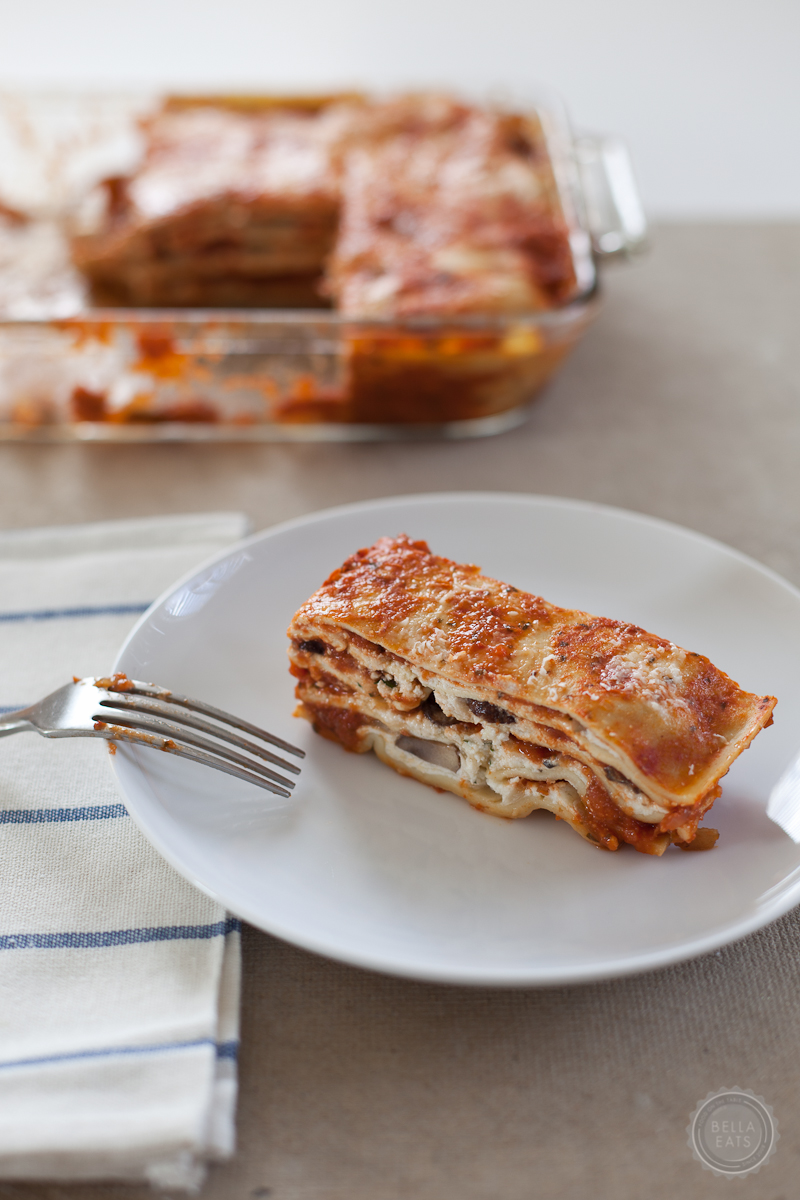
I made this lasagna last month for very good friends we hadn't seen in many weeks and I must say, it was the perfect dish for a mini-reunion. Simple ingredients create a complex marriage of flavors and textures that you just can't stop eating. We sat around our table for hours catching up, the pan of lasagna between us enticing each of us to a second serving.

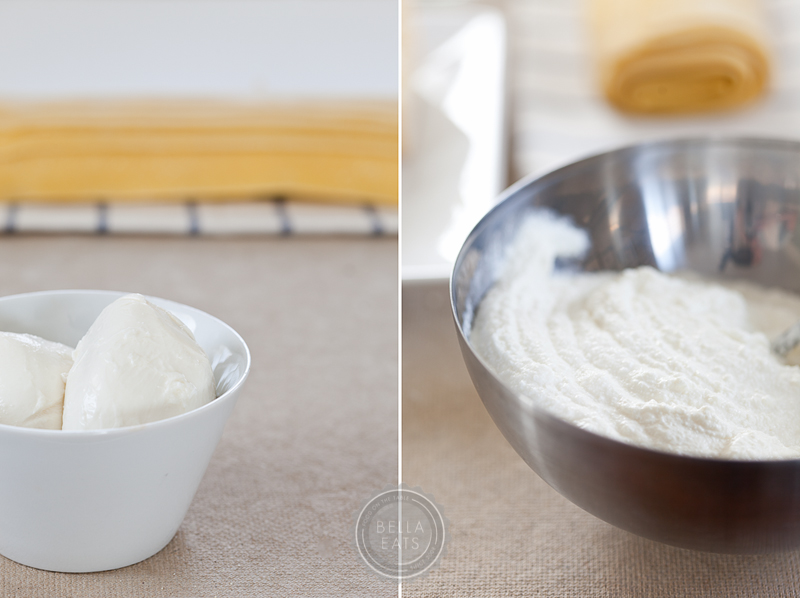
The pasta, cheese, and canned tomatoes were purchased at our local pasta shop, Mona Lisa Pasta. It shouldn't be a problem for you to find them in most grocery stores, but do seek out the highest quality cheeses and tomatoes you can.  The simplicity of this lasagna allows their flavors to shine. I did a little happy dance when those sheets of fresh pasta were brought out to me in the shop, soft and supple and brushed with semolina. I'd been contemplating making my own, but with limited time was pleased to have this option. If you can, use fresh pasta, but if not dried will do as well.

Also, the sauce is delicious. It is worth keeping a can of san marzano tomatoes in your pantry for an emergency batch of fresh sauce whenever it may be needed.

I followed the recipe in The Italian County Table almost exactly, adding only the mushrooms.

Home-Style Lasagna with Mushrooms (optional)

from The Italian Country Table

serves 8-12

Tomato Sauce Ingredients

  • 3 tightly packed tablespoons each fresh basil and Italian parsley leaves
  • 1tsp fresh oregano leaves
  • 2 medium onions, coarsely chopped
  • 2 tbsp fruity extra-virgin olive oil
  • 2 large cloves garlic, minced
  • 1 pint basket (3/4 pound) flavorful cherry tomatoes, halved
  • 1 28-ounce can whole tomatoes
  • 1/2 cup water
  • pinch of sugar
  • salt and freshly ground black pepper
  • 1/8 tsp hot red pepper flakes

Lasagna Ingredients

  • 1 cup freshly grated parmesan cheese
  • 1-3/4 to 2 pounds high-quality, creamy ricotta cheese
  • 1/2 pound fresh mozzarella cheese, shredded
  • 8 scallions, trimmed of root ends
  • 2 tightly packed tbsp fresh basil leaves
  • 1 tightly packed tbsp fresh Italian parsley leaves
  • 1 tsp fresh oregano leaves
  • 2 cloves garlic
  • salt and freshly ground black pepper
  • 1 medium large onion, cut vertically into strips about 1/4 inch wide
  • 1/2 pound cremini mushrooms, cleaned and sliced (optional)
  • extra-virgin olive oil
  • 1 pound dried lasagna pasta (or, homemade pasta. or, if you're very lucky, fresh pasta from your local pasta shop.)

Method

  1. Prepare the tomato sauce by mincing together the herbs and chopped onions.  Heat the oil in a 12-inch skillet over medium-high heat.  Saute the onions and herbs to golden brown.  Add the garlic and cook a few seconds, then stir in the cherry tomatoes and the canned ones with their juices, crushing them with your hands as they go into the pan.  Boil, uncovered, over high heat until thick, stirring often.  Add the water and cook a few moments more.  Stir in the sugar and season with salt and black pepper and red pepper flakes to taste. Cool briefly, then pass the sauce through a food mill or puree in a processor or blander.  Cover and set aside.
  2. Holding pack 2 tbsp of the parmesan, blend the cheese in a bowl.  Mince together the scallions, basil, parsley, oregano, and garlic.  Stir into the cheeses, seasoning to taste with salt and pepper.
  3. Toss the onion strips and mushrooms with a little olive oil, salt, and pepper.  Heat a saute pan over high and saute until the onion is starting to brown and the mushrooms have released their liquid. Turn out of the pan.
  4. If you're using dried pasta, cook in fiercely boiling water, stirring often, until barely al dente (it should be underdone). Drain in a colander and hold in a bowl of cold water.  Fresh pasta does not need to be cooked.
  5. Preheat the oven to 350°F. Oil a shallow 2-1/2-quart baking dish. Drain the pasta and pat dry. Moisten the bottom of the dish with sauce. Cover with a single layer of pasta. Daub with one quarter of the cheese mixture and one quarter of the browned onions + mushrooms. Moisten with one sixth of the remaining sauce. Top with a layer of pasta and continue layering, topping the fifth layer of pasta with the remaining sauce. Cover lightly with foil.
  6. Bake for 40 minutes, or until heated through. Sprinkle with the reserved 2 tbsp parmesan. Let rest 10 minutes in the turned-off oven with its door open, then serve.